Begin
14 pages · ~28 min
Pinning Spreadsheets in Excel: Practical Workflow
Learn how to pin rows, columns, and panes in Excel spreadsheets to keep key data visible while scrolling. Ideal for Excel users seeking practical workflow efficiency.
A digital instructor presents all 14 pages. Hold “Ask” at any point and ask out loud — the answer comes from this course. No sign-up needed.
What you’ll learn
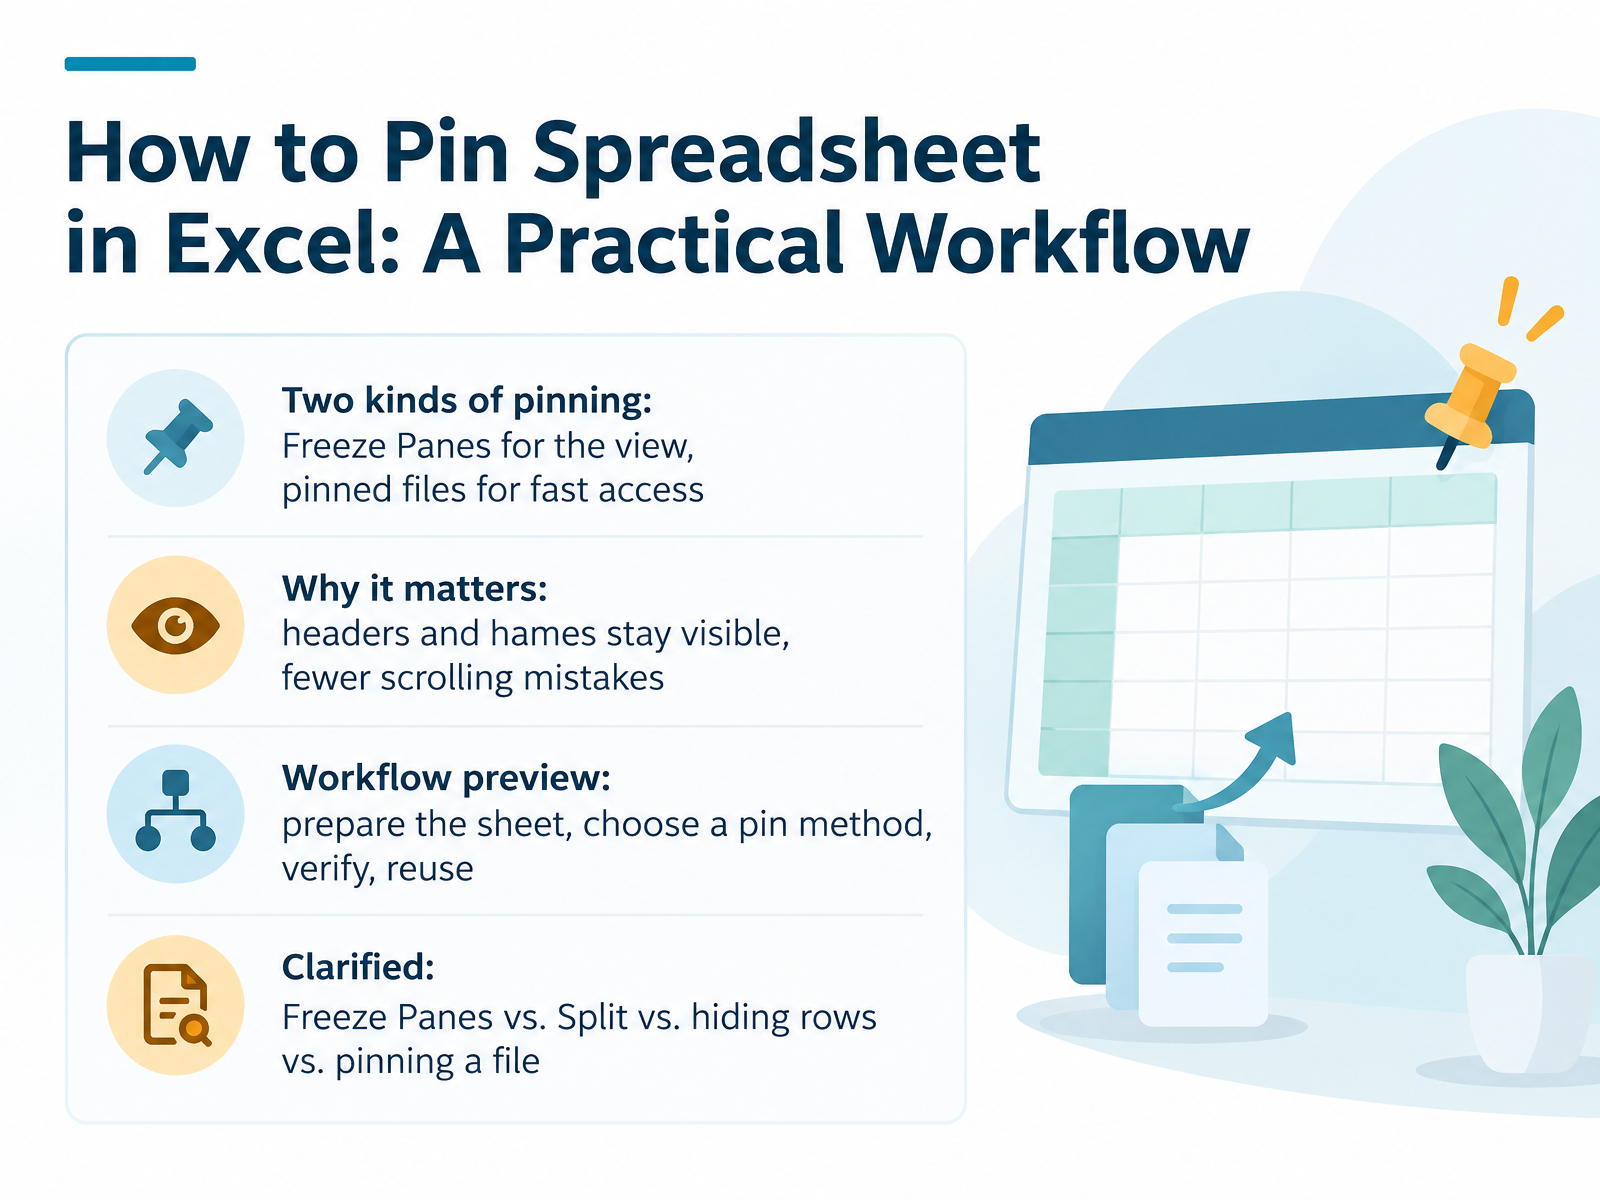
- 01How to Pin Spreadsheet in Excel: A Practical WorkflowWelcome. Today we'll learn how to pin a spreadsheet in Excel, using a simple and practical workflow. By the end, you'll know how to keep your headers and names visible while you scroll, and how to open your most important files faster. First, let's clear up one common confusion. In Excel, pinning can mean two different things. Freeze Panes keeps rows or columns in place on your screen, so labels stay visible as you scroll. Pinning a file keeps that workbook at the top of your recent files list for quick access. Freezing only changes what you see. It does not move or change your data. And it does not affect printing. This matters in everyday office tasks. When you scroll through a long attendance sheet, a budget, or a gradebook, the header row can disappear. Then it's easy to enter a value in the wrong column. Pinning solves that worry. Here's the workflow we'll follow. First, prepare the sheet. Next, choose the right pin method. Then, verify that it worked. Finally, reuse the setup so you don't repeat the work. We'll also compare Freeze Panes with Split, with hiding rows, and with pinning a file, so you can pick the right tool with confidence. Let's start by looking at the two kinds of pinning, view versus file.support.microsoft.comlearn.microsoft.comlearn.microsoft.com+22 min
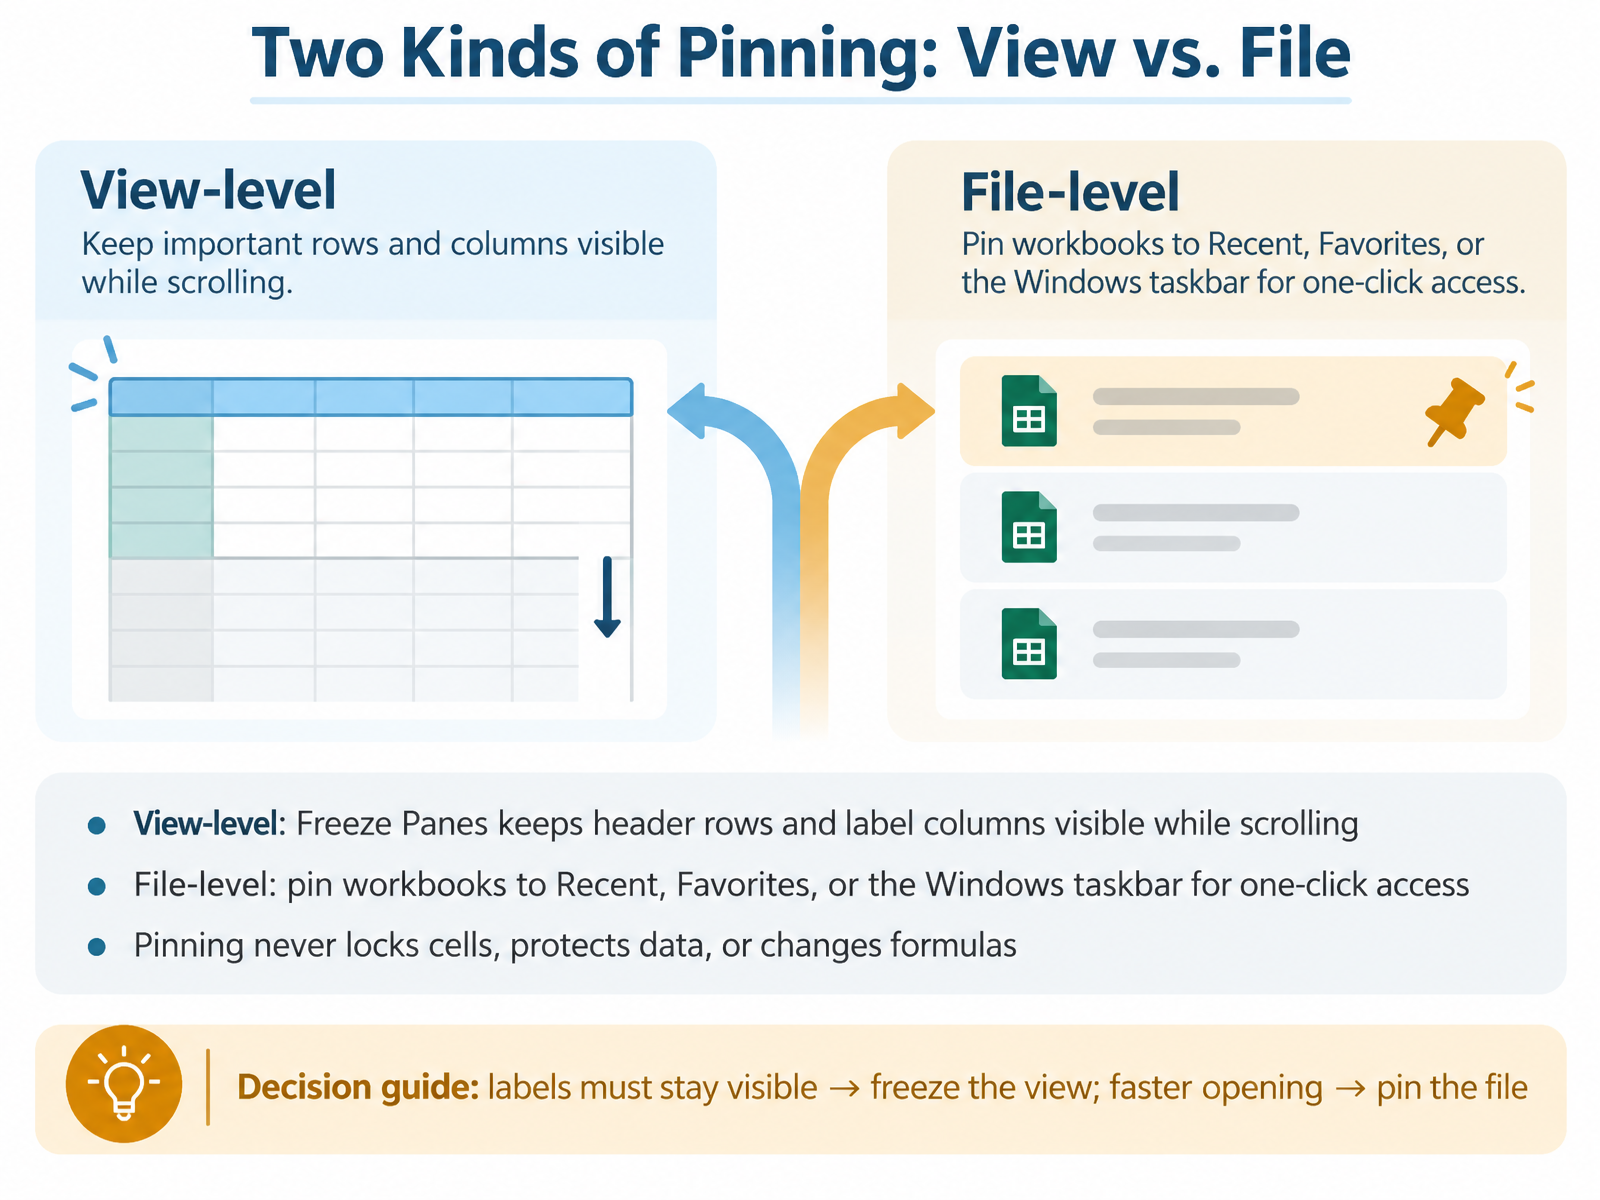
- 02Two Kinds of Pinning: View vs. FileLet's look at two kinds of pinning, because they solve different problems. The first is view-level pinning. Freeze Panes keeps header rows and label columns visible while you scroll. So if your column headings disappear as you scroll down a long list, freezing the view keeps them in place. The second is file-level pinning. Here, you pin a workbook to Recent, to Favorites, or to the Windows taskbar, so you can open it with one click. Now, one important point. Pinning never locks cells, it does not protect data, and it does not change any formulas. Here is a simple decision guide. If labels must stay visible, freeze the view. If you just want to open the file faster, pin the file. Next, we will look at key concepts and choosing the right pin.
 support.microsoft.comlearn.microsoft.comlearn.microsoft.com+22 min
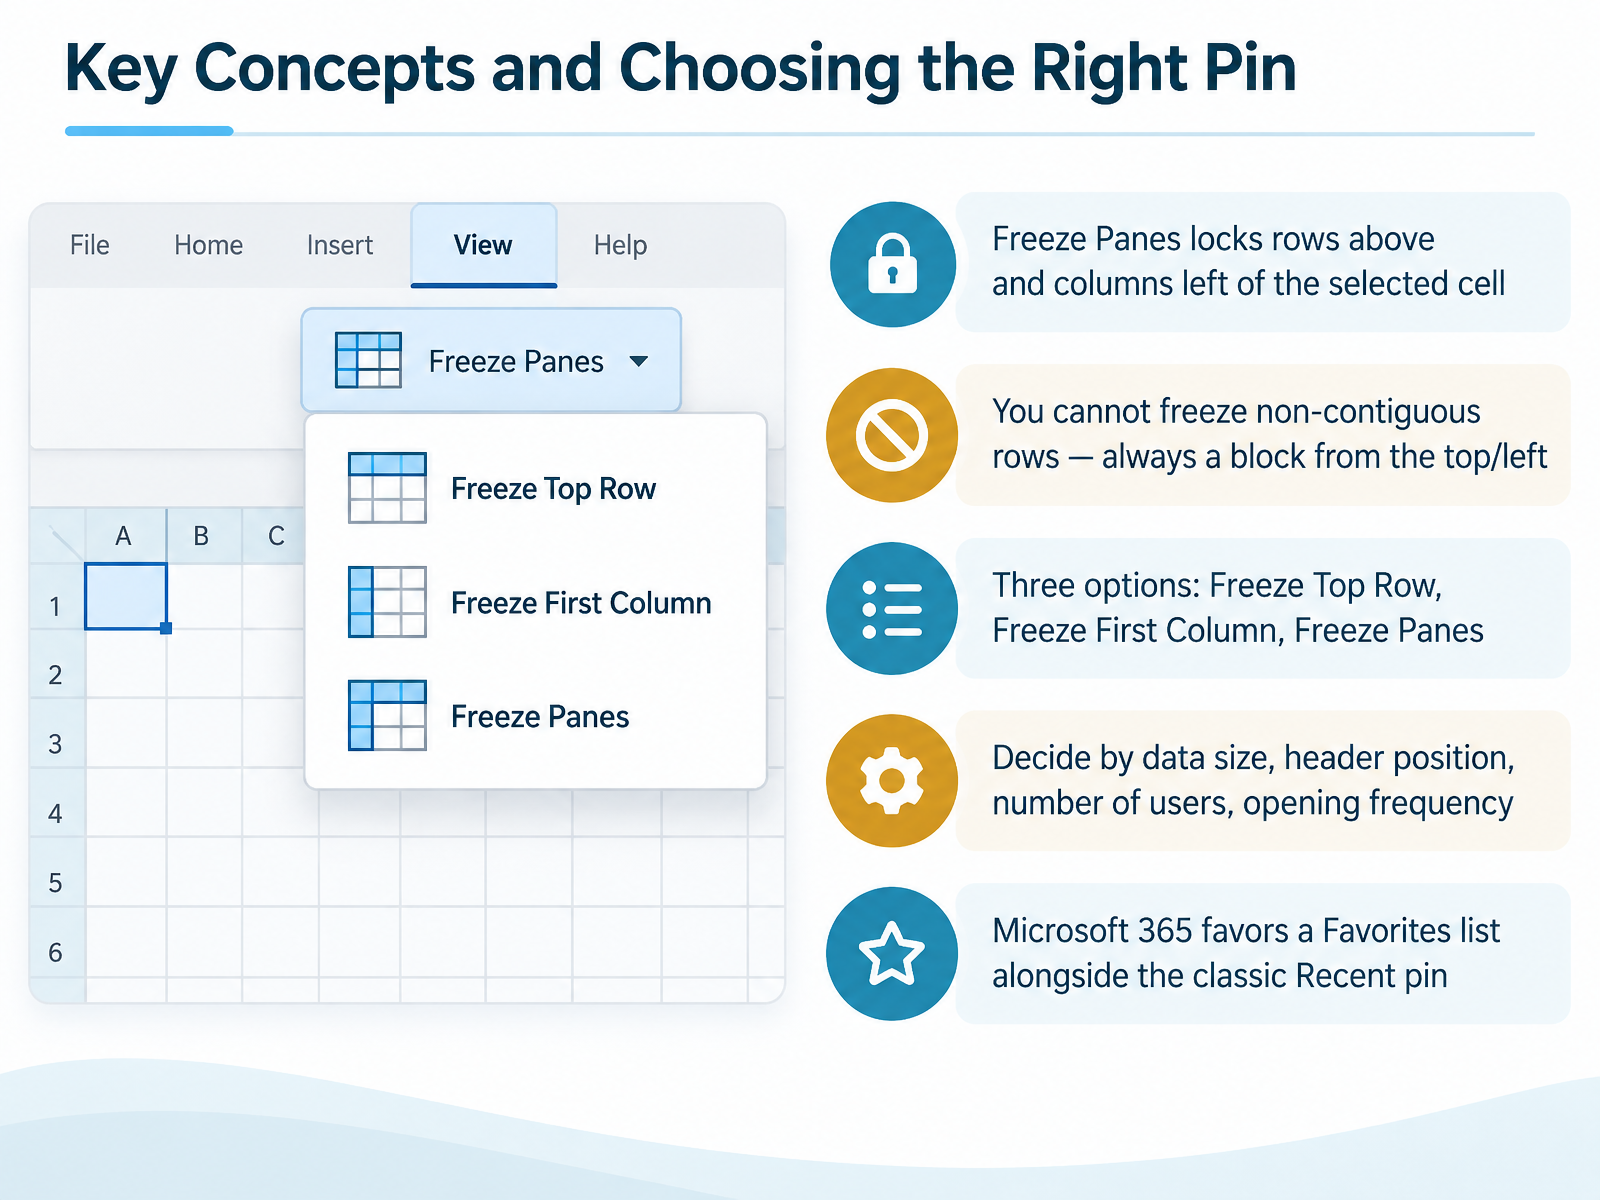
- 03Key Concepts and Choosing the Right PinLet's look at the key concepts behind pinning, so you can choose the right option. First, Freeze Panes locks the rows above and the columns to the left of the cell you select. So the cell you click decides what stays visible. Second, you cannot freeze non-contiguous rows. It is always a block starting from the top row or the left column. Excel offers three choices. Freeze Top Row keeps your header visible as you scroll down. Freeze First Column keeps names or IDs visible as you scroll right. Freeze Panes locks a block, based on the selected cell. To decide, check your data size, where your headers sit, how many people use the file, and how often it opens. Also, in Microsoft 365, pinning files is shifting toward a Favorites list alongside the classic Recent pin. Next, we will move on to preparing the sheet before you pin.
 support.microsoft.comsupport.microsoft.comsupport.microsoft.com+21 min
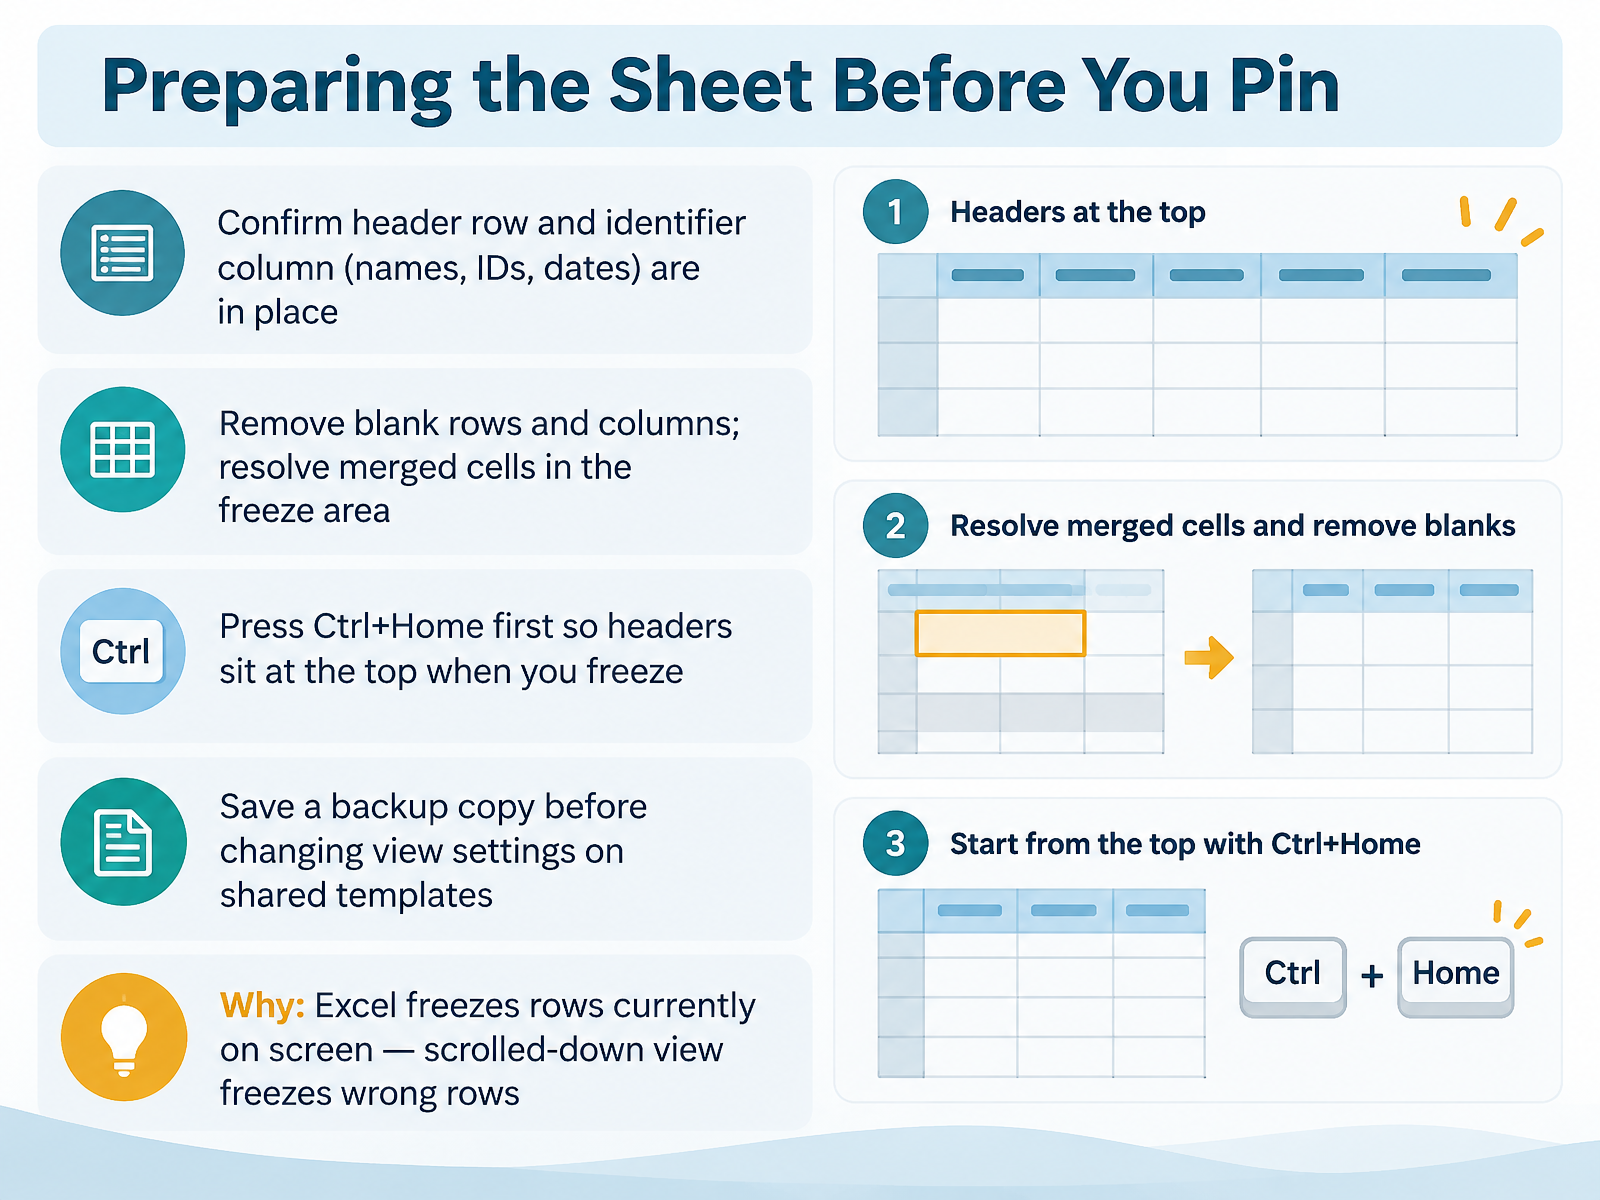
- 04Preparing the Sheet Before You PinBefore we freeze anything, let us take a moment to prepare the sheet. Start by confirming that your header row and your identifier column, such as names, IDs, or dates, are in place. Next, remove any blank rows and columns, and resolve merged cells inside the area you plan to freeze, because blank or merged cells can prevent Freeze Panes from working correctly. Then press Control Home, so your headers sit at the top of the window. This matters because Excel freezes the rows currently on screen. If you have scrolled down to row forty, you may freeze the wrong rows entirely. Finally, if you are working on a shared template, save a backup copy before changing any view settings. With your sheet clean and positioned at the top, you are ready to lock it in place. In the next part, we will look at freezing the top row or first column in one click.
 support.microsoft.comsupport.microsoft.comsupport.microsoft.com+21 min
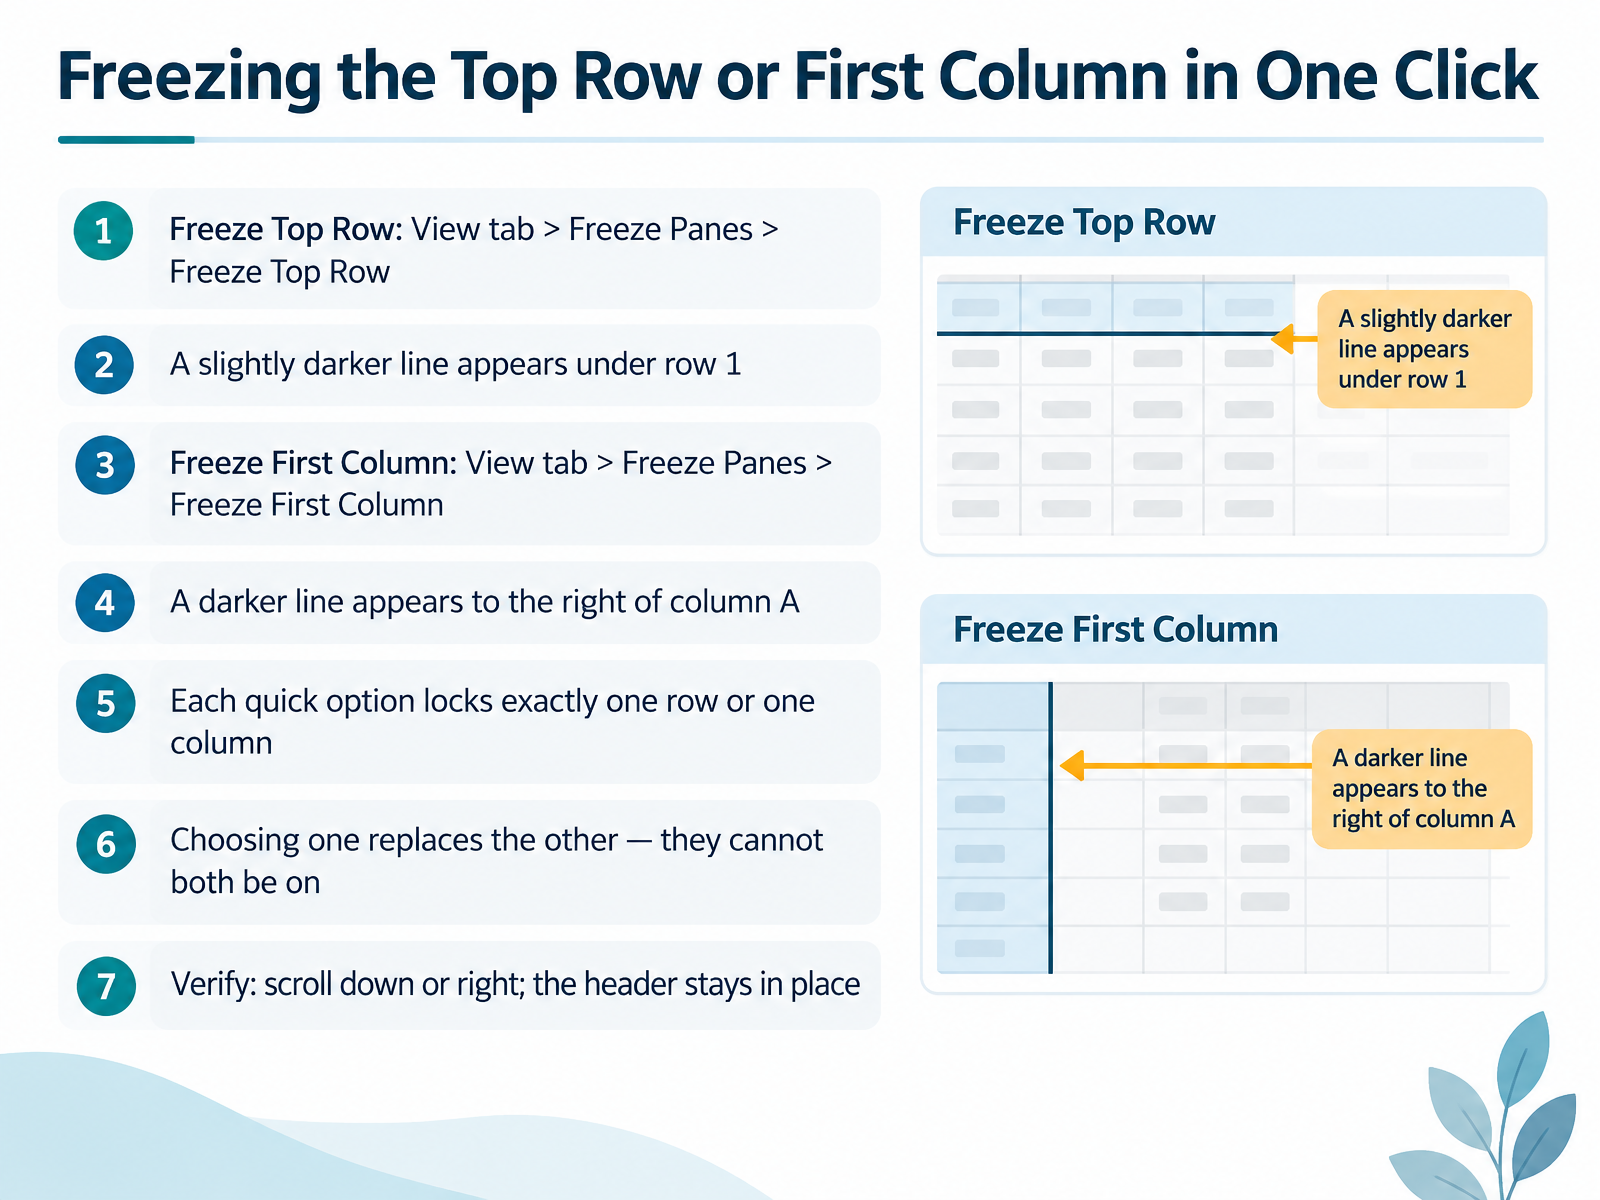
- 05Freezing the Top Row or First Column in One ClickNow let's look at the quickest way to lock a header in place. If you want to keep only the top row visible, first press Control plus Home so row one is showing at the top of your screen. Then click the View tab. Click Freeze Panes, and choose Freeze Top Row. You will see a slightly darker line under row one, which means that row is now frozen. To lock only the first column, click the View tab again. Click Freeze Panes, and choose Freeze First Column. A darker line appears to the right of column A. Keep in mind that each quick option locks exactly one row or one column. Choosing one replaces the other, so they cannot both be on at the same time. To check your work, scroll down or to the right. The header should stay in place while the rest of the sheet moves. Next, we will walk through freezing custom rows and columns step by step.
 support.microsoft.comsupport.microsoft.comsupport.microsoft.com+22 min
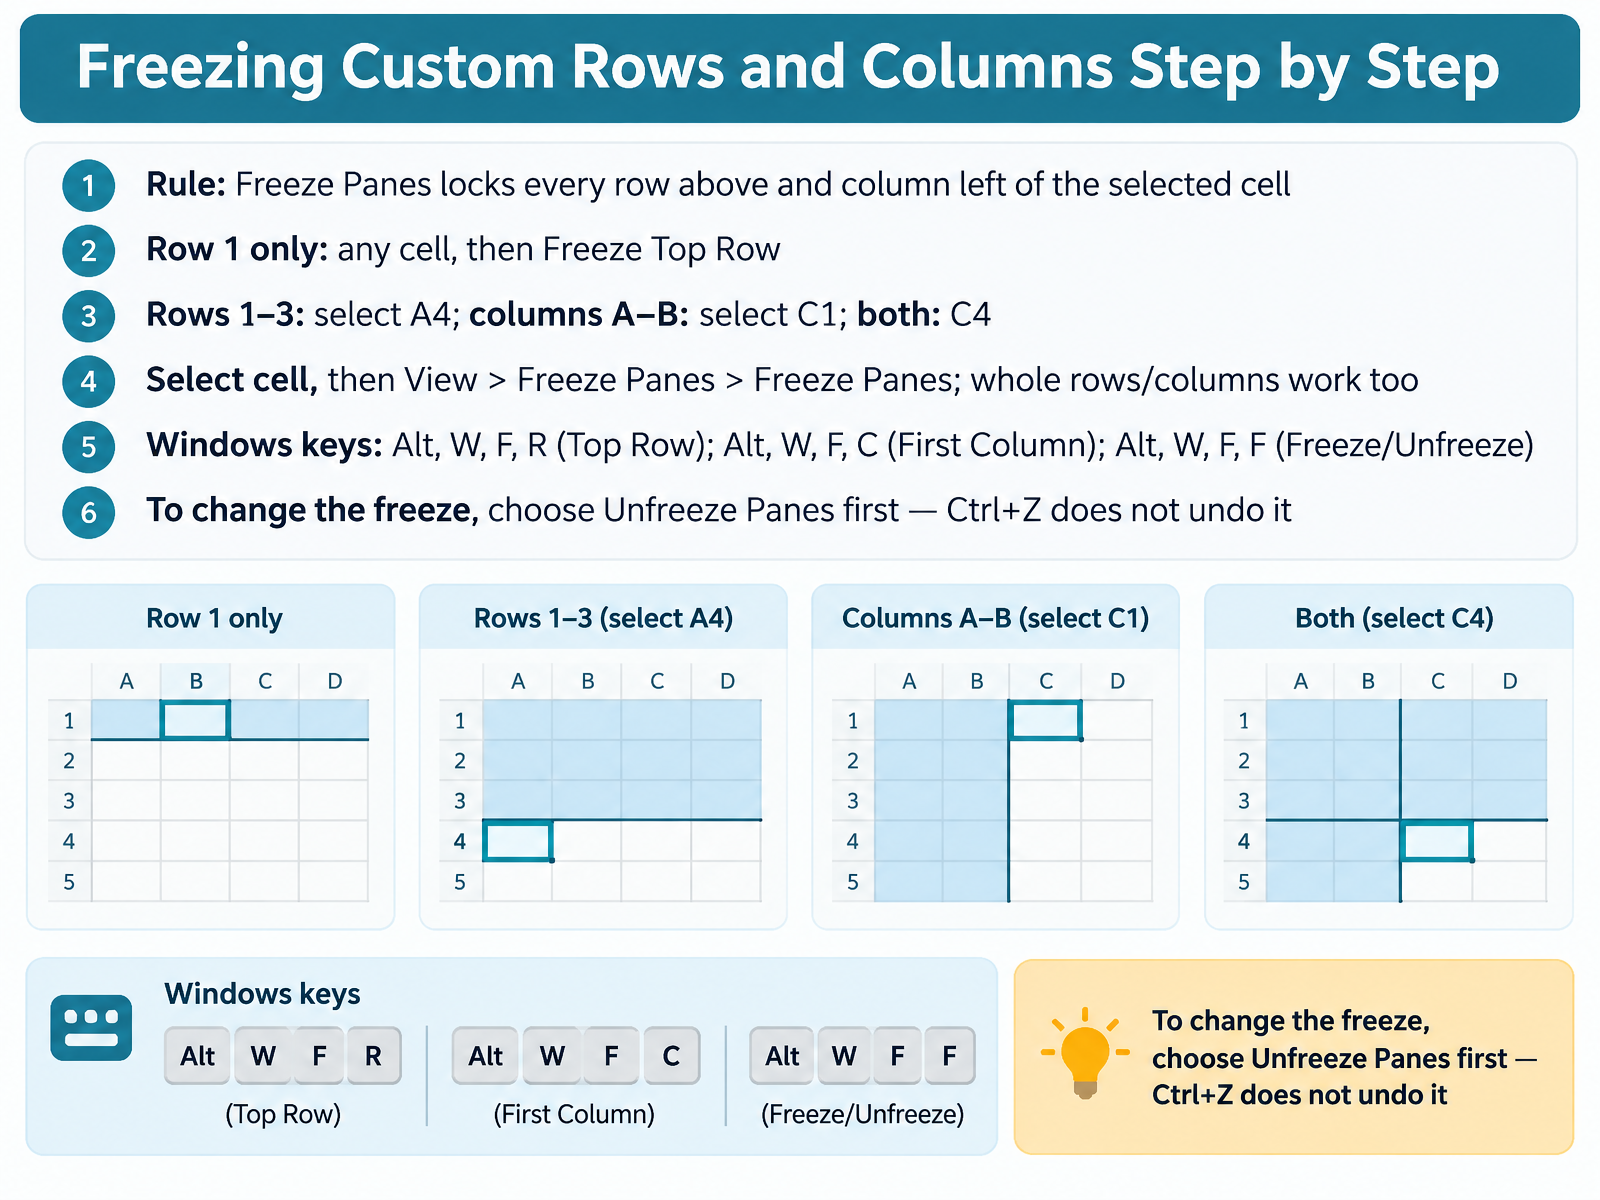
- 06Freezing Custom Rows and Columns Step by StepNow let's walk through freezing custom rows and columns, step by step. The rule to remember is simple: Freeze Panes locks every row above and every column to the left of the cell you select. To freeze only row one, select any cell, then choose Freeze Top Row. To freeze rows one through three, select cell A four, then go to View, Freeze Panes, and choose Freeze Panes. To freeze columns A and B, select cell C one first. To freeze both rows one through three and columns A and B, select cell C four. You can also select a whole row or column instead of a single cell. On Windows, try the keyboard shortcut Alt, W, F, R for Freeze Top Row, Alt, W, F, C for Freeze First Column, and Alt, W, F, F for Freeze Panes. One important note: to change the freeze, choose Unfreeze Panes first, because Control Z does not undo it. Next, we'll look at pinning files, folders, and Excel for fast access.
 support.microsoft.comsupport.microsoft.comsupport.microsoft.com+21 min
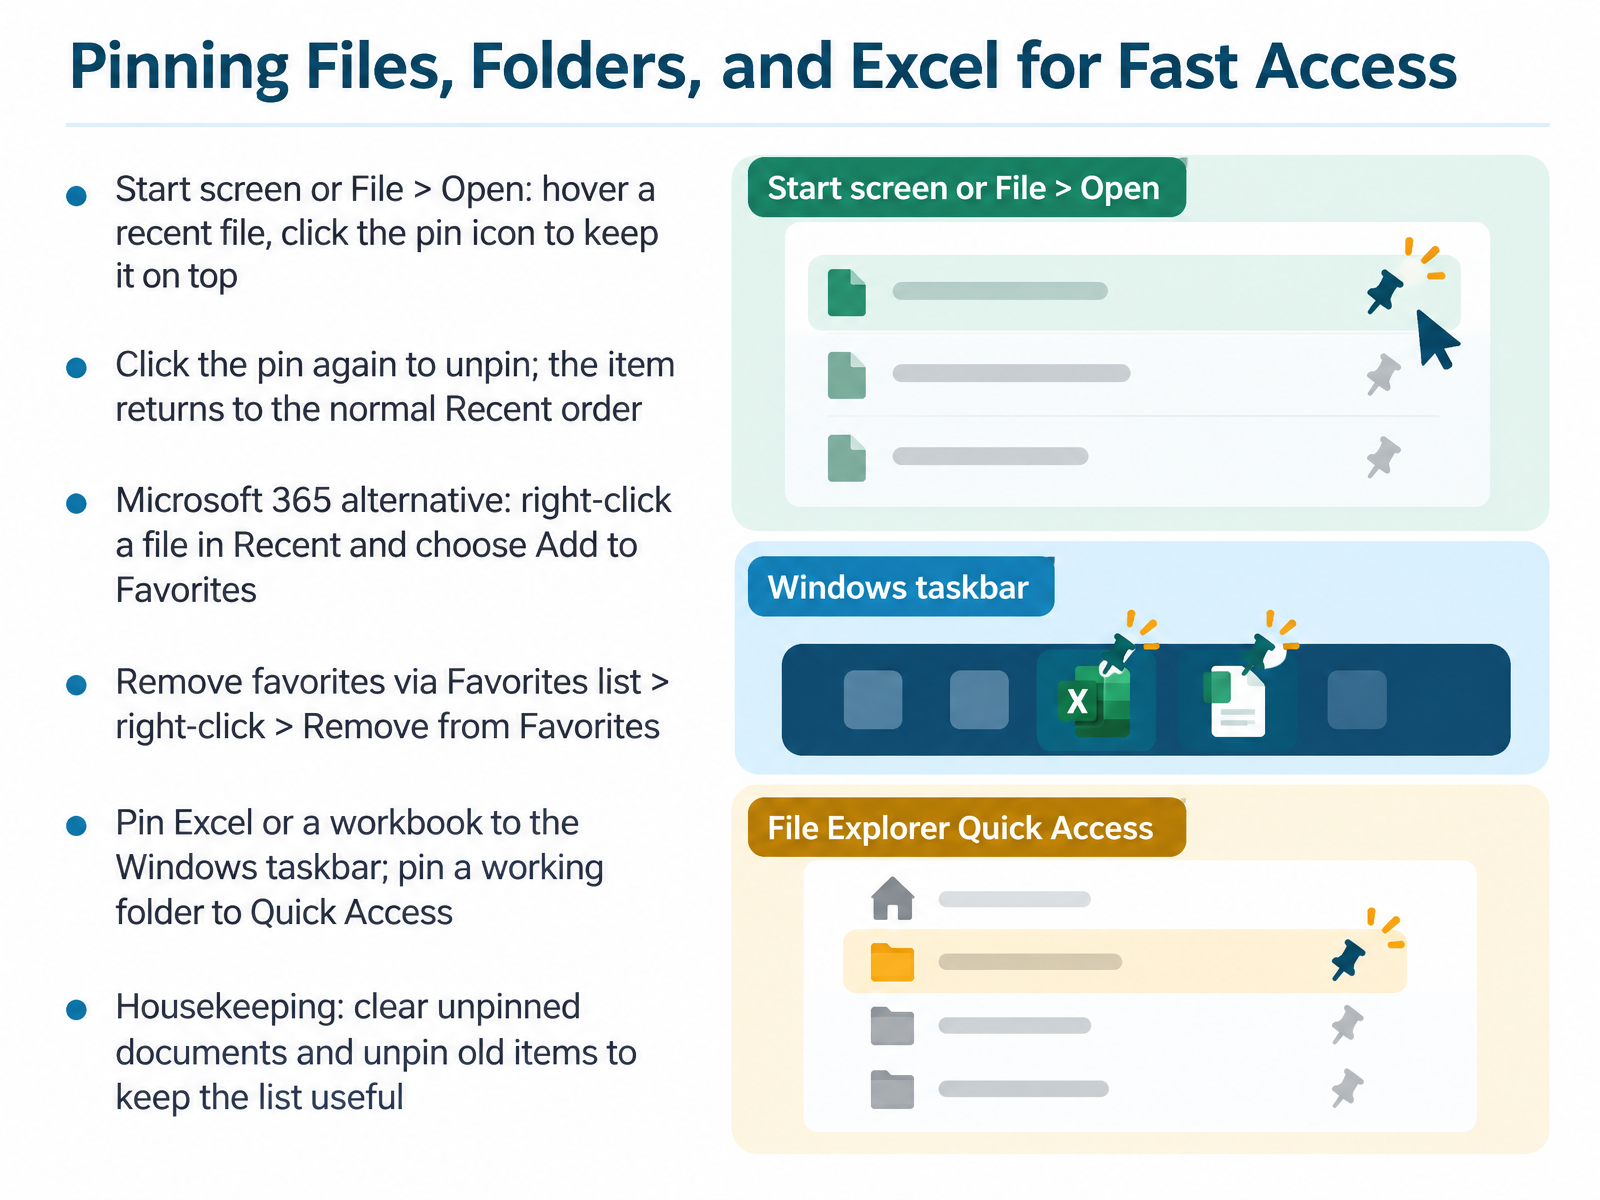
- 07Pinning Files, Folders, and Excel for Fast AccessNow let's make your frequently used files easier to reach. Pinning keeps an item at the top so it does not scroll away. Start on the Excel start screen, or open the File tab and choose Open. Hover over a recent file until the pin icon appears on the right. Click the pin. The file stays at the top of your list. To unpin it, click the pin again. The file returns to the normal Recent order. In Microsoft 365, you can also right click a file in Recent and choose Add to Favorites. To remove it, open the Favorites list, right click the file, and choose Remove from Favorites. You can also pin Excel itself or a workbook to the Windows taskbar, and pin a working folder to Quick Access. Finally, do a little housekeeping. Clear unpinned documents and unpin old items so the list stays useful. Next, we look at practical scenarios for office, teaching, and administration.
 support.microsoft.comthetraininglady.comwisechecker.com+22 min
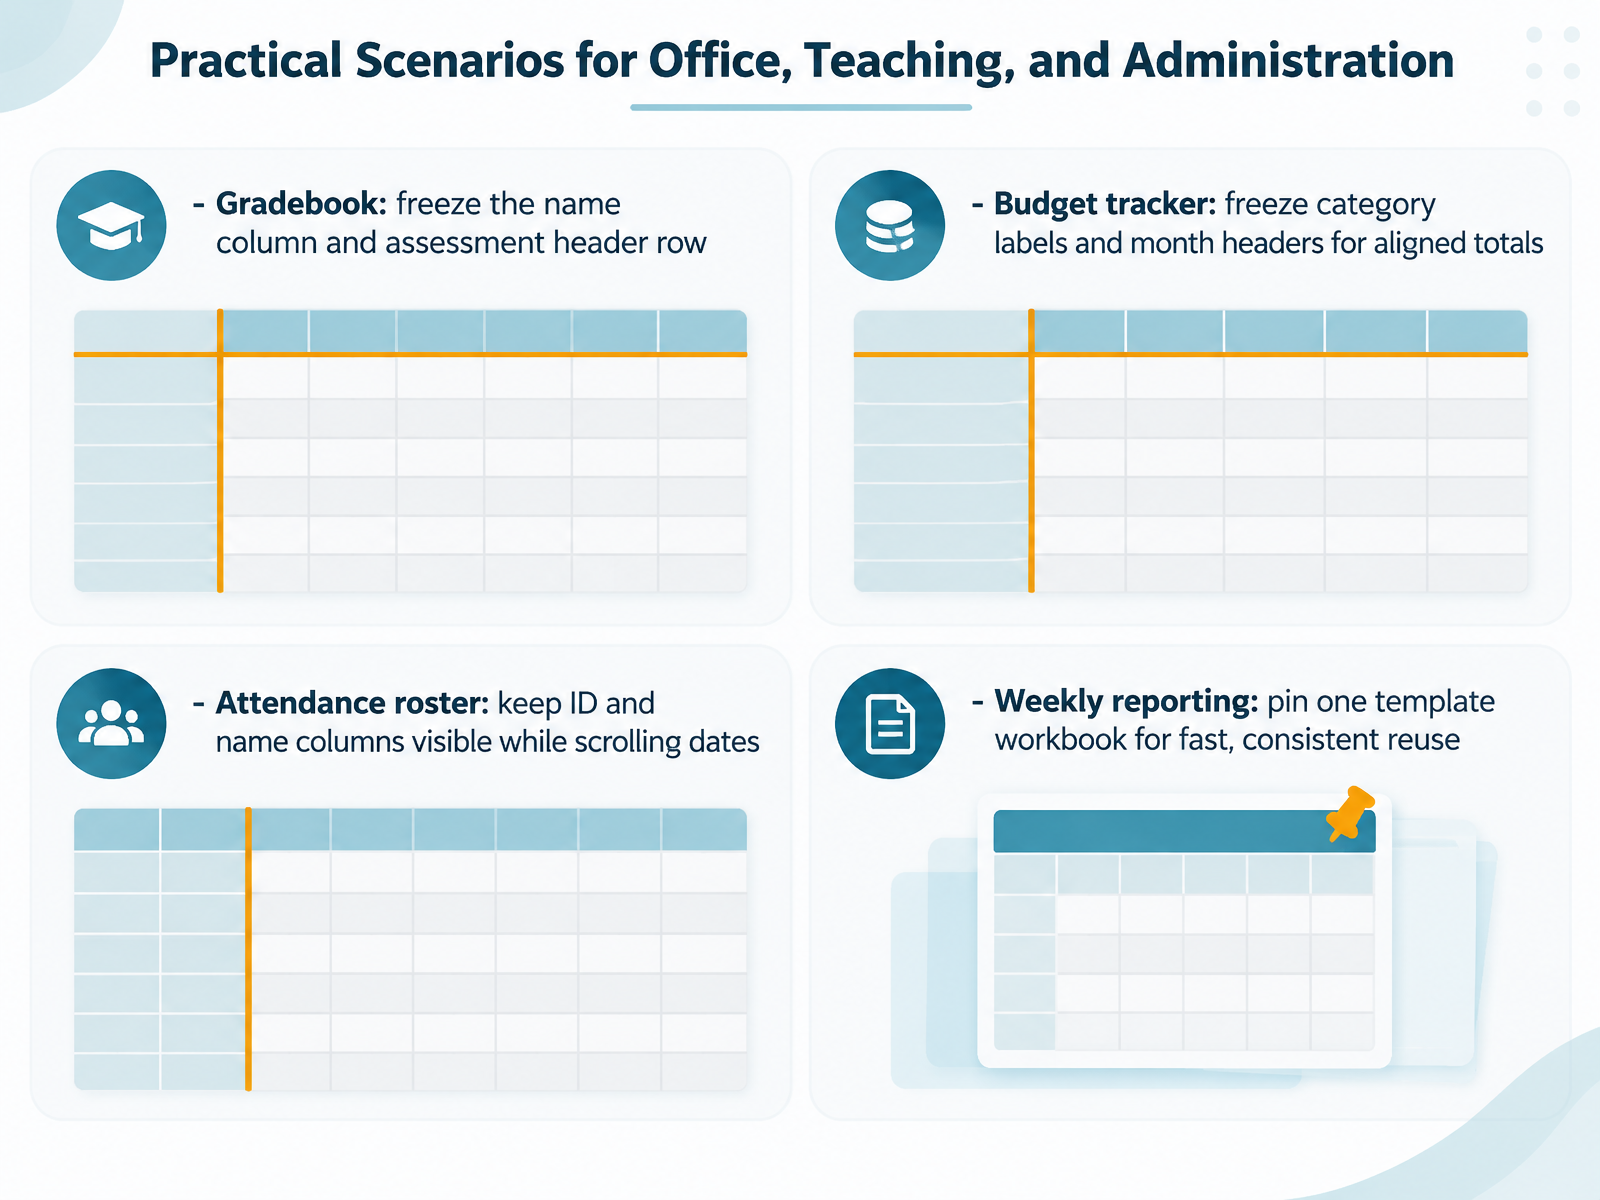
- 08Practical Scenarios for Office, Teaching, and AdministrationNow let's look at how this works in everyday office, teaching, and administration tasks. For a gradebook, place your cursor in the cell just below the name column and to the right of the assessment header row. Then select the View tab and choose Freeze Panes. This keeps student names and the header row visible while you scroll through scores. For a budget tracker, freeze your category labels and month headers the same way, so totals stay aligned as you move across the sheet. For an attendance roster, select the cell to the right of the ID and name columns, then freeze panes, so both stay in view while you scroll through dates. And for weekly reporting, open your template workbook, then go to the File tab and select Open. Hover over the template file and select the pin icon. That keeps it at the top of your recent list for fast, consistent reuse. In each case, remember the rule: freeze panes locks the rows above and the columns to the left of the cell you selected. That single habit saves you from losing your place. Next, we'll look at troubleshooting why freeze panes is grayed out.
 support.microsoft.comsupport.microsoft.comsupport.microsoft.com+22 min
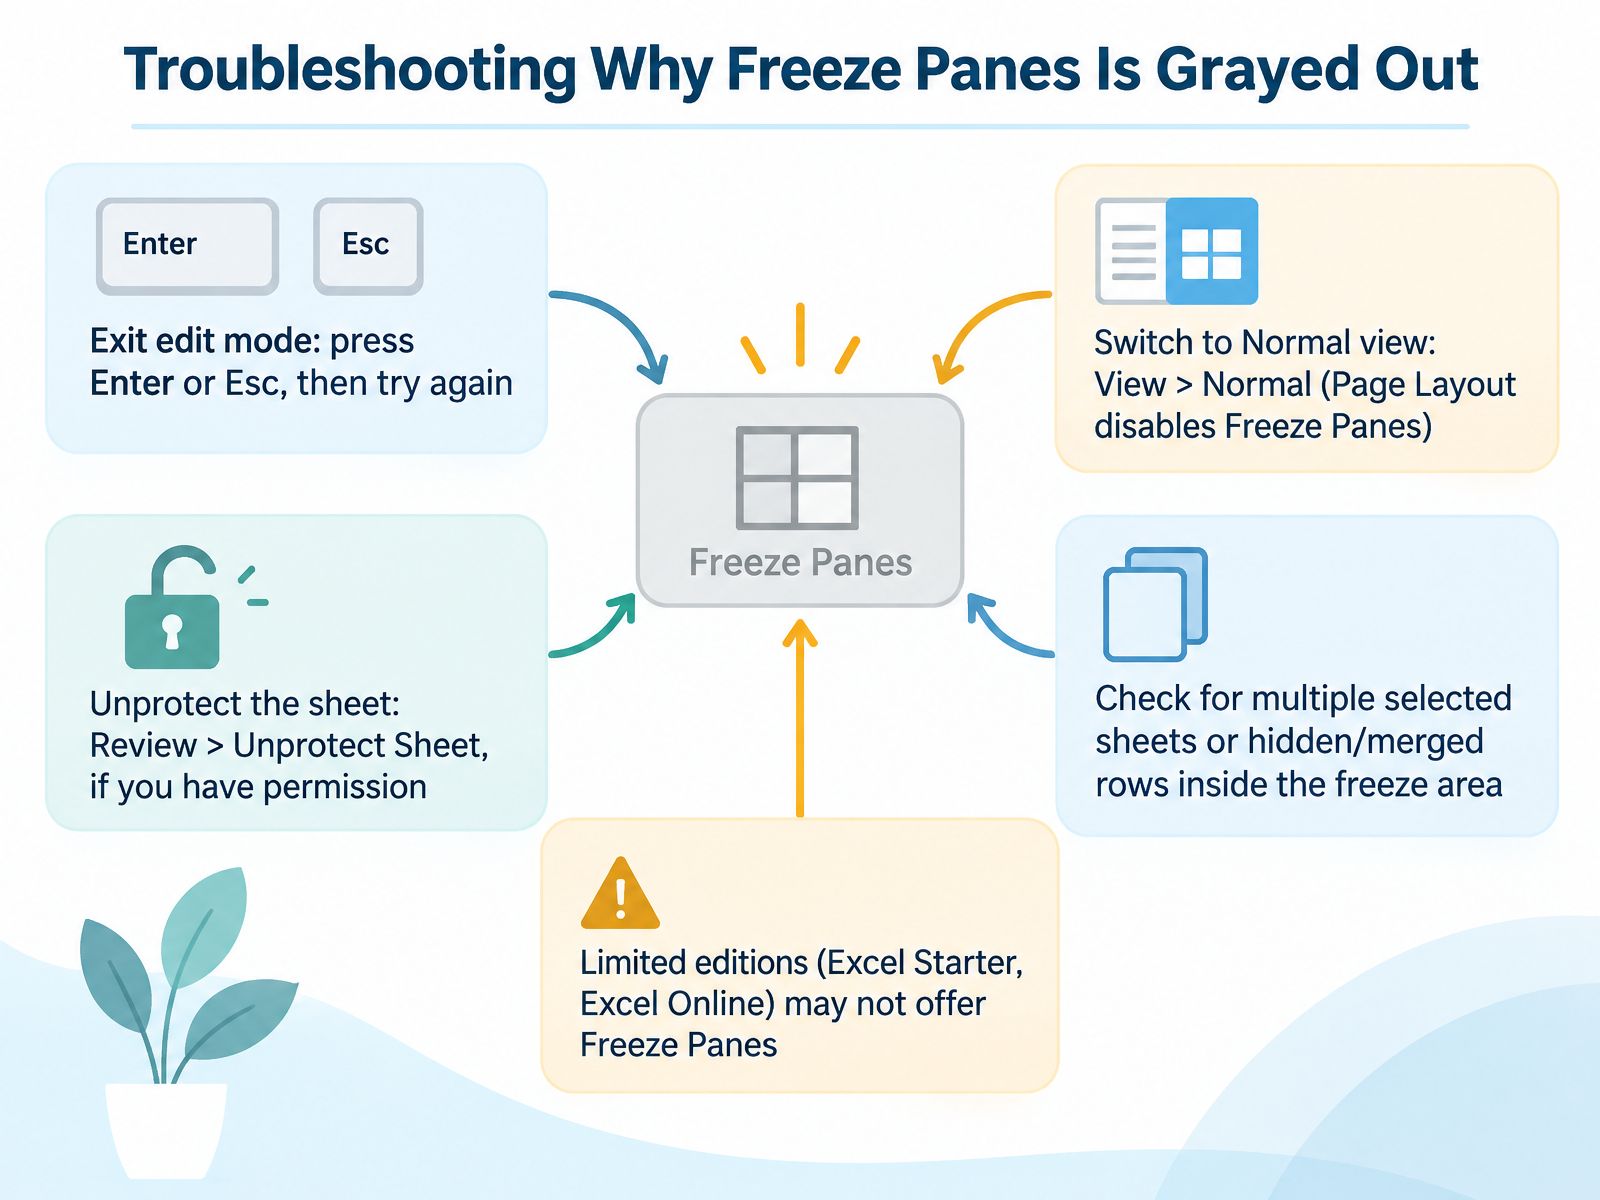
- 09Troubleshooting Why Freeze Panes Is Grayed OutSo what do you do when you click the View tab and Freeze Panes is grayed out? Let's work through the likely causes in order. First, check whether you are still editing a cell. If your cursor is inside a cell, press Enter or Escape to exit edit mode, then try again. Second, confirm your view. Click View, then Normal. Page Layout view disables Freeze Panes, so switching back to Normal usually re-enables it. Third, check sheet protection. Go to Review, and if you see Unprotect Sheet, click it, provided you have permission. Fourth, make sure only one sheet is selected, and look for hidden or merged rows inside the area you want to freeze. Finally, some limited editions, such as Excel Starter or Excel Online, may not offer Freeze Panes at all. Now let's move on to fixing wrong freezes, splits, and lost settings.
 learn.microsoft.comdatacamp.comgoskills.com+21 min
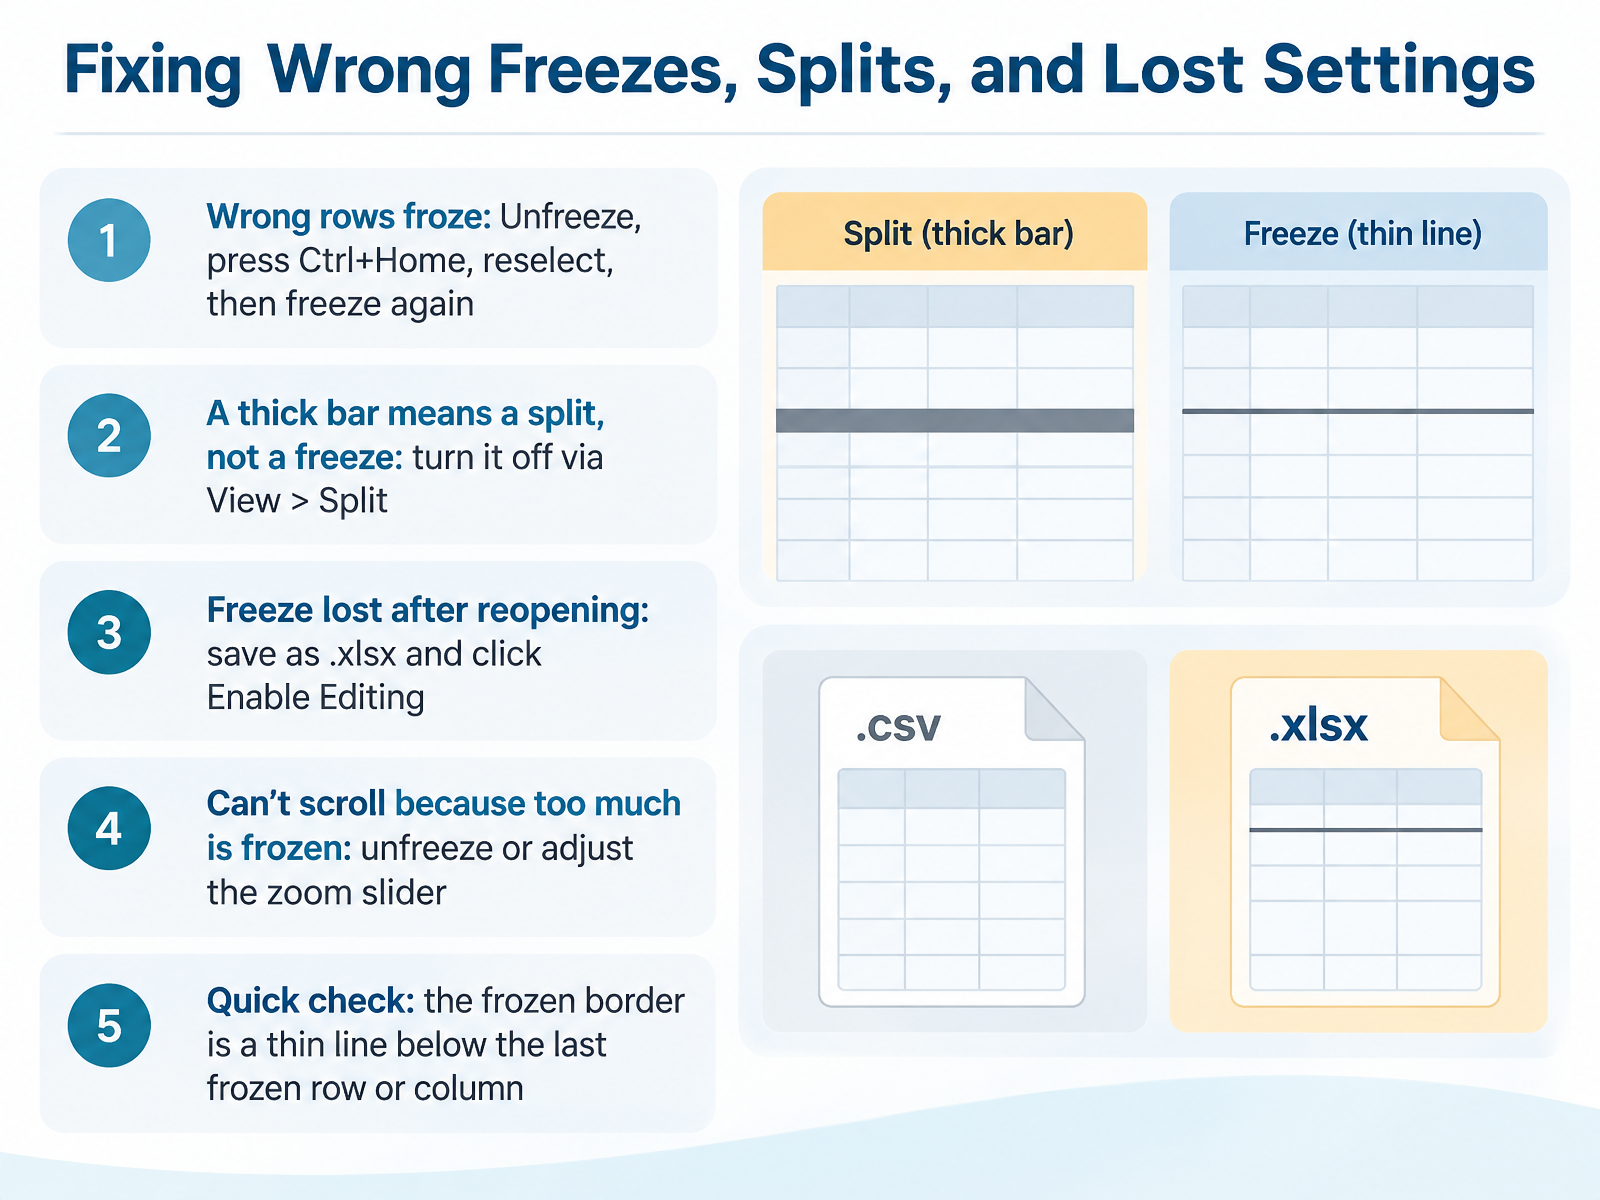
- 10Fixing Wrong Freezes, Splits, and Lost SettingsNow let's handle things going wrong. If the wrong rows froze, go to the View tab, open Freeze Panes, and choose Unfreeze Panes. Then press Control plus Home to jump back to the top of the sheet. Click the correct cell, making sure it sits just below the rows you want to keep, and freeze again. Next, if you see a thick bar across your sheet, that is a split, not a freeze. Turn it off by clicking View, then Split. If your freeze disappears after reopening the file, save the workbook in the standard .xlsx format, and if a yellow bar appears, click Enable Editing. And if you cannot scroll because too much is frozen, unfreeze and try again, or adjust the zoom slider. For a quick check, the frozen border is a thin line just below the last frozen row or column. Let's move on to pinning safely in shared and co-authored workbooks.
 learn.microsoft.comdatacamp.comgoskills.com+21 min
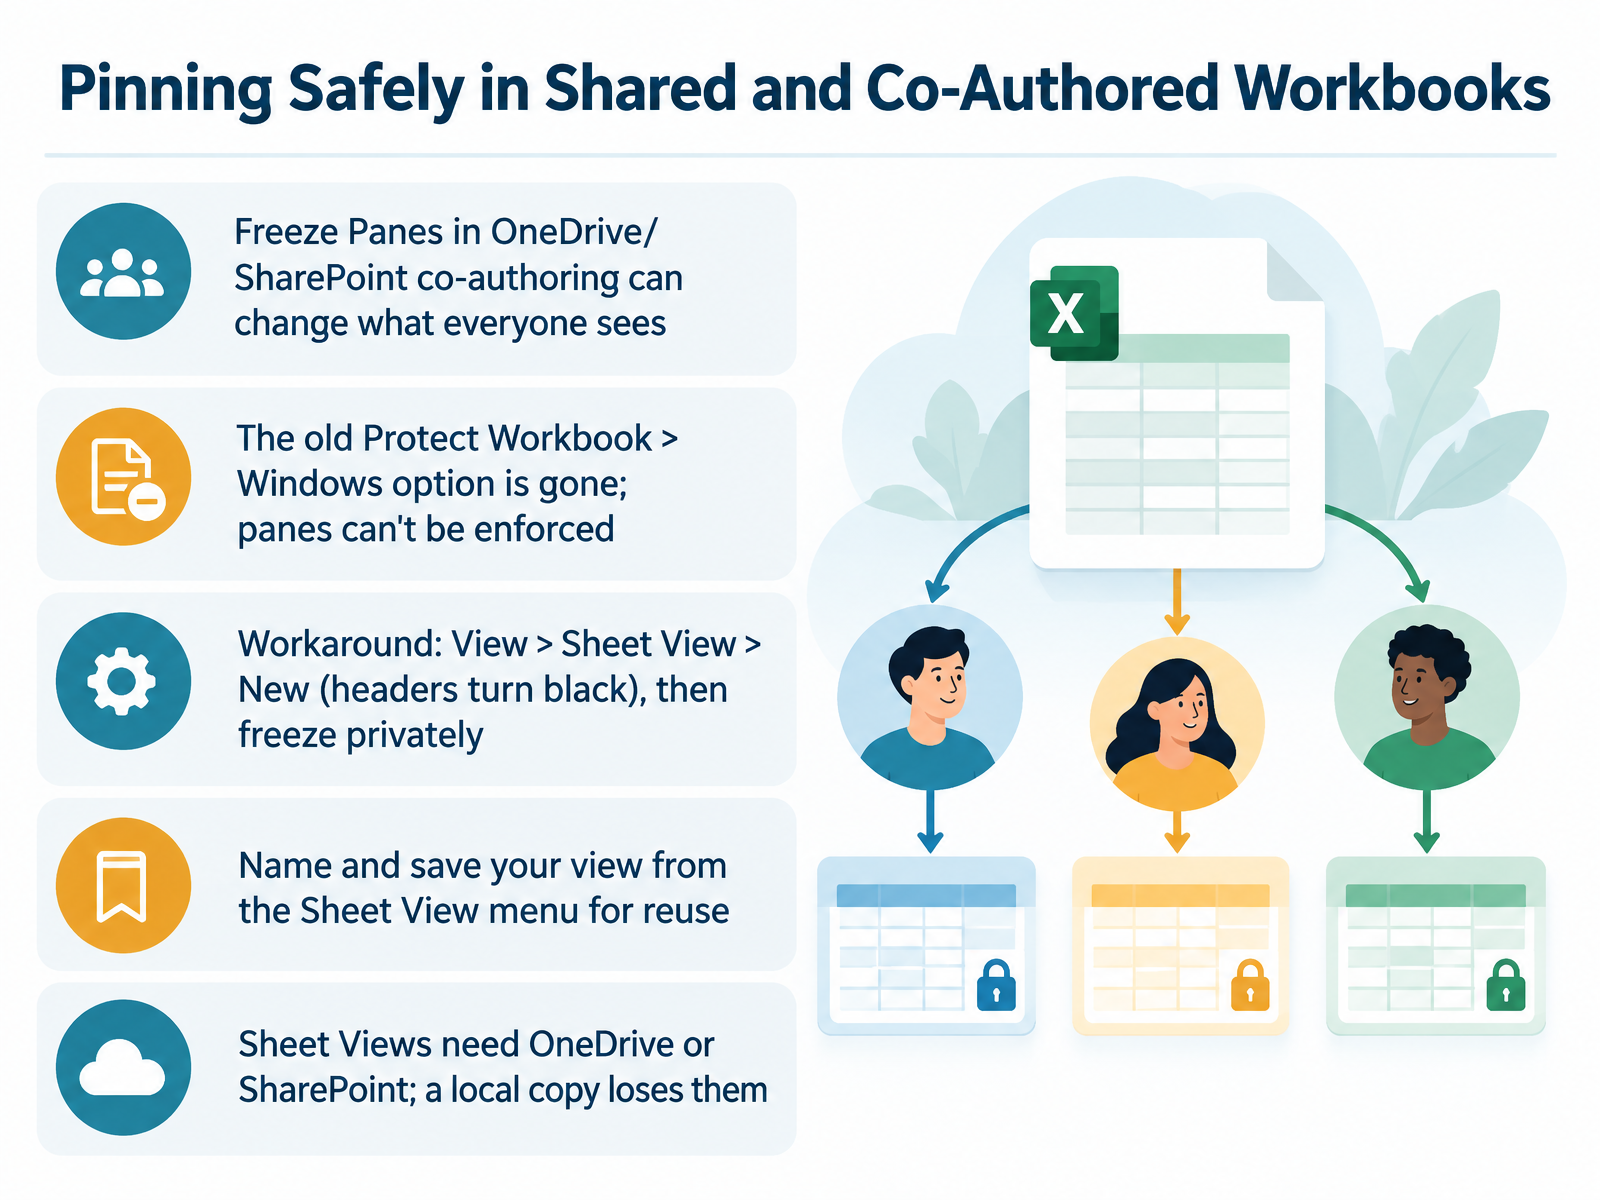
- 11Pinning Safely in Shared and Co-Authored WorkbooksNow let's talk about pinning safely in shared and co-authored workbooks. If you use Freeze Panes in a file stored on OneDrive or SharePoint while others are editing, your change can affect what everyone sees on their screen. You may also look for the old Protect Workbook option called Windows. That option is gone, so panes cannot be enforced for the whole team. Here is the workaround. Go to the View tab, select Sheet View, then click New. The row and column headers turn black, which tells you that you are in a private view. Now freeze panes as usual, and only you will see the result. To keep this setup, open the Sheet View menu, type a name for your view, and press Enter. Remember that Sheet Views need the file stored on OneDrive or SharePoint. If you save a local copy, your views are lost. Next, we will look at verifying, reusing, and sharing your pinned setup.
 support.microsoft.comlearn.microsoft.comlearn.microsoft.com+22 min
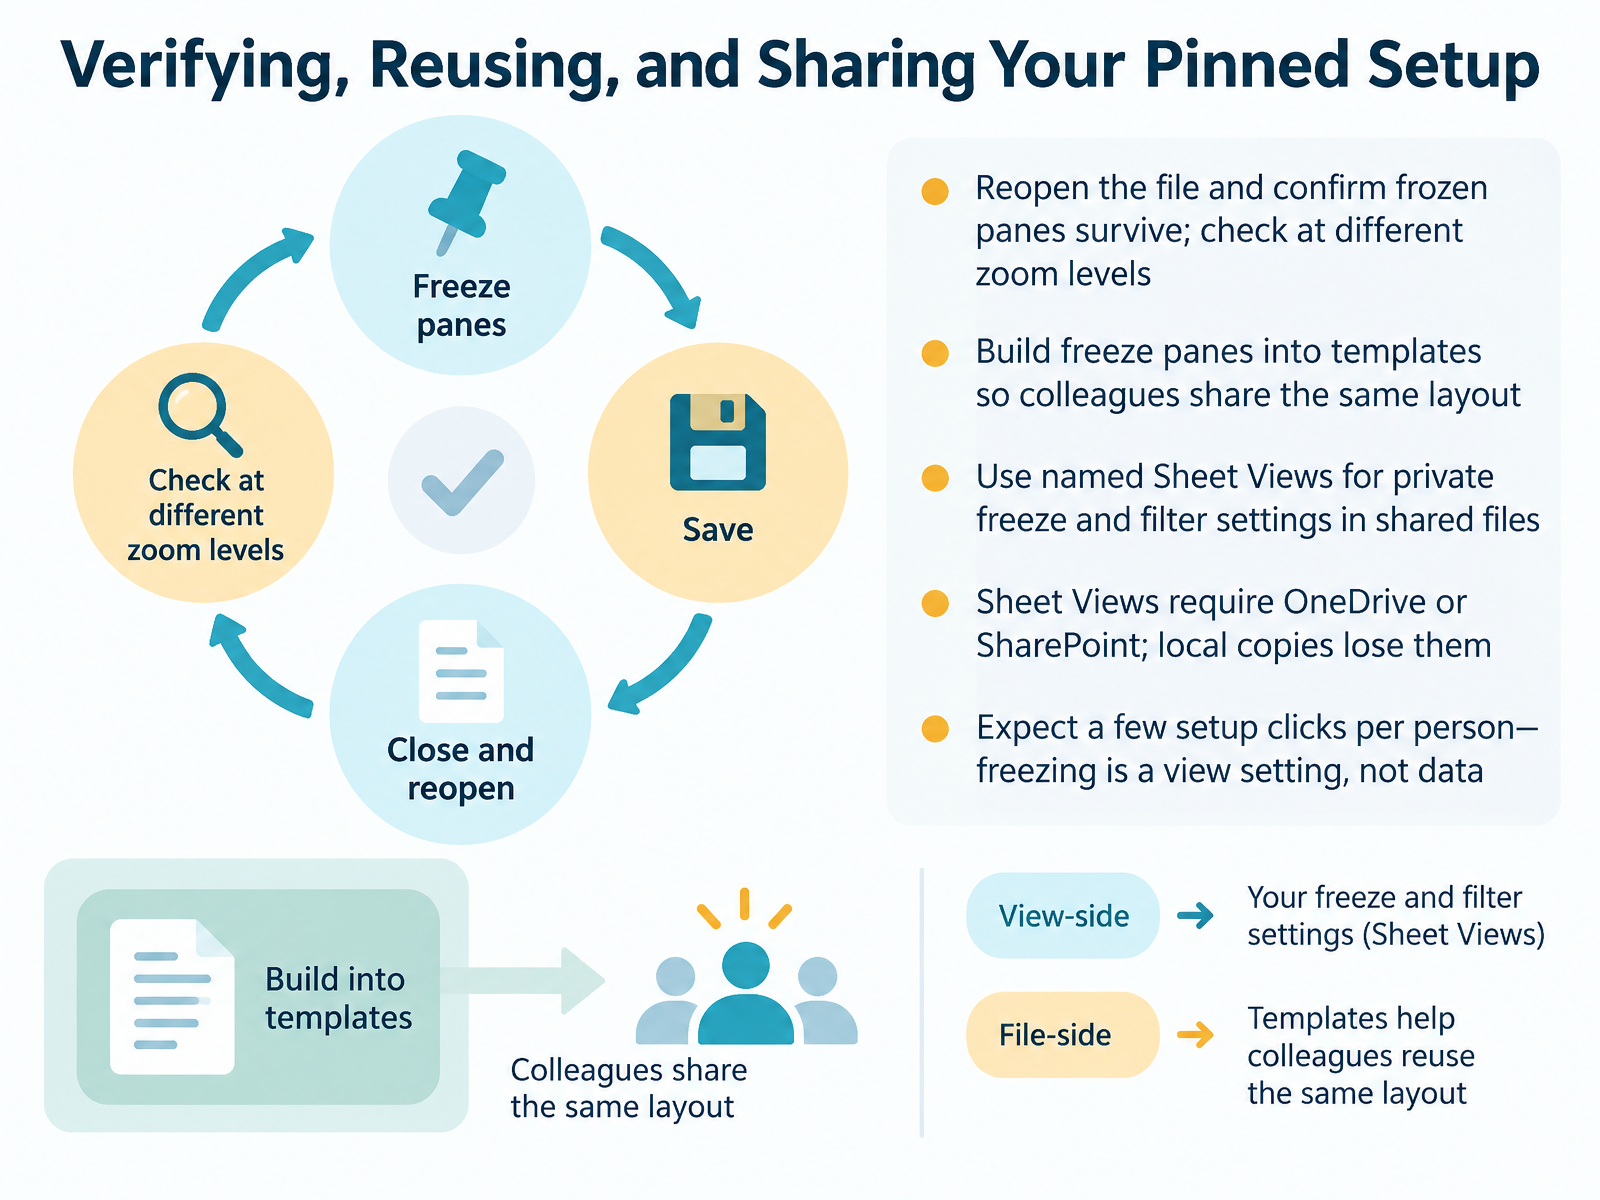
- 12Verifying, Reusing, and Sharing Your Pinned SetupNow let's verify your pinned setup and make it reusable. First, reopen the file and confirm your frozen panes are still there. Then check them at a few different zoom levels, because a freeze that looks right at one hundred percent should stay correct when you zoom in or out. Next, build freeze panes into your templates, so colleagues open the same layout and don't have to repeat the setup. For shared files, use named Sheet Views for private freeze and filter settings. Each person can keep their own view without disturbing anyone else. Keep in mind that Sheet Views require the file to be stored in OneDrive or SharePoint. If someone saves a local copy, those views are lost. Finally, expect a few setup clicks per person. Freezing panes is a view setting, not data, so it won't travel automatically with the workbook. Let's move on to hands-on practice and a pre, during, and post checklist.
 support.microsoft.comlearn.microsoft.comlearn.microsoft.com+21 min
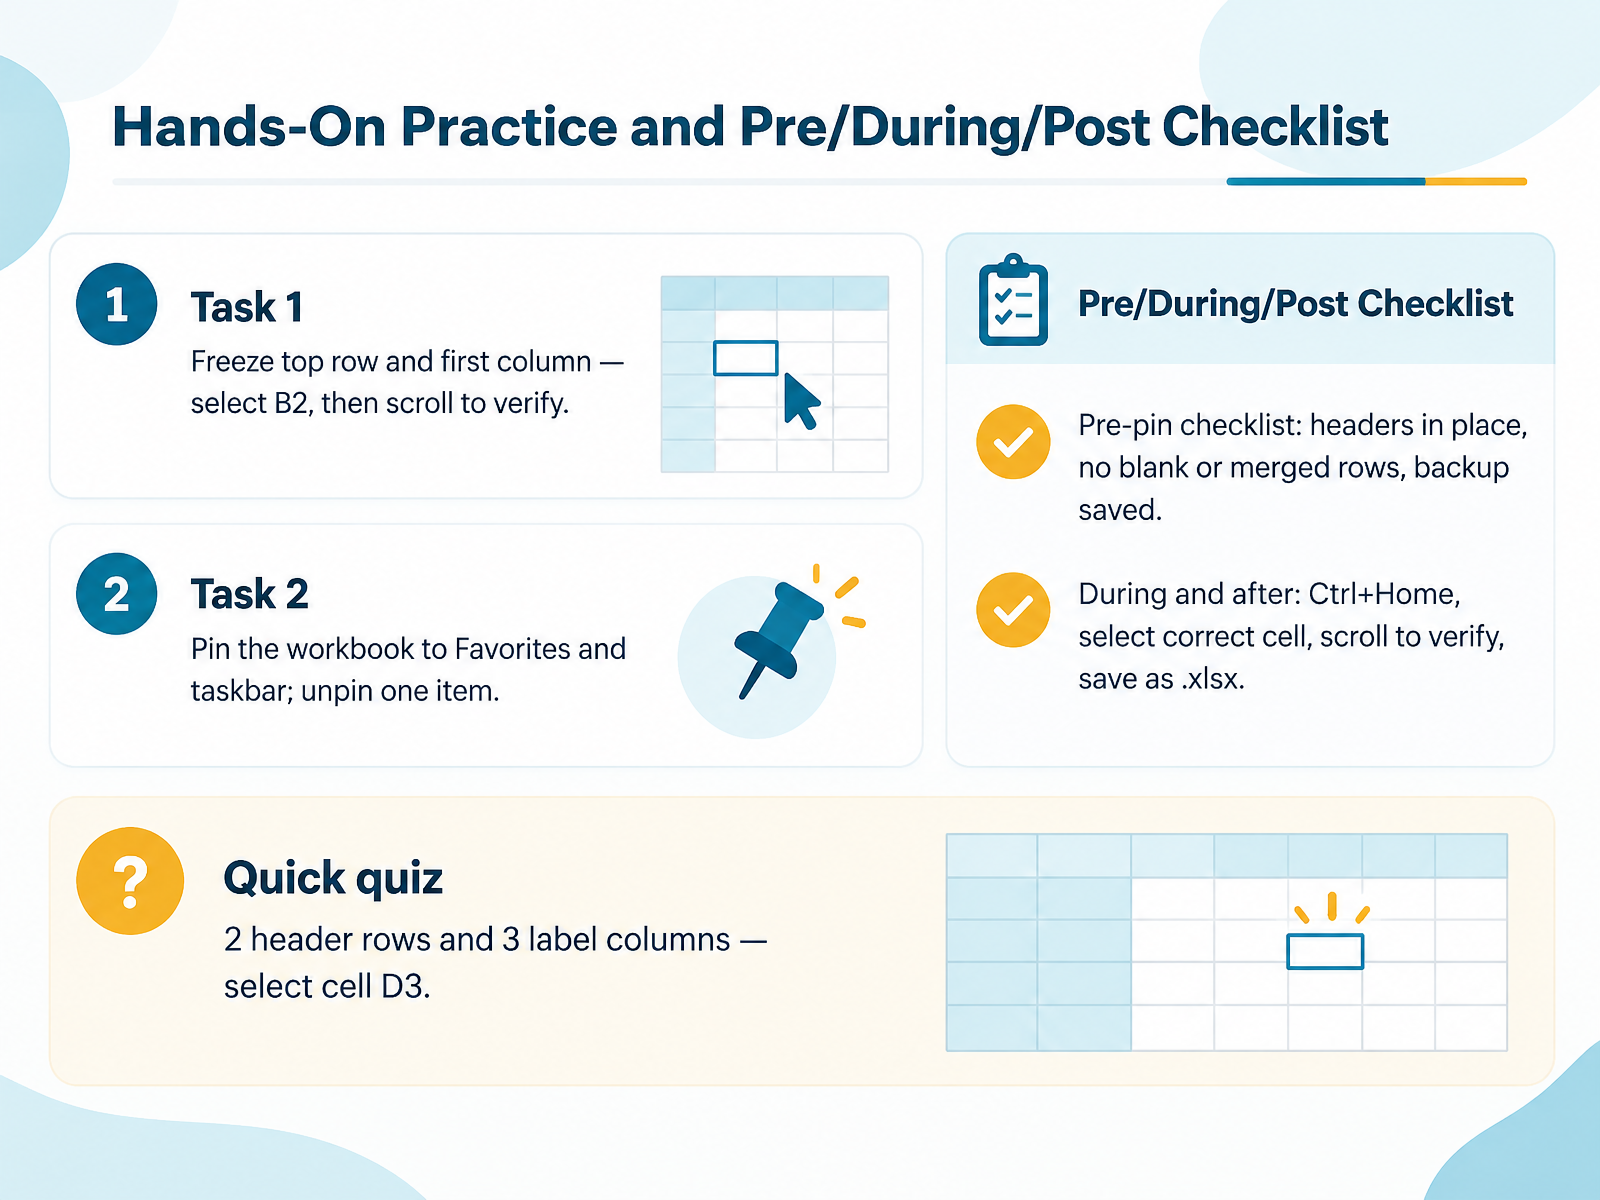
- 13Hands-On Practice and Pre/During/Post ChecklistNow let's put everything into practice with a short hands-on exercise. For Task one, you will freeze the top row and the first column at the same time. Press Control plus Home to return to the top of the sheet. Select cell B2. Then go to the View tab, click Freeze Panes, and choose Freeze Panes. Scroll down and to the right to confirm that row one and column A stay in place. Next, for Task two, pin the workbook. Go to the File tab, open the Recent list, right-click the file name, and choose Add to Favorites. Then right-click the Excel icon on your taskbar and pin the workbook there. Finally, unpin one of those two items so you know how to reverse the step. Before you pin anything, run a quick pre-check. Confirm your headers are in place. Remove blank or merged rows, and save a backup copy first. During and after pinning, use Control plus Home, select the correct cell, scroll to verify, and save the file as an xlsx file. Here is a quick quiz. If your sheet has two header rows and three label columns, which cell do you select? The answer is D3. That is the cell just below the frozen rows and to the right of the frozen columns. Let's wrap up with the key takeaways and next steps.
 support.microsoft.comsupport.microsoft.comsupport.microsoft.com+22 min
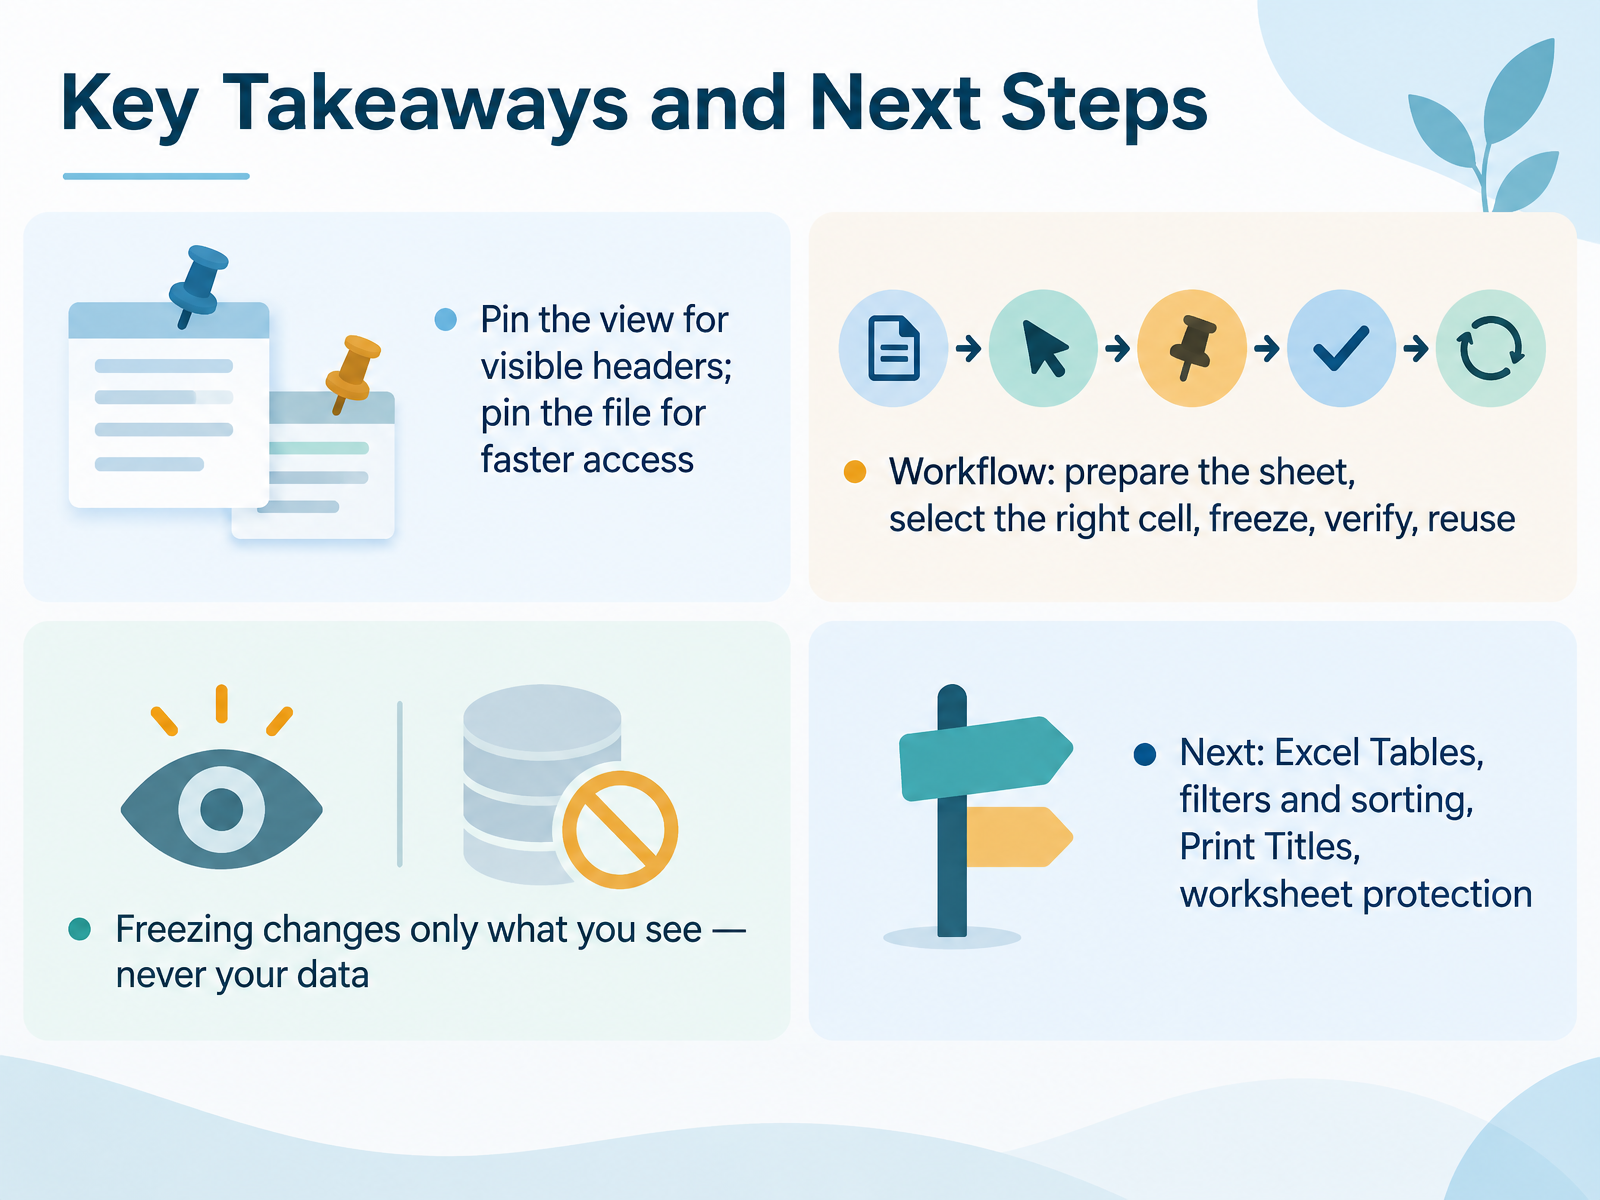
- 14Key Takeaways and Next StepsLet's bring everything together before you go. Remember two kinds of pinning. Pin the view when you need headers and labels to stay visible while you scroll. Pin the file, for example to your taskbar, when you want faster access to a workbook you open often. Keep the workflow simple: prepare the sheet, select the right cell, apply freeze, verify the result, and reuse it next time. And here is the reassurance to carry with you: freezing changes only what you see. It never changes your data. As a next step, explore Excel Tables, filters and sorting, Print Titles, and worksheet protection. Thank you for following along today. You now have a reliable habit for keeping your headers in view, so open a workbook you use often and try it once more. You are ready.
 support.microsoft.comlearn.microsoft.comlearn.microsoft.com+21 min
Take the deck with you
Download this course as a file — free, no sign-up needed.
- PDF handoutEvery slide page, ready to print or share.15 pages · 3.0 MBDownload
- Narrated PowerPointThe deck that presents itself — every slide carries the digital human's narration video.15 pages · 11.8 MBDownload
- PowerPoint slidesThe full deck as a .pptx — open it in PowerPoint, Keynote, or Google Slides.15 pages · 2.9 MBDownload
Free to use in your own training — please keep the PersonWise credit page at the end.
Have your own deck? Turn it into a course
Sources consulted
Web sources consulted while building this course.
- Create and manage Sheet Views in Excel | Microsoft Support — support.microsoft.com
- Shared Excel file showing freeze panes for all users when one user freezes panes - Microsoft Q&A — learn.microsoft.com
- Freeze Panes without impacting collaborators / Allow other collaborators to view a file with a unique freeze - Microsoft Q&A — learn.microsoft.com
- Freeze panes to lock rows and columns | Microsoft Support — support.microsoft.com
- Sheet View not working in Excel online/Excel for the web/Excel web version even when hosted in OneDrive - Microsoft Q&A — learn.microsoft.com
- Tips for Excel for the web - Microsoft Support — support.microsoft.com
- Freeze panes to lock the first row or column in Excel for Mac | Microsoft Support — support.microsoft.com
- See tips for Excel for the web — support.microsoft.com
- Freeze panes to lock the first row or column in Excel for Mac | Microsoft Support — support.microsoft.com
- Explore the Excel Interface | The Training Lady — thetraininglady.com
- How to Use Excel Start Screen: Open Recent Files, Start Blank, and More – WiseChecker — wisechecker.com
- Customize the list of recently used files in Office apps | Microsoft Support — support.microsoft.com
- Change Excel 365 Start Up — learn.microsoft.com
- Excel Why is Freeze Panes greyed out? - Microsoft Q&A — learn.microsoft.com
- How to Freeze Multiple Rows in Excel — datacamp.com
- How to Freeze Panes in Excel — goskills.com
- Excel Freeze Panes Not Working? 5 Easy Fixes to Resolve It — stellarinfo.com
- My Ruler, Freeze Panes and Window Split have all become greyed out and inaccessible in a particular spreadsheet - sheet is not protected nor is workbook. - Microsoft Q&A — learn.microsoft.com