Project Issue Log Creation
Begin
14 pages · ~28 min
Project Issue Log Creation
Learn to create and maintain a project issue log to track and resolve problems effectively, designed for project managers and team leads.
What you’ll learn
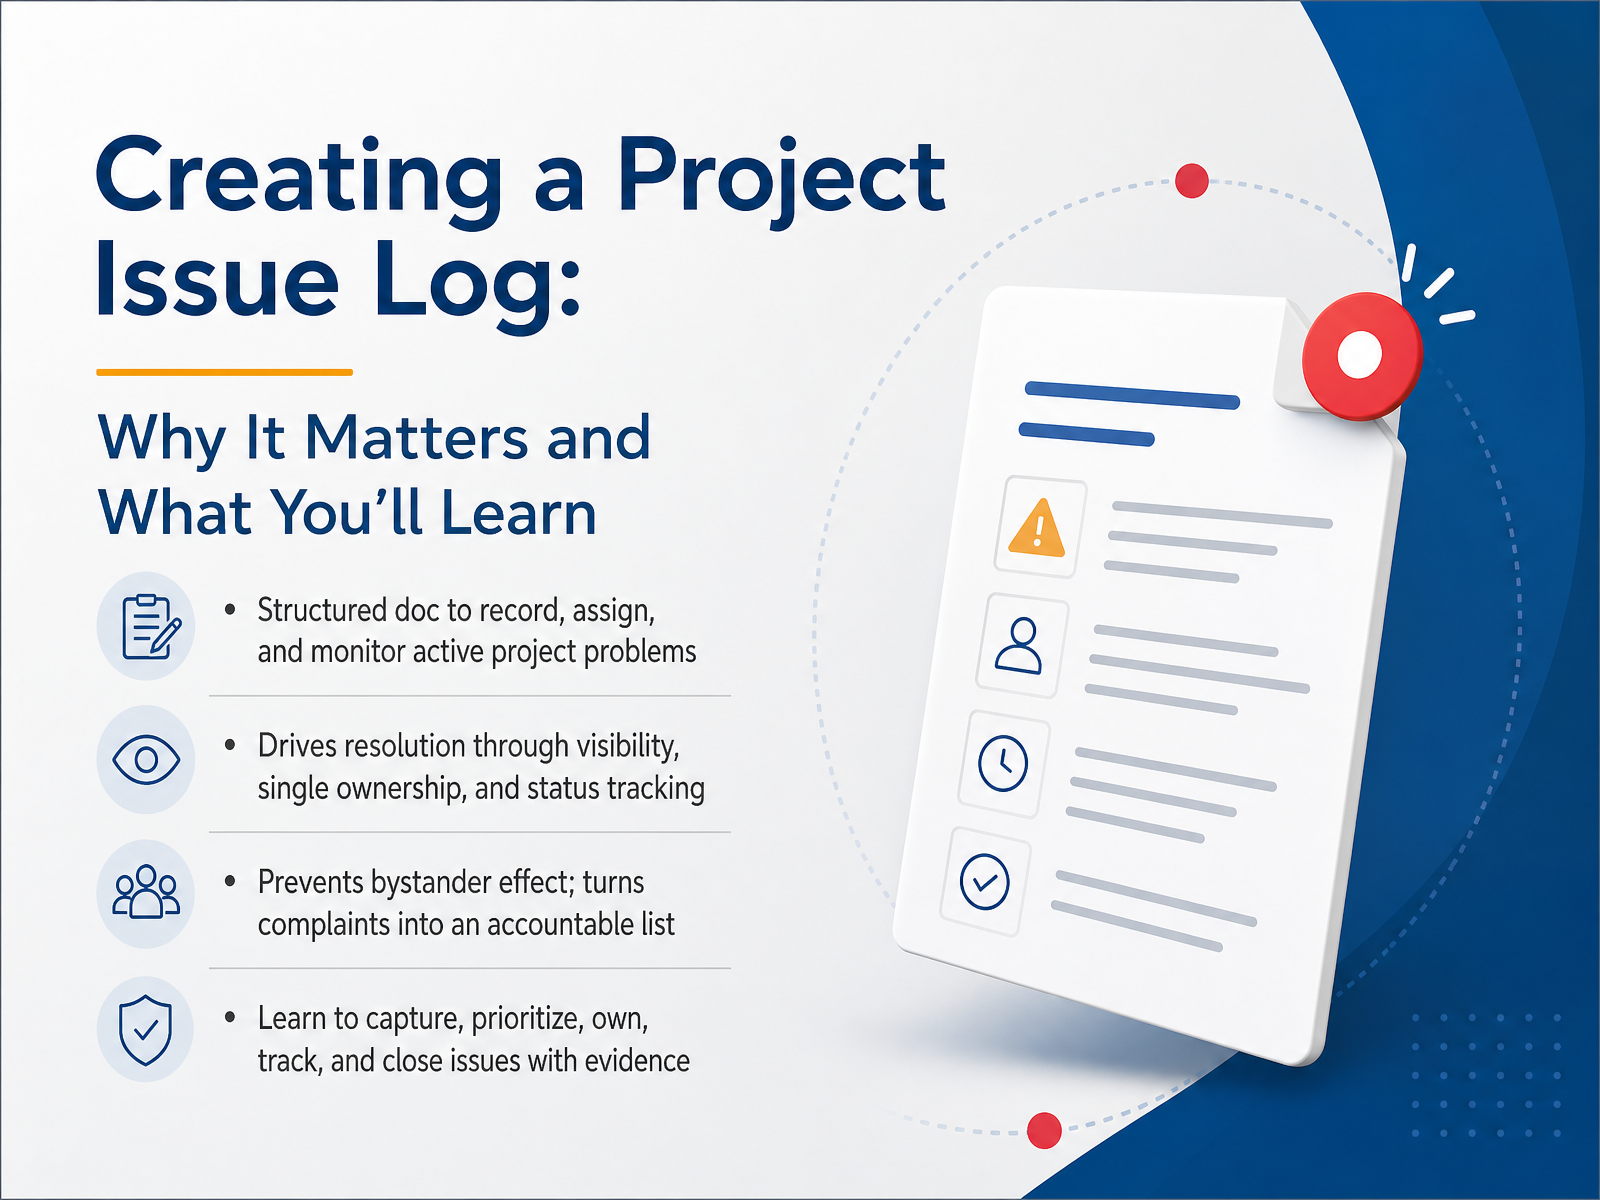
- 01Creating a Project Issue Log: Why It Matters and What You’ll LearnWelcome. When you're managing a project, things rarely go exactly as planned. A resource misses a deadline, a test fails, a client raises a new concern. These moments can feel like chaos. But there's a simple, powerful tool that can turn that chaos into a clear path forward: the project issue log. In this course, we'll explore why an issue log is not just another document to fill out, but a tool for accountability and resolution. You'll learn how a single, structured list moves problems from being everyone's complaint to someone's clear responsibility, and how tracking status prevents things from falling through the cracks. We'll walk through the entire process, from capturing the issue clearly, to assigning an owner and tracking it, right through to closing it out with evidence. By the end, you'll see the log as your project's action center. Let's start by clarifying what truly belongs in this log, by separating issues from risks and decisions.2 min
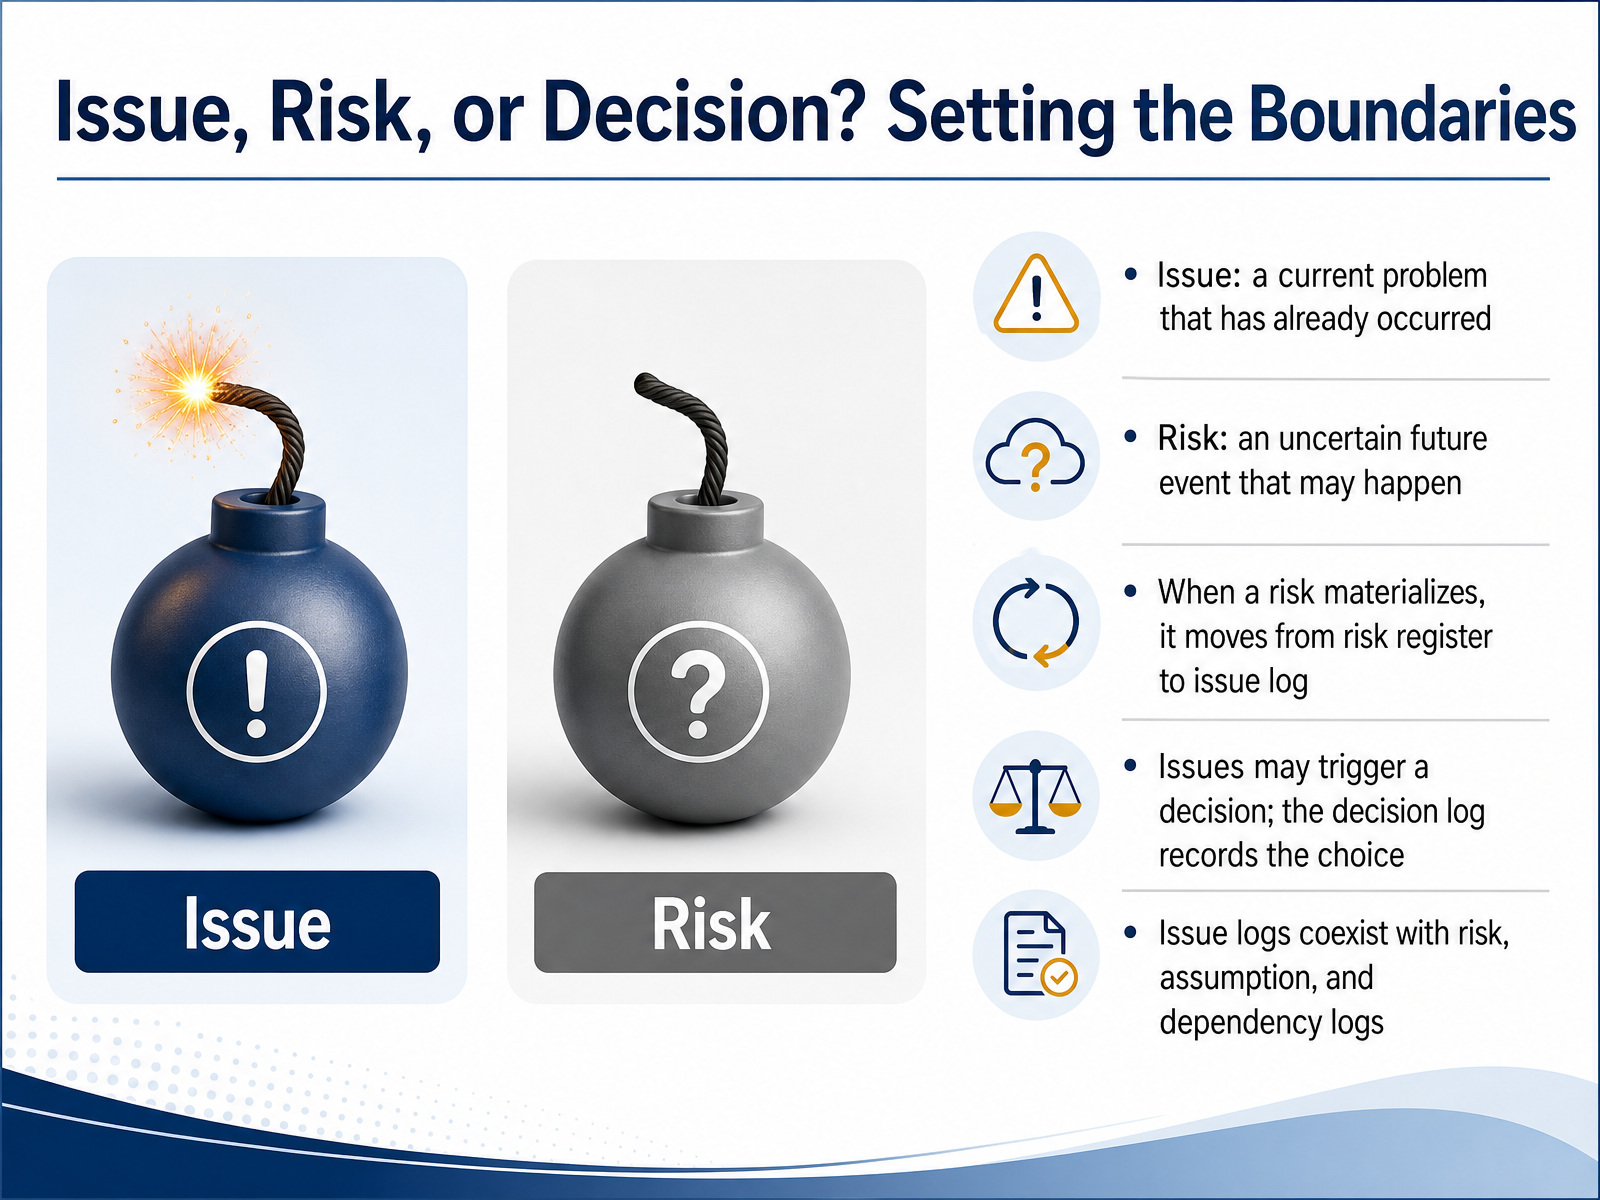
- 02Issue, Risk, or Decision? Setting the BoundariesBefore we start logging, let's clarify what actually goes into an issue log. It's easy to mix up issues, risks, and decisions, so setting clear boundaries up front will save you time later. Think of an issue as a current problem that has already occurred. Something has happened right now that needs a resolution. A risk, by contrast, is an uncertain future event. It might happen, and it might not. Now here's a key link between the two: when a risk materializes and actually happens, you move it from your risk register into your issue log. This keeps your risk list clean and your issue log focused on real, active problems. Also, when you're working through an issue, you may need to make a decision on how to resolve it. That choice gets recorded in a separate decision log. So in practice, your issue log coexists with other logs for risks, assumptions, and dependencies. They each have their own purpose, and together they give you a complete picture of project health. Knowing these boundaries helps you place every item in the right home from the start. Next, let's look at when and where issues appear in the project life cycle.
 1 min
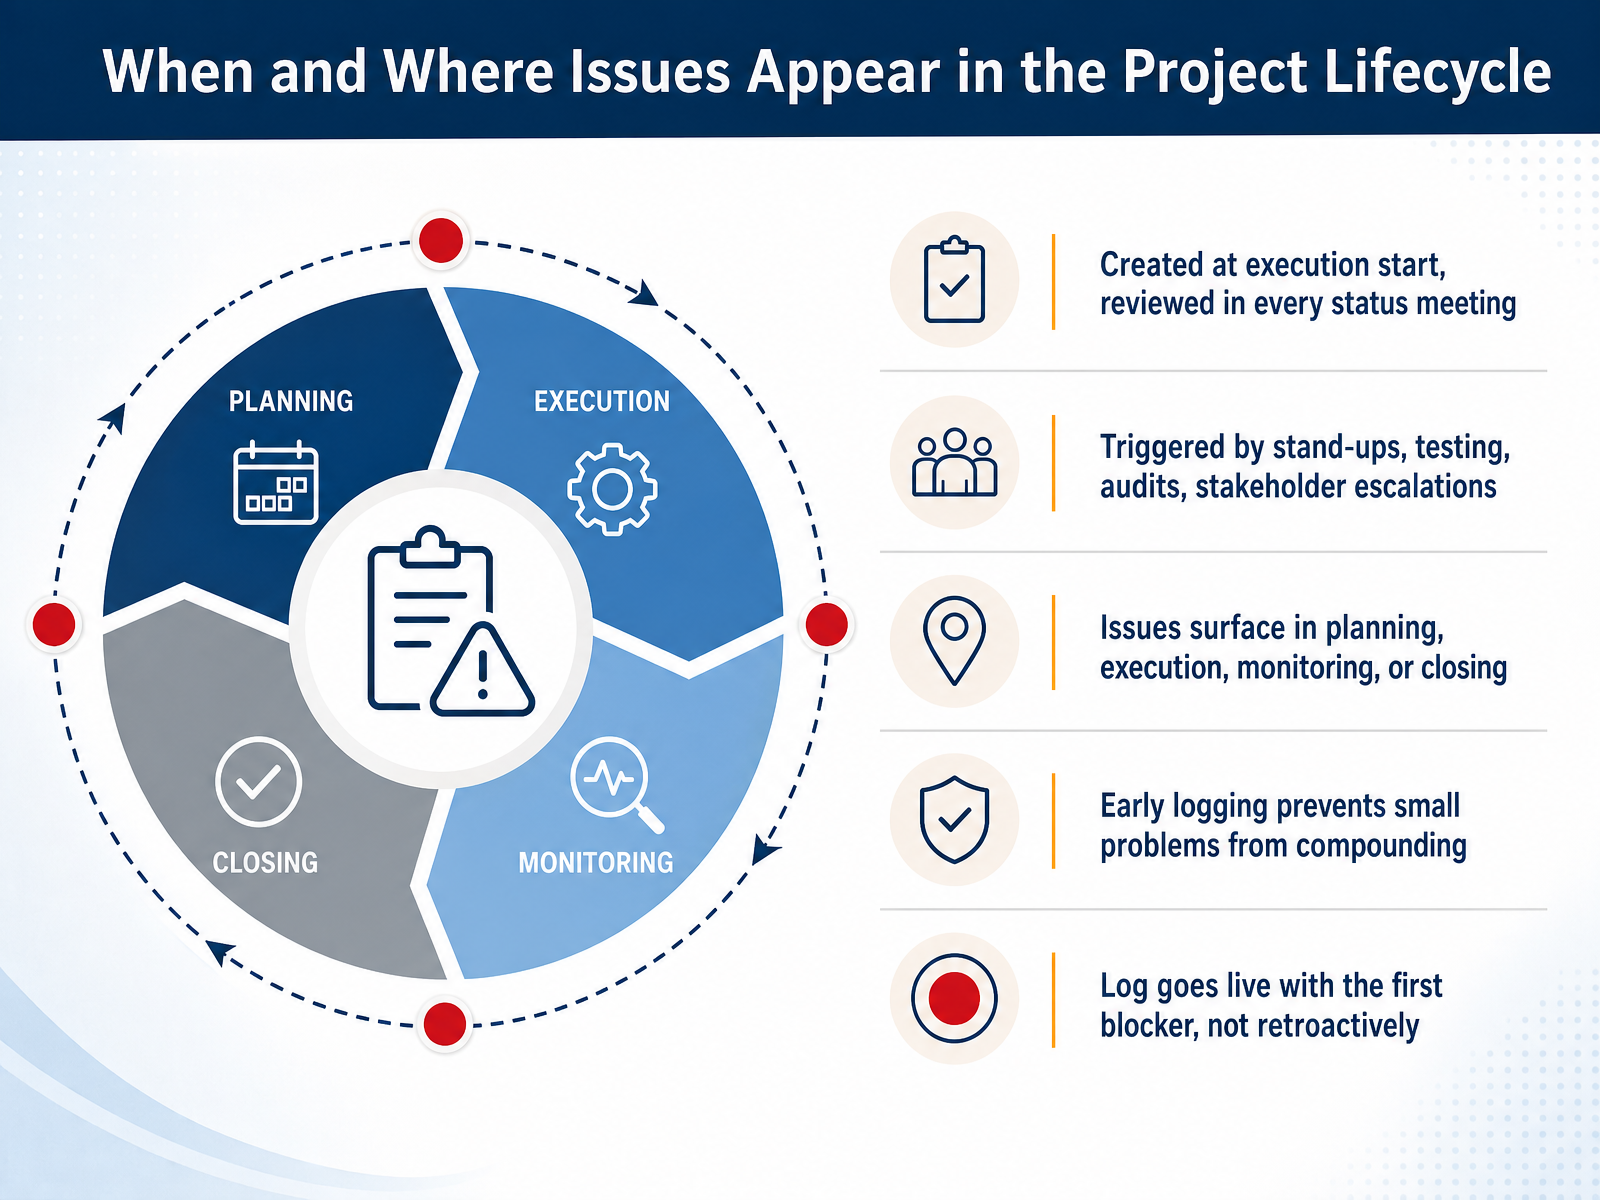
1 min - 03When and Where Issues Appear in the Project LifecycleNow let’s talk about when and where issues actually surface in the project lifecycle. You don’t wait for a perfect moment to start the log. The issue log is created at the very start of execution, and it stays alive through every status meeting. New entries are triggered all the time: during daily stand-ups, testing cycles, quality audits, or when a stakeholder raises a concern. Issues can appear in any phase, whether you’re still planning, deep in execution, actively monitoring, or even closing out the work. The most important habit is early logging. Catching a small problem and writing it down right away prevents it from compounding into a larger crisis later. That’s why the log goes live with the first blocker you hit, not retroactively when everything is already resolved. Think of it as your project’s real-time health record. Next, we’ll look at the minimum viable issue log: ten fields that drive action.
 1 min
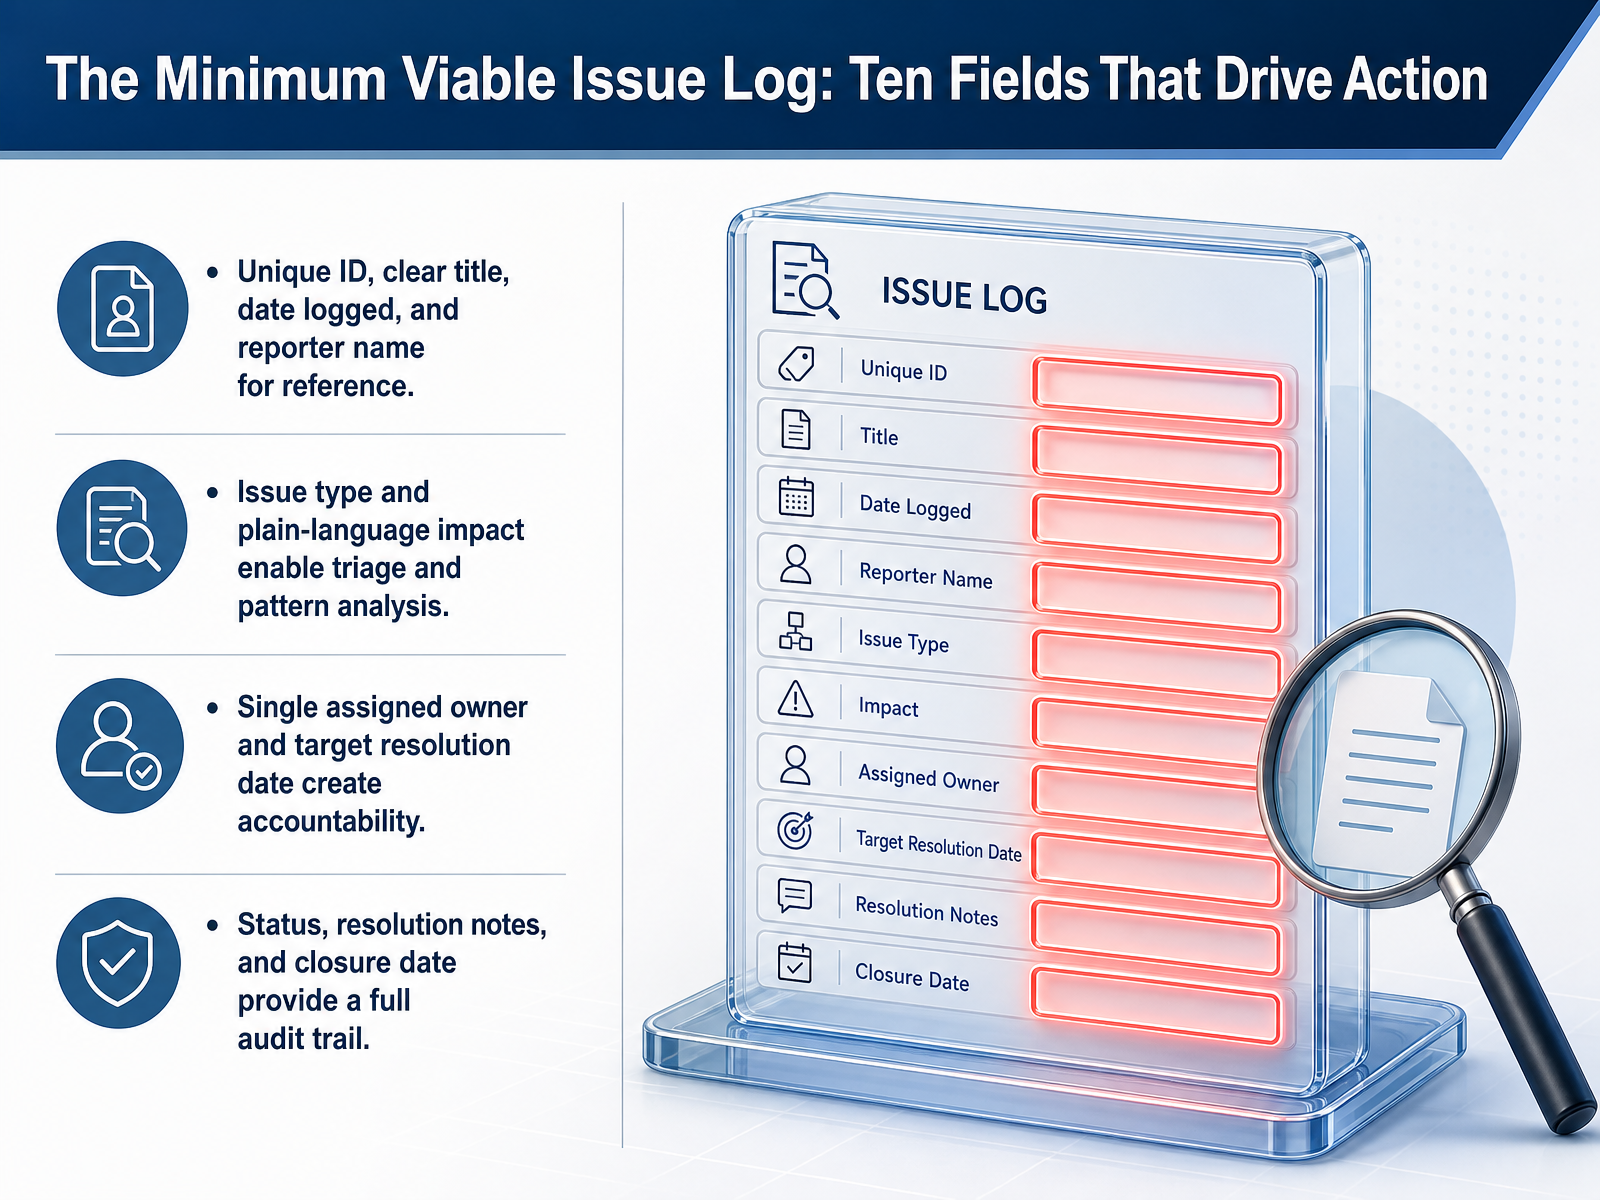
1 min - 04The Minimum Viable Issue Log: Ten Fields That Drive ActionLet's look at the ten fields that form the backbone of an actionable issue log. We'll call this our minimum viable structure, because these fields are exactly what you need to move from noticing a problem to resolving it. First, for basic reference, we have a unique ID, a clear title, the date logged, and the reporter's name. Next, adding an issue type and a plain‑language impact description helps your team quickly triage the issue and spot patterns over time. Then, to create real accountability, we assign a single owner and set a target resolution date. Finally, the status, resolution notes, and closure date give you a complete audit trail from start to finish. Up next, we'll explore optional fields that let you adapt the log to your specific project needs.
 1 min
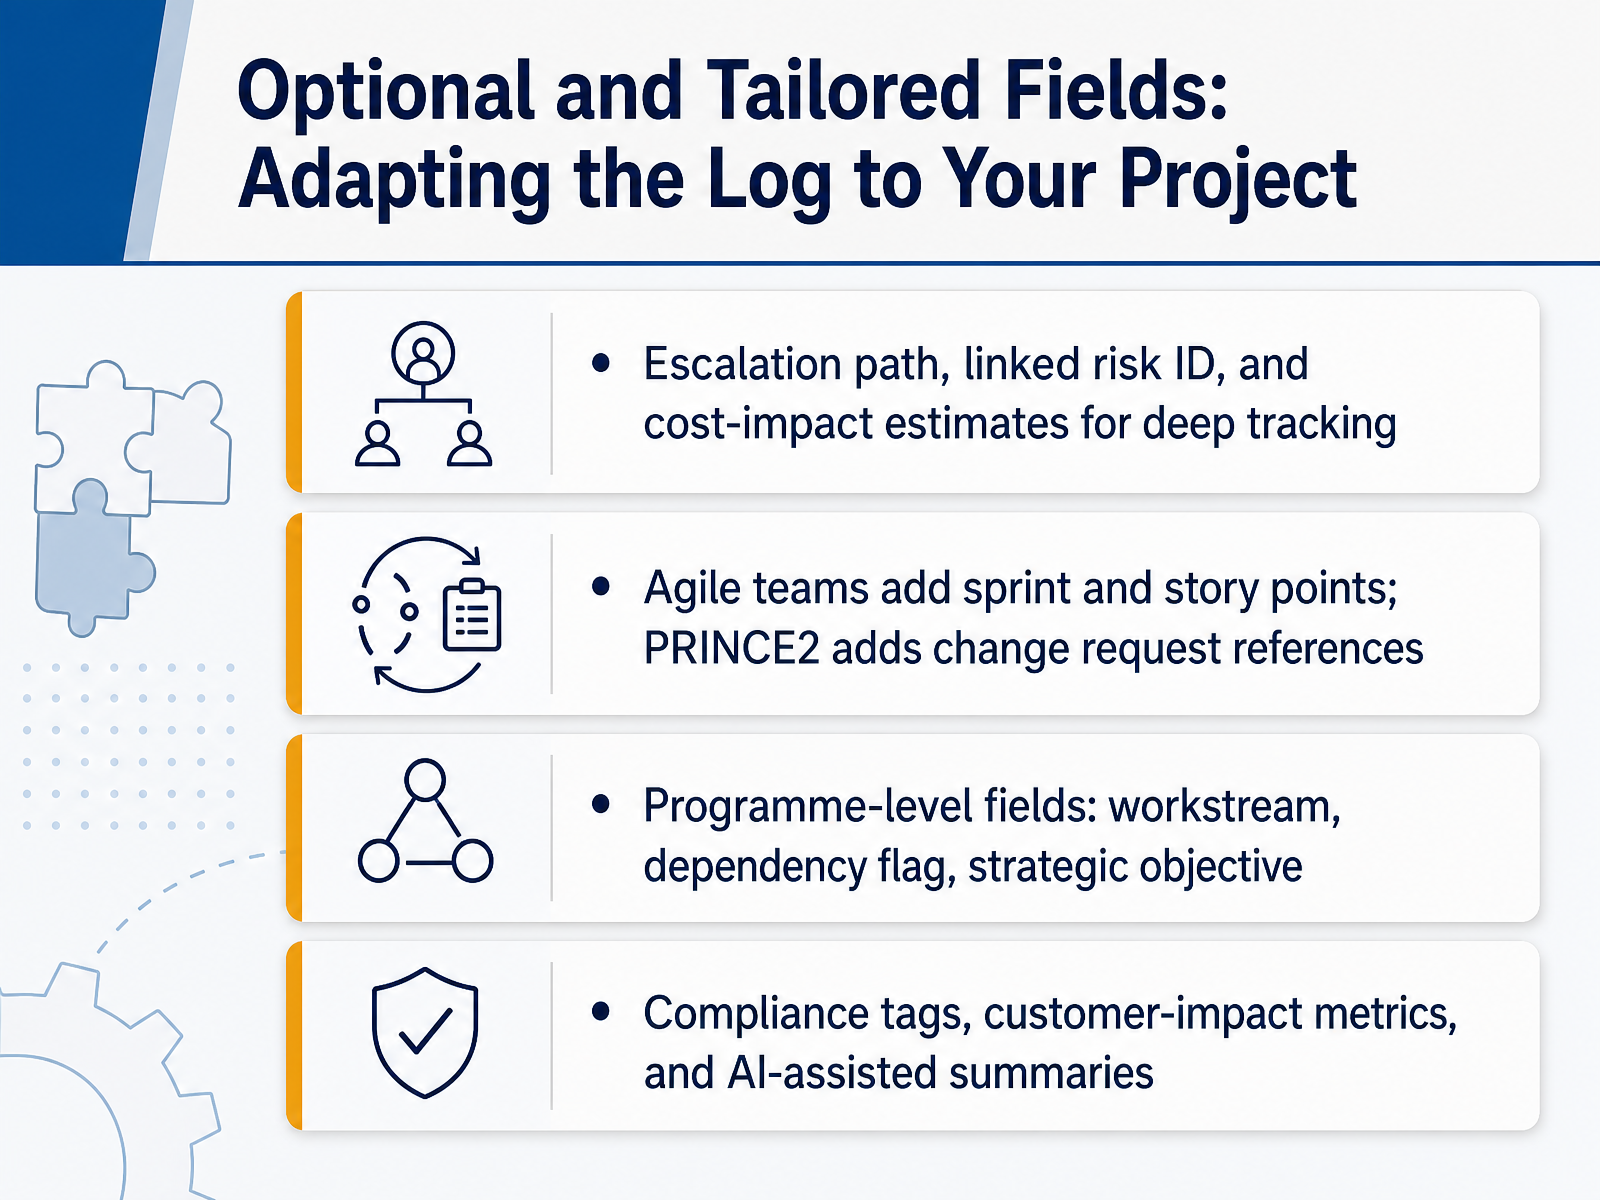
1 min - 05Optional and Tailored Fields: Adapting the Log to Your ProjectNow, let's look at how you can tailor the log to fit your specific project. These fields are completely optional, so you only add what adds value. For deeper tracking, you might include an escalation path, a linked risk identifier, or a cost-impact estimate. If you are working in an Agile team, consider adding sprint numbers and story points. In a PRINCE2 environment, linking a change request reference is a great practice. At the programme level, fields like workstream, dependency flags, and strategic objectives help you see the bigger picture. You can also track compliance tags, customer-impact metrics, or even use an AI-assisted summary to capture the essence of an issue quickly. The key is to build a tool that works for you, not a rigid form to fill out. Next, we will move from tracking issues to prioritizing them, with a focus on priority, impact, and urgency, and how to decide what to fix first.
 2 min
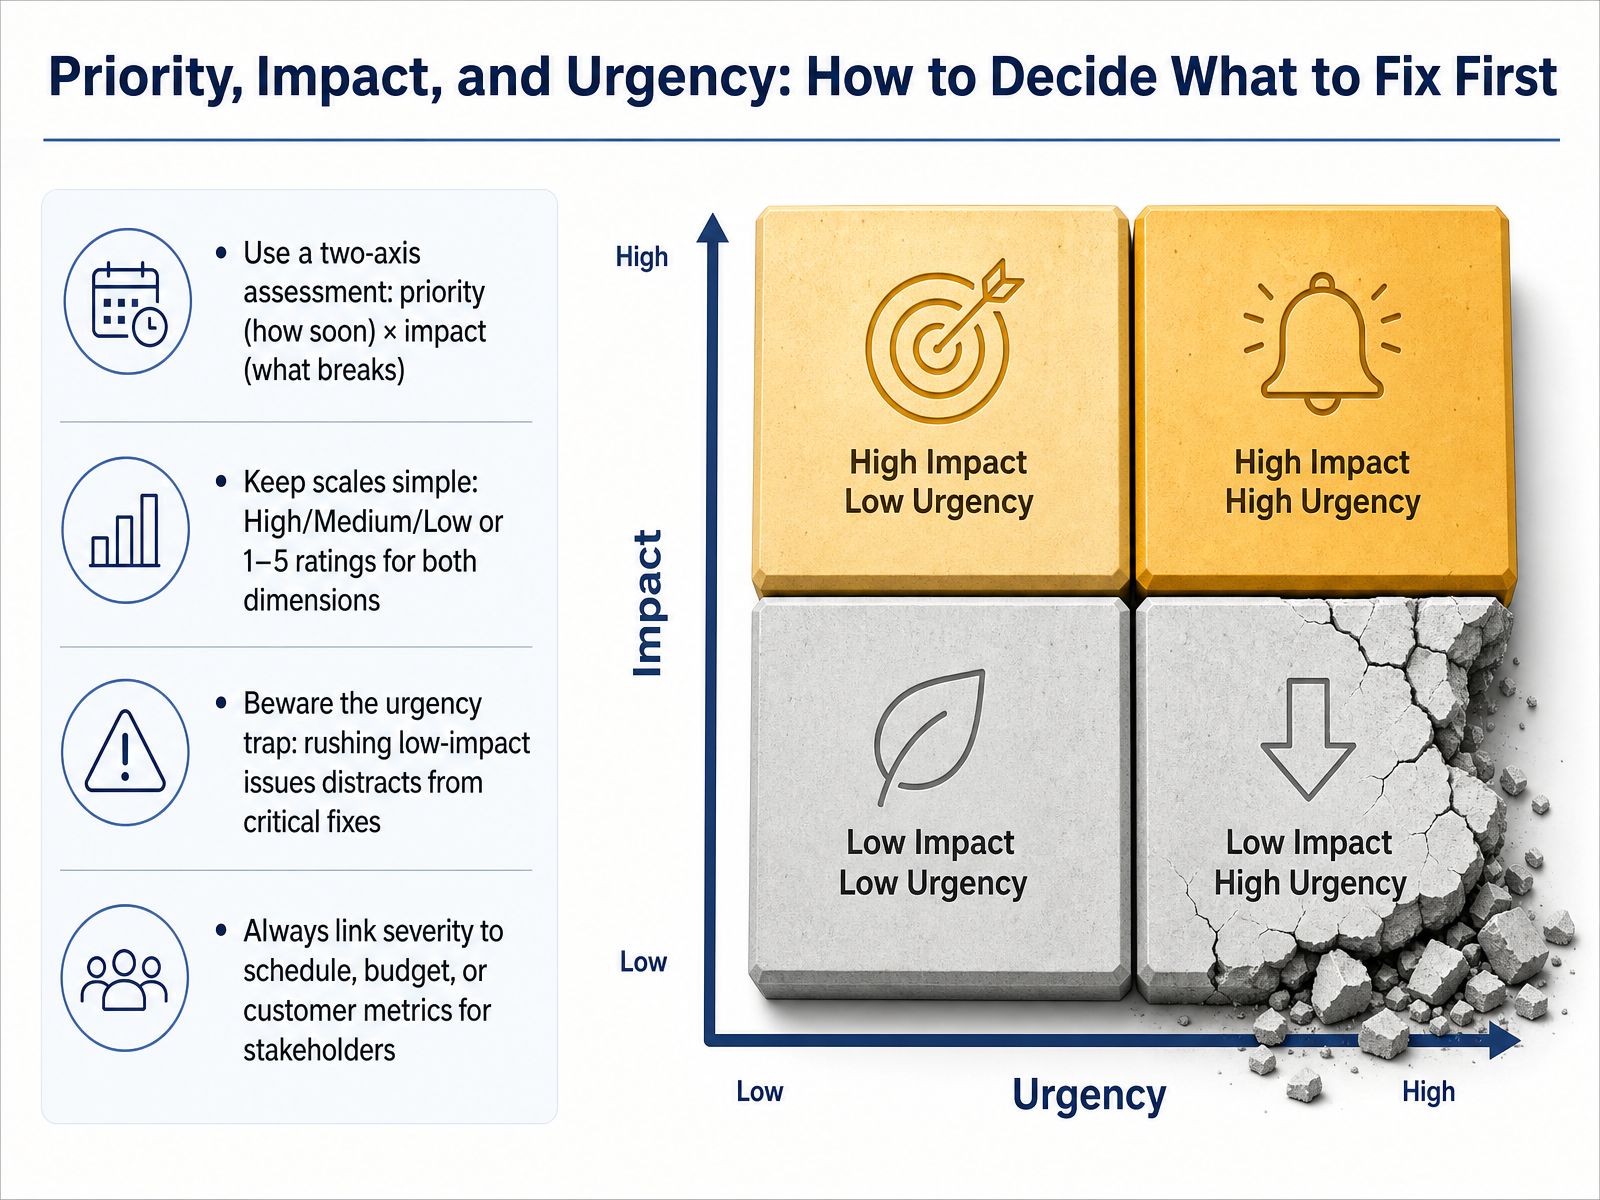
2 min - 06Priority, Impact, and Urgency: How to Decide What to Fix FirstNow that you can log an issue, the next question becomes: which one should you fix first? Let's talk about priority, impact, and urgency. We'll look at each issue through two simple lenses: priority, meaning how soon it needs attention, and impact, meaning what actually breaks if we wait. I recommend keeping the scale straightforward, like High, Medium, and Low, or a simple one-to-five rating for each dimension. This turns a messy list into a clear, comparable picture. One common mistake is the urgency trap. That happens when someone shouts loudly about a low-impact issue, and suddenly your team gets pulled away from a critical fix. Always anchor your severity decisions to hard metrics: does the issue threaten the schedule, consume unplanned budget, or visibly hurt the customer experience? Framing it that way helps stakeholders understand why you chose one fix over another. Next, we'll set up a status lifecycle and the single-owner principle, so every issue stays on track.
 2 min
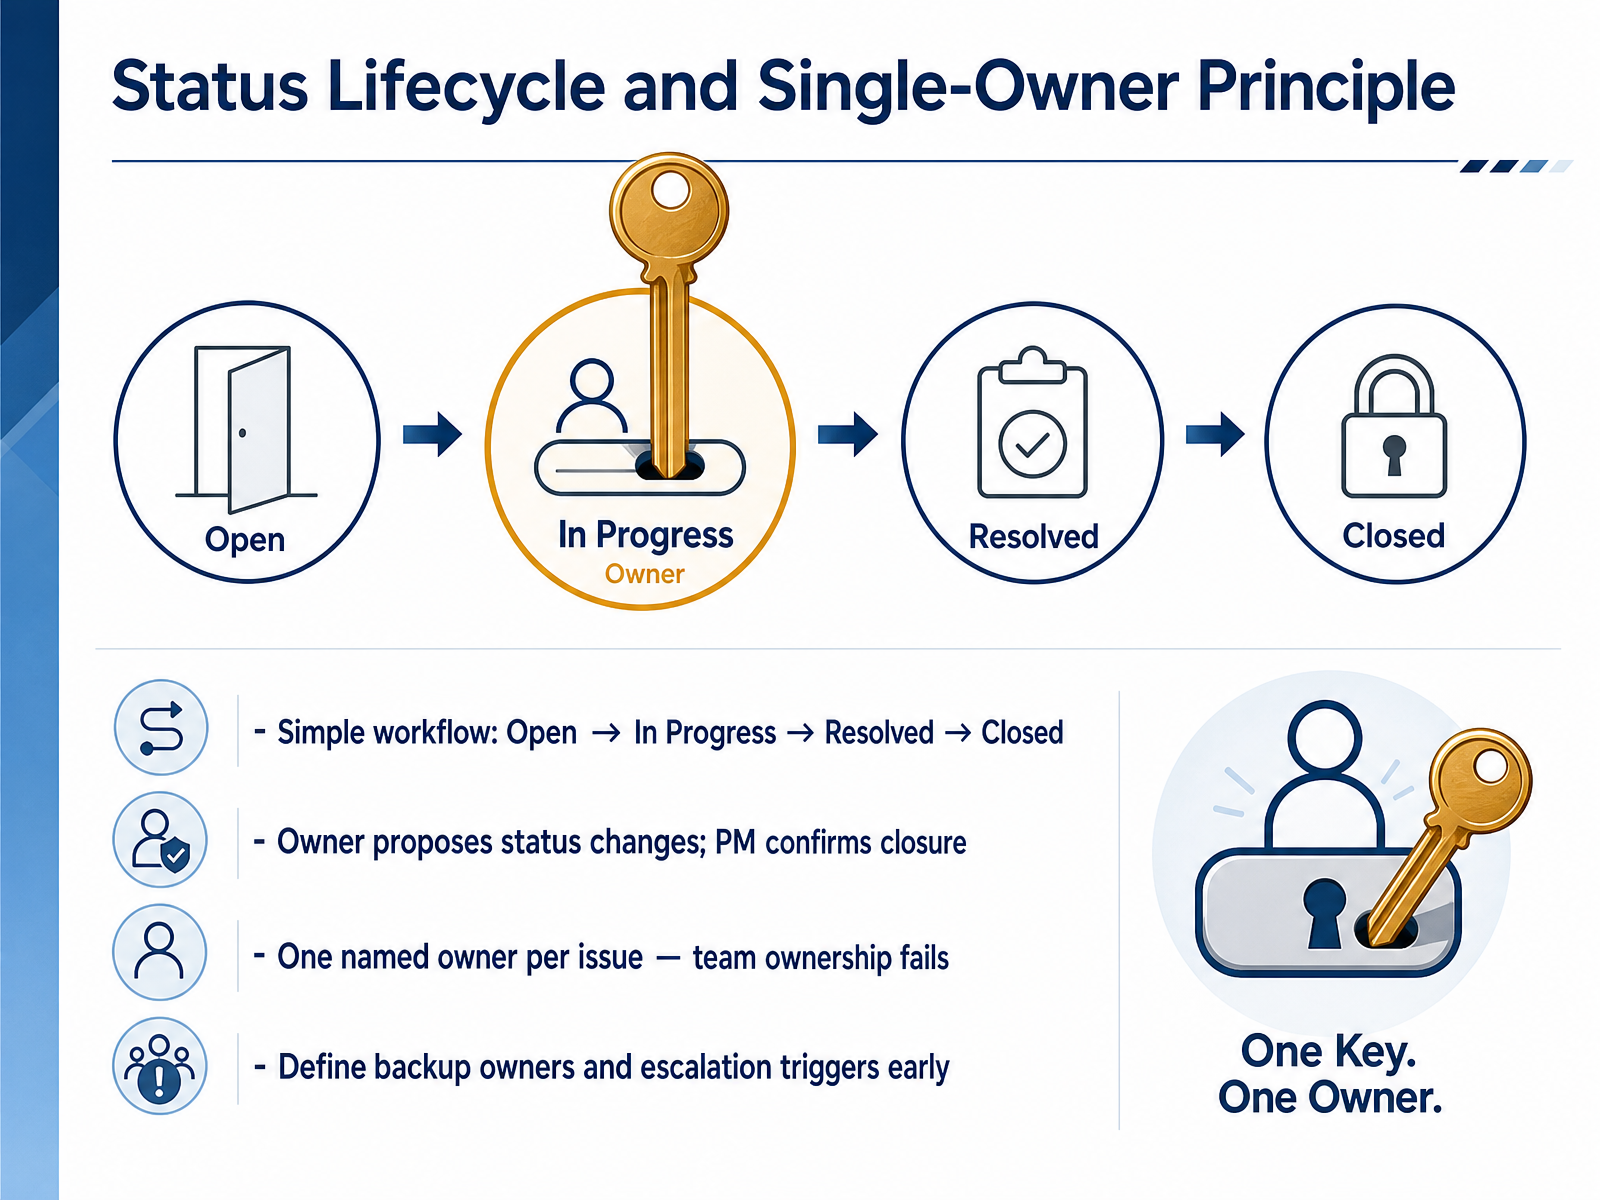
2 min - 07Status Lifecycle and Single‑Owner PrincipleEvery issue needs a clear status so the whole team knows where things stand. Think of the lifecycle as four simple stages. Open means the issue is captured and waiting for action. In Progress means the owner is actively working on a solution. Resolved means a fix has been applied and is ready for review. Closed means the project manager confirms everything is done and the record is complete. Now, the rule that makes this hum is single-owner ownership. For every single row in the log, put exactly one person's name. Team ownership sounds collaborative, but in practice, it fails because nobody feels the primary pull to drive resolution. The owner proposes status moves, like going from In Progress to Resolved, but the project manager is the one who confirms closure. To prevent stalls when someone is out, define backup owners and escalation triggers early. For example, if an issue sits In Progress for three days with no update, it automatically escalates to a named backup. This keeps the log alive and moving without you having to chase people. Up next, we'll step through a practical workflow, taking a fresh capture all the way to a clean closure.
 2 min
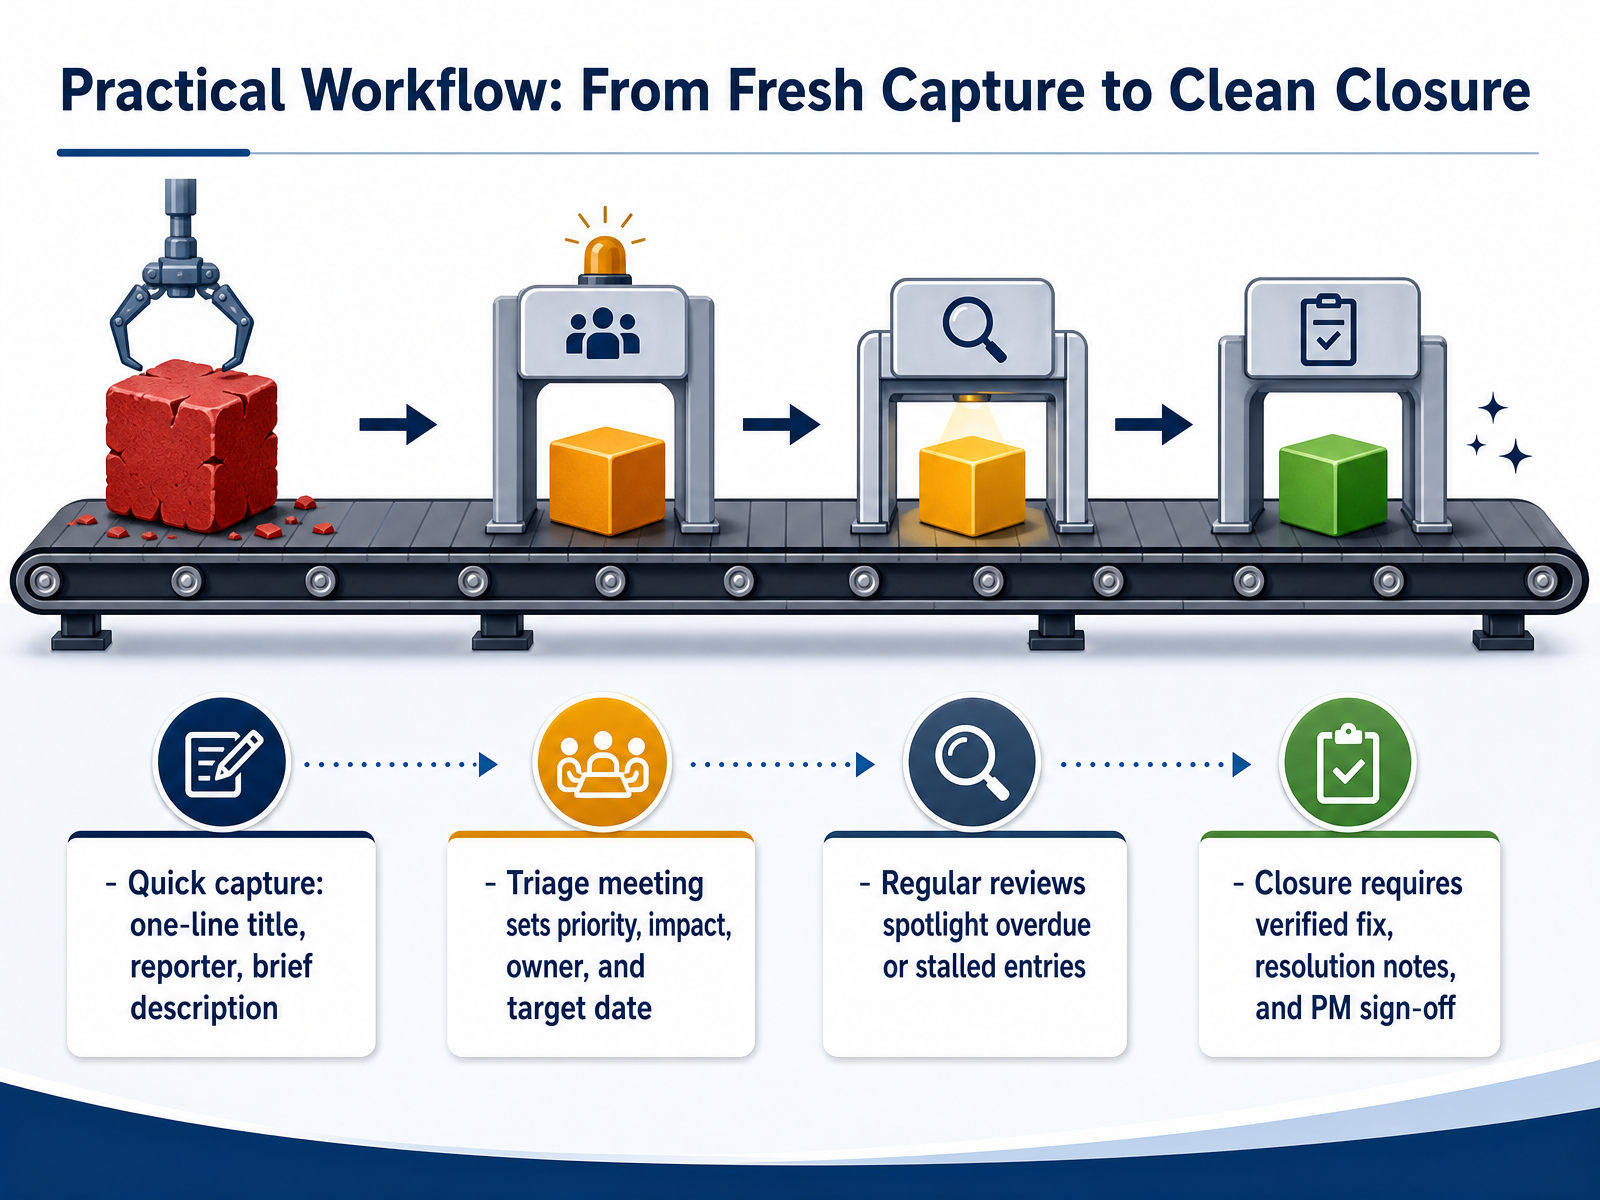
2 min - 08Practical Workflow: From Fresh Capture to Clean ClosureNow let’s walk through the practical workflow that takes an issue from quick capture all the way to clean closure. It really comes down to four stages. First, anyone spots a problem and does a fast capture: a one-line title, the reporter’s name, and a brief description of what happened. This keeps the barrier low so issues get logged right away, even when things are busy. The second stage is a triage meeting where the team sets priority, assesses impact, assigns a clear owner, and agrees on a target date. This turns a rough report into an owned, time-bound action item. Third, you hold regular reviews to spotlight overdue or stalled entries, so nothing just sits there forgotten. And finally, closure isn’t just marking it done; it requires a verified fix, clear resolution notes, and the project manager’s sign-off. That sign-off confirms the issue is truly resolved before it leaves the log. Up next, we’ll look at escalation paths and when to raise the alarm.
 2 min
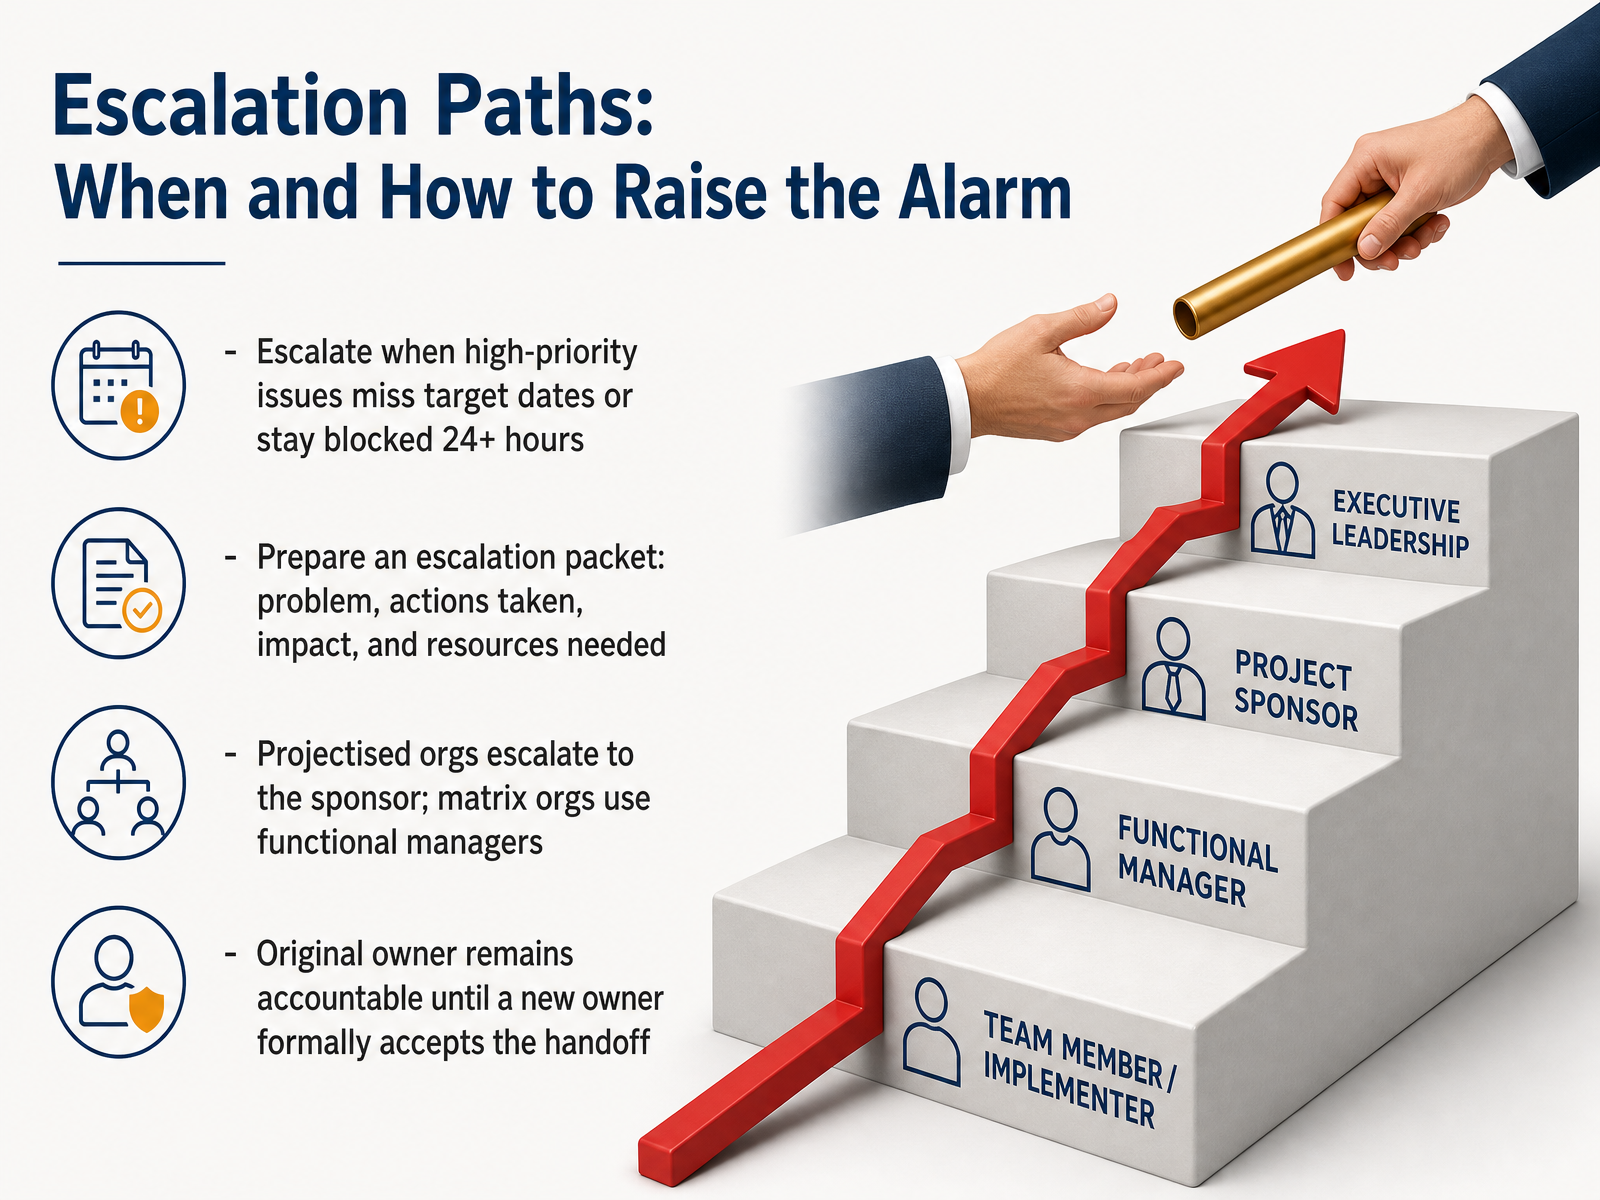
2 min - 09Escalation Paths: When and How to Raise the AlarmLet's talk about escalation paths. Sometimes, despite your best efforts, an issue gets stuck. Knowing when and how to raise the alarm keeps the project moving without creating panic. The first trigger is time. Escalate when a high-priority issue misses its target resolution date, or remains blocked for more than twenty-four hours. Waiting longer often makes the problem bigger. When you do escalate, don't just pass the problem up. Prepare a small escalation packet. Briefly state the problem, list the actions you've already taken, describe the impact on the project, and specify the resources or decision you need. This shows you've done the work and makes it easy for a leader to help. Next, consider the right path. In a projectized organization, you escalate directly to the project sponsor. In a matrix organization, the path usually goes through a functional manager who controls the needed resources. A final critical point: you own the issue until a new owner formally accepts it. Never assume a handoff is complete. Always get confirmation. Now that we know when to escalate, let's look at the practical tools that make tracking all of this much simpler.
 2 min
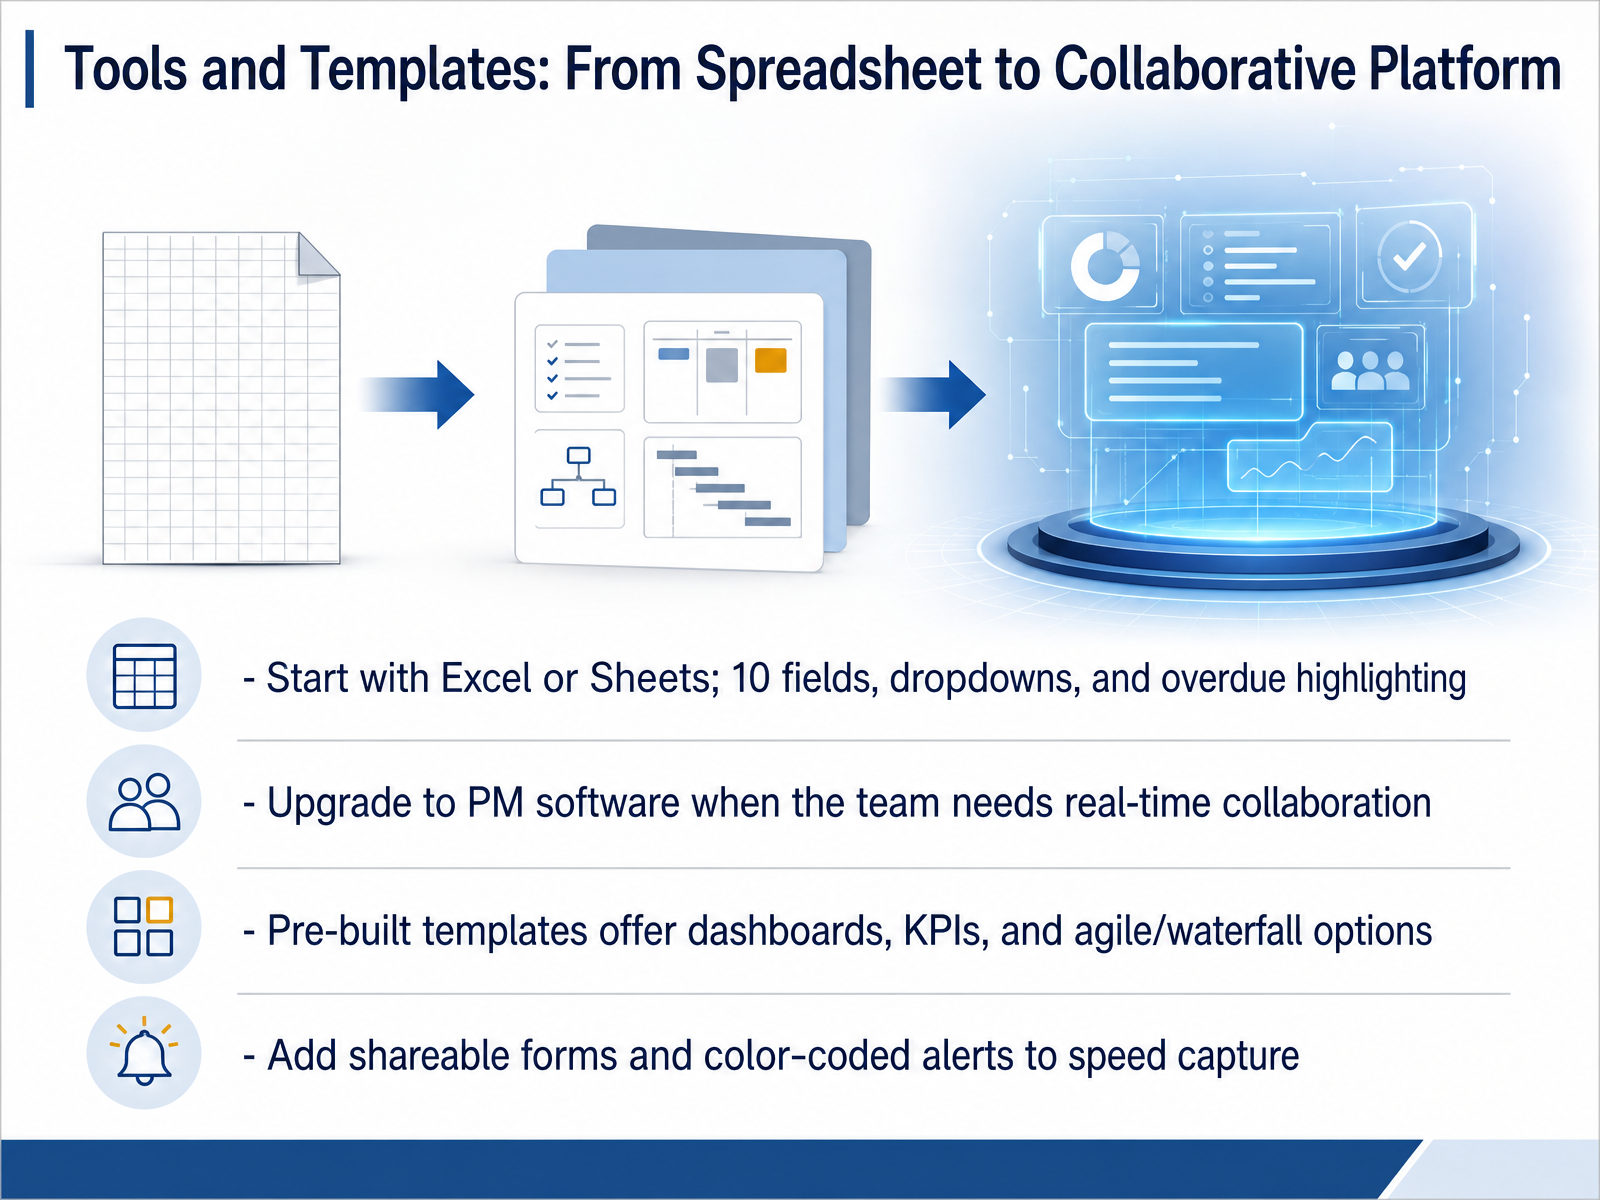
2 min - 10Tools and Templates: From Spreadsheet to Collaborative PlatformLet's look at how we actually build and maintain our issue log, so the process creates clarity instead of extra work. I recommend starting with a tool your whole team already knows, like Microsoft Excel or Google Sheets. You can build a simple, structured log with about ten key fields, use dropdowns for categories and status values, and add conditional formatting to highlight overdue items in red. This keeps the barrier to entry low and gets you running quickly. As the team grows or you need real-time collaboration, then it makes sense to upgrade to purpose-built project management software. Those platforms offer pre-built templates you don't have to design from scratch. They include dashboards, automatic KPI tracking, and workflows that fit agile or waterfall approaches right out of the box. You can even add shareable forms so anyone on the team can instantly log an issue, and set up color-coded alerts to accelerate the capture and response process. The tool should serve the habit, not become a side project itself. Next we will walk through a tool selection guide that helps you match the platform to your team's specific needs and working style.
 2 min
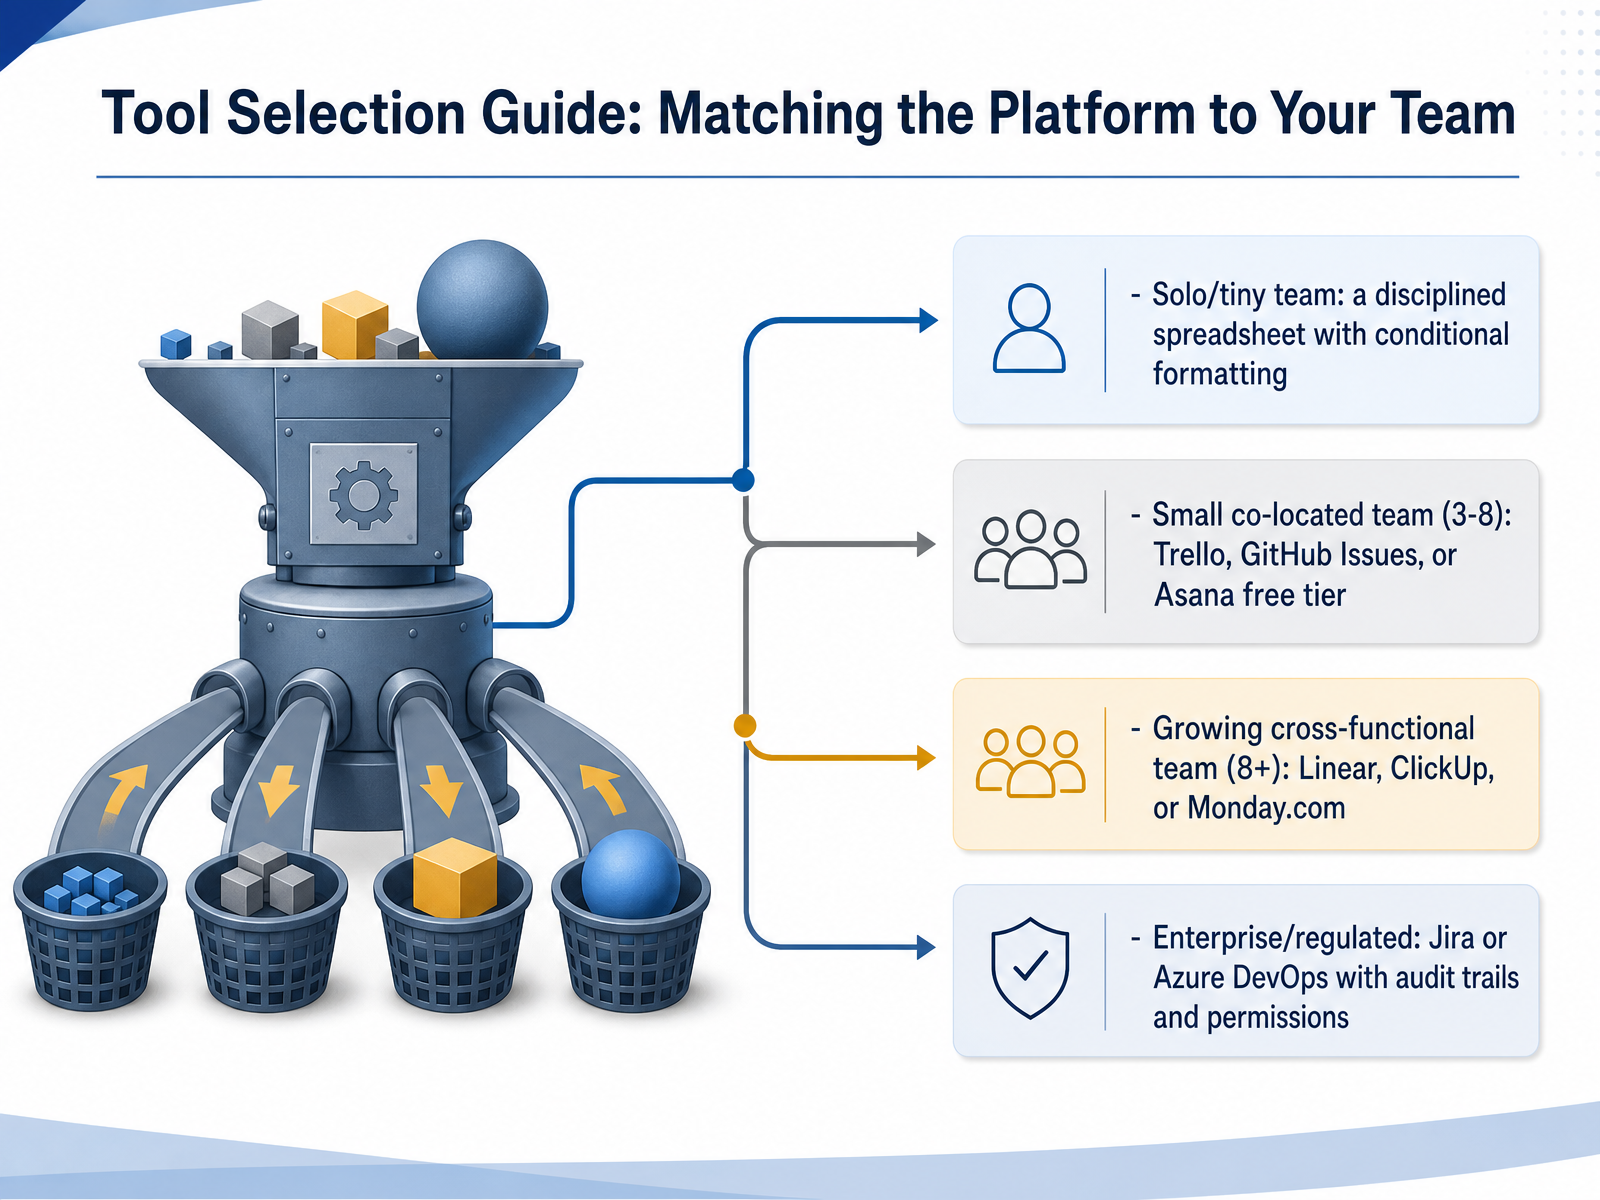
2 min - 11Tool Selection Guide: Matching the Platform to Your TeamNow that you know what to track, let's talk about where to track it. The right tool makes the log easy to maintain, so I want to give you a quick guide based on your team's size and structure. If you are a solo project manager or a tiny team, a well-structured spreadsheet with conditional formatting can work perfectly. It is low cost, familiar, and keeps everything in one place. For small, co-located teams of three to eight people, tools like Trello, GitHub Issues, or the free tier of Asana are great choices. They add visibility without adding complexity. As your team grows and becomes cross-functional with eight or more members, you will need more structure. Consider Linear, ClickUp, or Monday.com. These platforms handle cross-team workflows and give you better reporting. And for larger enterprises or regulated environments, Jira or Azure DevOps are the standard. They provide the audit trails, advanced permissions, and compliance features you need. The key is to match the tool to your reality, not the other way around. Next, we will look at common pitfalls when maintaining an issue log and how to avoid them.
 2 min
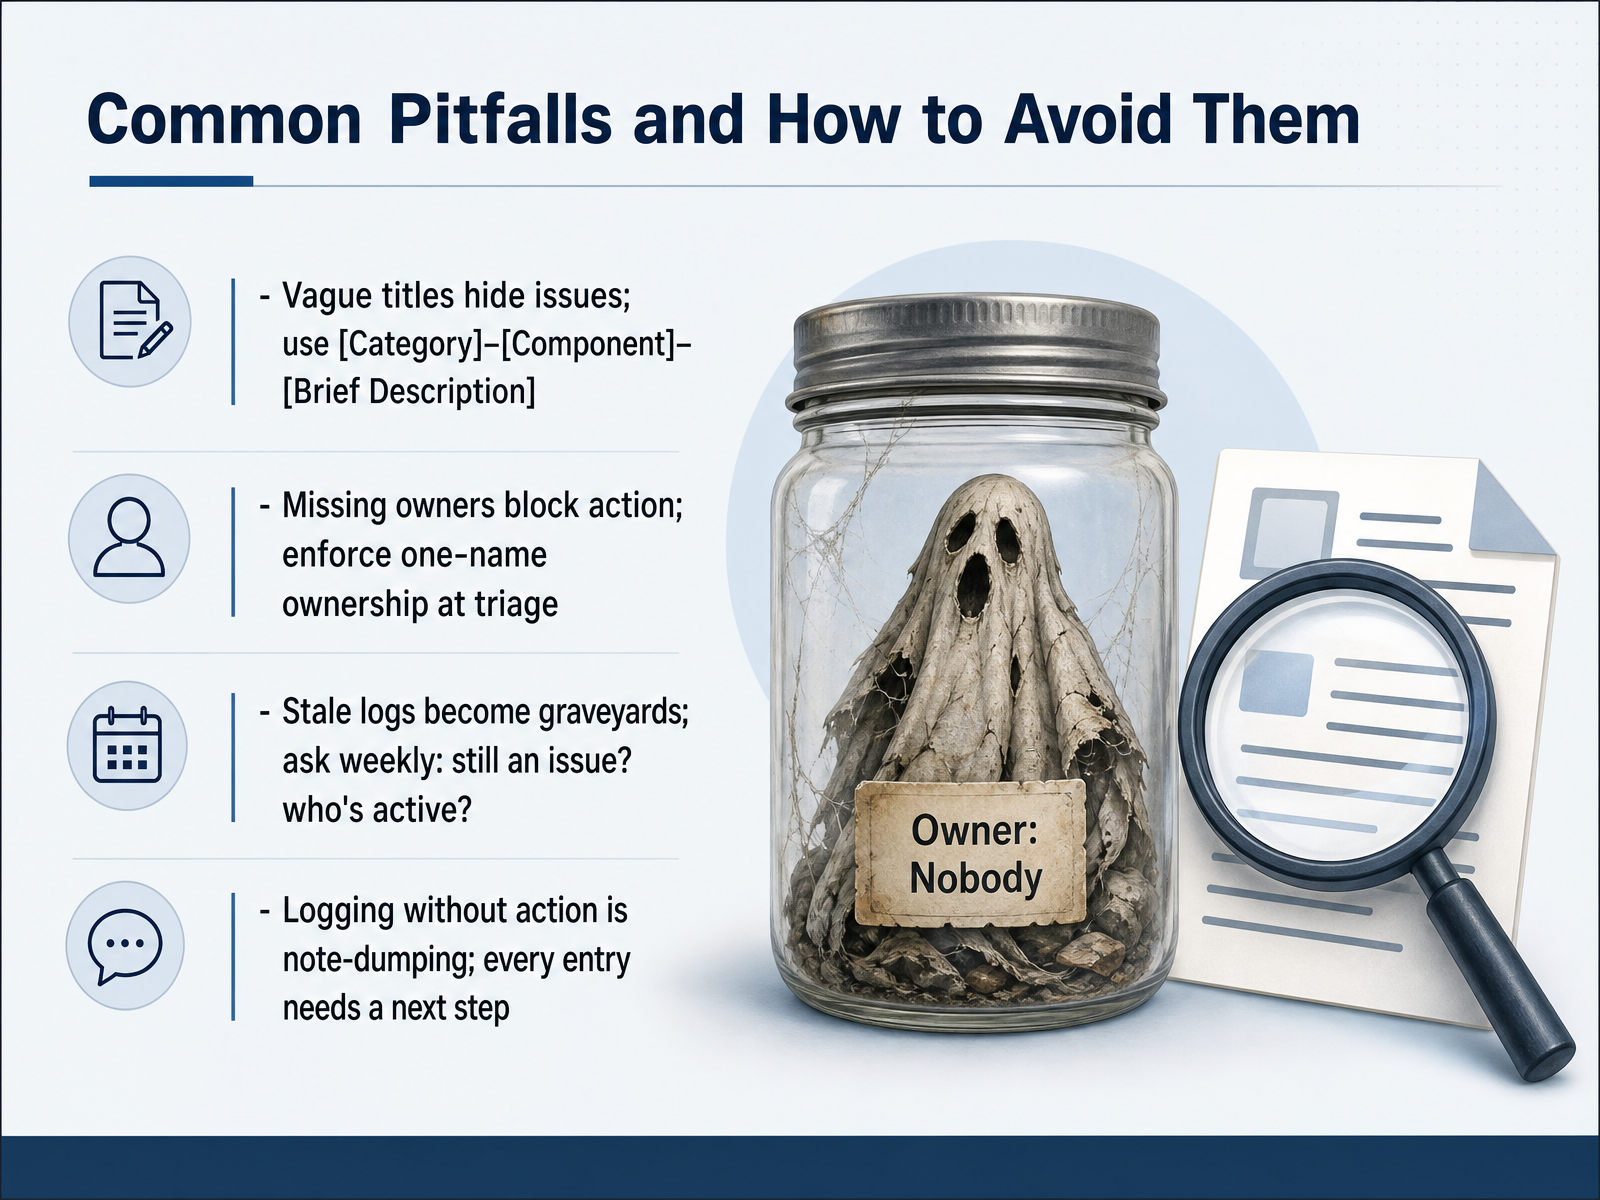
2 min - 12Common Pitfalls and How to Avoid ThemLet's walk through four common traps teams fall into, and more importantly, how to avoid them. First, vague titles hide issues. Instead of something like 'server problem,' use a clear format: Category, Component, and a brief description. For example, 'Infrastructure – Database – Connection Timeout.' This makes it instantly scannable. Second, missing owners block action. Right at triage, assign one name. Ownership creates accountability and breaks the bystander effect. Third, stale logs become graveyards. During your weekly review, ask two simple questions: is this still an issue, and who is actively working on it? If it's dead, close it. Finally, logging without action is just note-dumping. Every single entry must have a next step, a concrete action someone will take. Keeping this discipline turns the log from a collection of complaints into a resolution engine. Next, let's move on to quality checks and the everyday discipline needed to keep your log healthy.
 2 min
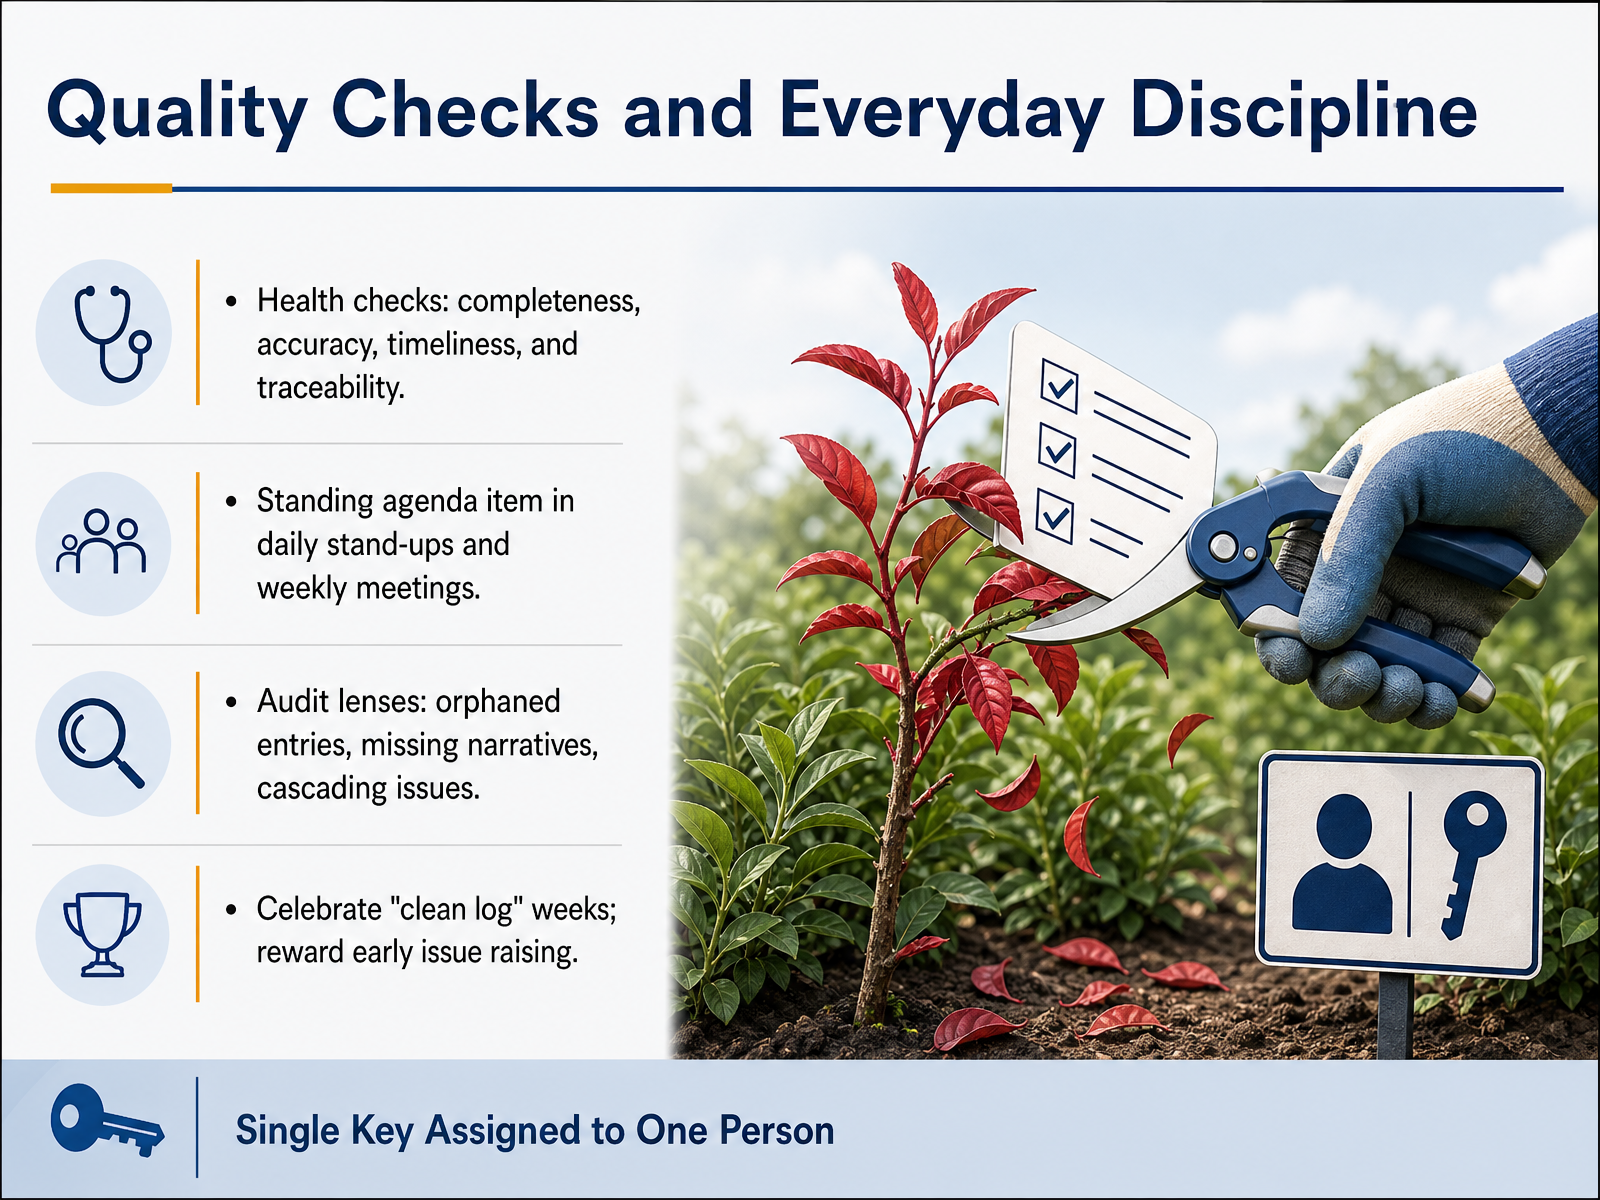
2 min - 13Quality Checks and Everyday DisciplineNow, let's talk about turning the issue log into a living part of your day, not just a document you visit once a month. Think of this as quality checks and everyday discipline. First, health checks. Before any meeting, quickly scan for completeness, accuracy, timeliness, and traceability. Are all the fields filled? Does the story make sense? Is it recent? Can you trace it back to the source? Next, make the log a standing agenda item. Spend just two minutes in your daily stand-up and a bit more in weekly meetings. This keeps issues visible and drives quick resolution. Also, use an audit lens. Look for orphaned entries that belong to no one, missing narratives where the current status is blank, or cascading issues where one problem spawns several others. Finally, and importantly, celebrate the wins. If you have a 'clean log' week, acknowledge the team's effort. Reward people who raise issues early. This shifts the log from a chore to a shared safety net. Next, let's put all of this into action with some hands-on practice where you'll build, update, and close a realistic issue log.
 2 min
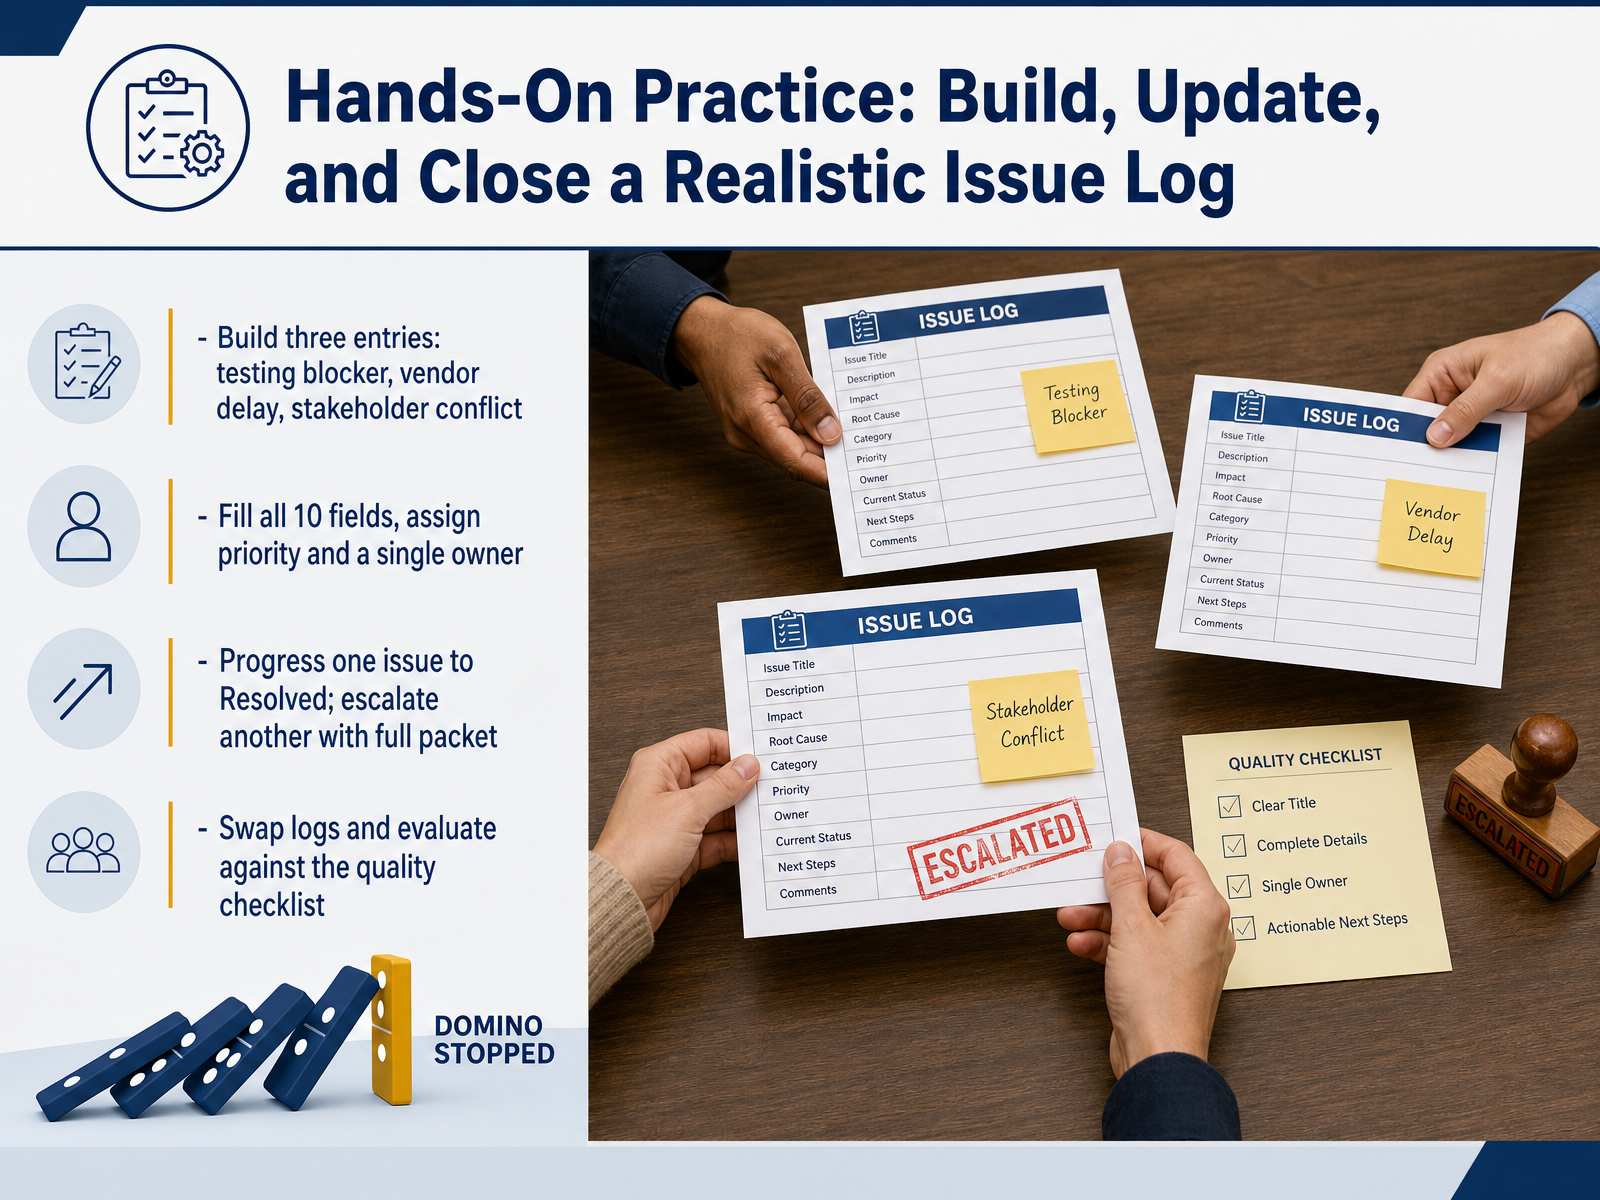
2 min - 14Hands‑On Practice: Build, Update, and Close a Realistic Issue LogWe have covered the structure and the process. Now it is time to put everything into practice. On your screen, you will find a blank issue log template. Your goal is to build a small but realistic log with three distinct entries: one for a testing blocker, one for a vendor delivery delay, and one for a stakeholder conflict. For each entry, make sure you fill out all ten fields, assign a clear priority, and name a single owner, so that accountability is never unclear. Once your log is built, take the first issue and move it all the way to the Resolved state, documenting the actual resolution. Then take the second issue and escalate it with a complete packet, including your impact analysis and recommendation. When you finish, swap your log with a partner and evaluate each other’s work against the quality checklist we reviewed earlier. This is your chance to experience the full lifecycle in a safe environment, so that you walk away confident, not just informed. Thank you for your focus throughout this session. You now have a practical, lightweight system to drive issues to closure without letting them drive your project.
 2 min
2 min
Take the deck with you
Download this course as a file — free, no sign-up needed.
- PDF handoutEvery slide page, ready to print or share.15 pages · 3.7 MBDownload
- Narrated PowerPointThe deck that presents itself — every slide carries the digital human's narration video.15 pages · 14.2 MBDownload
- PowerPoint slidesThe full deck as a .pptx — open it in PowerPoint, Keynote, or Google Slides.15 pages · 3.6 MBDownload
Free to use in your own training — please keep the PersonWise credit page at the end.
Have your own deck? Turn it into a course