Begin
14 pages · ~28 min
Uizard AI UI Design Mastery
Learn to use Uizard, an AI-powered UI design tool, to rapidly create wireframes and prototypes. Ideal for designers and product teams new to AI-assisted design.
A digital instructor presents all 14 pages. Hold “Ask” at any point and ask out loud — the answer comes from this course. No sign-up needed.
What you’ll learn
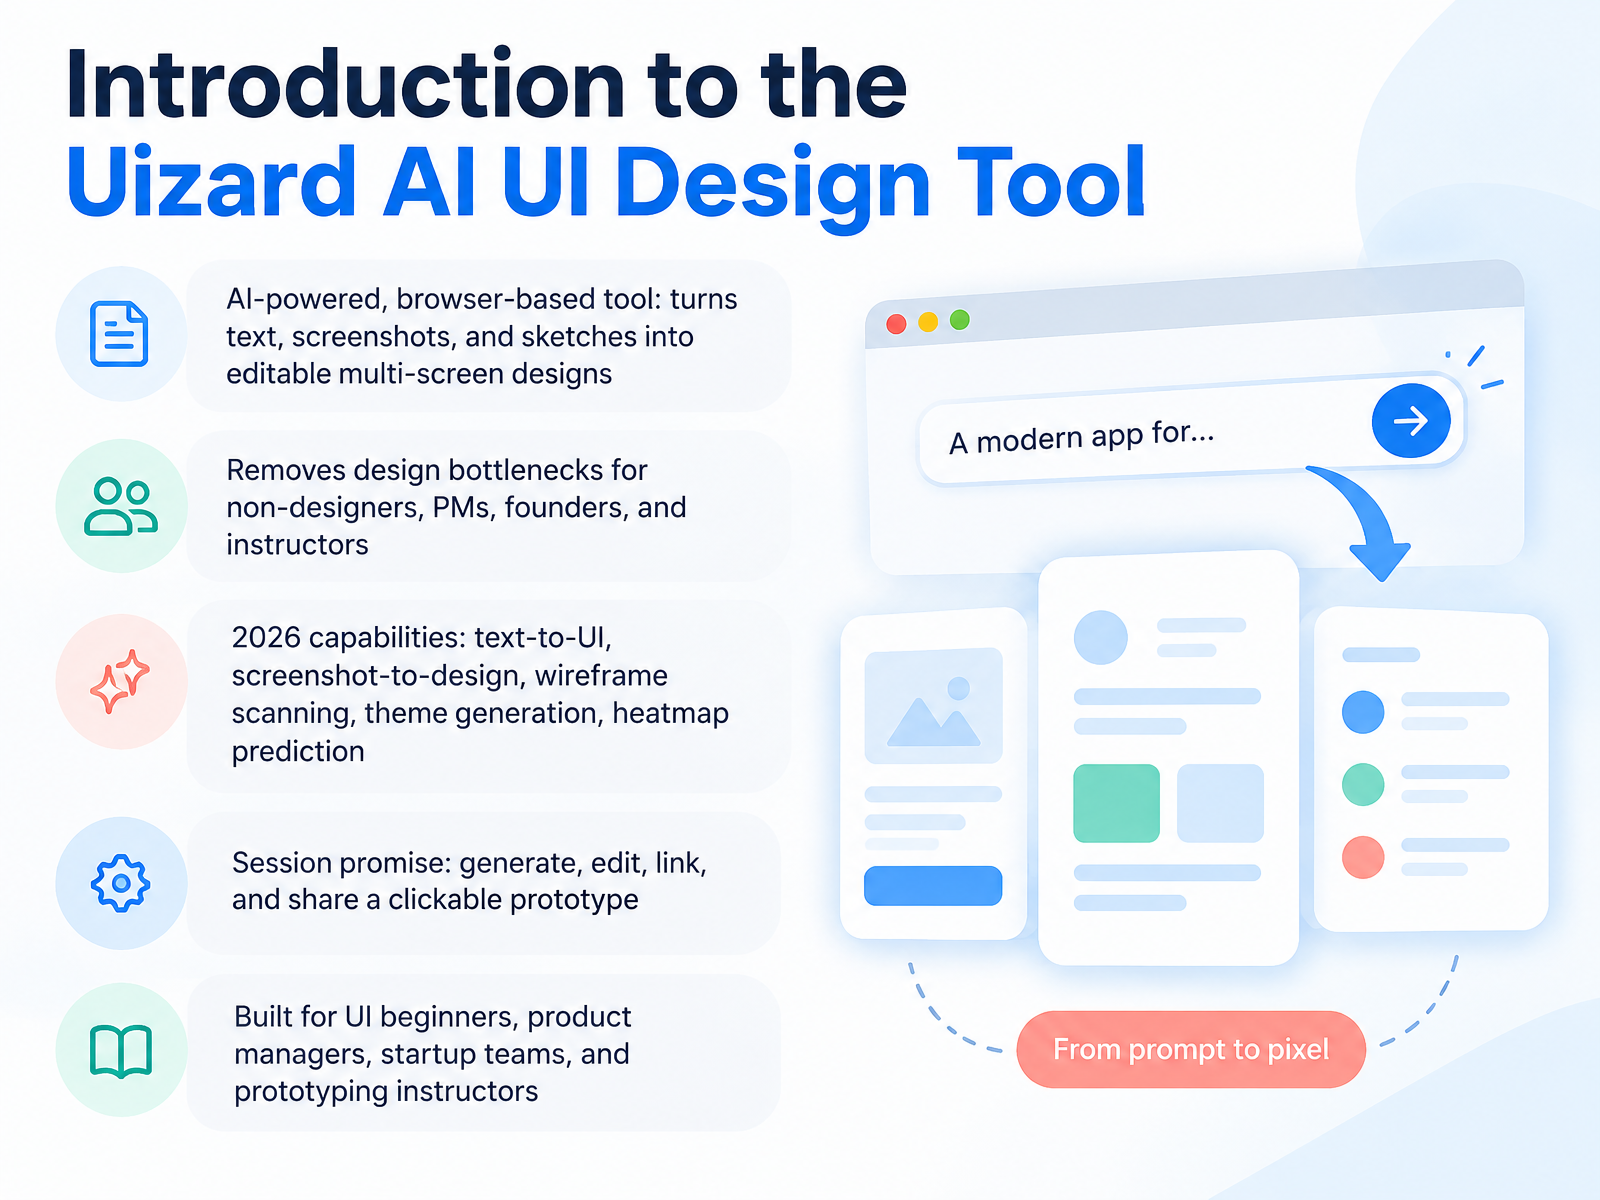
- 01Introduction to the Uizard AI UI Design ToolWelcome. In this session, you'll learn to use Uizard, an AI-powered UI design tool that runs in your browser, so there's nothing to install. Uizard turns text, screenshots, and hand-drawn sketches into editable, multi-screen designs. That removes a common bottleneck for people who don't design for a living, including product managers, founders, and instructors. You'll work with its core 2026 features: text-to-UI, which generates screens from a written prompt; screenshot-to-design; wireframe scanning, which digitizes paper sketches; theme generation; and heatmap prediction, which estimates where users will focus. Treat every AI result as a first draft. Review it, adjust it, and decide what to keep. By the end, you'll be able to generate, edit, link, and share a clickable prototype. To start, open Uizard in your browser and sign in, and keep one product idea ready to practice with. Next, we'll look at why AI-assisted UI design matters in 2026.uizard.iouizard.iouizard.io+21 min
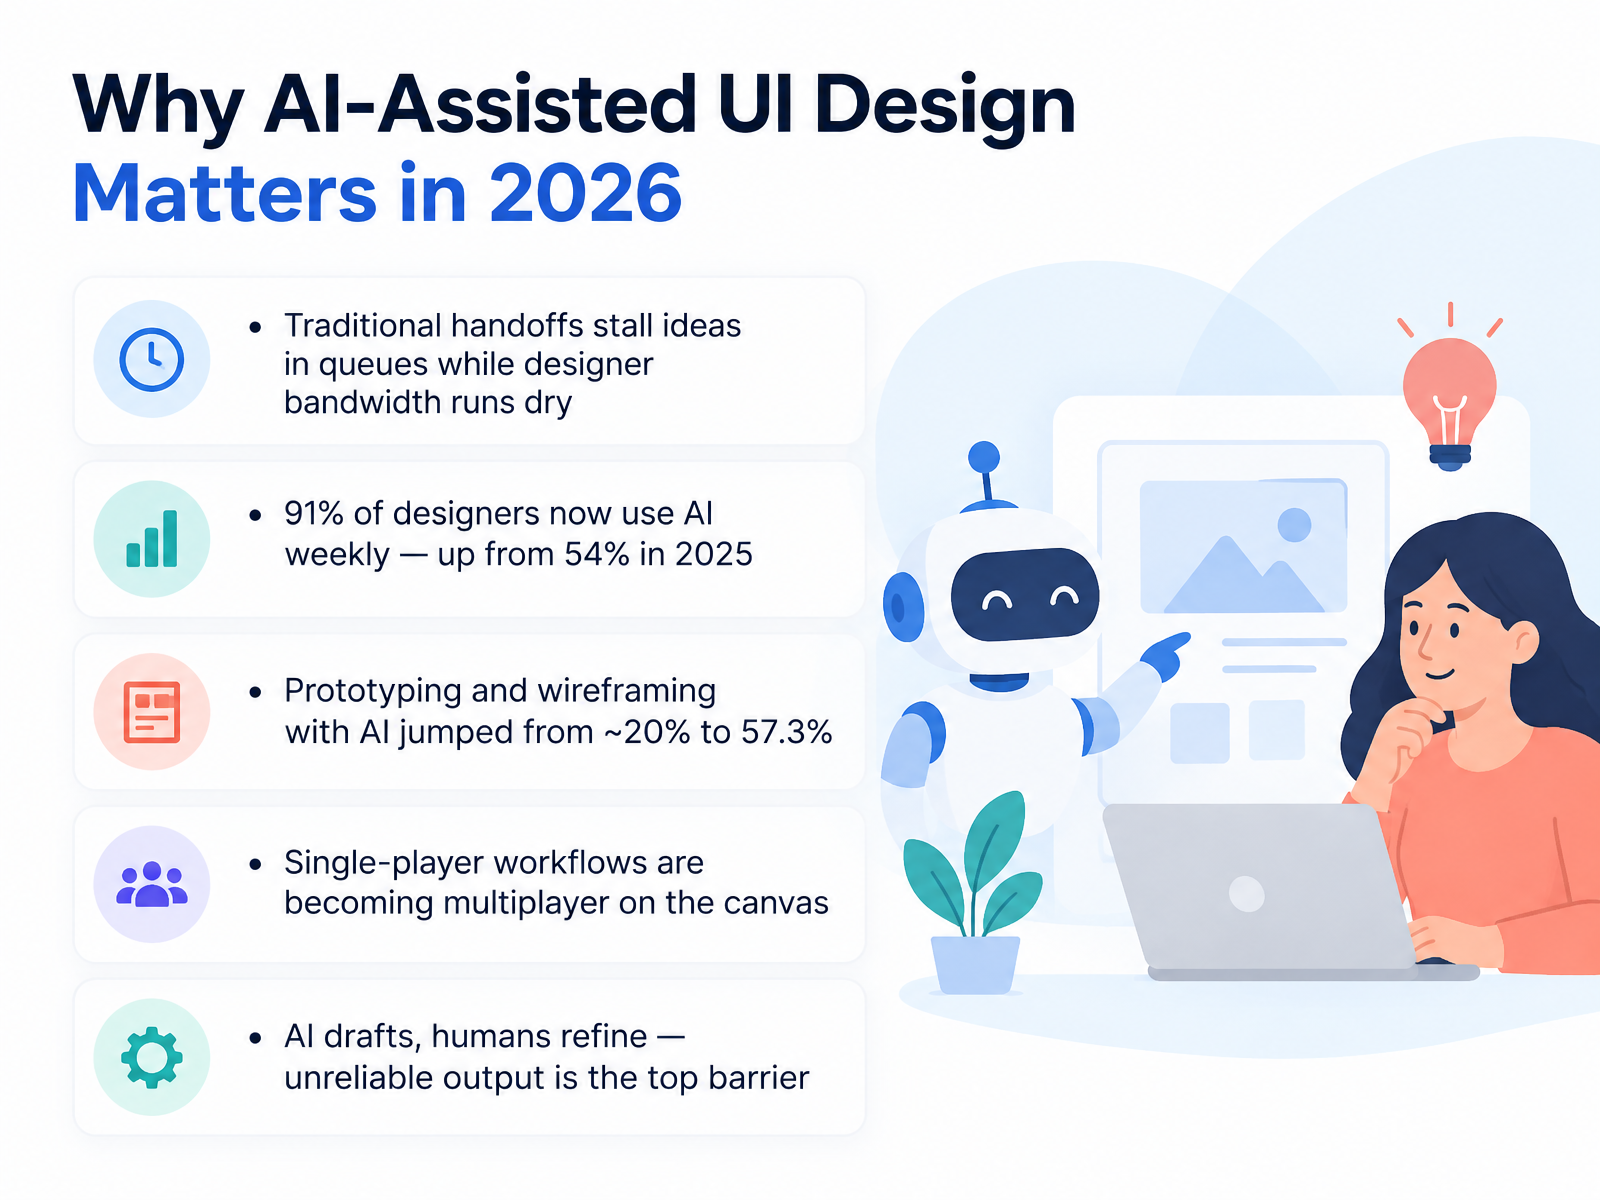
- 02Why AI-Assisted UI Design Matters in 2026So why does AI-assisted UI design matter in 2026? Because the old handoff model stalls. Ideas sit in queues while designer bandwidth runs dry. The numbers show the shift. Ninety-one percent of designers now use AI weekly, up from fifty-four percent in 2025. And prototyping and wireframing with AI jumped from about twenty percent to fifty-seven point three percent. Work is also moving from single-player to multiplayer on the canvas, where teams sketch, compare, and review together. One decision rule: let AI draft, then have a human refine. Unreliable output is still the top barrier, so treat every generated screen as a starting point that needs your review. Next, we'll look at how Uizard generates UI.
 figma.comdesignerfund.comnngroup.com+21 min
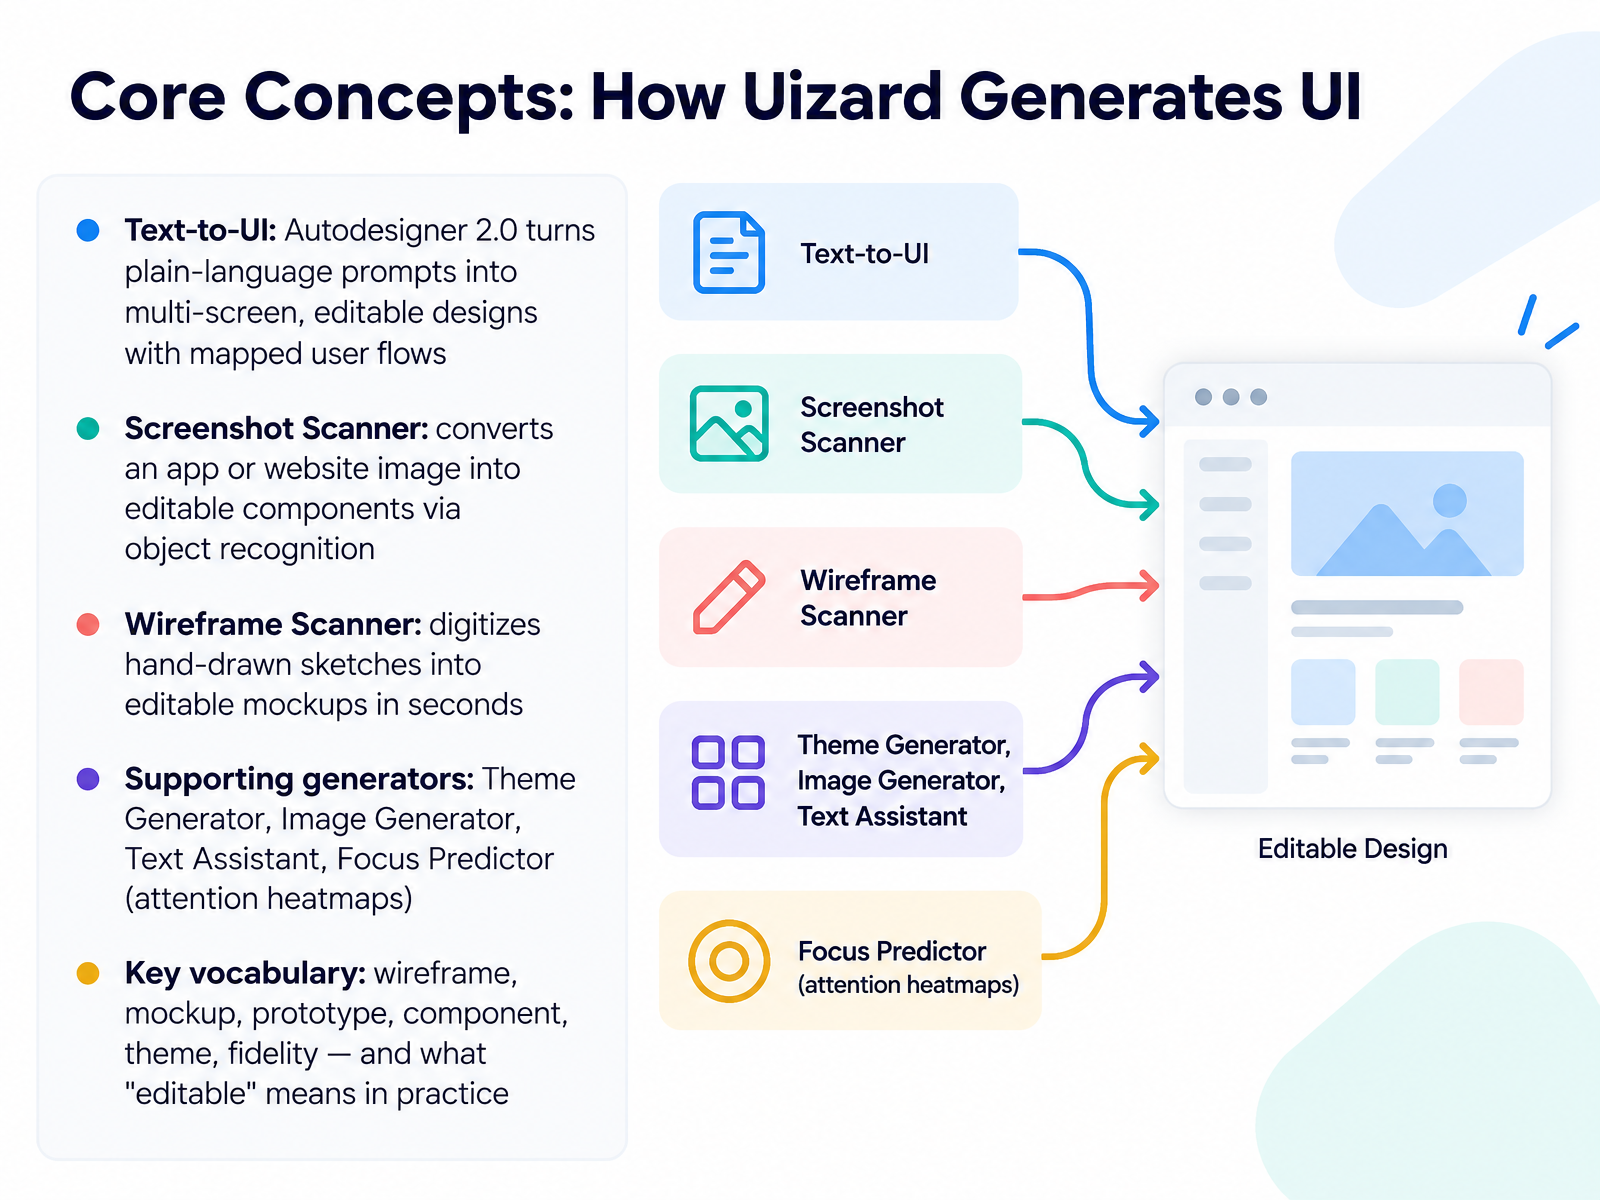
- 03Core Concepts: How Uizard Generates UINow let's look at how Uizard actually generates UI. The main engine is Autodesigner two point zero. You type a plain-language prompt, and it returns multi-screen, editable designs with the user flow already mapped between screens. Treat that output as a strong first draft, then review and adjust each screen. The Screenshot Scanner takes an app or website image and converts it into editable components using object recognition, so computers identify buttons and fields inside the picture. The Wireframe Scanner digitizes hand-drawn sketches into editable mockups in seconds. Supporting generators cover themes, images, text, and the Focus Predictor, which produces attention heatmaps. Keep one vocabulary set straight: a wireframe is low fidelity structure, a mockup adds visual detail, a prototype adds clickable flow, a component is a reusable element, a theme is your shared styling, and fidelity is how realistic the design looks. Editable means each element stays a separate object you can select and change, not a flat image. So pick one method and generate a screen, then check and adjust it manually. Next, we move into the workspace itself in Product Tour: The Uizard Workspace.
 uizard.iouizard.iouizard.io+22 min
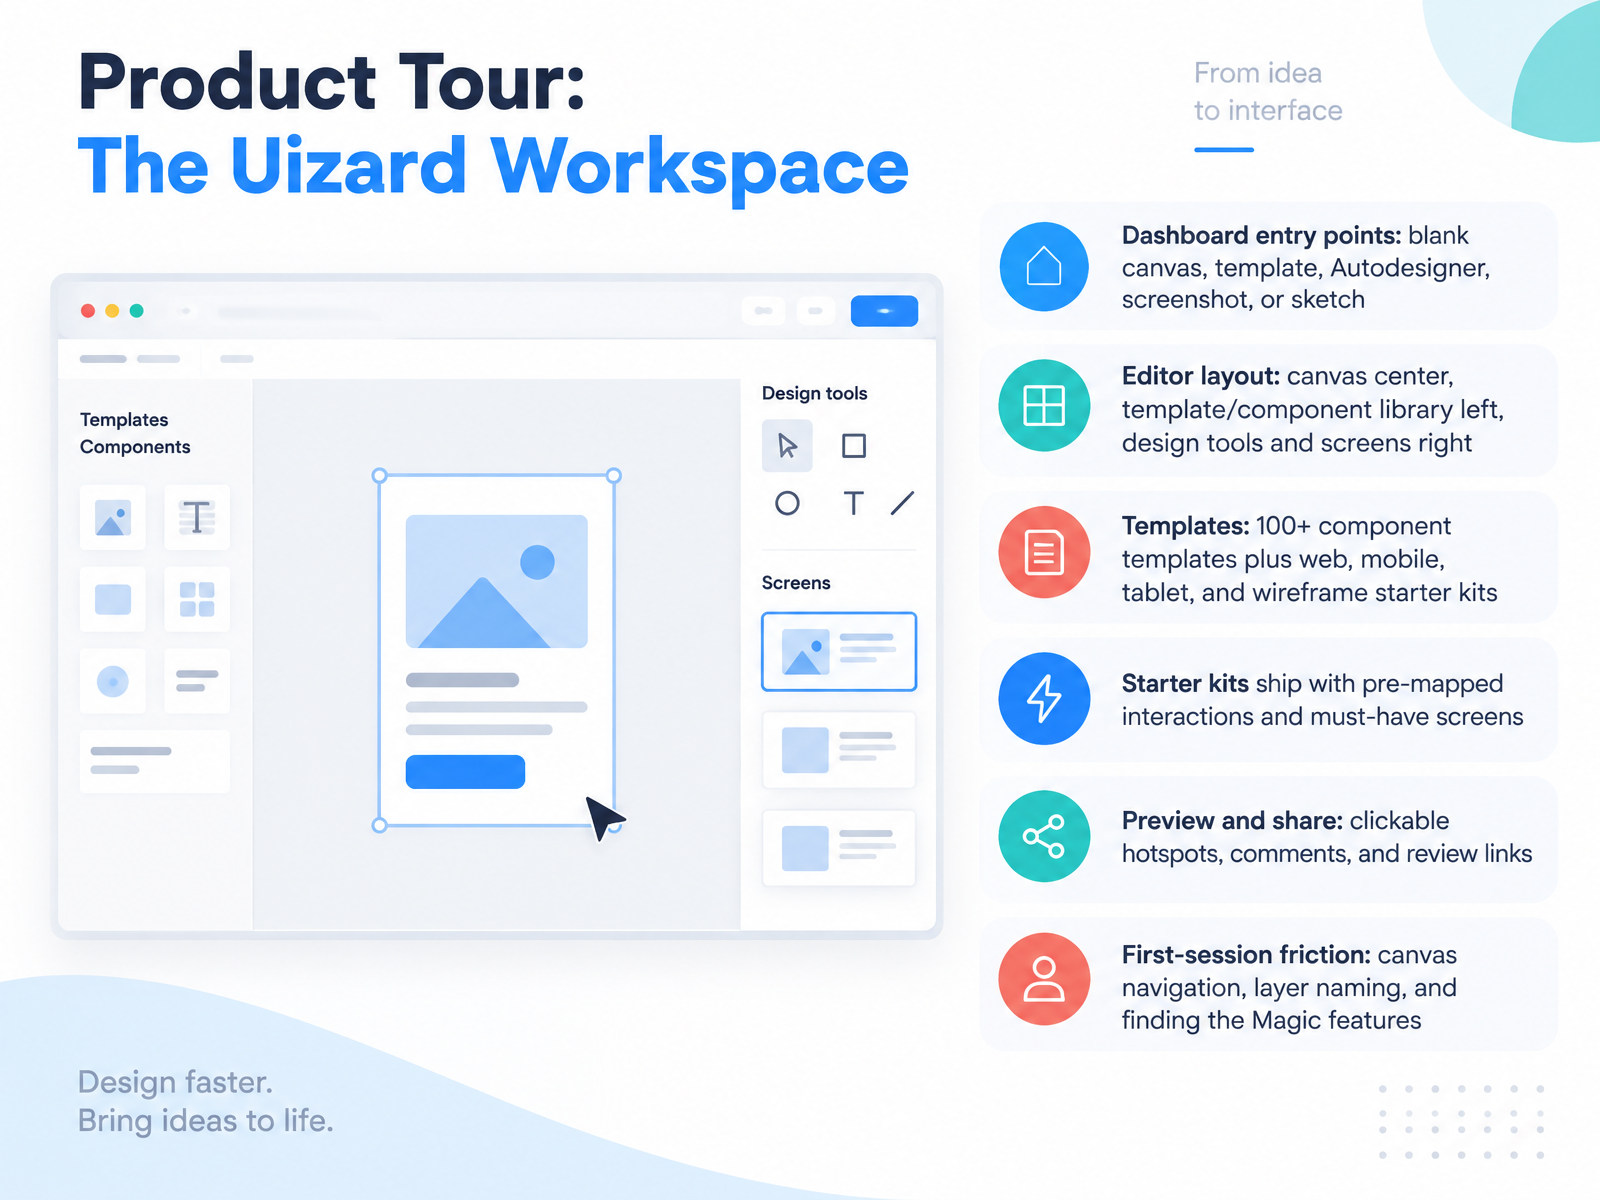
- 04Product Tour: The Uizard WorkspaceNow let's look at the workspace itself. From the dashboard, you have five entry points: a blank canvas, a template, Autodesigner, a screenshot upload, or a sketch scan. Pick the one closest to what you already have. Once you're in the editor, the canvas sits in the center, the template and component library on the left, and design tools plus screen management on the right. Templates are a fast start. Uizard offers over one hundred component templates, plus starter kits for web, mobile, tablet, and wireframes. Starter kits arrive with must-have screens and pre-mapped interactions, so you can preview a clickable prototype immediately. When you're ready to review, add hotspots with the lightning icon, drop comments in the notes tab, and send a share link. Expect some first-session friction. Canvas navigation, layer naming, and finding the Magic features take practice. So here's your next action: open a mobile starter kit, preview it, and click through one flow. That sets up our next slide, Prompt Craft for UI Generation.
 youtube.comuizard.iosupport.uizard.io+22 min
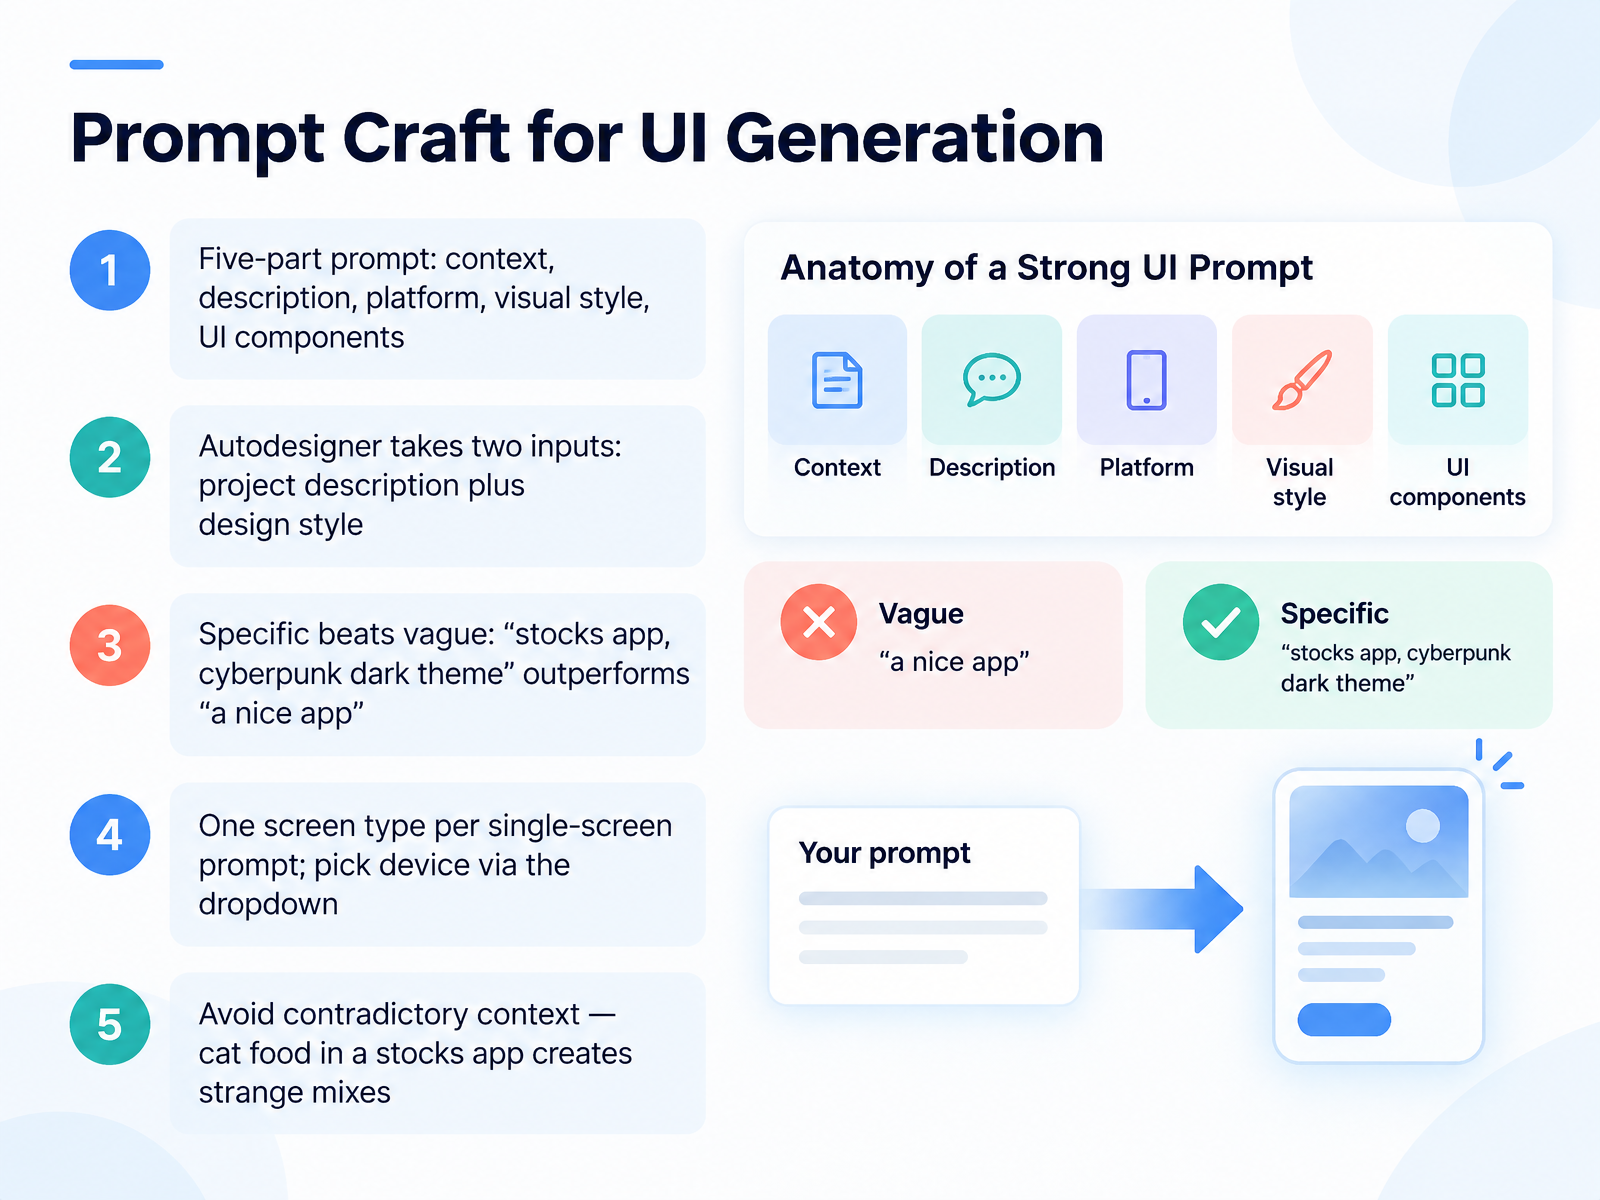
- 05Prompt Craft for UI GenerationNow let's talk about how to write prompts that actually produce usable screens. Think of a strong prompt as five parts: context, description, platform, visual style, and the UI components you want. In Autodesigner, you mainly fill two inputs: a project description and a design style. For single screens, name one screen type only, and pick the device from the dropdown instead of typing it. Specific beats vague. A stocks app with a cyberpunk dark theme will perform far better than a nice app. And keep context consistent, because cat food in a stocks app creates strange mixes. The AI output is a draft, so review it and adjust before you rely on it. Next, we'll put this into practice in Hands-On Workflow: From Prompt to Prototype.
 uizard.iouizard.ioklero.ai+21 min
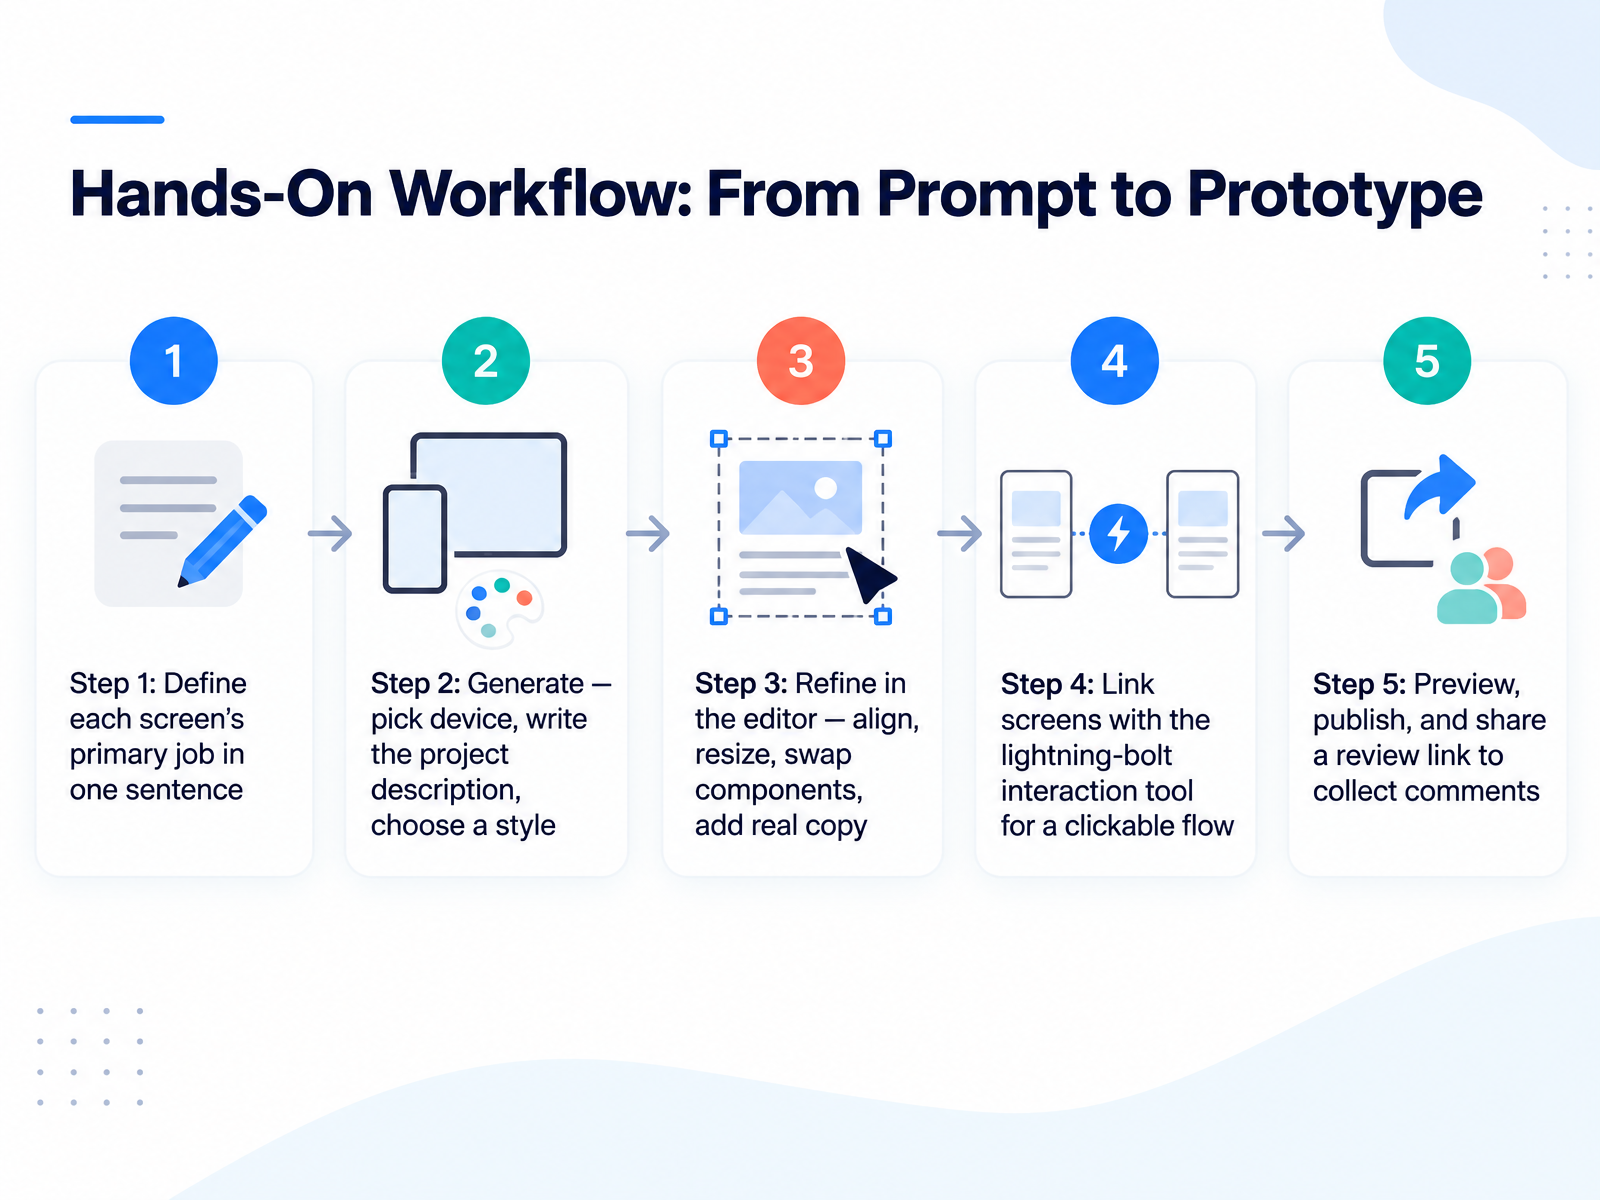
- 06Hands-On Workflow: From Prompt to PrototypeNow let's walk through the full hands-on workflow, from prompt to prototype. Start with one sentence per screen that defines its primary job, such as, this screen lets a new user sign up. That sentence keeps every later decision focused. Next, generate. In Autodesigner, pick your device, write a short, clear project description, and choose a style, either from a prompt, a screenshot, or a URL. Treat the output as a starting point, not a finished design. Then refine in the editor. Align elements, resize them, swap components from the library, and replace placeholder text with real copy. With your screens ready, link them using the lightning bolt icon: select a component, drag the blue arrow to the target screen, and repeat to build a clickable flow. Finally, preview your project, click through each interaction to confirm it works, then publish and share the review link so your team can comment in one place. That loop, define, generate, refine, link, and review, is your repeatable process. Next, we'll look at iterating faster with AI through conversational edits and design review.
 mspoweruser.comyoutube.comuizard.io+22 min
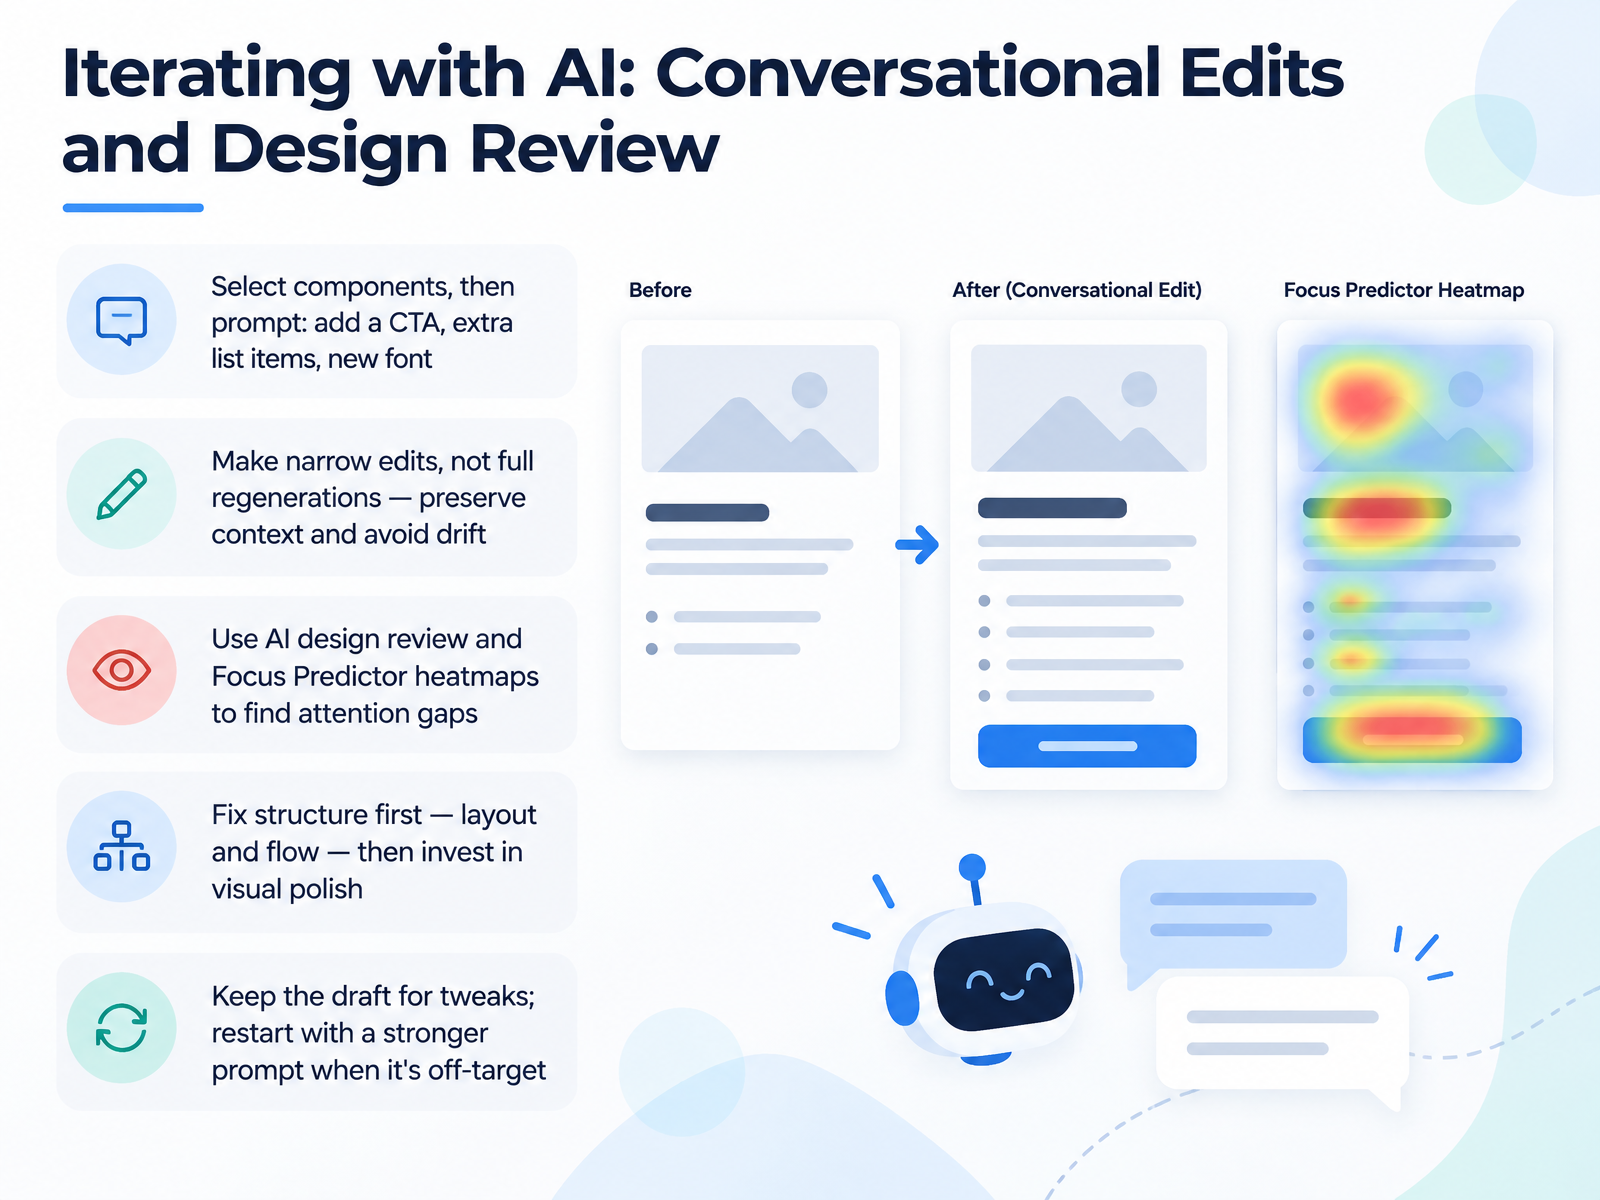
- 07Iterating with AI: Conversational Edits and Design ReviewNow let's look at iteration, which is where AI drafts actually become usable screens. In Uizard, select a group of components, then prompt the AI to modify just that selection. For example, select your header and type: add a call to action button that says order now, and a back button. Or ask for three more list items and a Roboto font. Keep edits narrow. Avoid full regenerations unless the direction is genuinely wrong, because small edits preserve context and prevent design drift. When you want a second opinion, run the AI design review to hear what works and what needs improvement, and use Focus Predictor heatmaps to spot attention gaps before real user testing. As a rule, fix structure first, meaning layout and flow, then invest in visual polish. And keep your draft for quick tweaks, but restart with a stronger, more specific prompt when the output is clearly off target. So your next step is to open a screen, select a component, and make one narrow prompt edit. Next, we'll move from sketch and screenshot to editable design.
 uizard.iouizard.iouizard.io+21 min
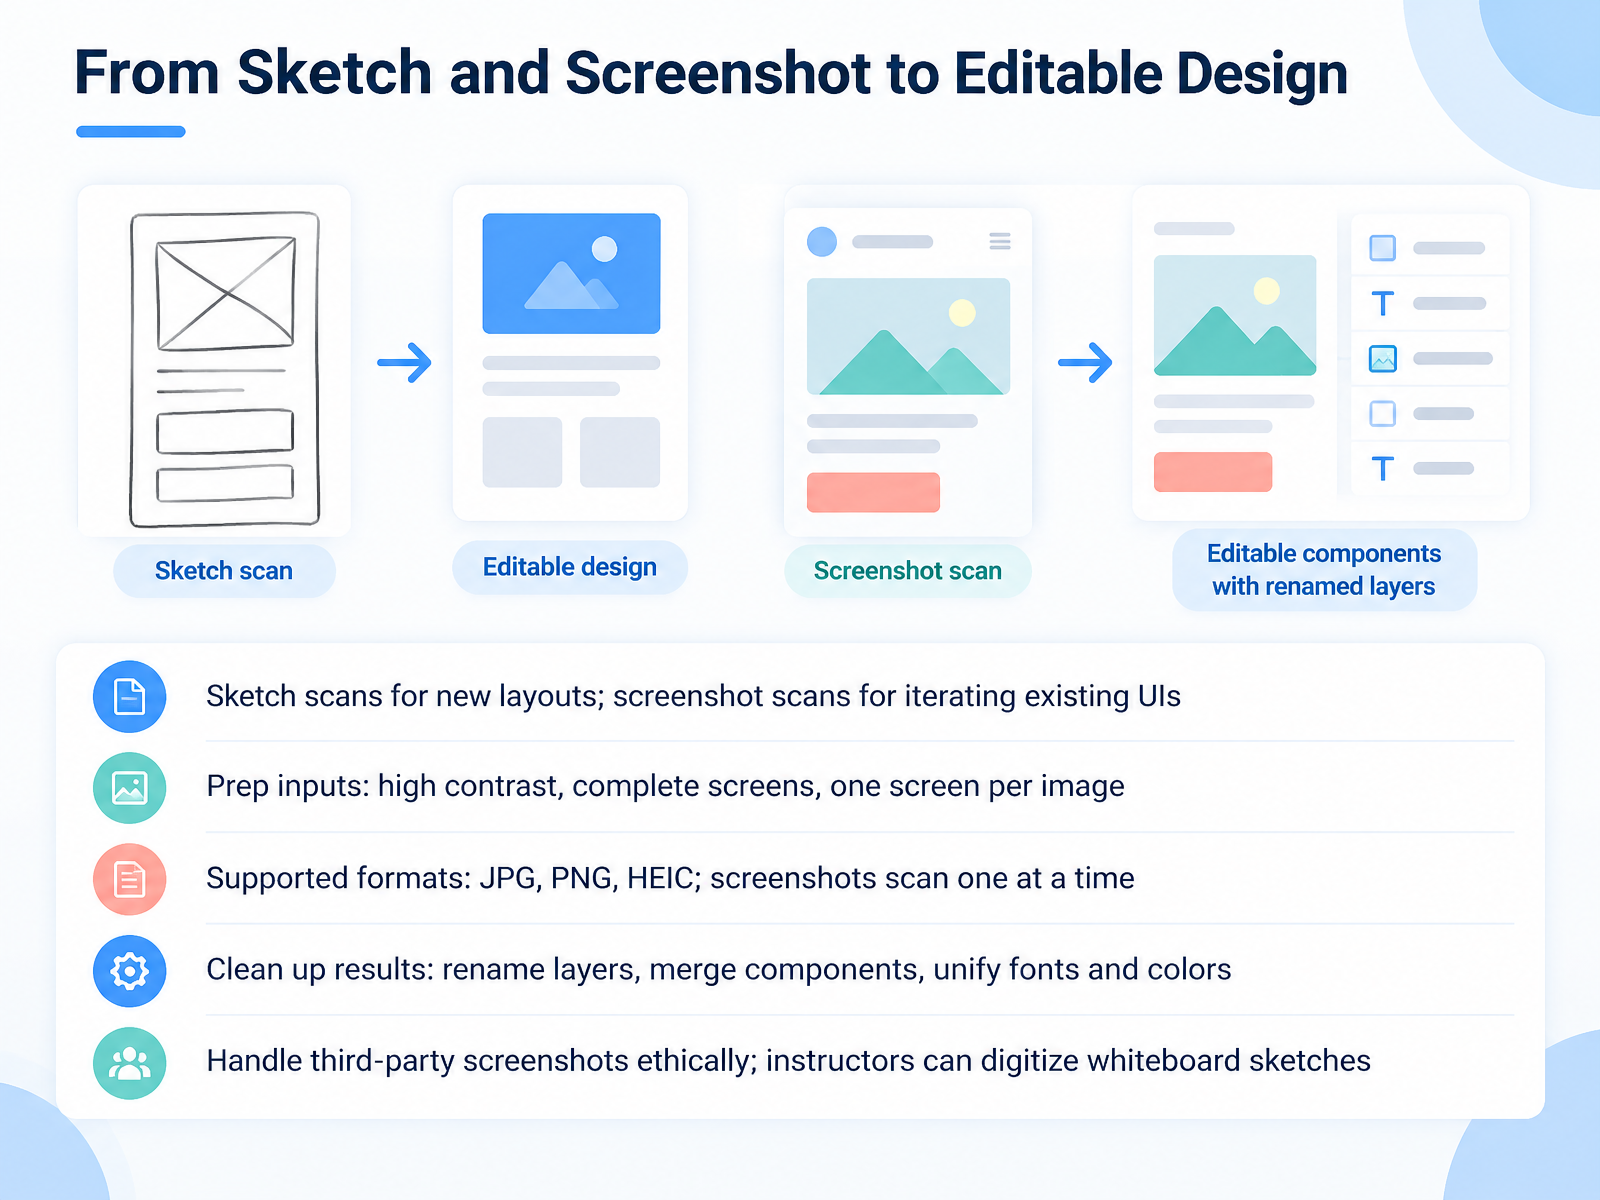
- 08From Sketch and Screenshot to Editable DesignNow let's turn images into editable designs. Uizard has two scanners, and picking the right one saves time. Use the sketch scan, also called the Wireframe Scanner, when you are exploring new layouts from a hand-drawn wireframe. Use the screenshot scan when you want to rework an existing app or website UI. Before you upload, prepare the input. Use high contrast, capture complete screens, and keep one screen per image. Supported formats are JPG, PNG, and HEIC. Screenshots scan one at a time, so build that into your workflow. AI output will not be perfect, so plan a cleanup pass: rename layers, merge components, and unify fonts and colors. Handle third-party screenshots ethically, and only adapt designs you have the right to use. Instructors, this is a quick way to digitize whiteboard sketches. Your next step: pick one sketch or screenshot and run a scan, then clean it up. Next, we look at From Prototype to Product: Handoff and Collaboration.
 uizard.io1 min
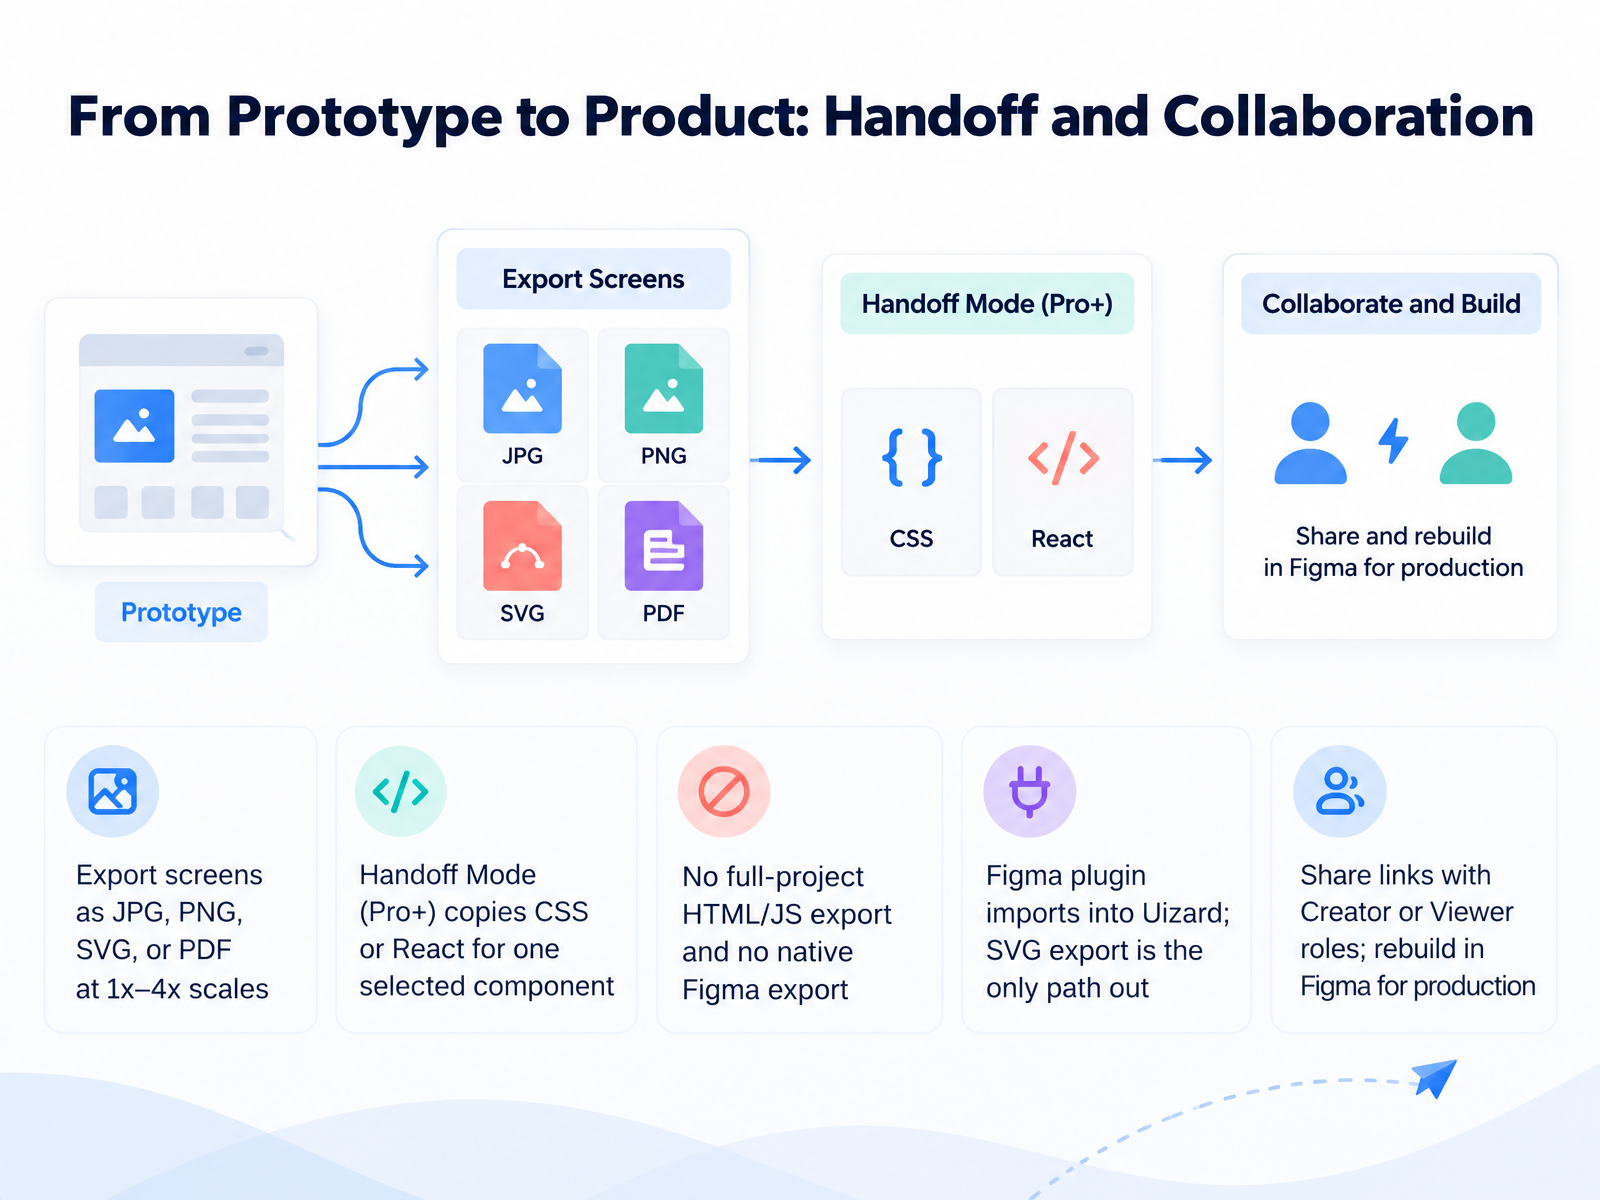
- 09From Prototype to Product: Handoff and CollaborationNext, let's look at handing your work off. Once screens are ready, you export them as JPG, PNG, SVG, or PDF, at one to four times scale. Select the screens, open Handoff Mode, choose your format and scale, check the preview, then export. Each screen becomes its own file, so keep your screen names on those files. Handoff Mode, available on Pro and higher, also copies CSS or React for one selected component at a time. That's a measurement sheet for a developer, not a working app. Be clear on the limits: there's no full project export to HTML or JavaScript, and no native Figma export. The Figma plugin imports into Uizard, not out, and SVG is the only path out. For collaboration, use Share links and assign Creator or Viewer roles. Creators edit; Viewers only view and comment. So plan to rebuild in Figma for production. Next, use cases for product managers and startup teams.
 2 min
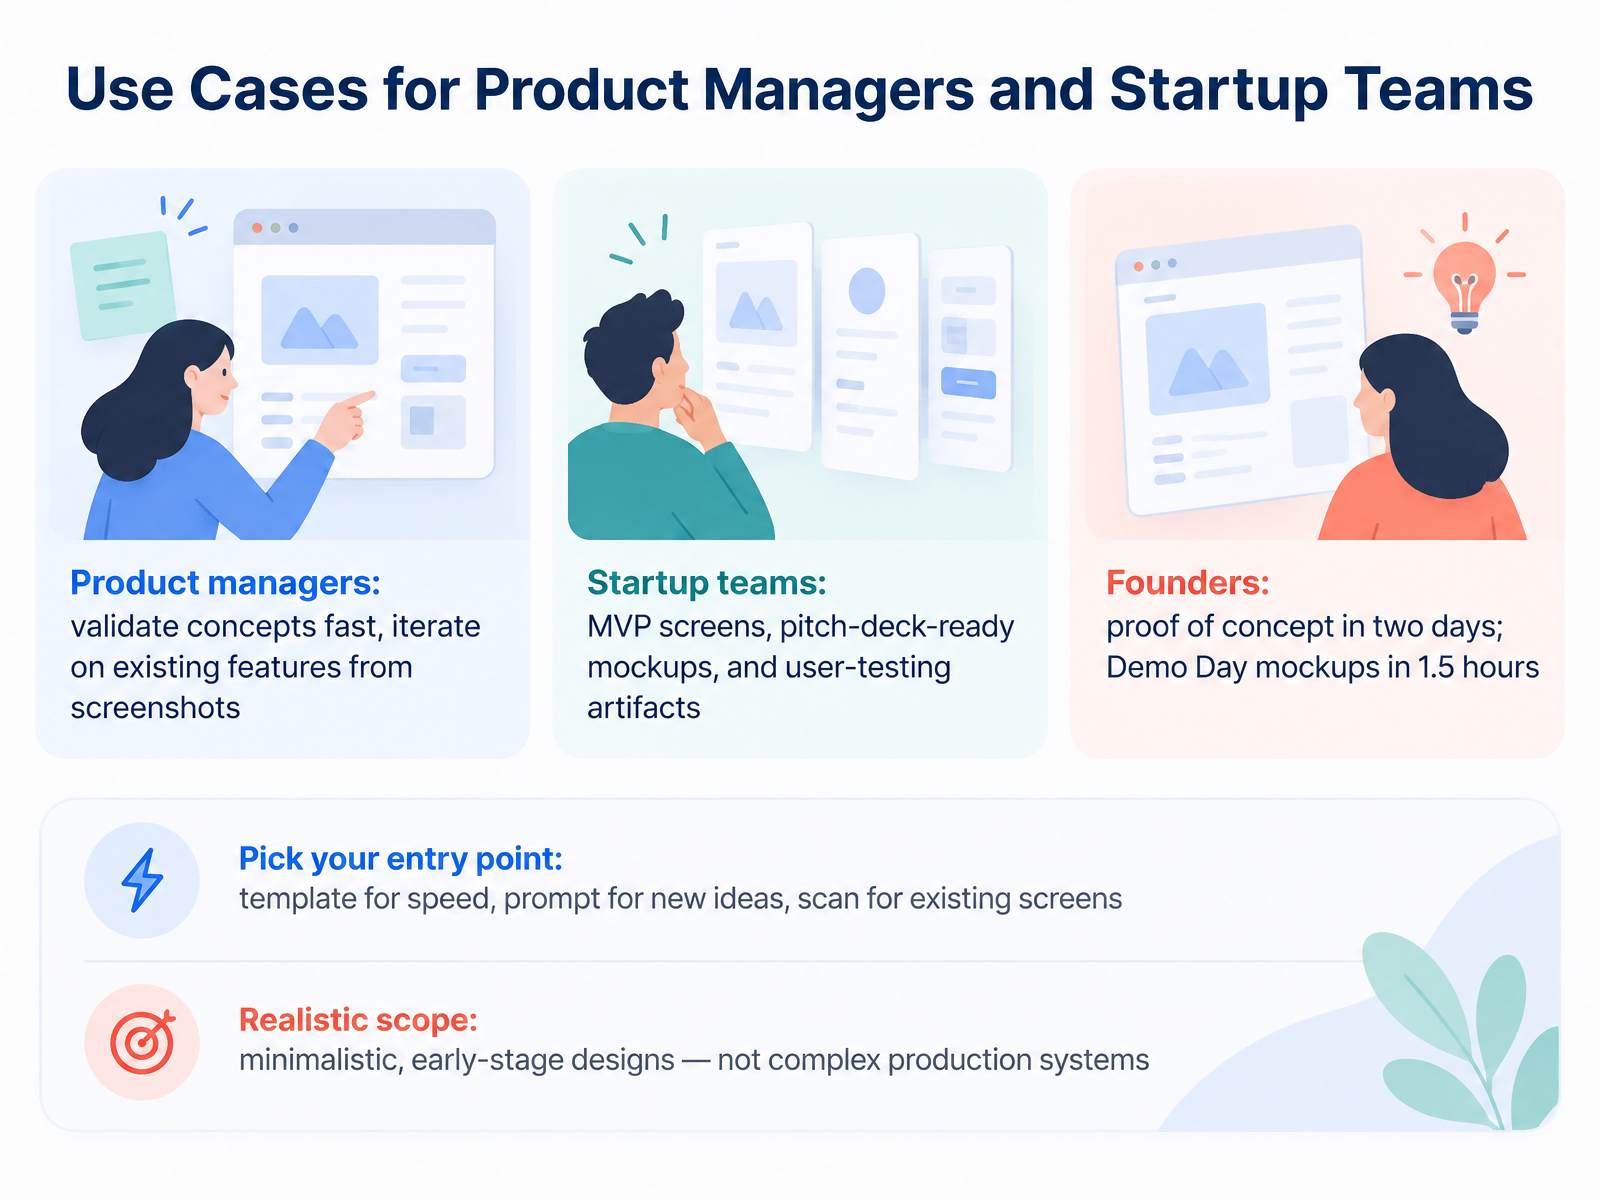
- 10Use Cases for Product Managers and Startup TeamsNext, let's look at who gets the most out of Uizard day to day. Product managers use it to validate a concept fast, and to iterate on existing features by uploading a screenshot and turning it into an editable design. Startup teams use it for MVP screens, pitch-deck-ready mockups, and user-testing artifacts. One founder built a proof of concept in two days; another team had Demo Day mockups ready in about one and a half hours. So pick your entry point. Choose a template for speed, a text prompt when you want new ideas, and scan when you already have screens. Then set a realistic scope: keep designs minimal and early-stage. These are concept mockups, not complex production systems, so plan a human review pass before anyone treats them as final. Next, Uizard in the Classroom: A Track for Prototyping Instructors.
 figma.comdesignerfund.comnngroup.com+22 min
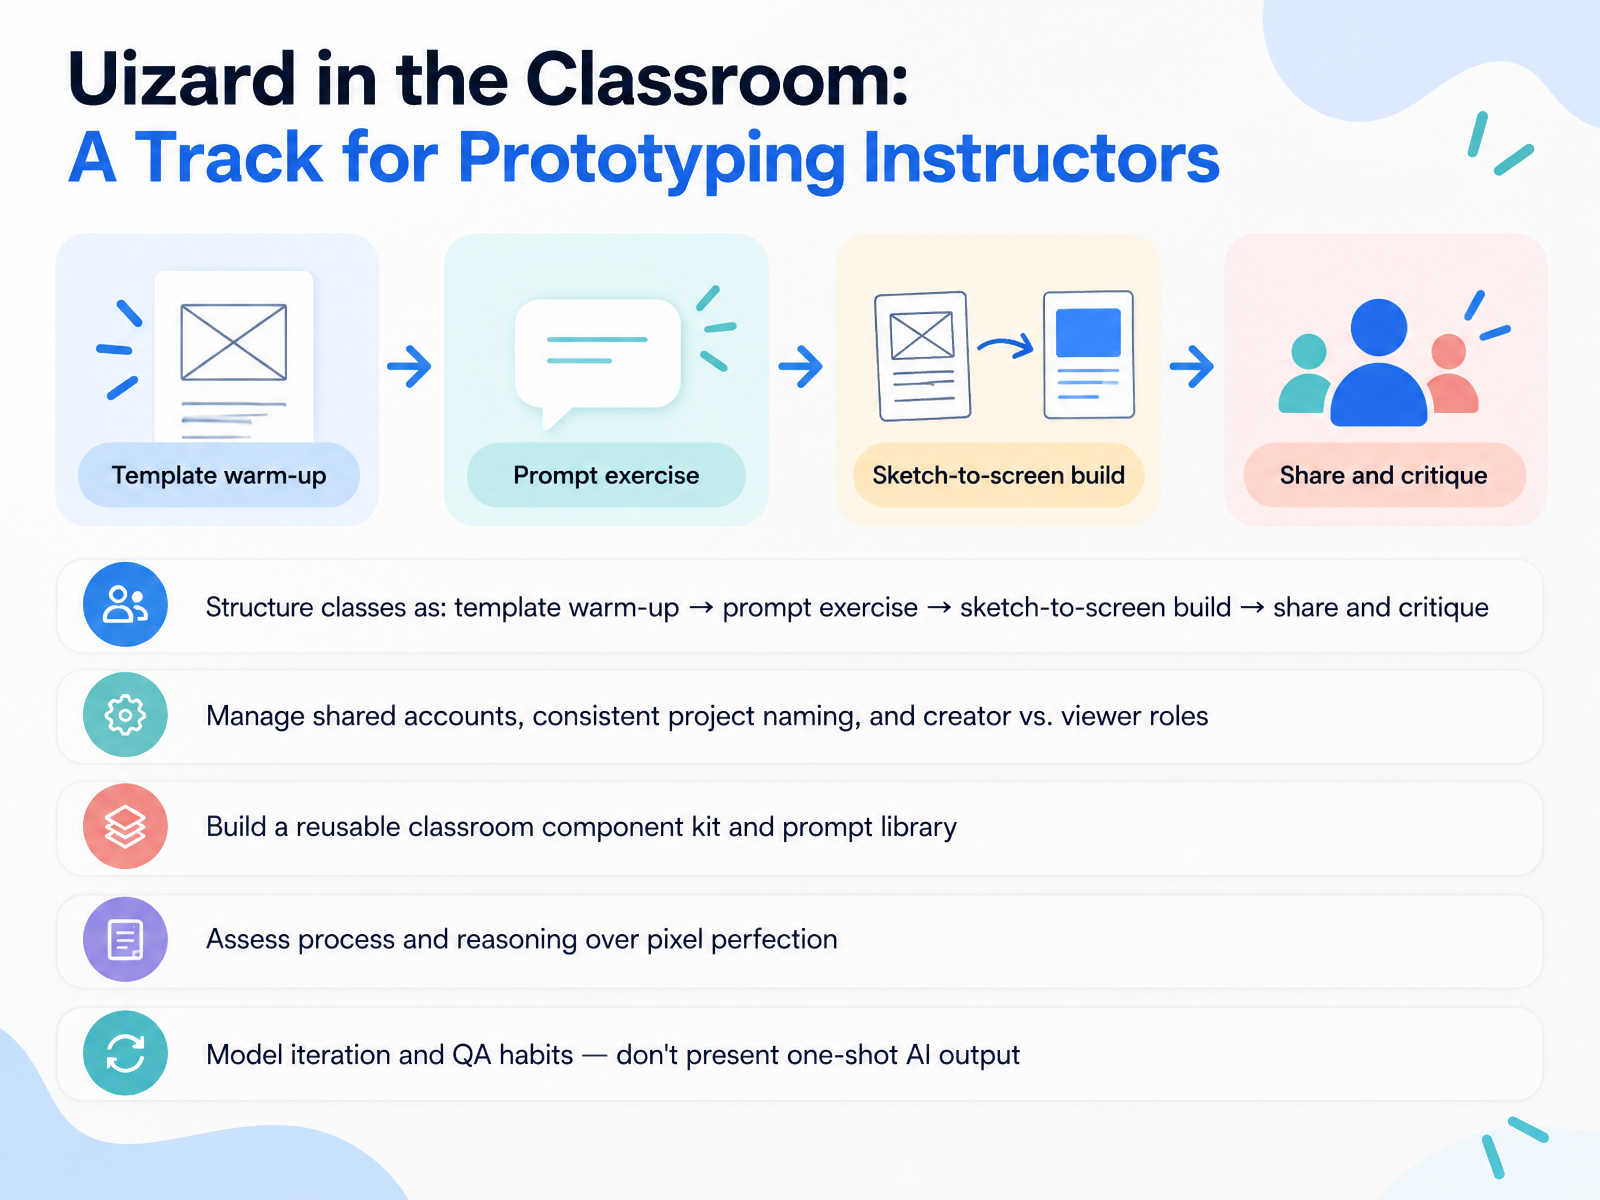
- 11Uizard in the Classroom: A Track for Prototyping InstructorsNow let's talk about running Uizard as a prototyping instructor. Structure each class as a sequence: start with a template warm-up, so students explore a pre-made layout and lose the blank-page fear. Then run a prompt exercise, where students write a description and a design style for Autodesigner and compare outputs. Next, a sketch-to-screen build, using the Wireframe Scanner to turn hand drawings into editable screens. Finish with a share-and-critique session using share links and notes. For account management, set up shared team accounts, agree on a consistent project naming convention, and assign creator versus viewer roles so students can't overwrite each other. Build a reusable classroom component kit by saving component templates, plus a prompt library of prompts that worked. When you assess, grade process and reasoning over pixel perfection. Ask students to explain why they adjusted a layout, not just whether it looks nice. And model good iteration habits. Don't present one-shot AI output as finished work. Show how you review generated screens, check flow and content, then refine. That sets up the quality checks we'll cover next, in Quality Checks Before You Share.
 youtube.comuizard.iosupport.uizard.io+22 min
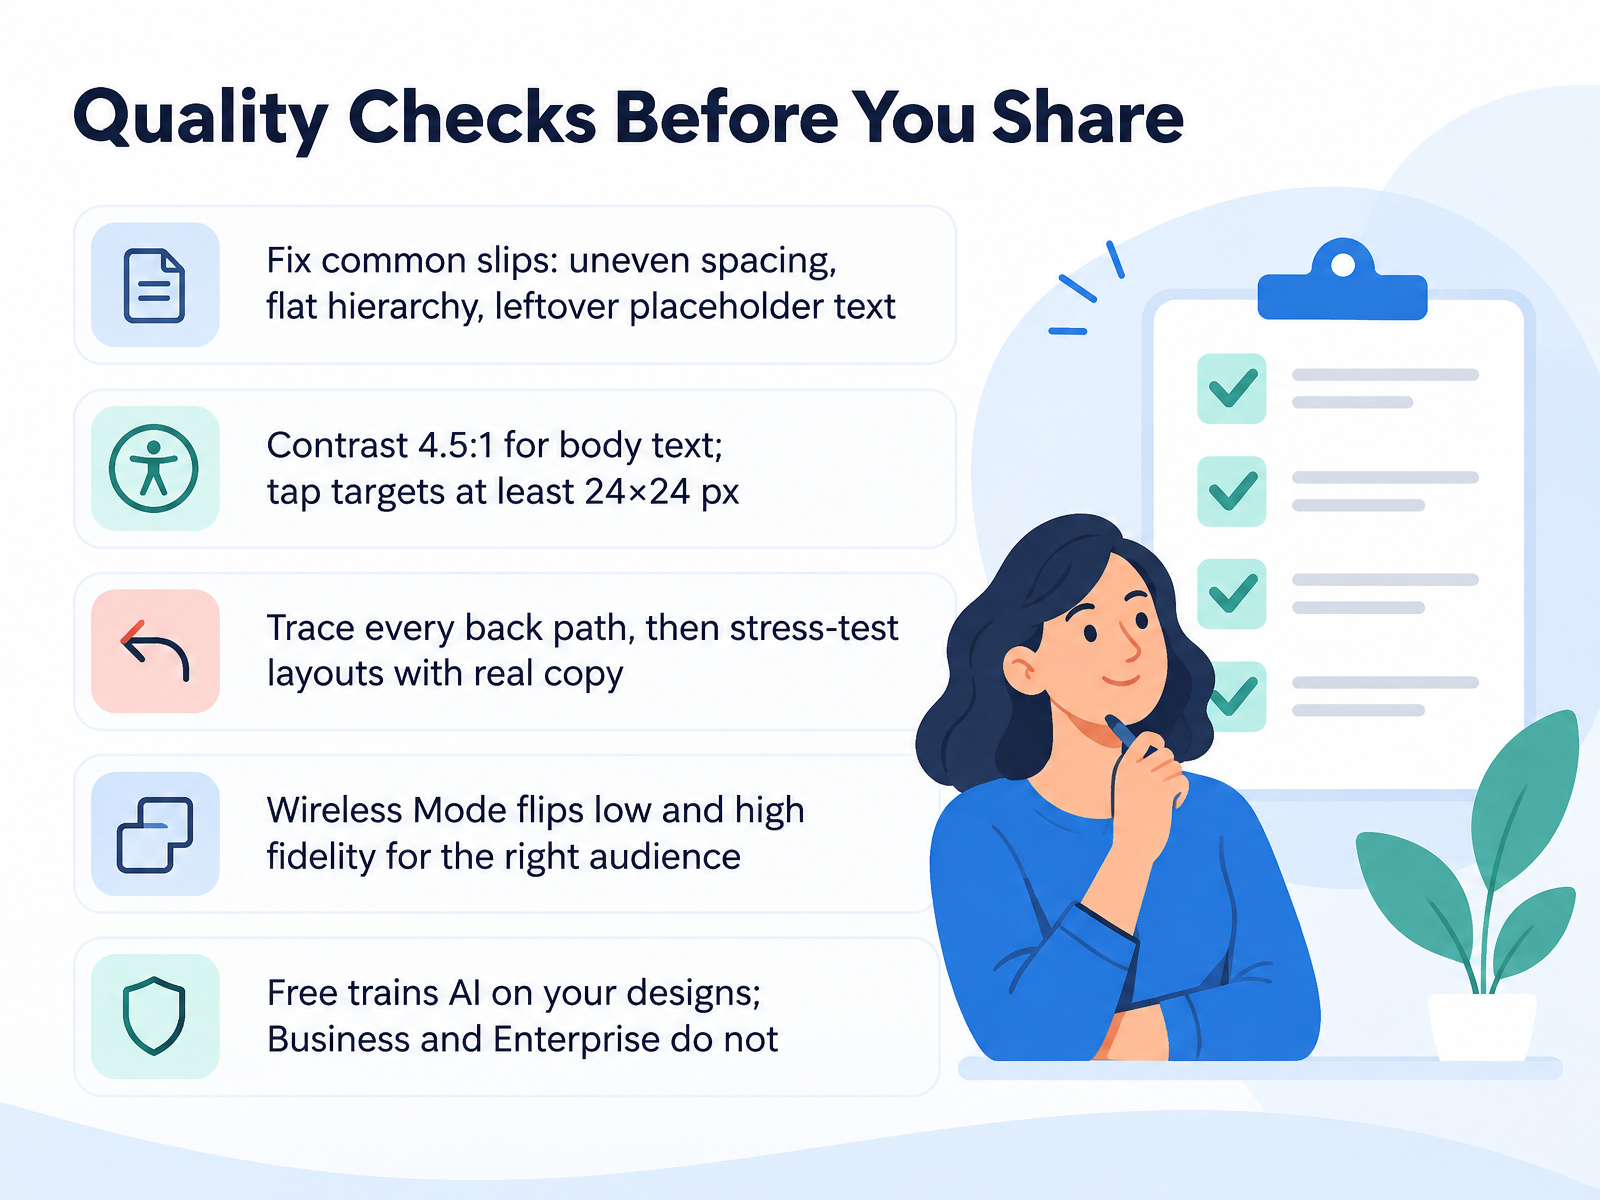
- 12Quality Checks Before You ShareBefore you send that link, run a quick quality pass. Start by fixing the common slips: uneven spacing, a flat visual hierarchy where everything looks equally important, and leftover placeholder text. Then check accessibility numbers. Body text should hit a contrast ratio of four point five to one. Tap targets, the clickable area around a button or icon, should be at least twenty four by twenty four pixels. Next, trace every back path so users can return from each screen, then stress test layouts with real copy instead of sample text. If a header doubles in length, does the layout still hold? For sharing, Wireless Mode lets you flip between low fidelity, meaning rough wireframes, and high fidelity screens, so you match the audience. Finally, know your plan: on the Free plan, Uizard may train its AI on your designs, and Business and Enterprise plans do not. Treat generated output as a draft and confirm these checks yourself. Now let's move on to responsible use and comparison with alternatives.
 uizard.iouizard.iouizard.io+22 min
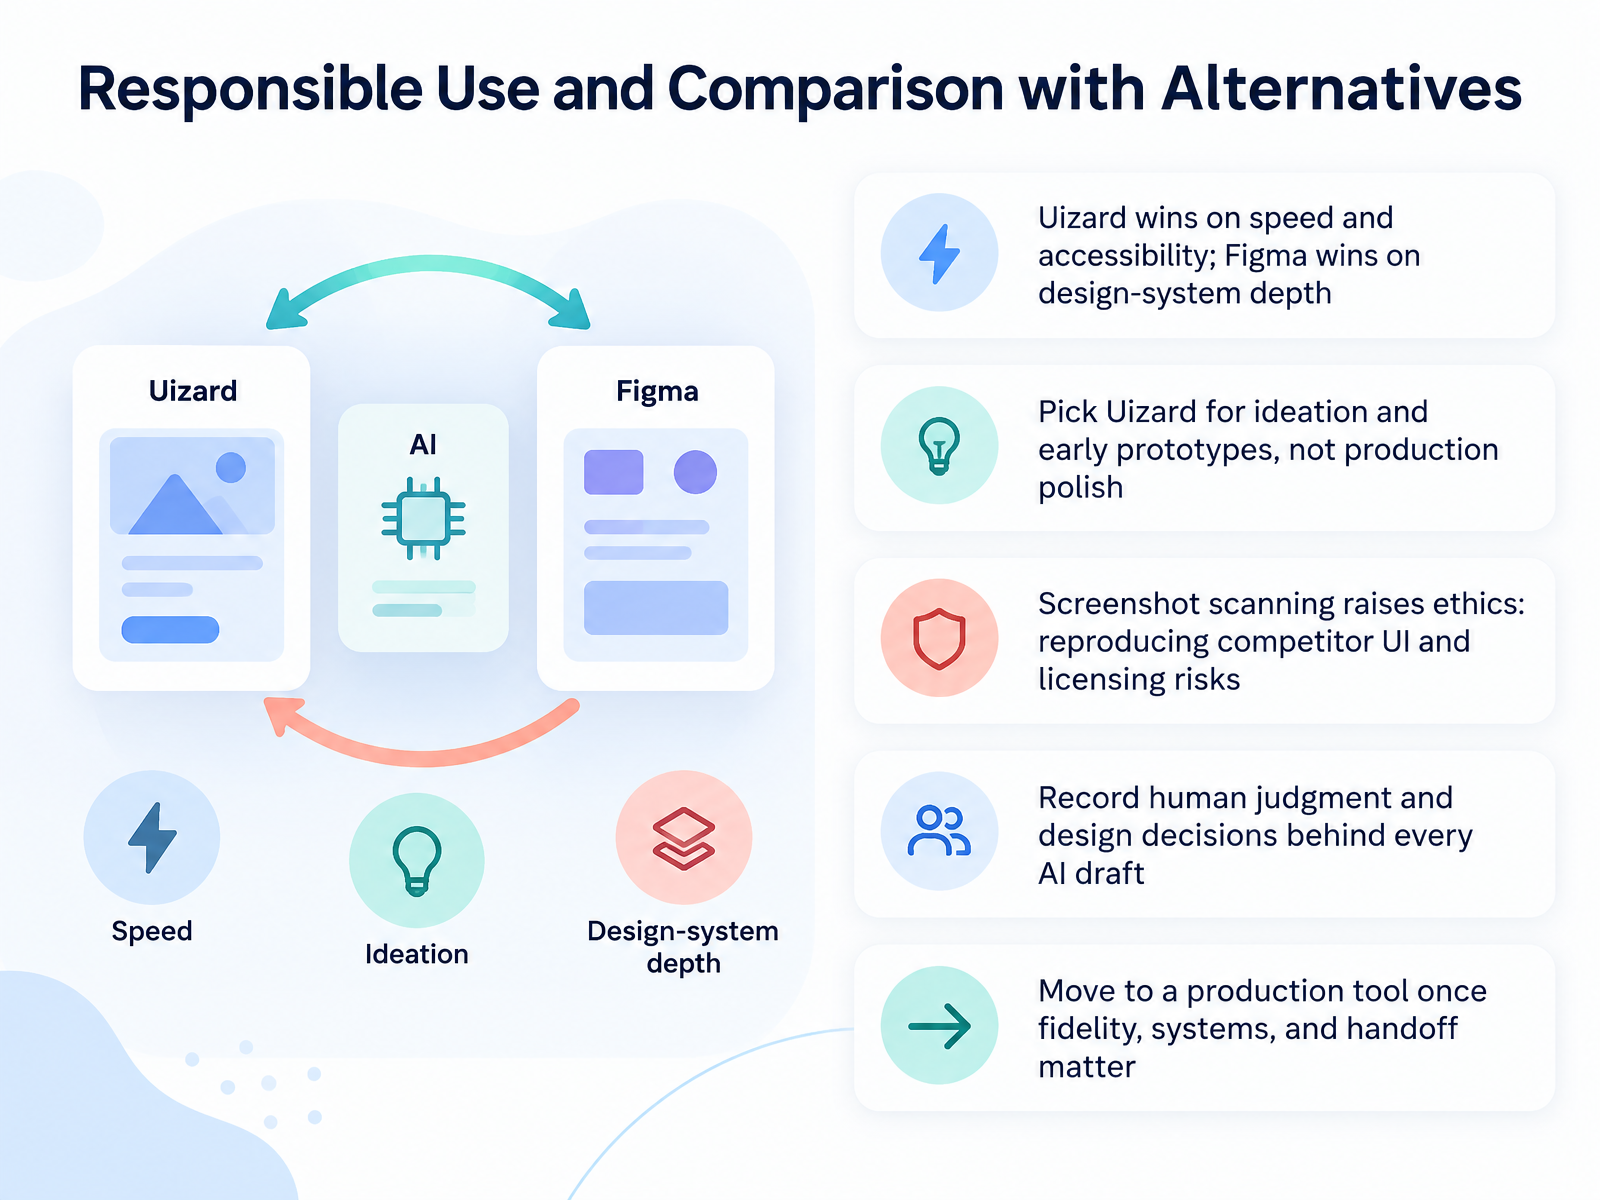
- 13Responsible Use and Comparison with AlternativesNow let's talk about responsible use, and how Uizard compares with the alternatives. The short version: Uizard wins on speed and accessibility. Figma wins on design-system depth, meaning reusable components, variables, and libraries that scale. So pick Uizard for ideation and early prototypes, not production polish. Use it to explore five concepts in an afternoon, then stop. Screenshot scanning raises real ethics questions. Scanning a competitor's app to reproduce their interface can create licensing and legal risk, so treat scanned screens as reference for layout patterns, not as assets to copy. Also record the human judgment behind every AI draft. For each screen, note who reviewed it and what you changed, so the design decision stays traceable. And remember the technical limit: Uizard exports images, plus CSS or React for single components in Handoff Mode. It cannot export a full project to code, and there is no native Figma export. Move to a production tool once fidelity, systems, and handoff matter. Next, we'll cover your practice plan, resources, and next steps.
 figma.comdesignerfund.comnngroup.com+22 min
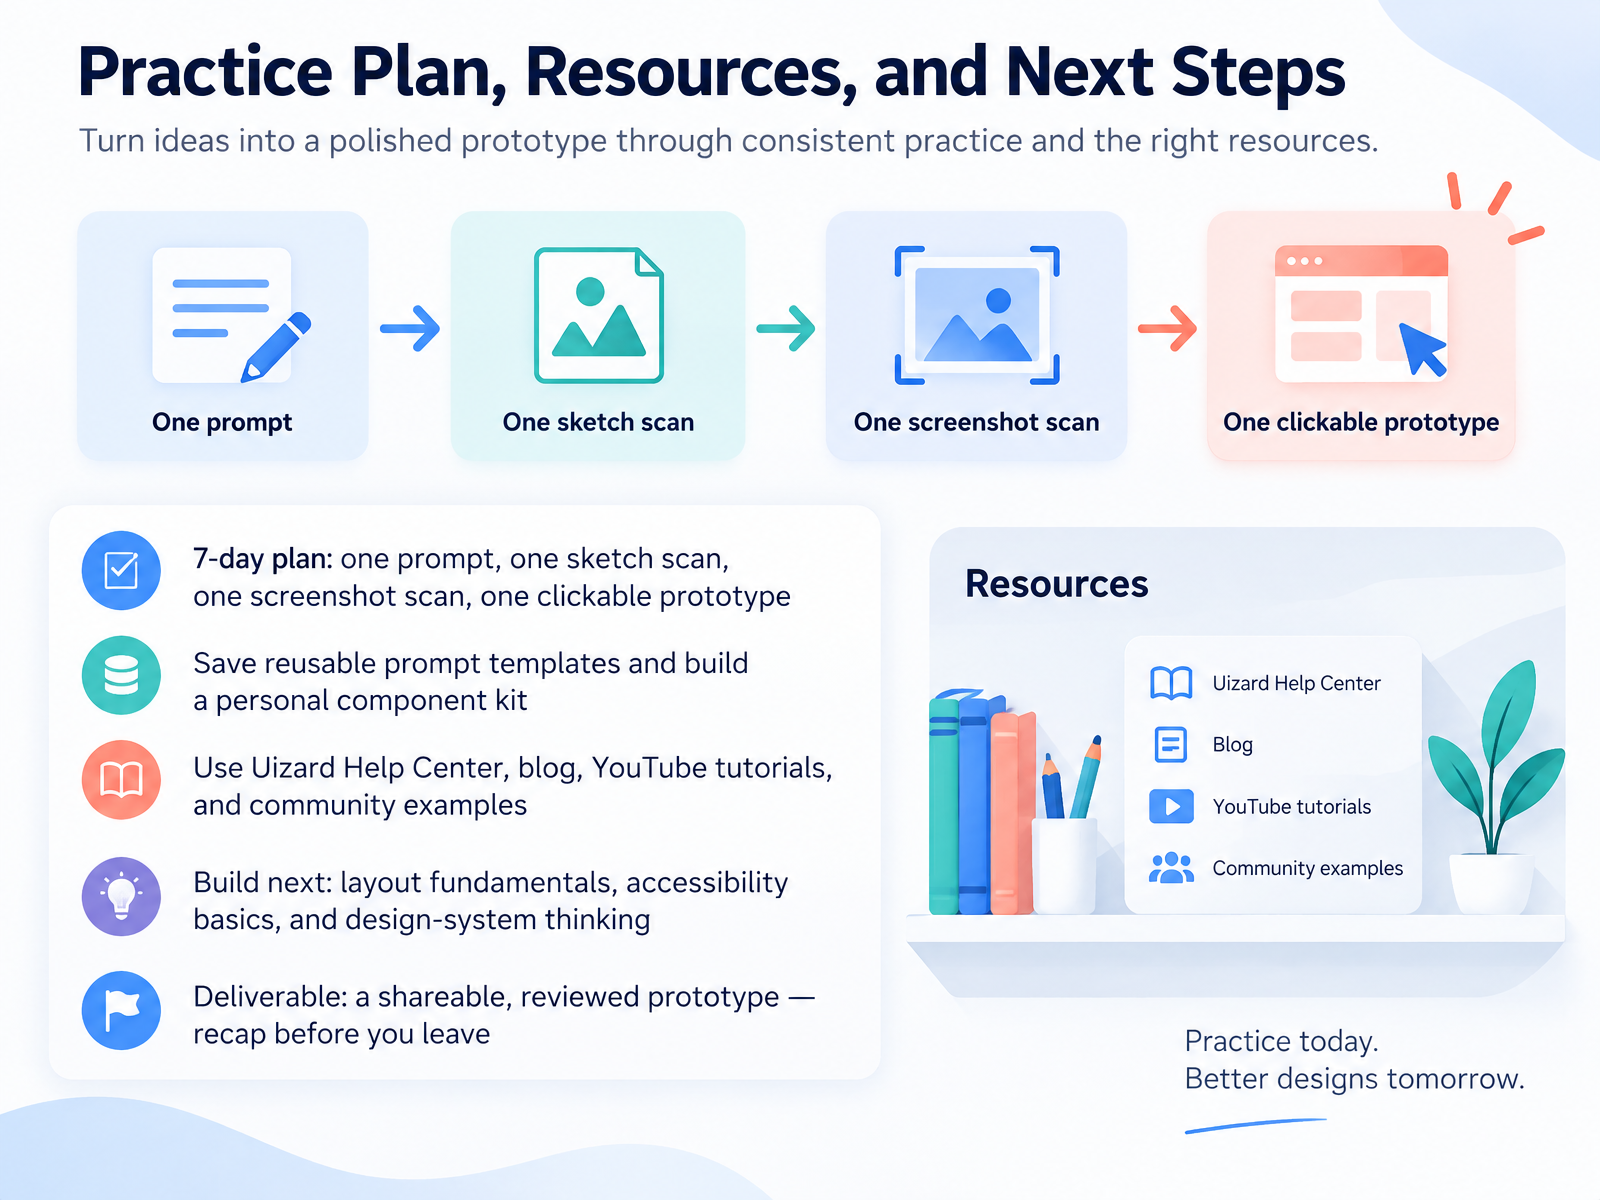
- 14Practice Plan, Resources, and Next StepsLet's close with a plan you can actually run. Over the next seven days, do four reps: one text prompt with Autodesigner, one hand-drawn sketch scan, one screenshot scan, and one clickable prototype. During those reps, save the prompts that gave you clean results as reusable templates, and save your best buttons and cards as component templates so your personal kit grows with you. Need guidance? Use the Uizard Help Center and video tutorials, the Uizard blog and YouTube channel, and community examples. Then build your foundations: layout fundamentals, accessibility basics like readable contrast and tap targets, and design-system thinking. Remember, AI output is a draft, so always review, adjust, and update the content yourself before sharing. Your deliverable is a shareable, reviewed prototype. So before you leave, recap your plan, lock in your first session this week, and ship that first screen. Thank you for joining, and go build something you can show.
 youtube.comuizard.iosupport.uizard.io+22 min
Take the deck with you
Download this course as a file — free, no sign-up needed.
- PDF handoutEvery slide page, ready to print or share.15 pages · 2.9 MBDownload
- Narrated PowerPointThe deck that presents itself — every slide carries the digital human's narration video.15 pages · 24.7 MBDownload
- PowerPoint slidesThe full deck as a .pptx — open it in PowerPoint, Keynote, or Google Slides.15 pages · 2.8 MBDownload
Free to use in your own training — please keep the PersonWise credit page at the end.
Have your own deck? Turn it into a course
Sources consulted
Web sources consulted while building this course.
- Uizard | UI Design Made Easy, Powered By AI | Sign Up Free — uizard.io
- Uizard Pricing | Explore Our Pricing Plans | Uizard — uizard.io
- Uizard Vs Design Tools | Uizard — uizard.io
- Autodesigner 2.0 is here! — uizard.io
- App Mockup Tool | Mockup Software | Uizard — uizard.io
- Figma’s 2026 AI Report: Can AI Help Us Collaborate Better? | Figma Blog — figma.com
- AI in Design 2026: The inflection point is here — designerfund.com
- AI in UX: Work Is Faster, But Practitioners Have Mixed Feelings - NN/G — nngroup.com
- State of Prototyping: Spring 2026 — uxtools.co
- Design-to-Code: A Handoff Workflow Reimagined with AI — blogs.cisco.com
- A Beginner's Guide to Uizard (Full Walkthrough) — youtube.com
- How To Use And Edit UI Design Templates | Uizard — uizard.io
- Getting started: Video tutorials | Uizard Help Center — support.uizard.io
- Managing component templates | Uizard Help Center — support.uizard.io
- Managing components | Uizard Help Center — support.uizard.io
- A Guide To Using Prompts In Uizard | AI Design | Uizard — uizard.io
- What Is Prompt Engineering? | AI Prompt | Uizard — uizard.io
- Uizard Guide: AI-Powered Design, Wireframes & Mockups | Klero — klero.ai
- Uizard Complete Guide | AI UI Design Tool 2025 — artificial-intelligence-wiki.com
- Uizard Review: Can It Really Generate a Usable UI? — mspoweruser.com