Homelab DevOps Learning Workflow
Begin
14 pages · ~28 min
Homelab DevOps Learning Workflow
Hands-on training for aspiring DevOps engineers on building a homelab to practice real-world workflows, tools, and automation skills.
What you’ll learn
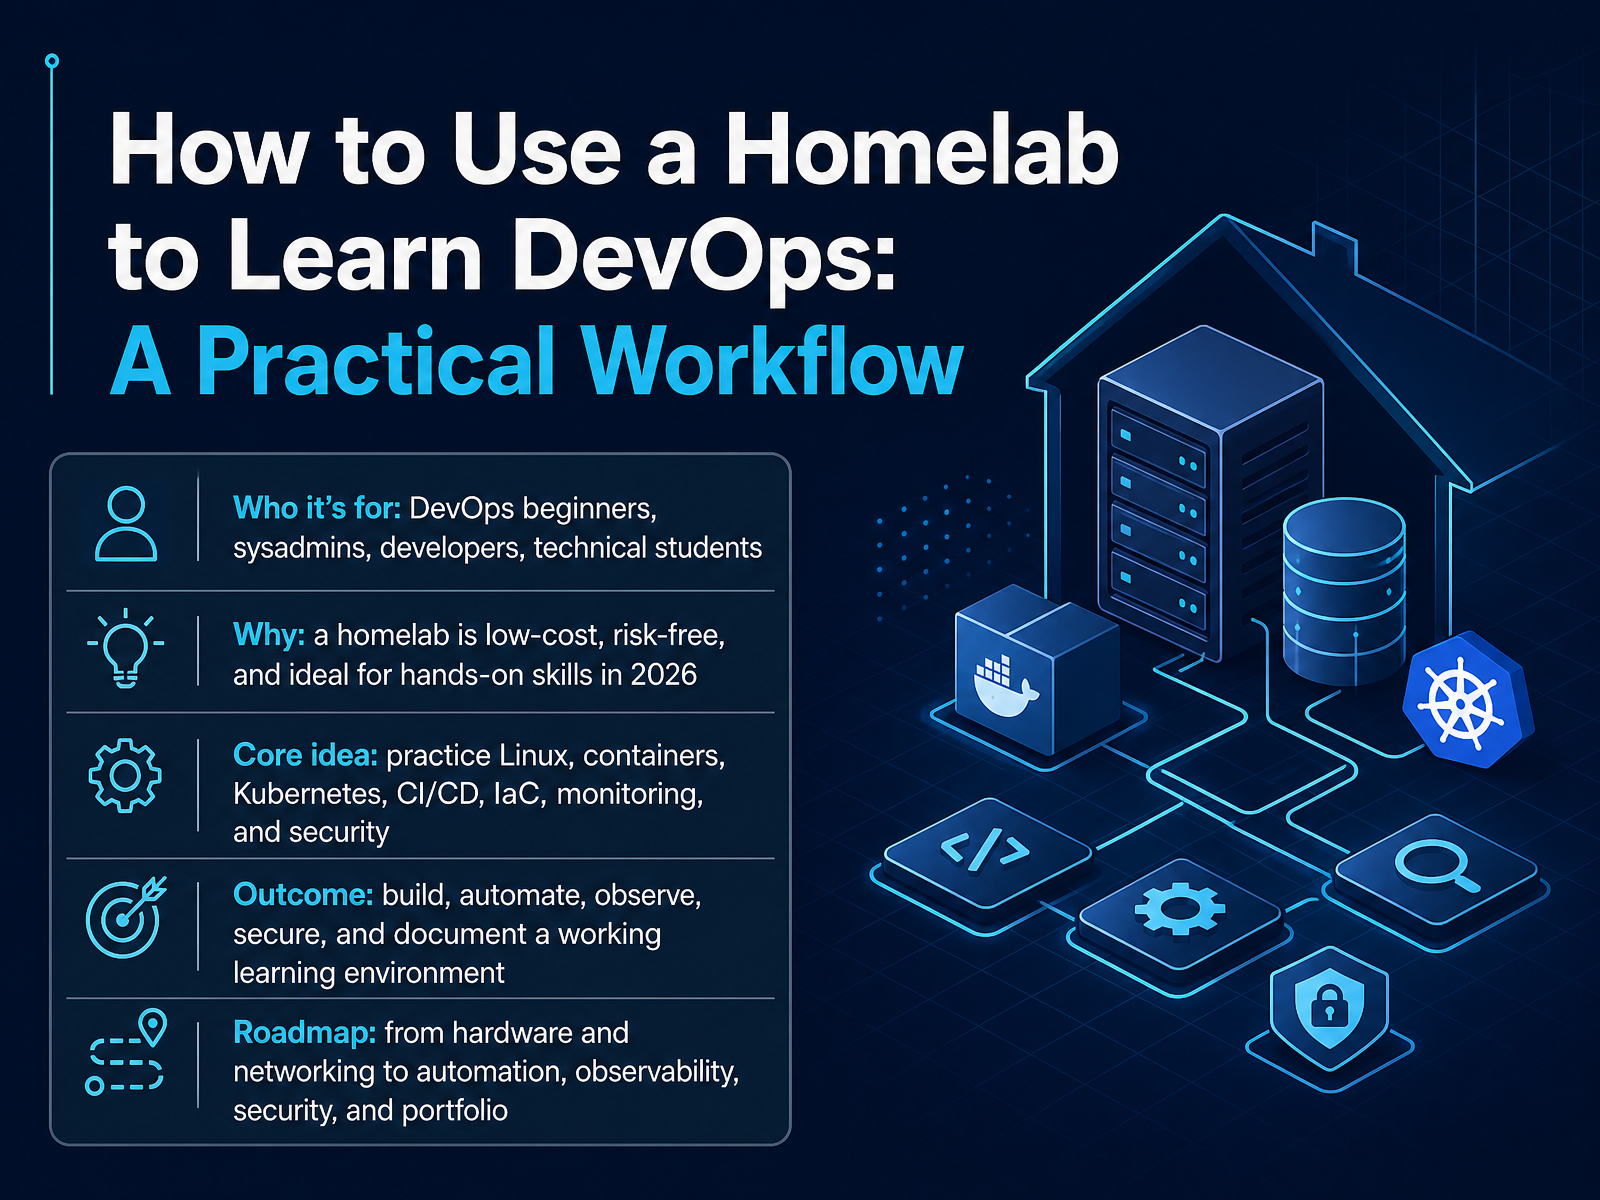
- 01How to Use a Homelab to Learn DevOps: A Practical WorkflowWelcome. If you want to break into DevOps, or level up your current skills, you’ve come to the right place. This course is built for beginners, sysadmins, developers, and students who learn best by doing. You don’t need expensive gear or a company budget. You just need a homelab. Think of it as your own private sandbox: a low-cost, risk-free environment where you can break things, fix them, and learn without fear of taking down production or running up a cloud bill. Over the next few modules, we’ll build a complete learning environment. You’ll practice Linux, containers, Kubernetes, CI/CD, infrastructure as code, monitoring, and security. The outcome is simple: you’ll design, automate, observe, and secure a working lab that you can show off in interviews. Let’s begin with the big picture and what a homelab actually is, plus everything it can teach you.chrisnortonjr.comtechpulsesite.comfuturion.blog+21 min
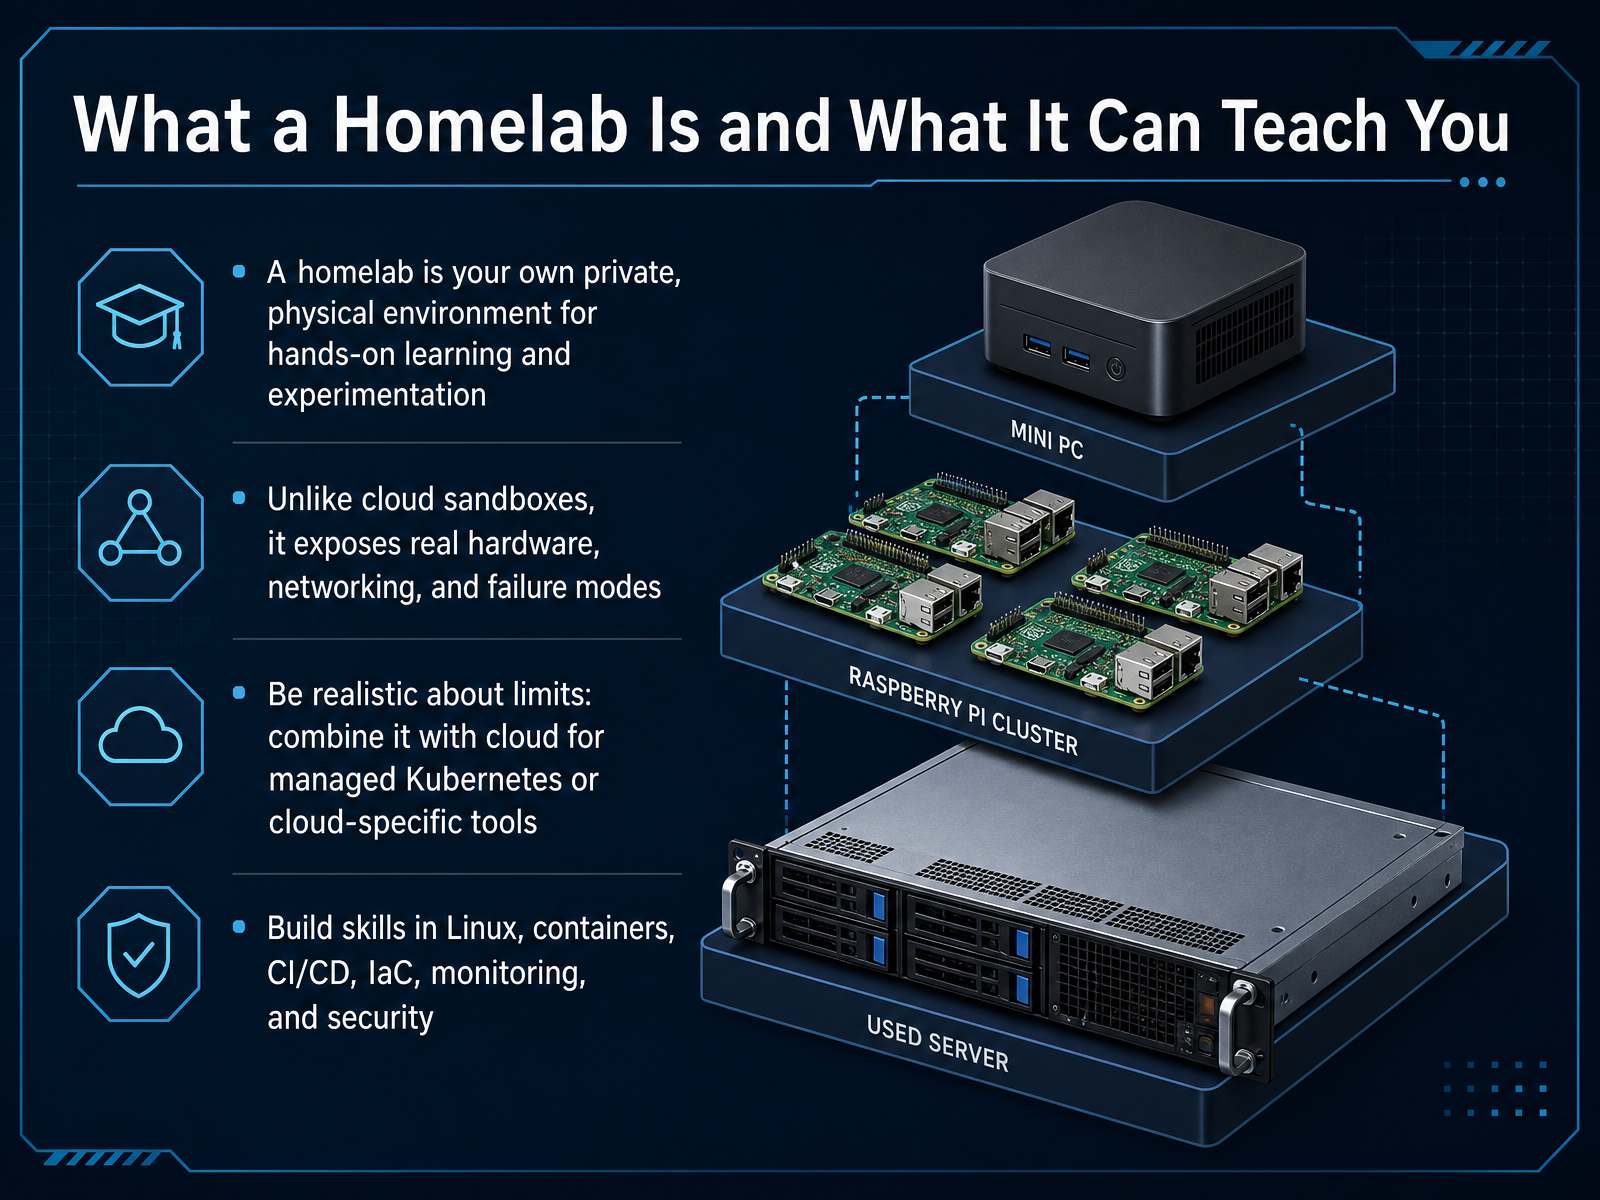
- 02What a Homelab Is and What It Can Teach YouLet's talk about what a homelab really is. It's your own private, physical environment for hands-on learning. It's a safe place to break things and make mistakes without risking a company's production servers. Unlike cloud sandboxes, a homelab exposes you to real hardware and real networking. You'll feel what it's like when a disk fails or a service goes down. That experience is invaluable. But be realistic about its limits. Use cloud for managed Kubernetes or for tools that only exist there. The best approach is a hybrid. Build the foundation locally on real wires, then expand into the cloud for cloud-specific practice. So, what can you actually learn here? You'll build skills in Linux, containers, CI/CD pipelines, infrastructure as code, and monitoring. This is where the theory becomes practical, and failure becomes your best teacher. Now, the next big step is choosing the right hardware and virtualization setup to make all this happen.
 chrisnortonjr.comtechpulsesite.comfuturion.blog+21 min
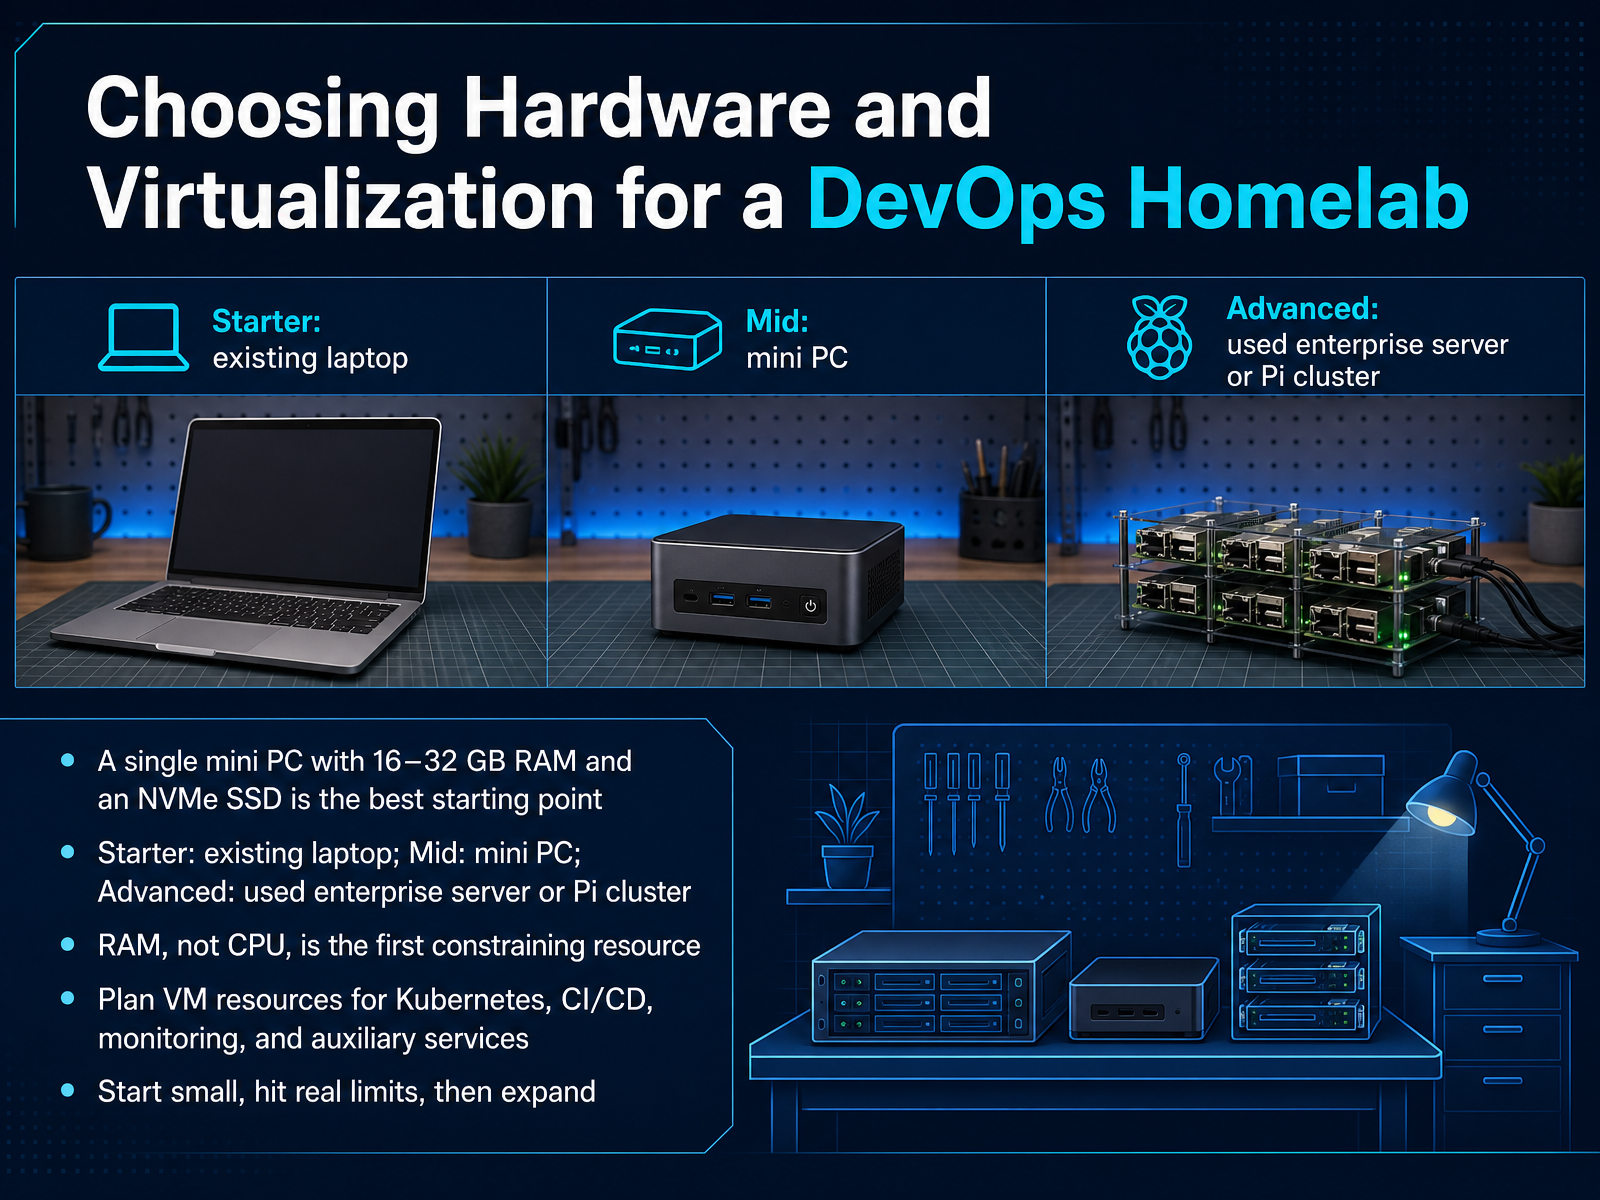
 - 03Choosing Hardware and Virtualization for a DevOps HomelabLet's talk hardware, but let's keep it simple. You do not need a rack of enterprise servers to start. The best starting point is a single mini PC with 16 to 32 gigabytes of RAM and a fast NVMe SSD. If you already have an older laptop collecting dust, that works perfectly fine for day one. A used mini PC is the ideal middle ground. And as you get more serious, you can look at used enterprise servers or a small cluster of Raspberry Pis. Here is the key insight: in a homelab, RAM is almost always your first bottleneck, not your CPU. So plan your memory carefully. You will want to run virtual machines for Kubernetes, CI/CD pipelines, monitoring tools, and supporting services. My advice is to start small. Hit real limits, feel the pain of a resource crunch, and then expand when you understand exactly what you need. Overbuilding early just adds complexity. Starting lean keeps the focus on learning. Next, we will move on to designing your network, covering VLANs, DNS, DHCP, and routing.
 chrisnortonjr.comtechpulsesite.comfuturion.blog+21 min
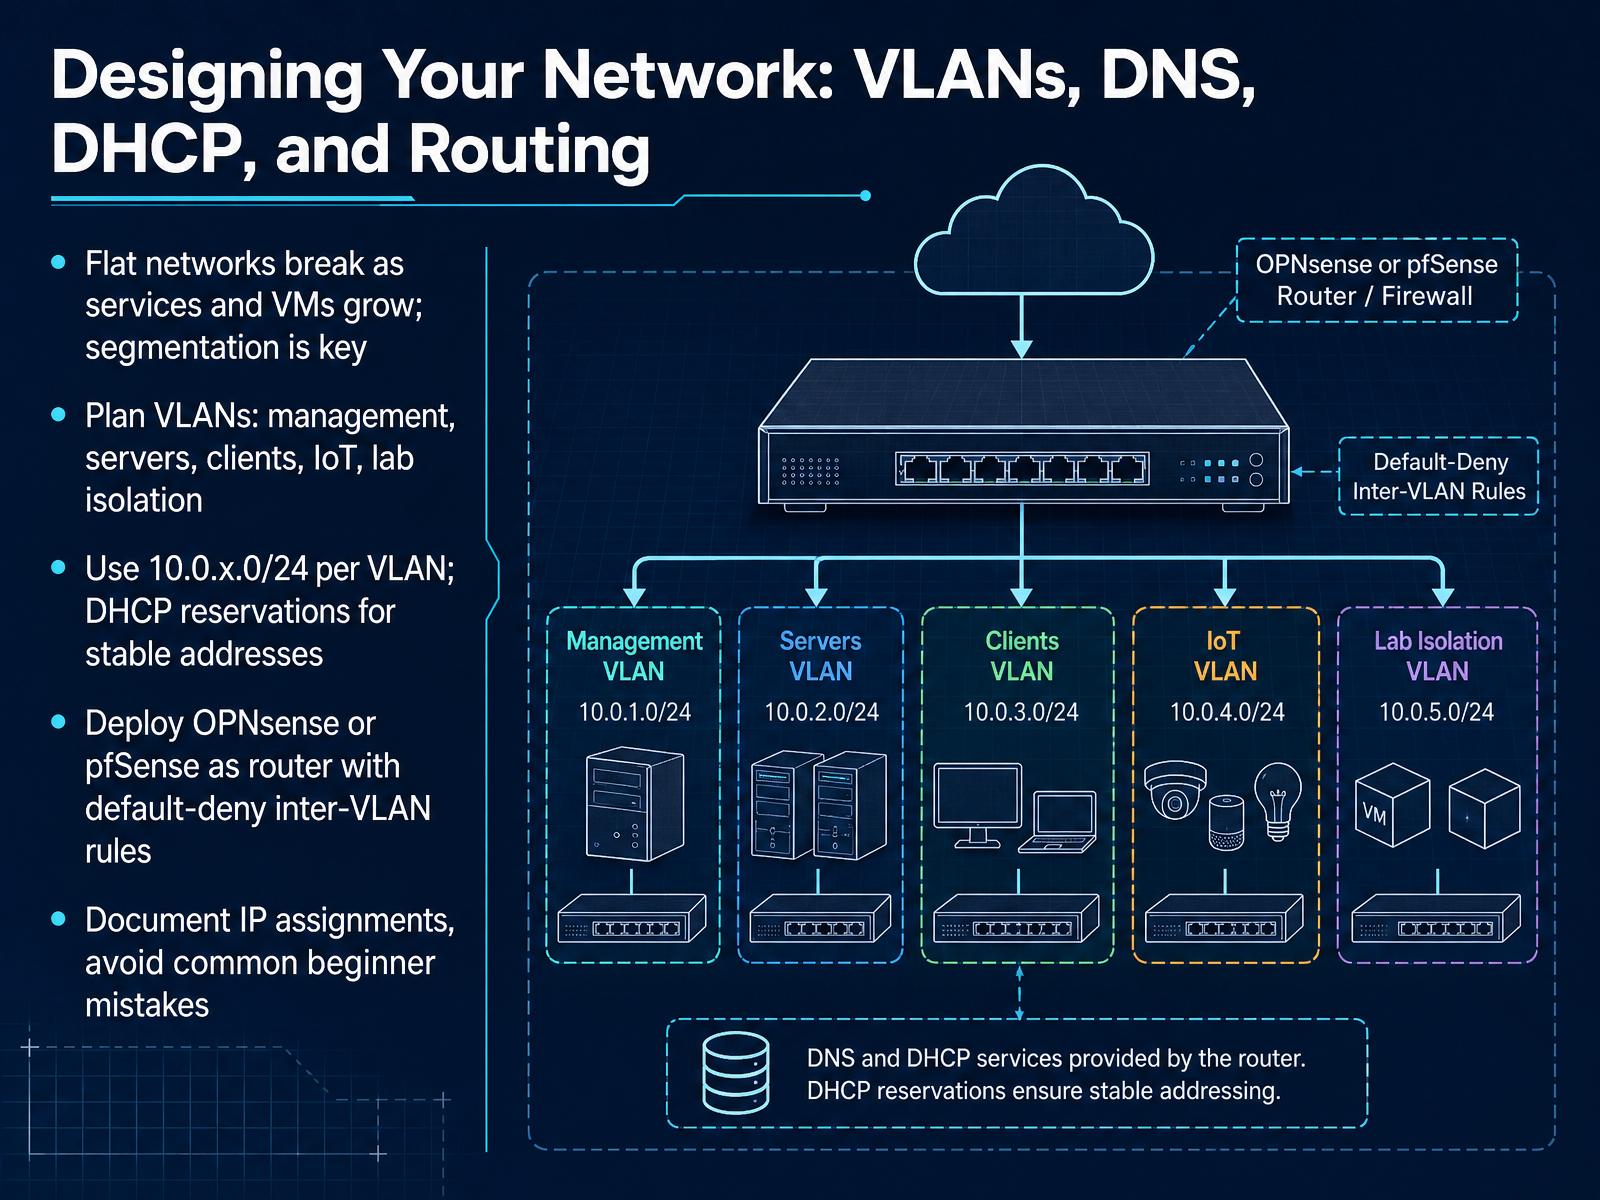
 - 04Designing Your Network: VLANs, DNS, DHCP, and RoutingNow let's talk about designing your network—the backbone of your homelab. A flat network, where everything shares one subnet, feels fine at first. But as you add services and virtual machines, it becomes chaotic and insecure. Segmentation is the fix. Start by planning VLANs. A practical starting point is three: one for trusted devices like your laptop, one for servers, and one for IoT gadgets that you don't fully trust. Later, add a guest network and a management VLAN for your switches and hypervisor. For IP addressing, avoid the default 192.168.1.0 range; it clashes with VPNs and hotel Wi-Fi. Instead, use 10.0.x.0 per 24 for each VLAN, like 10.0.10.0 for clients and 10.0.20.0 for servers. Assign IPs with DHCP reservations so important machines never change addresses. Your router should be a software firewall like OPNsense or pfSense. Set a default-deny stance between VLANs—block everything by default, then allow only what you need, like your laptop reaching your media server on port 32400. Finally, document every IP and VLAN in a spreadsheet. Future you will be grateful. Next, let's move to Linux foundations, where you'll put these networking skills to work on the command line.
 speedtesthq.comsillectus.combudgethomelab.com+21 min
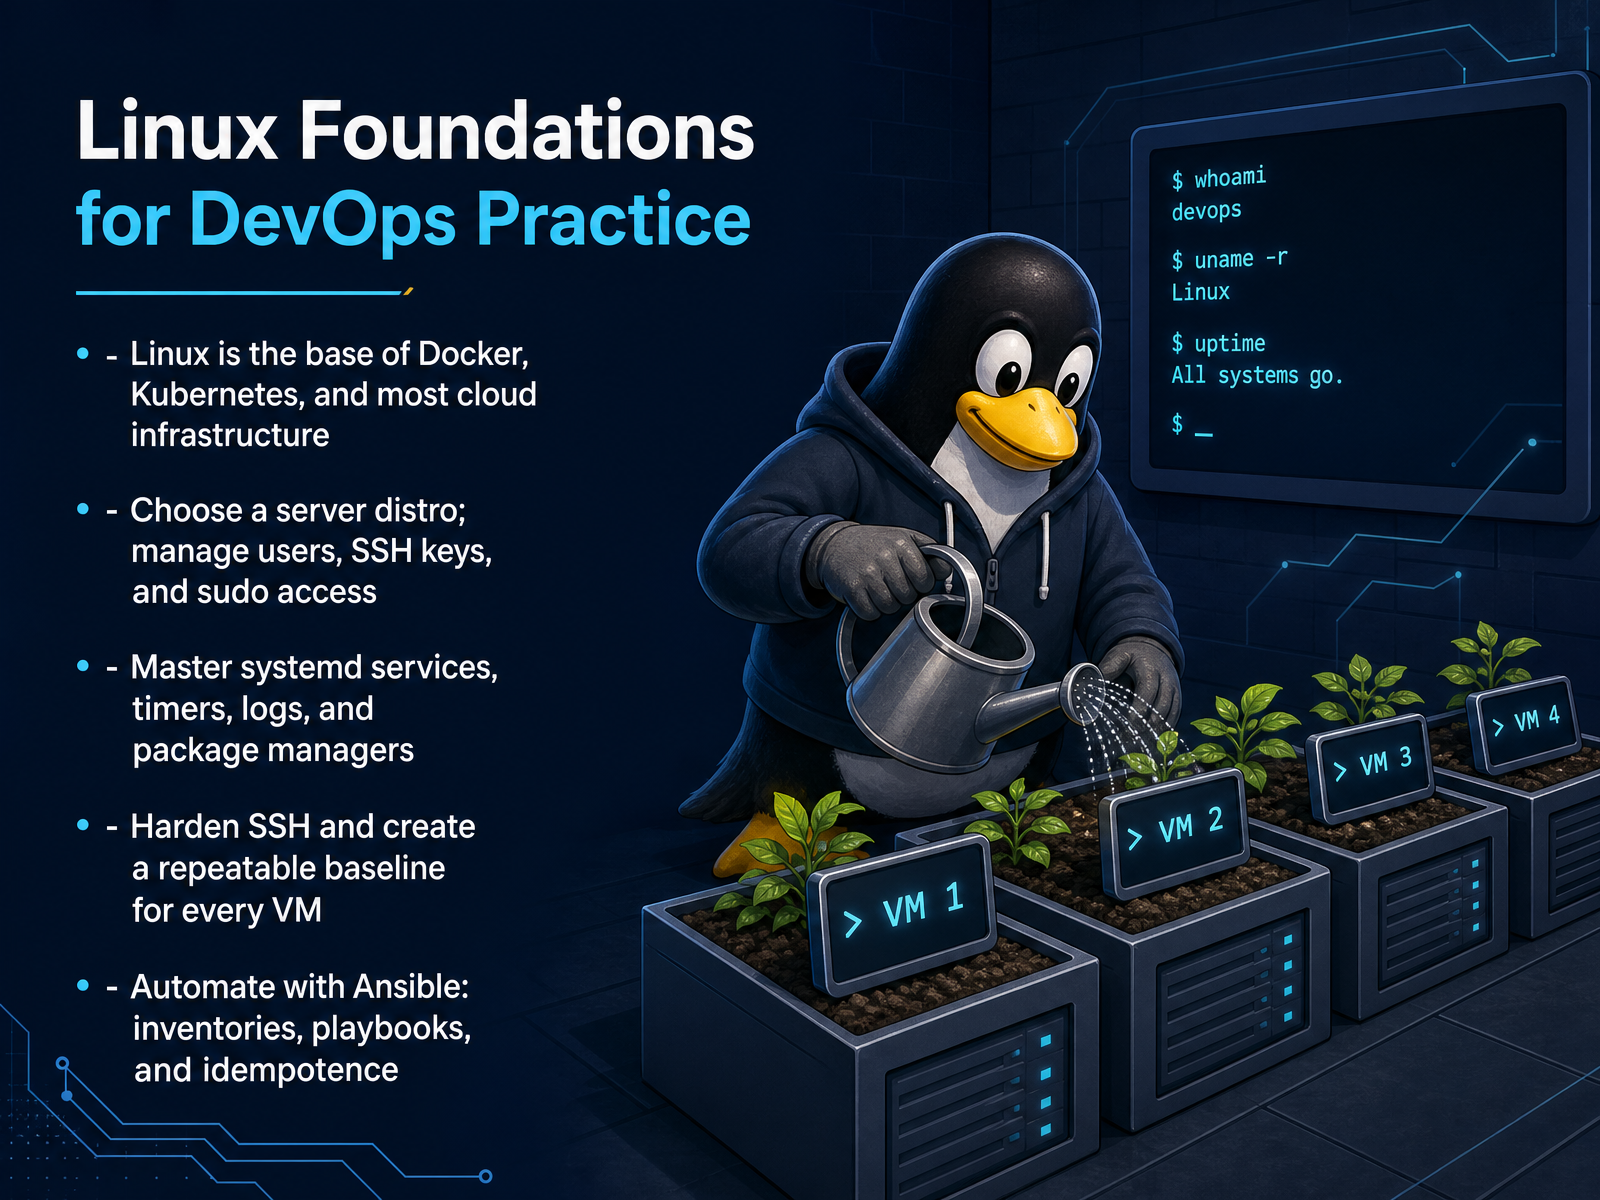
 - 05Linux Foundations for DevOps PracticeLet's talk about Linux, because this is the engine under the hood of everything we do in DevOps. Docker containers, Kubernetes nodes, and most cloud servers all run on Linux, so being comfortable at the command line is non-negotiable. Start by picking a standard server distribution like Ubuntu Server and get familiar with the basics: managing users, setting up SSH keys, and configuring sudo access. Then, learn how systemd works. That's the system that starts services, keeps them running, and collects their logs. For example, instead of manually restarting an application after a crash, you write a systemd service file that tells the system to restart it automatically. Next, harden your SSH setup. Disable root login, use key-based authentication instead of passwords, and validate your config changes before reloading the daemon. A small typo there can lock you out of your machine. Once you have one VM configured the right way, make that process repeatable. That's where Ansible comes in. You write an inventory listing your servers, create a playbook that defines the desired state, and Ansible makes it happen over SSH. The beauty is that it's idempotent, meaning you can run the same playbook over and over, and it only makes changes when the system doesn't already match your definition. This keeps every server identical and eliminates manual config drift. Master these Linux fundamentals, and you've built a solid foundation for automating everything else. Up next, we'll look at how to automate the setup of your VMs and systems using Infrastructure as Code tools.
 opscanopy.comdevopsschool.orgredhat.com+22 min
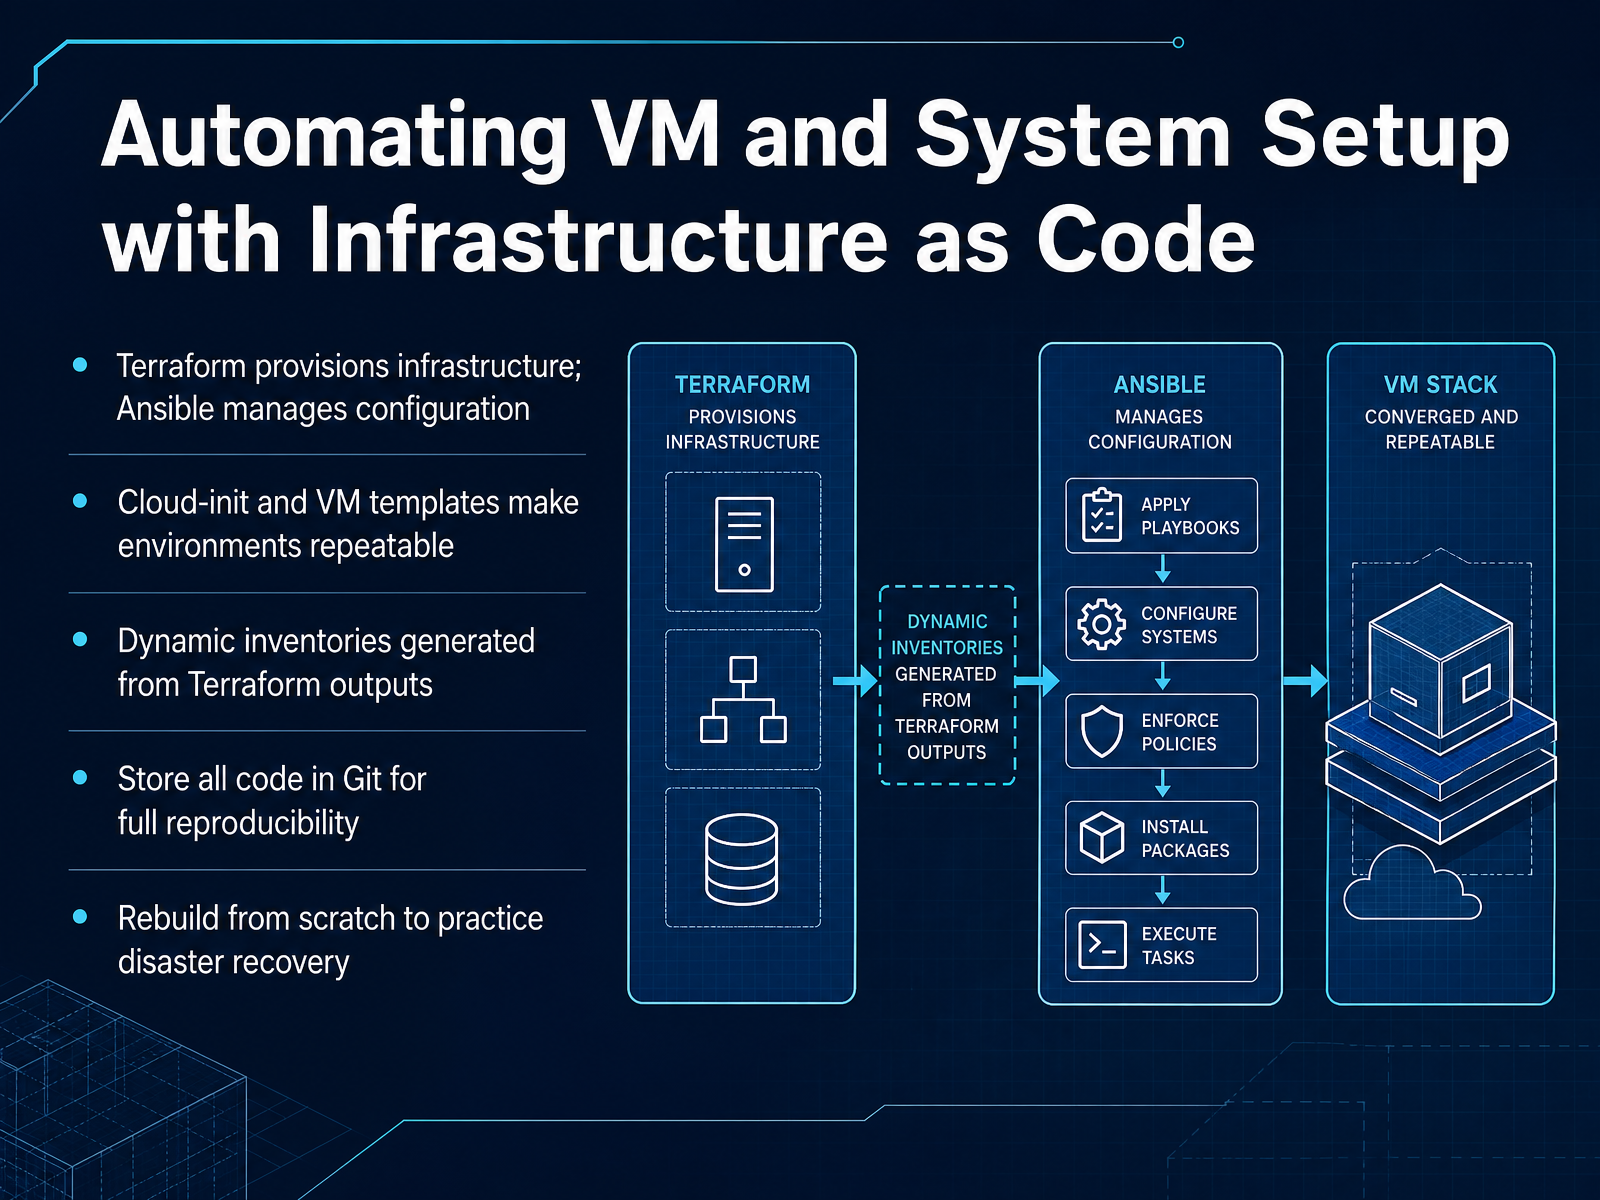
 - 06Automating VM and System Setup with Infrastructure as CodeNow let's talk about automating the boring parts. Once you've manually set up a few VMs, you'll notice the same steps happening every time. That's your cue to start using Infrastructure as Code. The standard pairing is Terraform plus Ansible. Terraform handles the provisioning side, like creating the VM, its disks, and its network. Ansible handles what happens after, like installing packages, setting up services, and locking down the system. You could say Terraform asks, 'Does this VM exist?' while Ansible asks, 'Is this VM set up correctly?' To connect them, you can generate an Ansible inventory from Terraform's output. And there's a timing trick worth knowing. Terraform reports success the moment the VM is created, not when SSH is ready. So add a small wait task at the start of your playbook to give cloud-init time to finish. The real payoff of this workflow is repeatability. Keep all of your code in Git, and you can destroy everything and rebuild it from scratch, which is the best disaster recovery practice you can get in a homelab. Before moving on to Containers and Kubernetes in Your Homelab, just remember, the goal is to make accidental infrastructure impossible, and intentional infrastructure a few commands away.
 computingforgeeks.comjrtashjian.comgithub.com+21 min
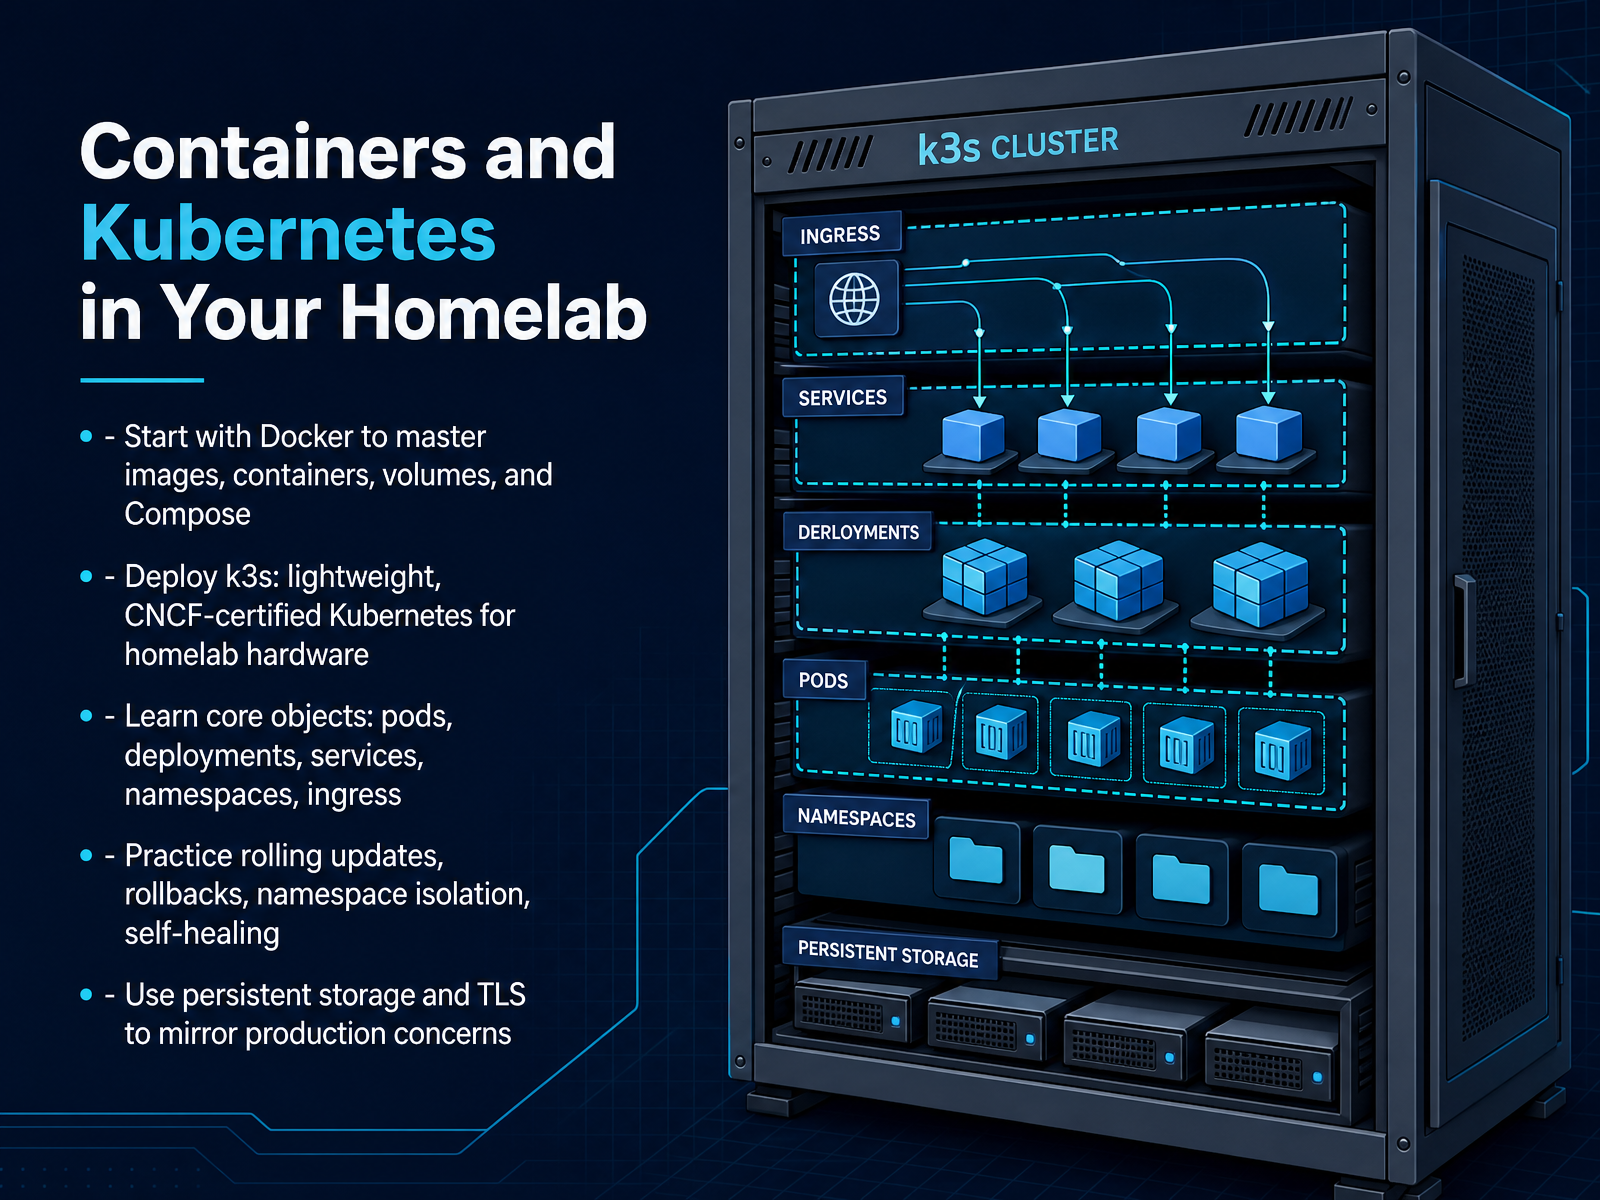
 - 07Containers and Kubernetes in Your HomelabOnce your homelab runs Docker reliably, the next step is Kubernetes. Start with k3s. It is a lightweight, CNCF-certified distribution, and you can install it with one command. It bundles everything you need, including an ingress controller and storage, so you focus on learning, not setup. First, get comfortable with the core objects. Pods are the smallest unit Kubernetes schedules. Deployments manage replicas and handle rolling updates. Services give stable addresses to ephemeral pods. Namespaces keep environments isolated, and ingress exposes apps to the outside world. Here is the key practice: deploy a small app with two replicas, then intentionally break one. Watch Kubernetes heal itself. Update the image and perform a rollback. Move that app into its own namespace and observe the isolation. Finally, mirror production by adding persistent storage and TLS certificates. You can use cert-manager for automated certificates, even in a homelab. If you are wondering whether a single node is enough, yes, it is. One node is a complete, production-capable cluster. You can learn everything on it and add worker nodes later. A running cluster is your sandbox to break, fix, and understand. That is where the real learning happens. Up next, we will connect this cluster to a building a local CI/CD pipeline.
 2 min
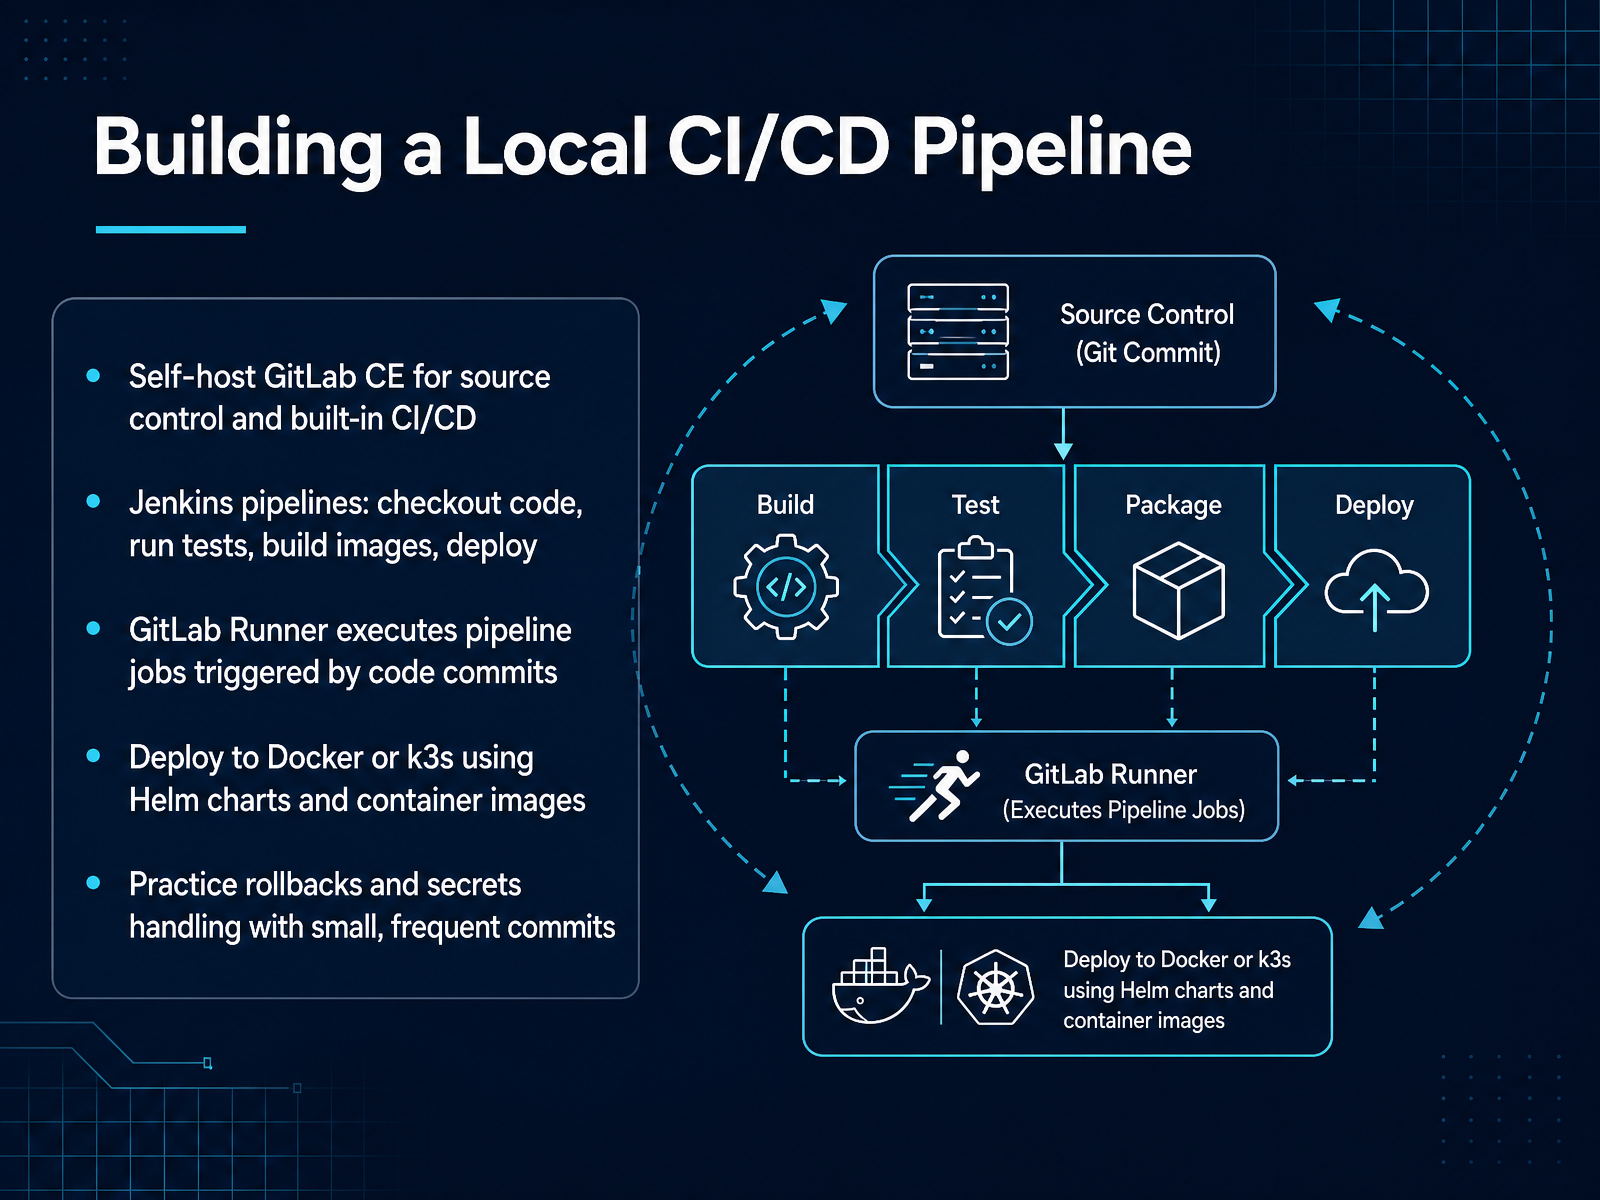
2 min - 08Building a Local CI/CD PipelineNow let's tie everything together with a local CI/CD pipeline. This is where your homelab starts to feel like a real DevOps playground. Start by self-hosting GitLab Community Edition on your cluster. It gives you source control, a container registry, and built-in CI/CD in one package. Pair it with Jenkins if you want, but GitLab alone can handle most of the work. The key piece is a GitLab Runner. Think of it as the worker that executes your pipeline jobs every time you push code. You define those jobs in a file called .gitlab-ci.yml at the root of your repository. Here's a simple workflow: you commit code, GitLab Runner picks it up, checks out the code, runs your tests, builds a Docker image, and then deploys it. For deployment, you can target Docker directly or use a lightweight Kubernetes distribution like k3s. Helm charts make packaging and versioning your app easier. As you get comfortable, practice rollbacks. Intentionally push a bad change, watch the pipeline fail or produce a broken version, then roll back using Helm or Git revert. Also, get into the habit of handling secrets early. Use GitLab CI/CD variables or a tool like Vault instead of hardcoding credentials. The great thing about a homelab is you can break things without real consequences. Keep your commits small and frequent. That way, every pipeline run is a lesson. Up next, we'll look at how to observe everything with metrics, logs, and alerting.
 2 min
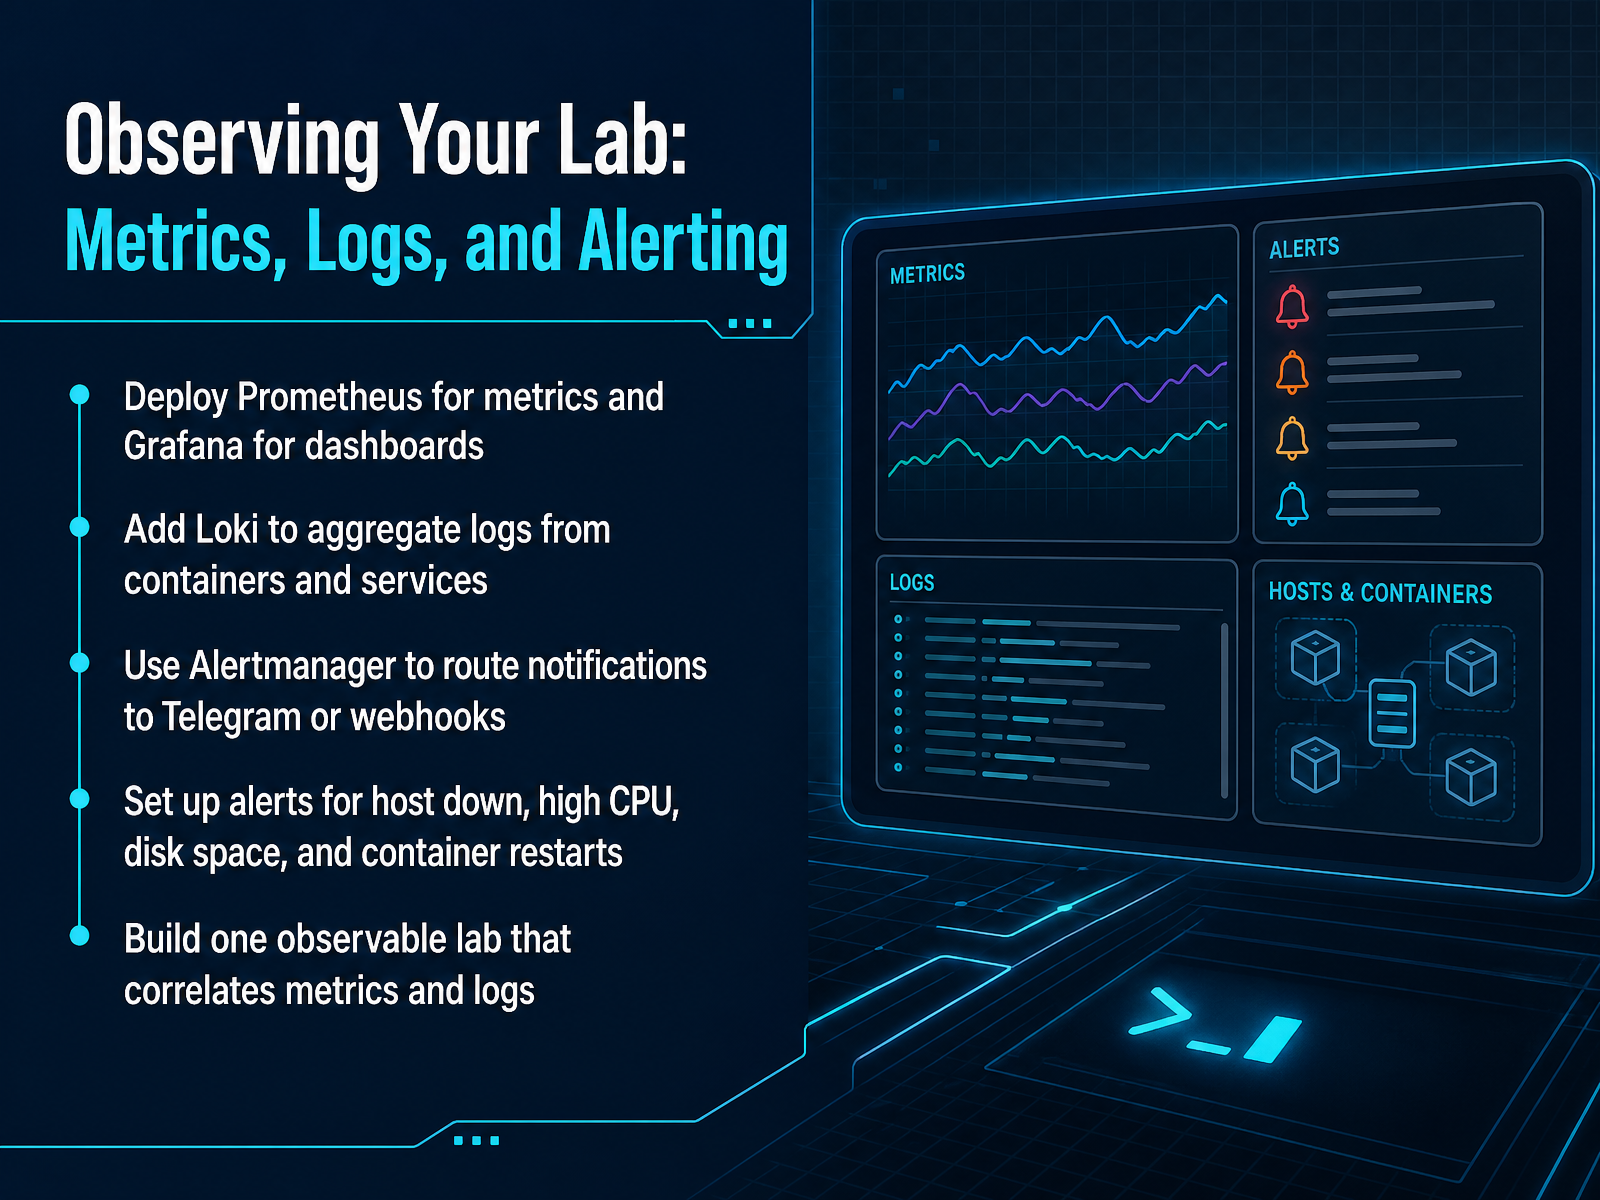
2 min - 09Observing Your Lab: Metrics, Logs, and AlertingNow let’s talk about making your homelab observable. You want to know what’s happening before something breaks. Start by deploying Prometheus to collect metrics, and Grafana to turn those numbers into dashboards you can actually read. Add Loki to pull logs from all your containers and services in one place. Then use Alertmanager to route alerts to your phone, maybe through Telegram or a simple webhook. Set up alerts for the things that matter: host down, high CPU, low disk space, and containers restarting repeatedly. The real payoff comes when you can look at a spike on a graph and, right beside it, see the logs that explain why. That correlation turns blind guessing into fast diagnosis. Once your stack is running, you’ll find yourself checking dashboards instead of SSHing into every box to grep logs. That’s the habit that makes you a better DevOps engineer. Next, we’ll look at securing your lab and troubleshooting when things don’t go as planned.
 2 min
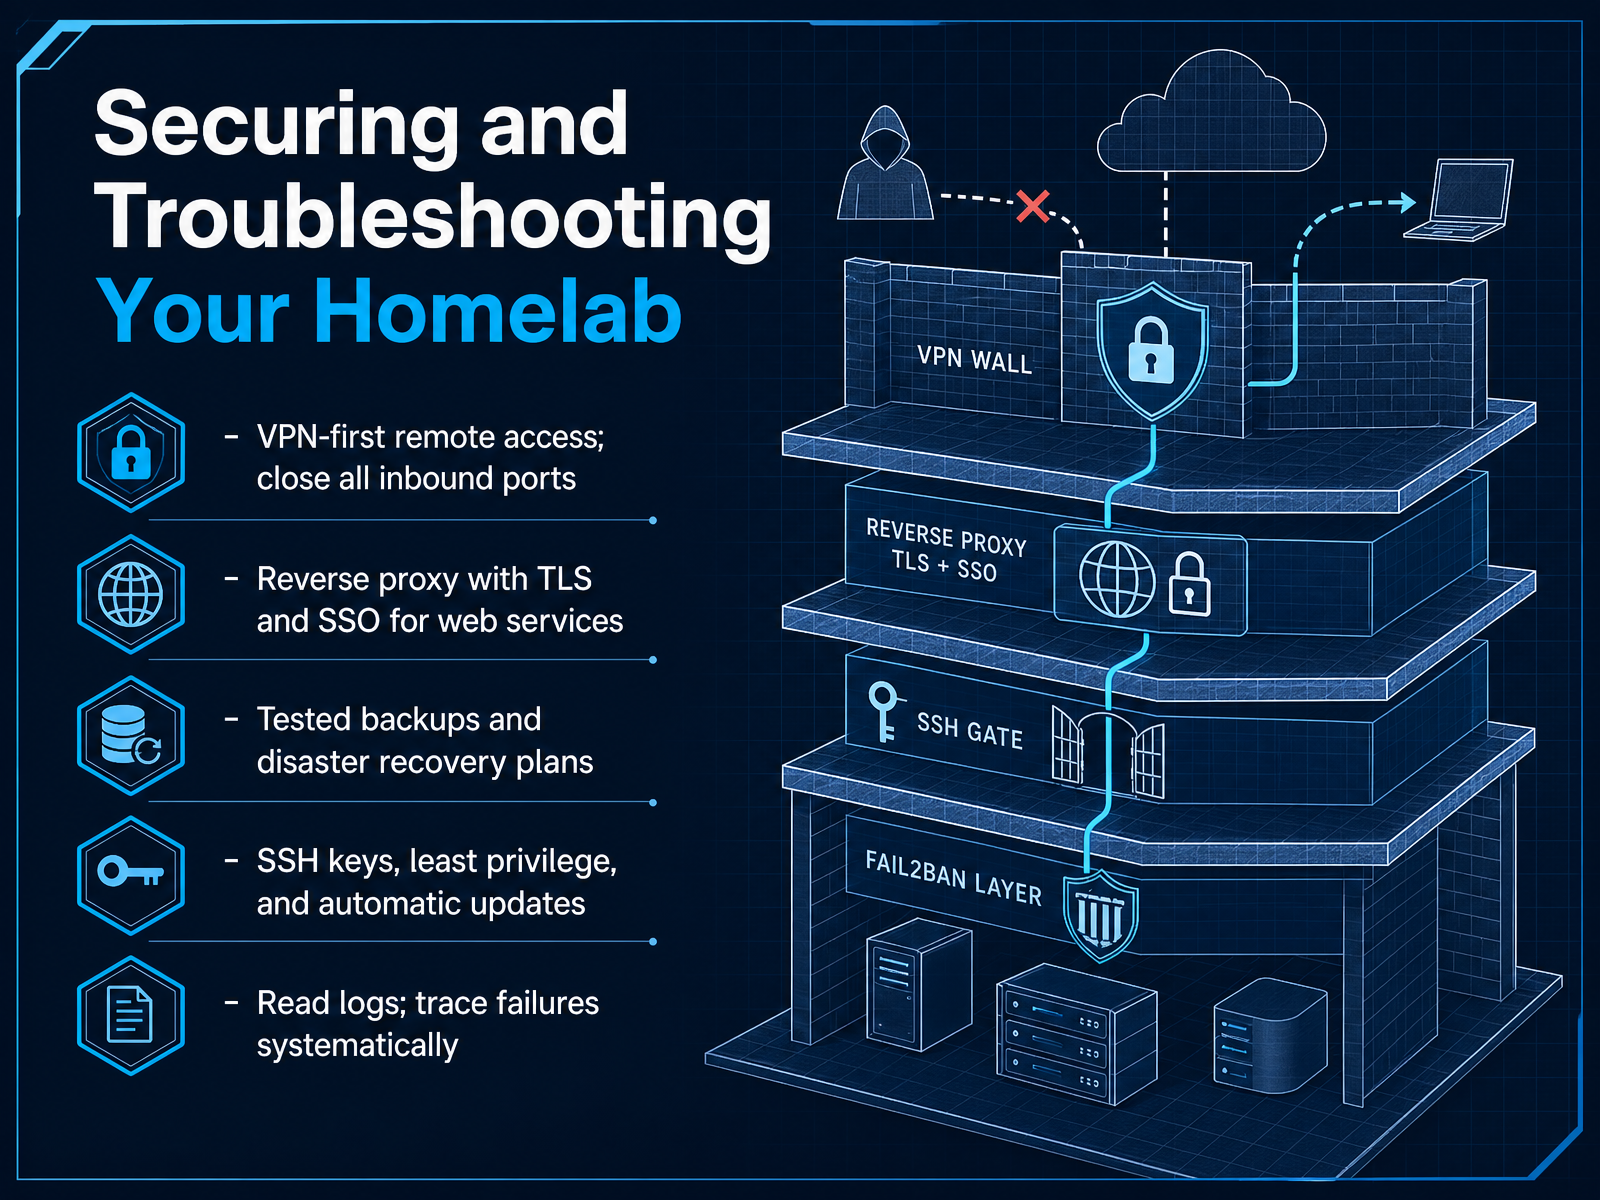
2 min - 10Securing and Troubleshooting Your HomelabNow let’s talk about keeping that homelab secure and knowing what to do when things break. First rule: don’t expose your services straight to the internet. Set up a VPN, like Tailscale or WireGuard, and close all inbound ports on your router. That way, you connect to your lab from anywhere without opening a single door to scanners. If you do need to share a web service, put a reverse proxy in front of it. Tools like Caddy or Nginx Proxy Manager handle HTTPS certificates automatically, and you can add a single sign-on layer like Authelia for extra protection. Next, make sure your backups are actually tested. A backup you’ve never restored is just a hope. Snapshots and offsite copies are great, but schedule a full restore drill now and then. Use SSH keys instead of passwords, give each user the least access they need, and enable automatic updates so you’re not relying on memory to patch things. When something fails, don’t guess. Read your logs, start with the most recent error, and trace the failure step by step. It’s a skill, and it gets faster with practice. Keep this baseline solid, and your homelab becomes a safe sandbox for learning. Next, let’s walk through a practical beginner workflow: your first DevOps project.
 budgethomelab.com2 min
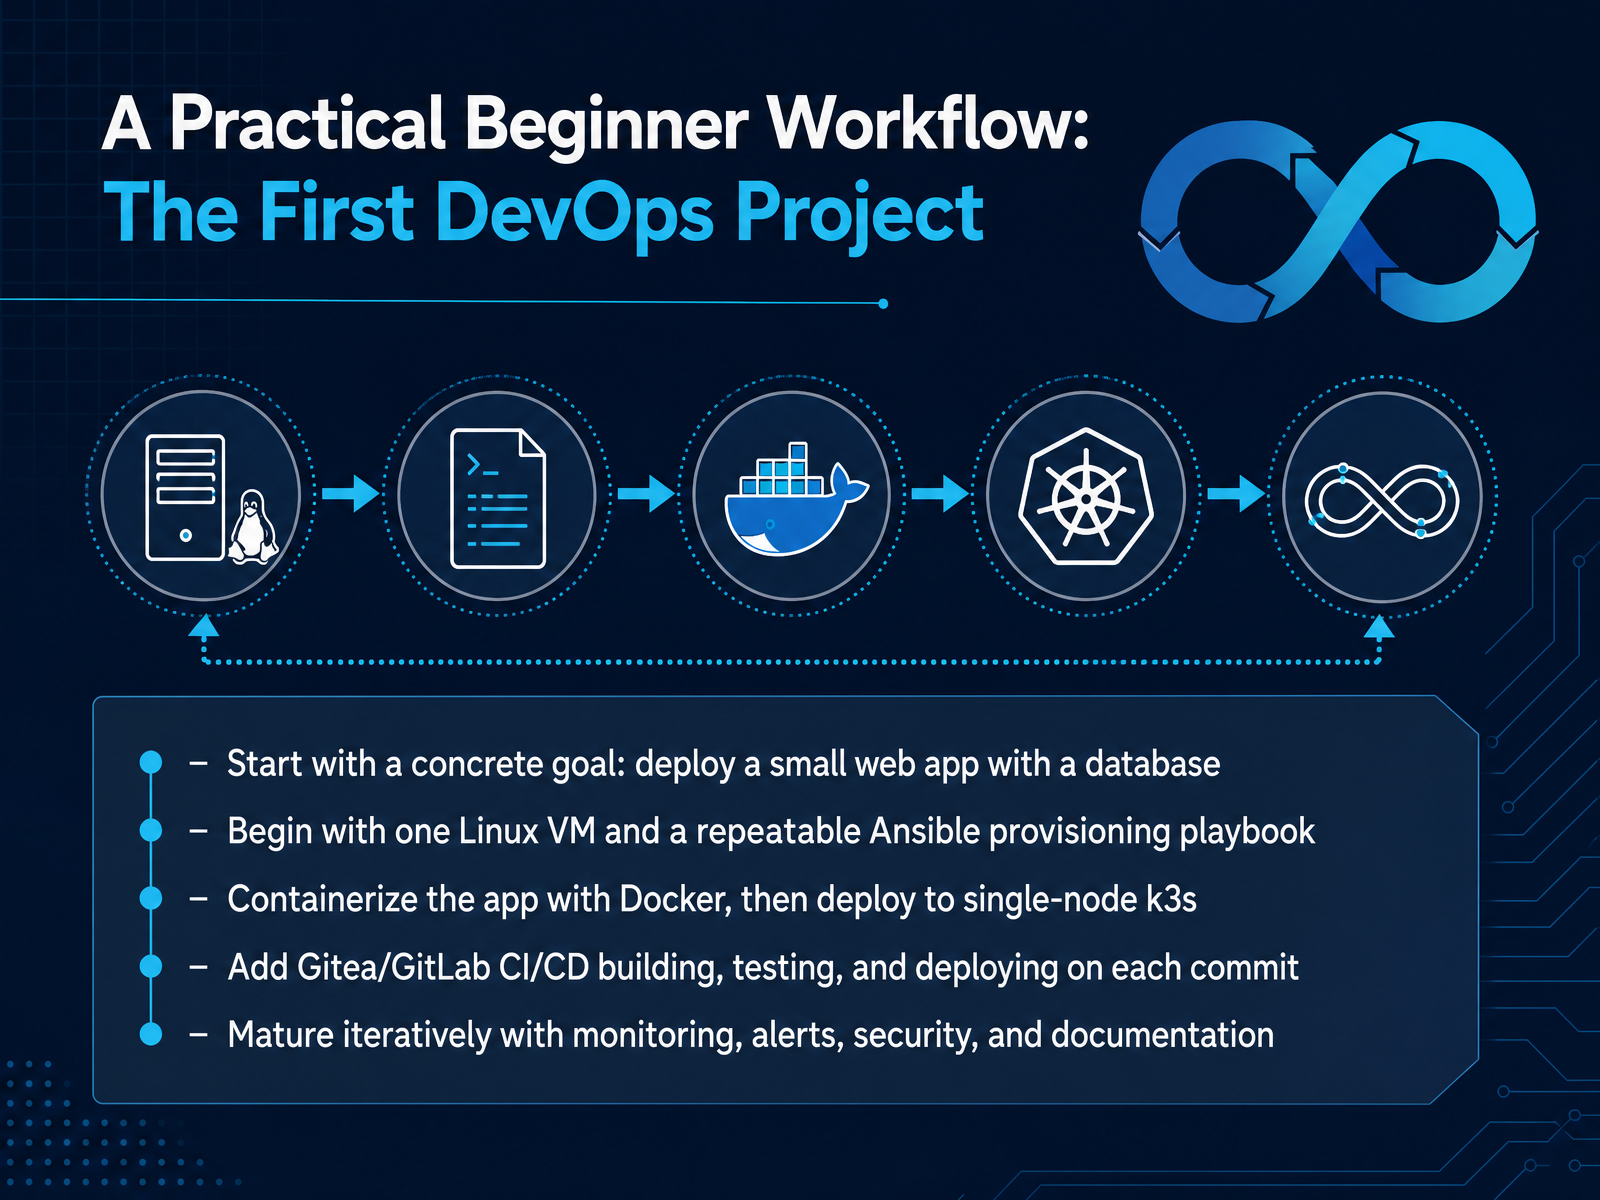
 - 11A Practical Beginner Workflow: The First DevOps ProjectNow that you understand the hardware and the tools, let's talk about how to actually start. The best way to learn is with a single, concrete project, not a sprawling infrastructure. Begin by defining a simple goal, for example, deploy a small web app that stores some data in a database. Look for something you actually want to use, it makes the process much more rewarding. Start with just one Linux virtual machine and write an Ansible playbook to provision it. This gets you comfortable with infrastructure as code and repeatable setup. Then, containerize your app with Docker. Once that runs smoothly, deploy that container to a lightweight Kubernetes distribution like k3s on that same machine, learning how the pieces fit together. Next, add a self-hosted Git platform like Gitea or GitLab and configure a CI/CD pipeline. Now, every commit you push will automatically build, test, and deploy your app. This is where the magic clicks. From here, mature your project iteratively. Add monitoring with Prometheus and Grafana, then set up alerts. Harden security and, most importantly, document what you have built. This workflow lets you start small and add complexity at your own pace, mastering each skill before moving to the next. As you finish this, the next big step is knowing what not to do, and that is exactly what we will cover next.
 chrisnortonjr.comtechpulsesite.comfuturion.blog+21 min
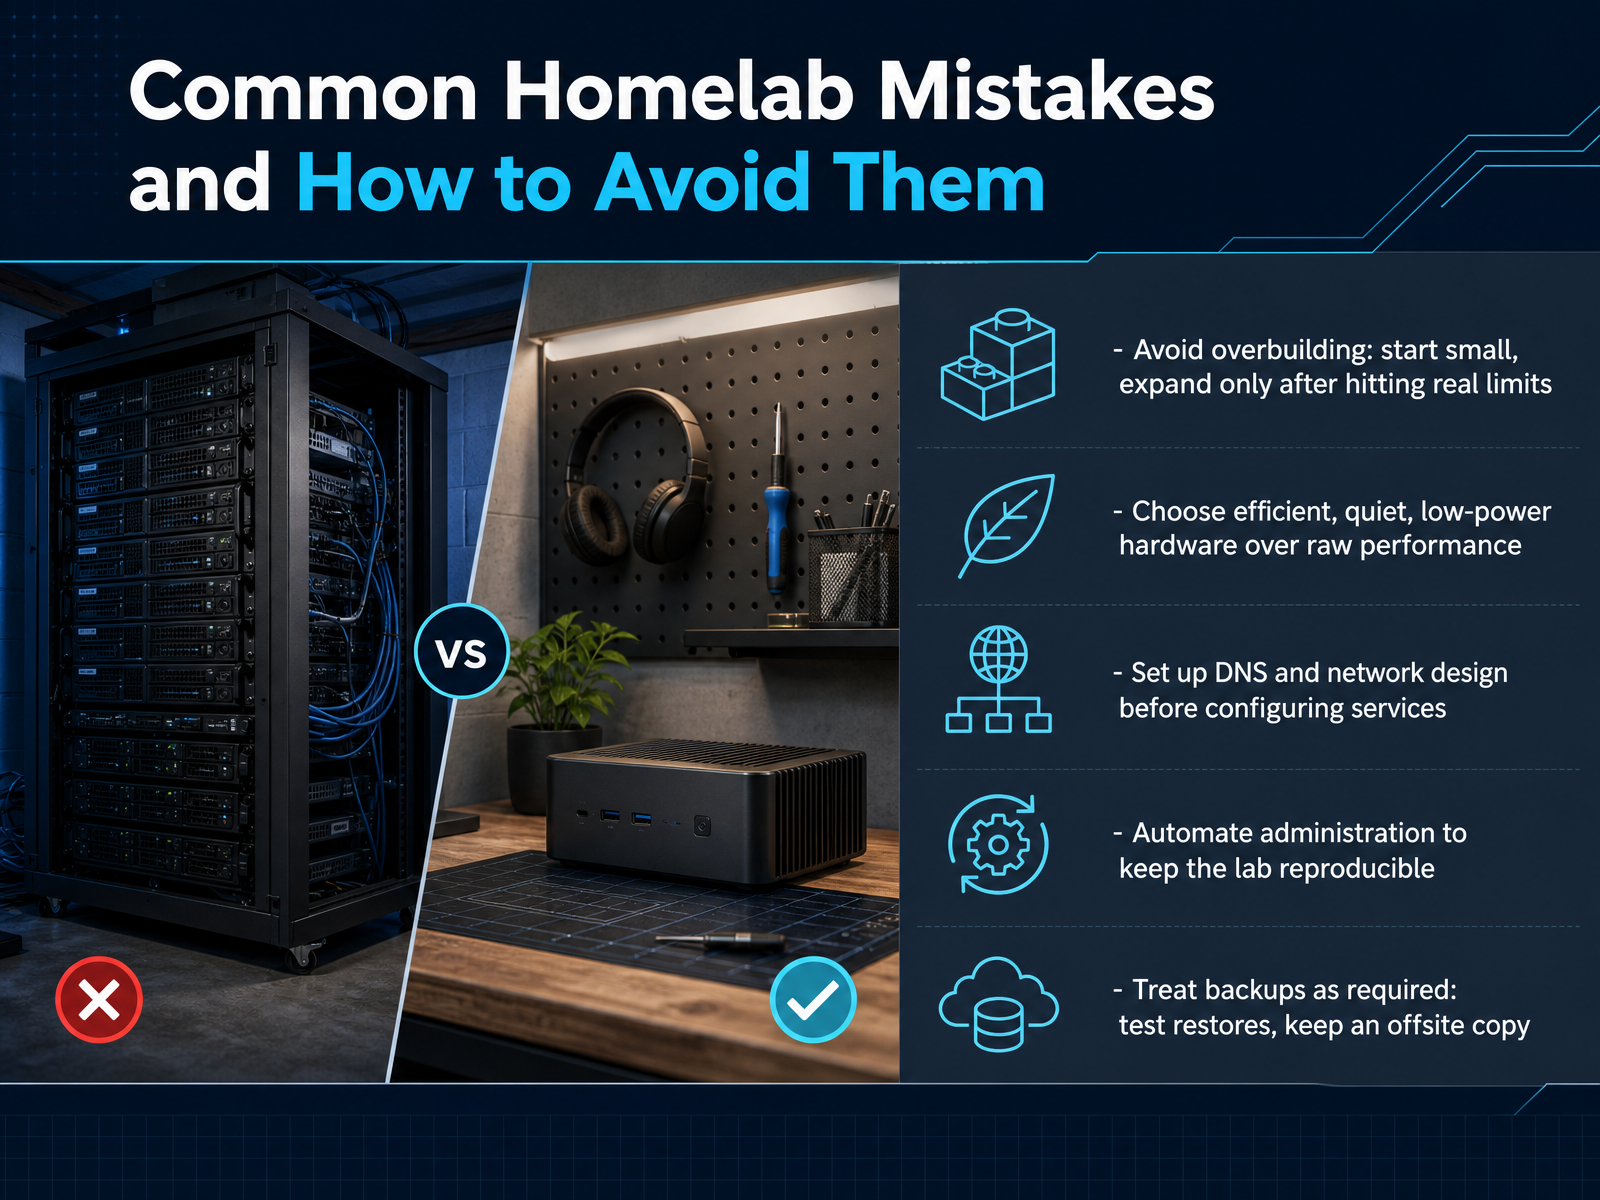
 - 12Common Homelab Mistakes and How to Avoid ThemNow, let's talk about the mistakes nearly every homelabber makes, so you can skip the painful part of the learning curve. First, avoid overbuilding. It's tempting to buy three servers on day one, but you will learn far more by starting with a single mini PC and expanding only after you hit real limits. Second, choose efficiency over raw performance. A quiet, low-power machine that runs 24/7 teaches you more than a loud, power-hungry beast you turn off to save your sanity. Third, this one is crucial: set up your DNS and network design before you configure services. Scrubbing raw IPs and ports from a dozen config files is miserable. Do the addressing and naming once, up front. Fourth, automate your administration. Write scripts for the boring tasks, like updates and backups. This is DevOps practice, after all. Finally, treat backups as non-negotiable. That means testing restores regularly and keeping an encrypted copy offsite. A backup you have never restored is just a hope. Keep the lab small, reproducible, and boring to operate. That boring foundation is what frees you up to take real risks. Up next, we will turn your working homelab into a DevOps portfolio that gets you hired.
 speedtesthq.comsillectus.combudgethomelab.com+22 min
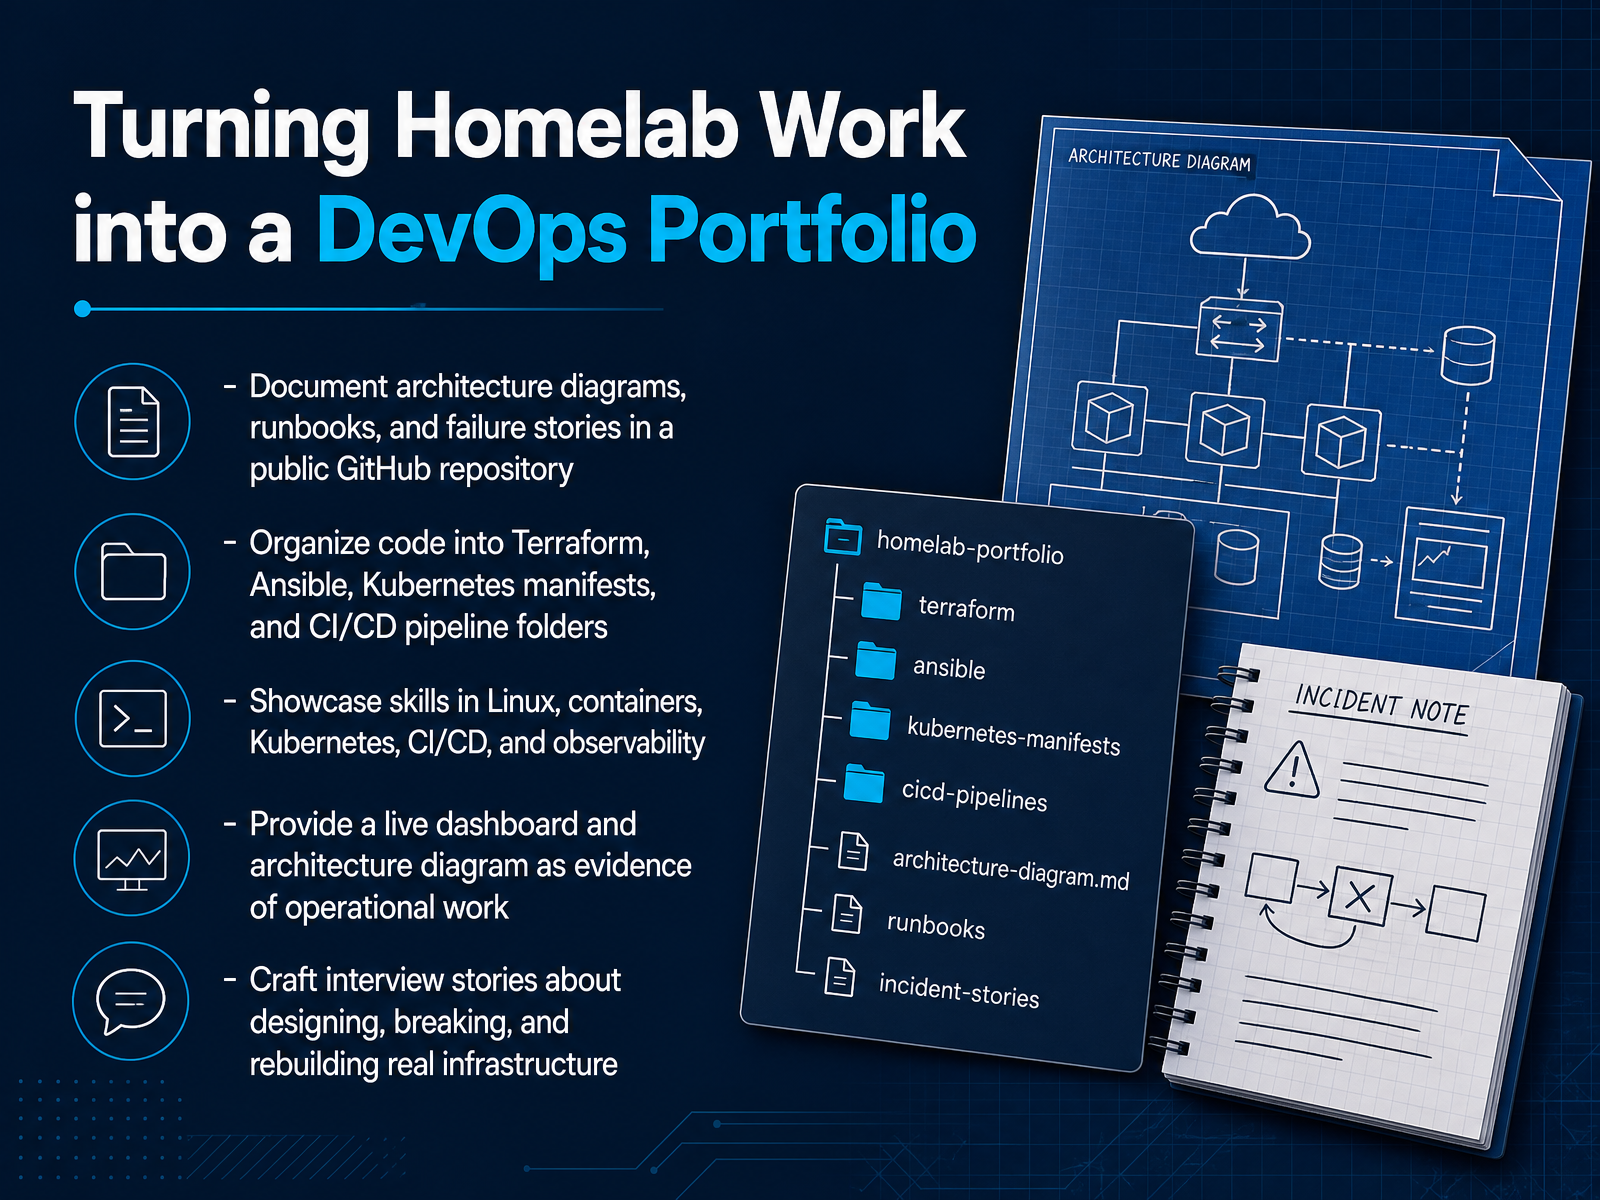
 - 13Turning Homelab Work into a DevOps PortfolioOnce your homelab is stable and automated, the smartest move is to turn it into proof of your skills. A public GitHub repository is your portfolio. Document your architecture diagrams, runbooks, and even your failure stories. Real-world troubleshooting shows more experience than a perfect setup ever will. Organize your code cleanly. Think separate folders for Terraform, Ansible, Kubernetes manifests, and CI/CD pipelines. This structure mirrors how real teams work, and it makes your work easy to review. Be sure to demonstrate your practical skills in Linux, containers, Kubernetes, CI/CD, and observability. You built it. Now let others see it. A live dashboard and clear architecture diagram are undeniable evidence that you operate real infrastructure. When interview time comes, you will have concrete stories to tell. Talk about why you designed things a certain way, how you broke your own setup, and exactly how you rebuilt it stronger. That narrative separates you from people who only followed tutorials. Long story short, your homelab is not just a hobby. It is your professional portfolio. Now, let us look at advanced paths and sustainable next steps to keep your momentum going.
 2 min
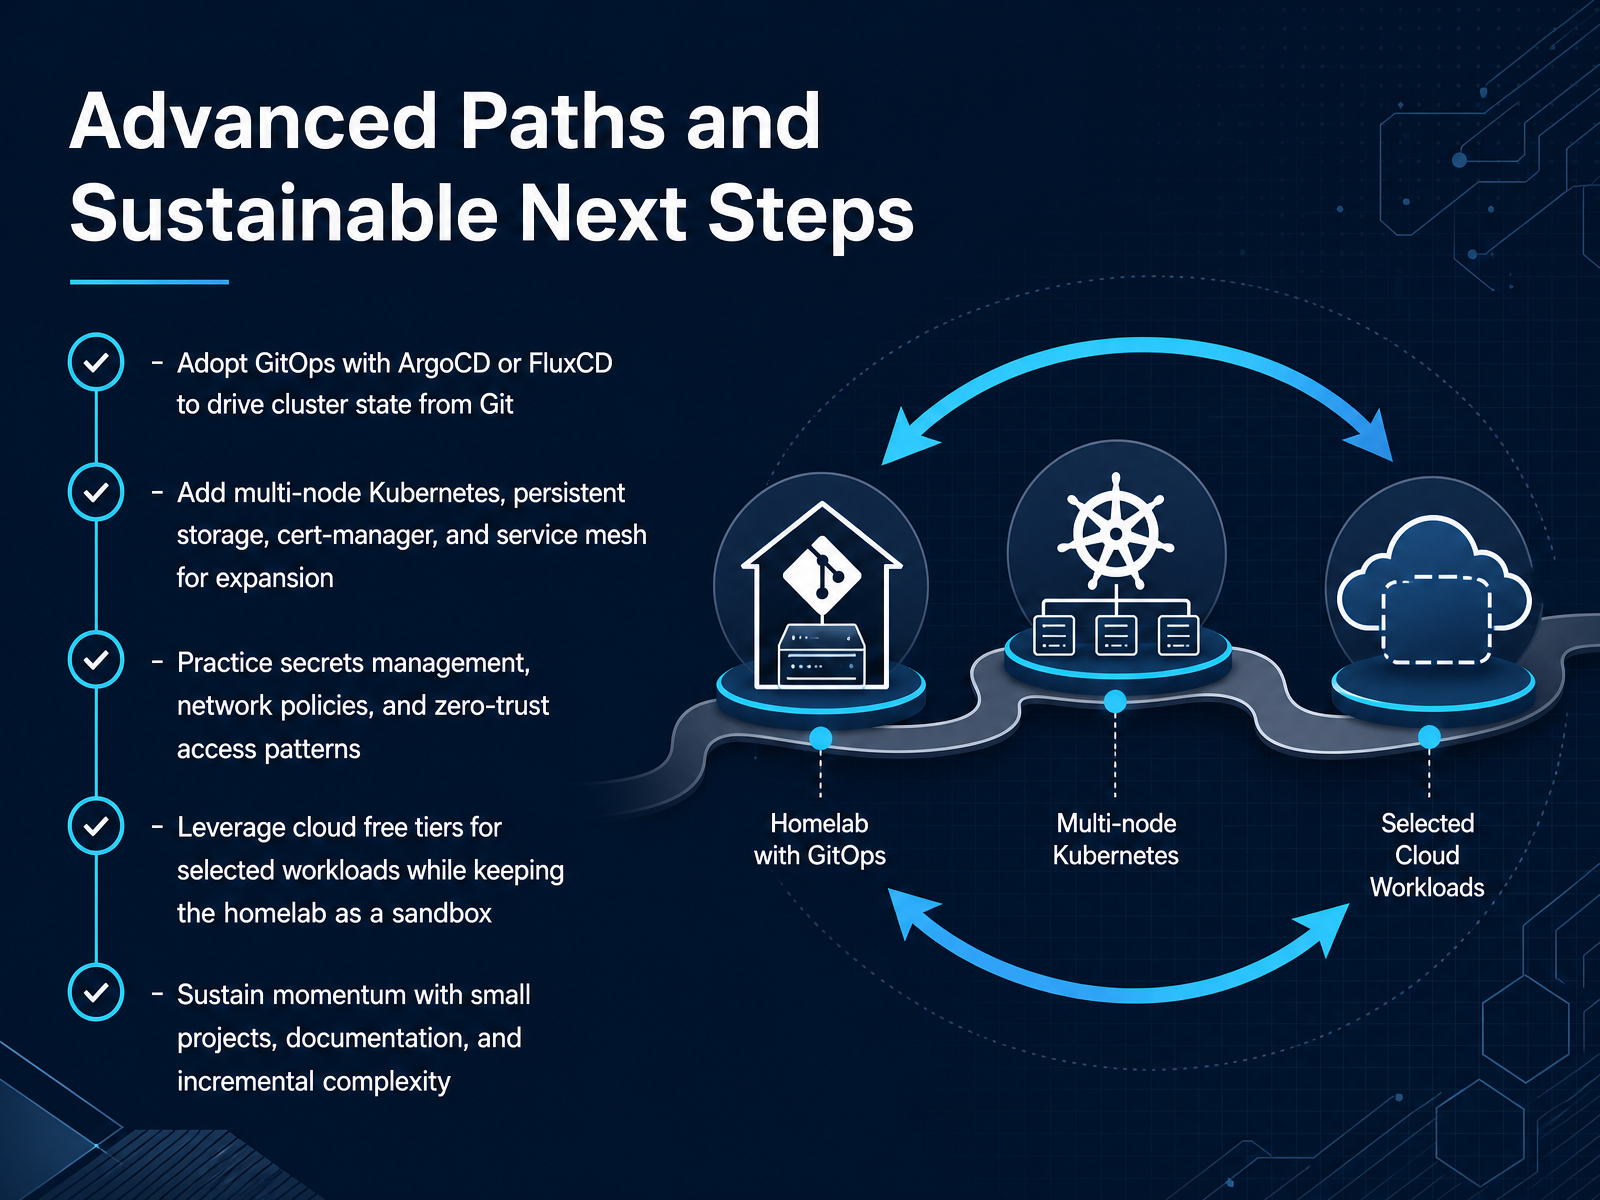
2 min - 14Advanced Paths and Sustainable Next StepsAs you grow, consider embracing GitOps with Argo CD or Flux. Git becomes the single source of truth for your cluster, and every change flows through a reviewable commit. From there, expand into multi-node Kubernetes, persistent storage with Longhorn, and cert-manager for automatic TLS certificates. Practice hardening too—network policies, secrets management, and zero-trust access patterns are exactly what employers look for. You can also mix in cloud free tiers for specific workloads, while keeping your homelab as the safe sandbox. The real secret to momentum is simple: pick small projects, document what you break and fix, and increase complexity gradually. You have built something real today. Keep iterating, keep breaking things on purpose, and let your lab grow with you. Thanks for learning along with me, and happy building.
 techpulsesite.com1 min
Take the deck with you
Download this course as a file — free, no sign-up needed.
- PDF handoutEvery slide page, ready to print or share.15 pages · 4.1 MBDownload
- Narrated PowerPointThe deck that presents itself — every slide carries the digital human's narration video.15 pages · 17.4 MBDownload
- PowerPoint slidesThe full deck as a .pptx — open it in PowerPoint, Keynote, or Google Slides.15 pages · 4.0 MBDownload
Free to use in your own training — please keep the PersonWise credit page at the end.
Have your own deck? Turn it into a course
Sources consulted
Web sources consulted while building this course.
- I Built a $500 Homelab for Learning DevOps — chrisnortonjr.com
- How to Set Up a Home Lab for Learning DevOps in 2026 – TechPulse — techpulsesite.com
- The Case for a Homelab in 2026: What You Can Learn That Cloud Can't Teach — futurion.blog
- The Top DevOps Skills in 2026 You Can Learn in a Home ... — virtualizationhowto.com
- Build a Home Lab to Learn DevOps Tools from Scratch — mattadam.com
- Homelab Network Design Guide for Beginners | SpeedTestHQ — speedtesthq.com
- Network Configuration for Home Labs: Complete Guide for Modern Home Lab Enthusiasts - Sillectus — sillectus.com
- Homelab Networking from Scratch: DNS, Reverse Proxy, VPN, and SSL | Budget Homelab — budgethomelab.com
- Home Lab Networking Setup: VLANs, Firewall & DNS Explained — TrevTech — trevtech.blog
- How to Manage IP Addresses in a Homelab: DHCP, DNS, Subnets ... — homelabaddiction.com
- Linux for DevOps Engineers — Complete Guide — OpsCanopy — opscanopy.com
- SysOps 90-Day Learning Path | DevOpsSchool.org — devopsschool.org
- Learning Ansible basics - Red Hat — redhat.com
- DevOps Foundation (Linux & Systems) - Hands-On - Coursera — coursera.org
- LINSYS-2 | DevOps/SRE Courses by Monospace Mentor — courses.monospacementor.com
- Terraform + Ansible on Proxmox [Complete Guide 2026] — computingforgeeks.com
- Terraform and Ansible in My Homelab - JR Tashjian — jrtashjian.com
- sfcal/homelab — github.com
- Implementing Declarative Infrastructure with Terraform and Ansible · Cameron Candau — cameroncandau.com
- Homelab as Code: Packer + Terraform + Ansible - merox — merox.dev