Begin
15 pages · ~30 min
Night Sky Reading Fundamentals
Learn to identify constellations, navigate by starlight, and understand celestial motion. Ideal for beginners in astronomy and outdoor enthusiasts seeking foundational night-sky skills.
A digital instructor presents all 15 pages. Hold “Ask” at any point and ask out loud — the answer comes from this course. No sign-up needed.
What you’ll learn
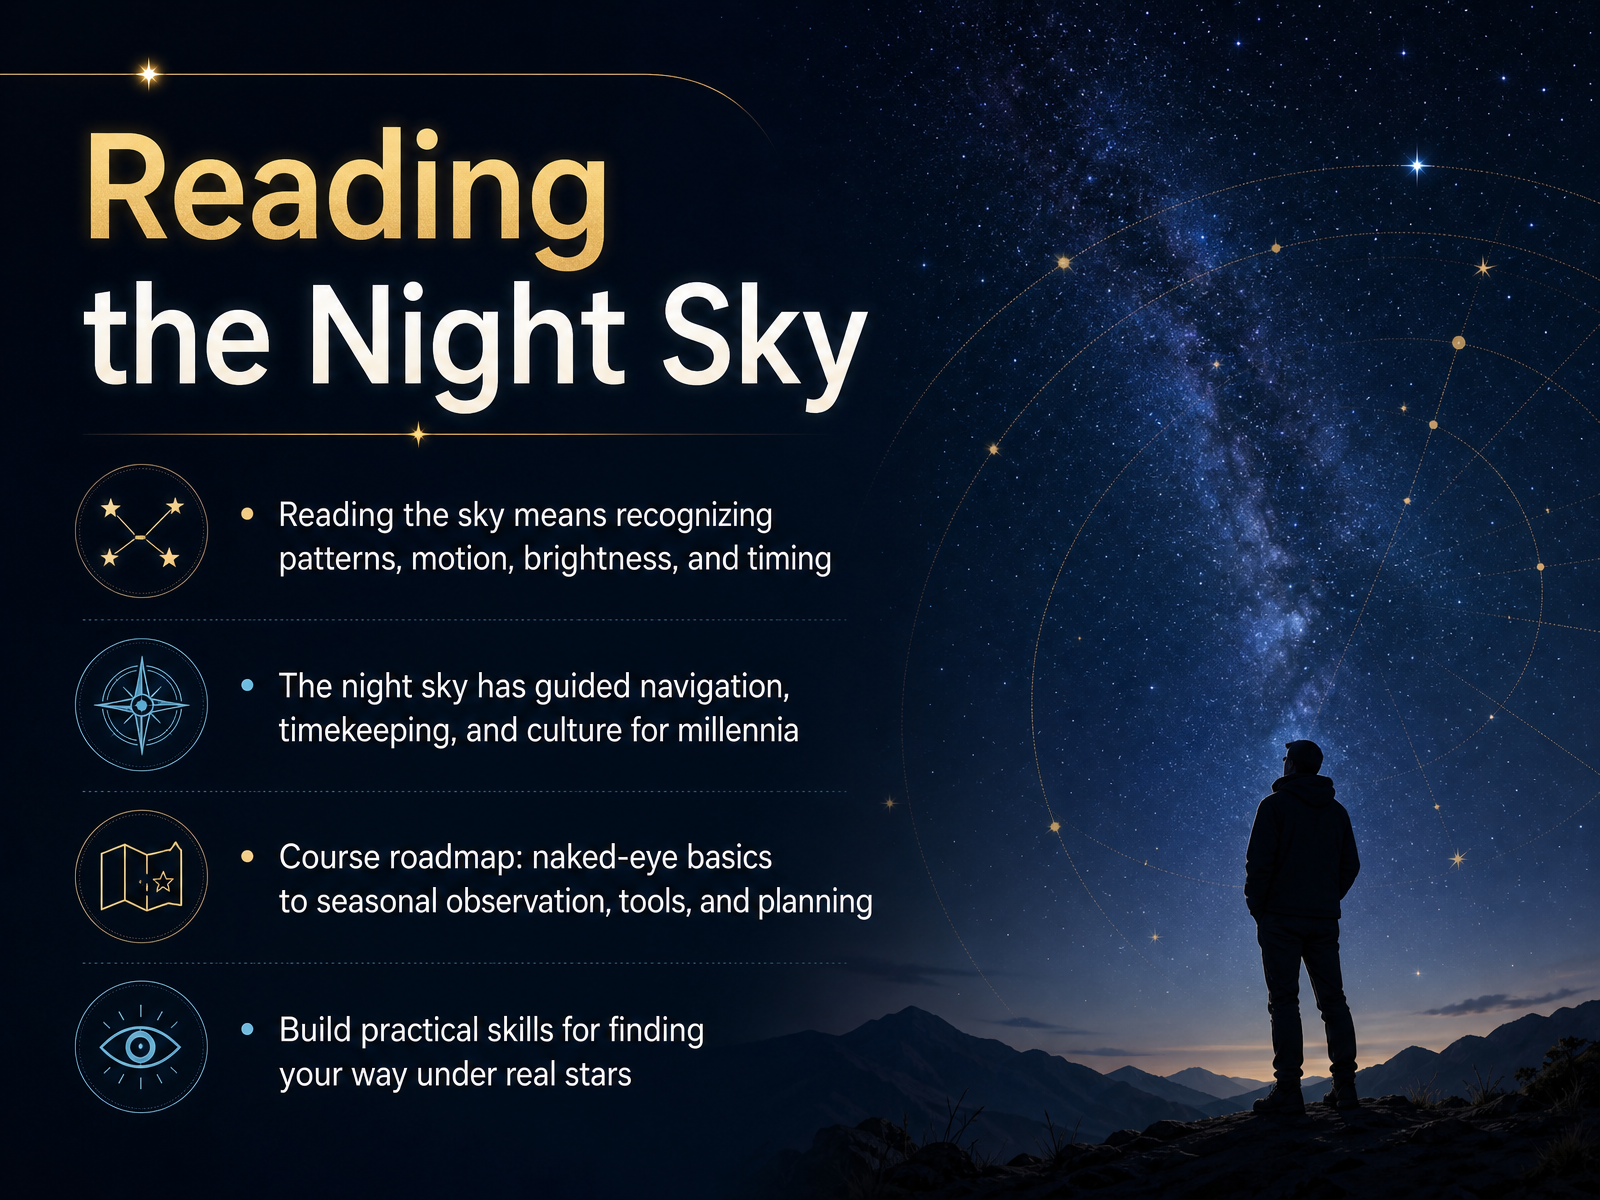
- 01Reading the Night SkyWelcome. I am so glad you are here. This course is about reading the night sky, and that simply means learning to recognize the patterns, the motion, the brightness, and even the timing of what you see overhead. For thousands of years, people have used the stars to navigate across oceans, to mark the passing seasons, and to tell stories that shaped entire cultures. You are joining that long human tradition. The sky is not just a random scattering of lights. It is a map, and you can learn to read it. Over the next few lessons, we will start with the naked-eye basics, then move into seasonal observation, and finally explore simple tools and planning. You do not need any prior knowledge. We will take it one step at a time, building practical skills you can use on your very next clear night. So let us begin by looking at what you can actually see up there.2 min
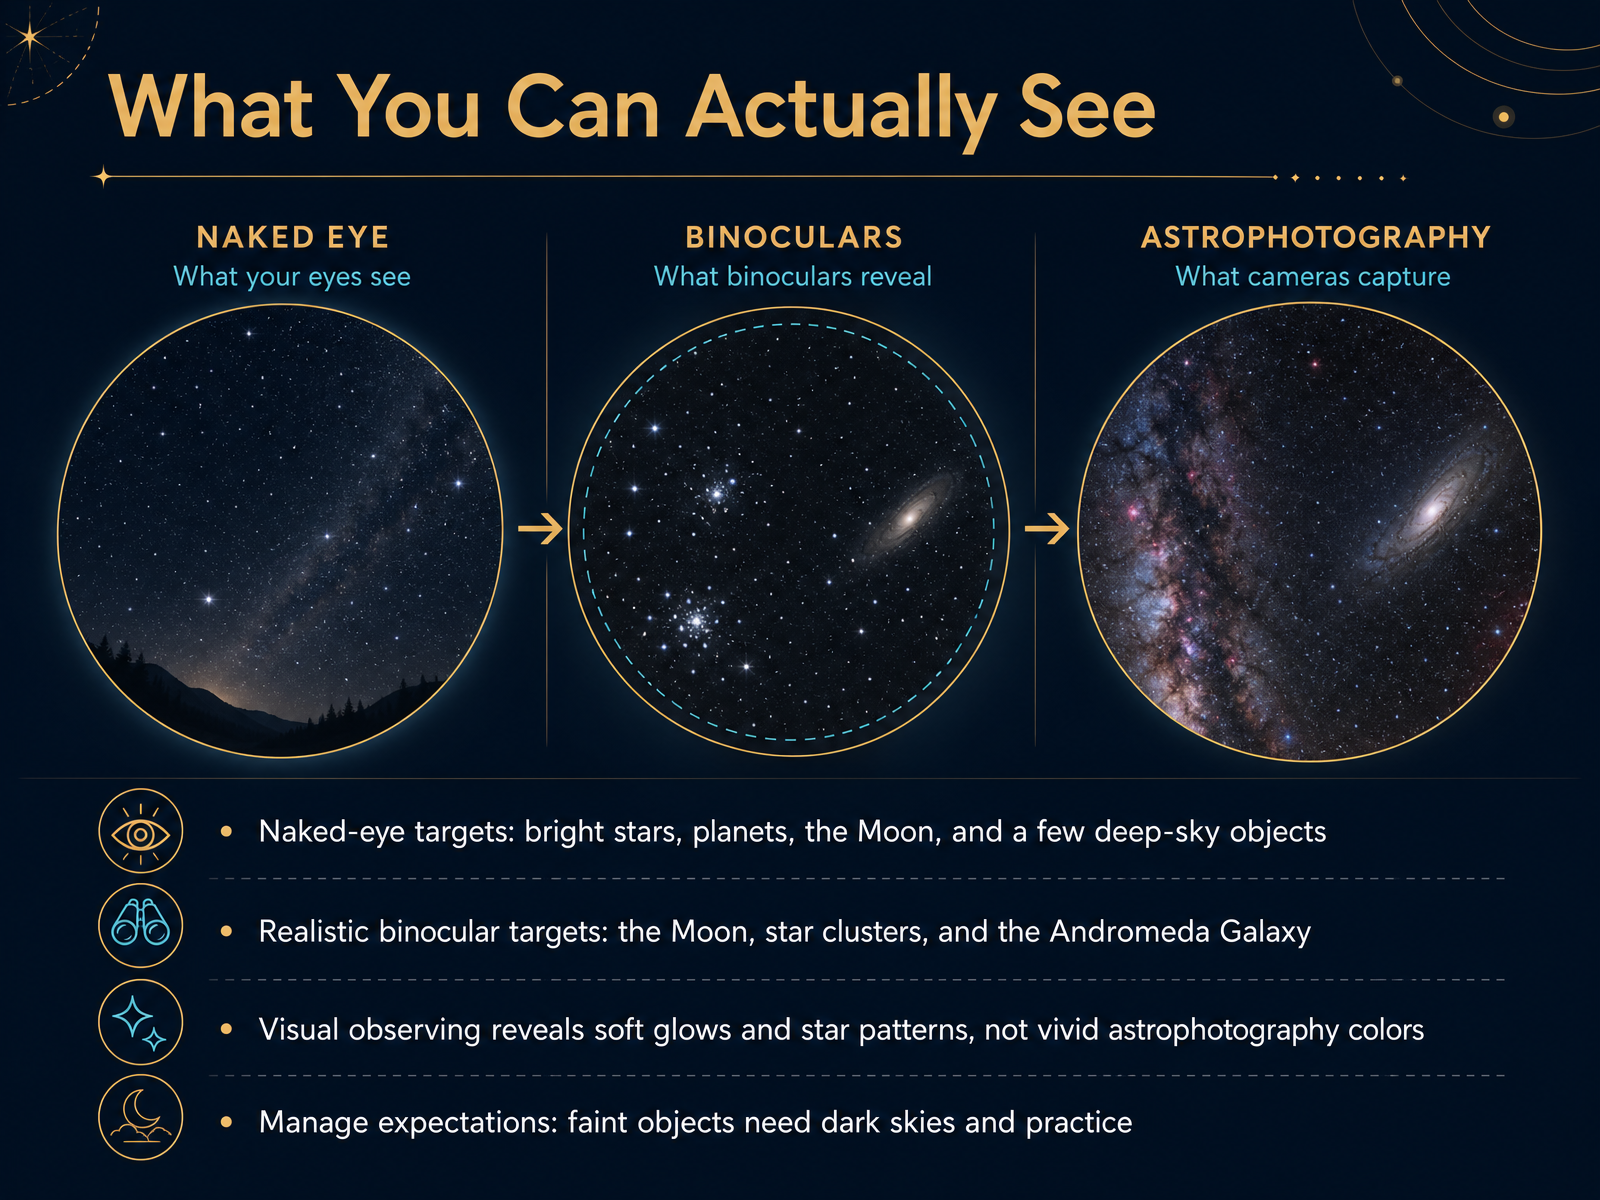
- 02What You Can Actually SeeSo before we get too far, let's talk about what you can actually expect to see. When you step outside and look up, your eyes alone can take in a lot: bright stars, the Moon, and planets like Venus and Jupiter. With patience, you might also spot a few faint, fuzzy patches, what we call deep-sky objects. A simple pair of binoculars opens up more. The Moon becomes a world of craters, and you can find star clusters and even the Andromeda Galaxy, a faint smudge of light over two million light-years away. But here's the key: what you see won't look like the colorful photos in books. Our eyes are not cameras. In the dark, we see soft glows and patterns of light, not vivid colors. So the more important habit is to manage your expectations. Faint objects need dark skies, away from city lights, and a little practice. It's a learned skill, like listening to a quiet song. Ready to begin? Next, we'll get oriented with directions, altitude, and azimuth, so you know exactly where to point your eyes.
 milwaukeeastro.orgearthsky.orgastronomy.com+21 min
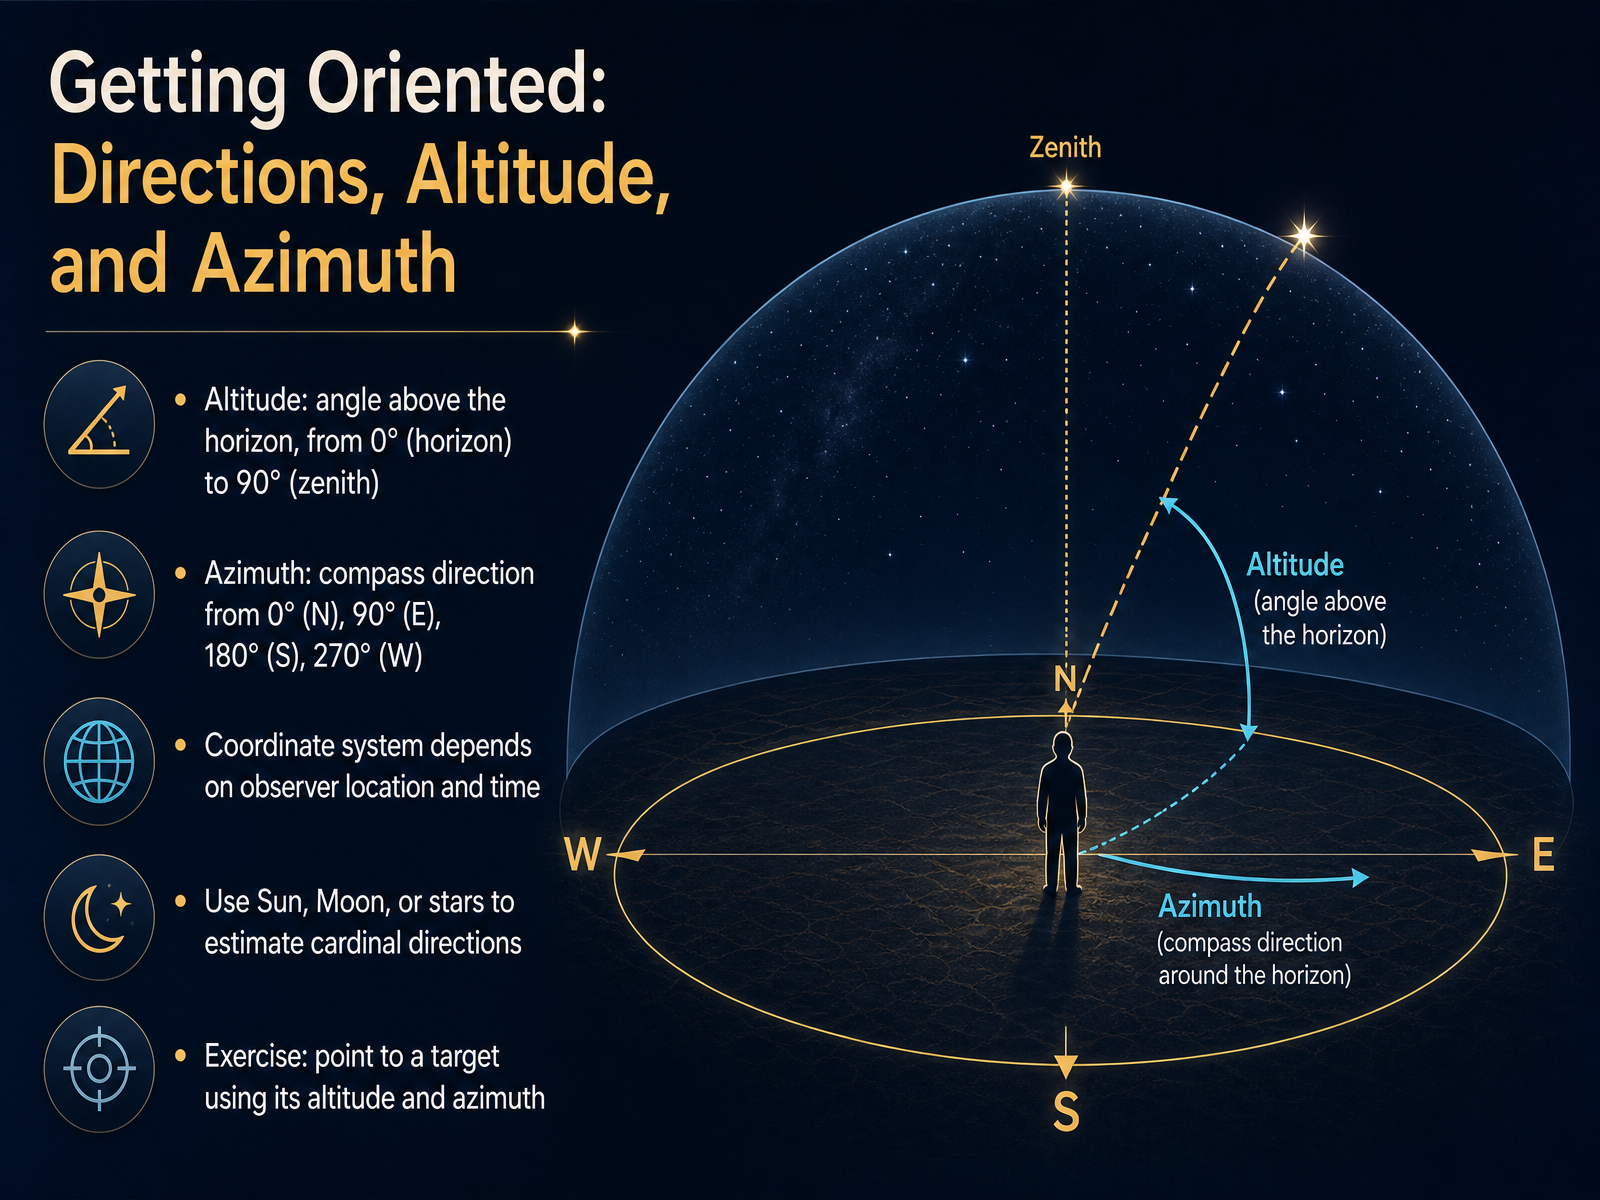
 - 03Getting Oriented: Directions, Altitude, and AzimuthNow that we have a feel for the night sky, let's give ourselves a way to navigate it. We need a common language to point to things. Think of the sky as a huge dome above you. To find anything on that dome, we use two simple numbers. The first is altitude. Altitude is just how high something is. We measure it as an angle from the horizon. The horizon is zero degrees, and straight up, the point called the zenith, is ninety degrees. So halfway up would be an altitude of forty-five degrees. The second number is azimuth. Azimuth tells us which compass direction to face. North is zero degrees, East is ninety, South is one hundred eighty, and West is two hundred seventy. So if I say a bright star is at altitude forty-five and azimuth two hundred seventy, you would look west, and then halfway up the sky. That is where you would find it. This system is based on you, right here, right now. If you move to a new location, or even wait an hour, these numbers change. But here is a fun trick. You can use the Sun, the Moon, or familiar stars to estimate your directions. For example, the Sun rises roughly in the east. Now let's try a quick exercise. Pick any bright light in the distance, a streetlight or a distant tower. Imagine a line from the horizon straight up to it. Estimate that altitude angle. Now, point to where it would appear on a compass. You have just used altitude and azimuth. With this tool, we are ready to meet our first guideposts, the bright stars and patterns we call asterisms.
 timeanddate.comschoolsobservatory.orgbritannica.com+22 min
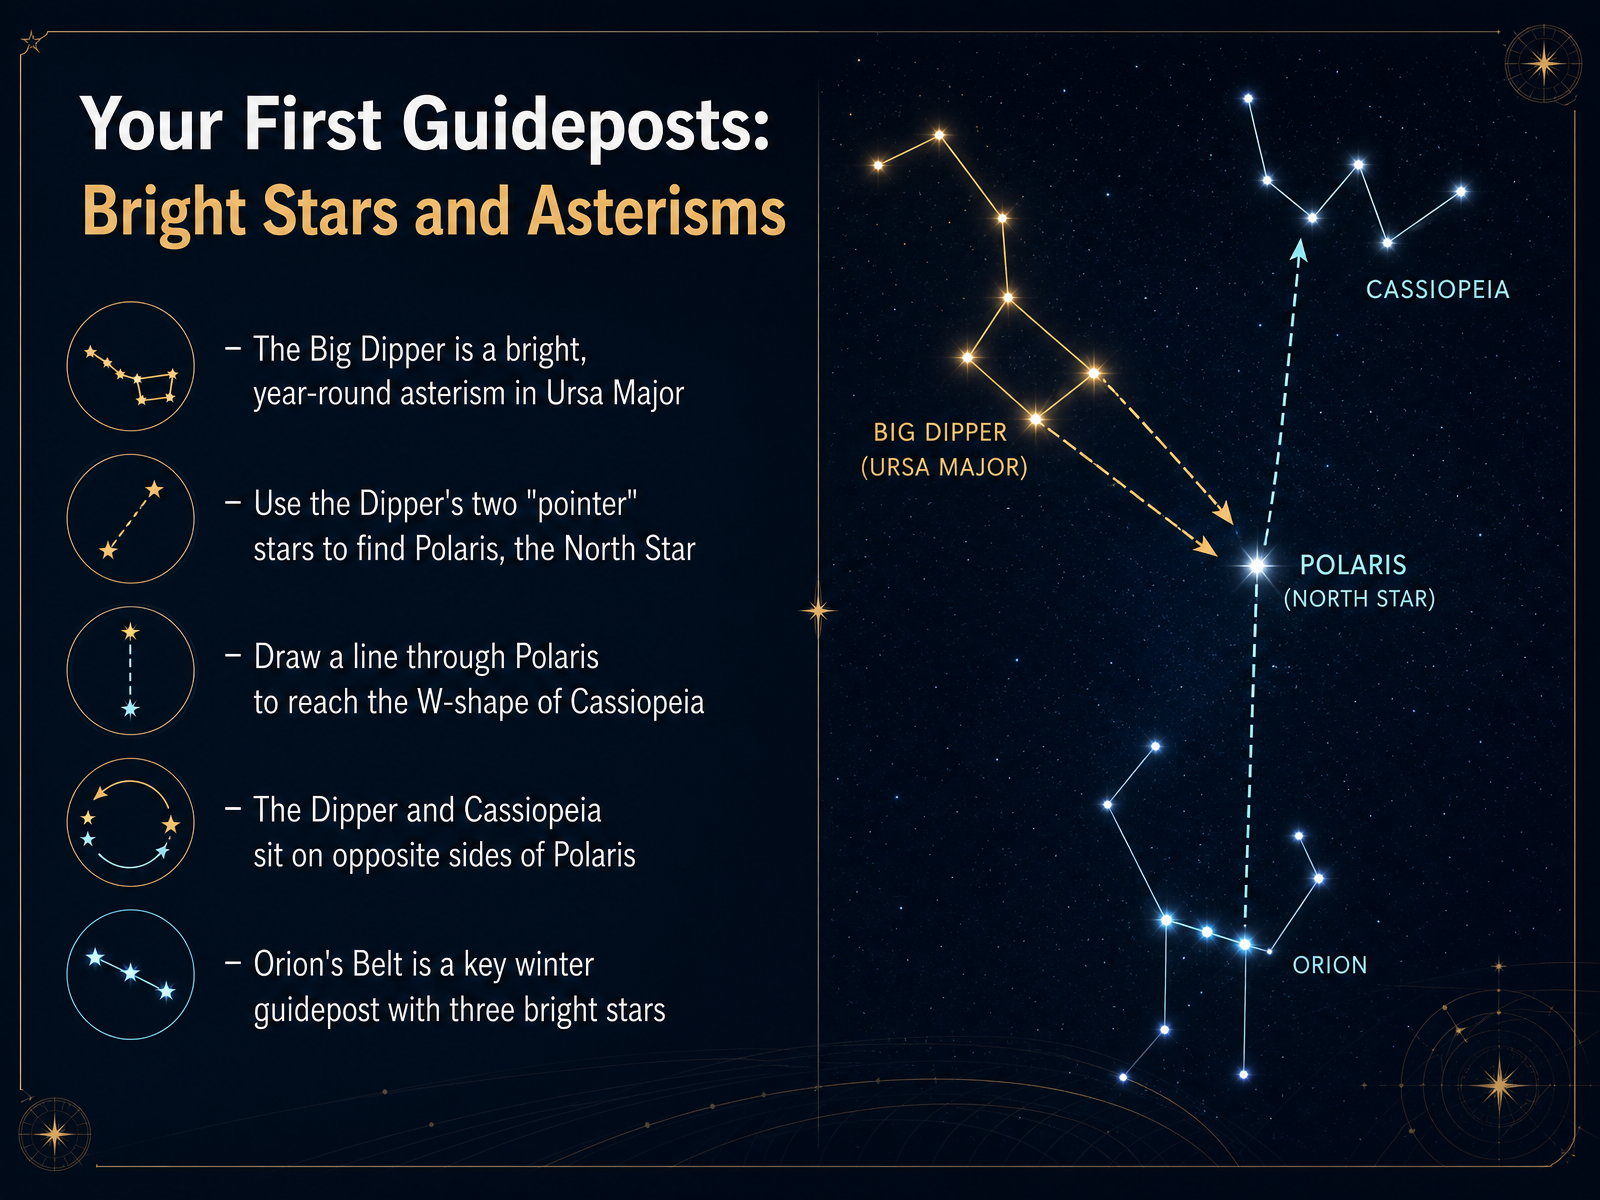
 - 04Your First Guideposts: Bright Stars and AsterismsNow let's find our very first guideposts in the sky. A great place to start is the Big Dipper. It's actually a star pattern called an asterism, and it's part of a larger constellation known as Ursa Major, the Great Bear. The Big Dipper is bright, easy to spot, and visible all year round for most of us. Once you find it, look at the two stars on the outer edge of its bowl. These are called the pointer stars because they point directly to Polaris, the North Star. Now, imagine drawing a straight line from Polaris onward. That line will lead you to a bright group of stars shaped like the letter W. That is Cassiopeia, the Queen. Here's a helpful trick: the Big Dipper and Cassiopeia sit on opposite sides of Polaris. When one is high in the sky, the other is usually low. And if you're out on a clear winter evening, look for Orion the Hunter. His most famous feature is a short, straight line of three bright stars known as Orion's Belt. It's an unmistakable landmark in the winter sky. Practice finding one of these patterns first. Once you do, the others become much easier. Next, let's explore why these celestial guideposts change with the seasons.
 skyatnightmagazine.comhowtogeek.comastronomy.com+22 min
 - 05Seasonal Constellations and Why They ChangeNow let's answer a question every stargazer eventually asks: why do we see different constellations as the year goes on? The stars aren't moving away. It's us. As Earth travels around the Sun, our nighttime view points toward a different part of space each season. So let's take a quick tour. In spring, look for Leo the Lion, shaped like a backward question mark, and Boötes the Herdsman. A handy trick is to follow the arc of the Big Dipper's handle straight to the bright orange star Arcturus. In summer, the famous Summer Triangle of Vega, Deneb, and Altair is your anchor, with Scorpius and Sagittarius low in the south. Autumn brings the Great Square of Pegasus, with Andromeda and Cassiopeia nearby. And in winter, Orion the Hunter takes center stage, along with Taurus, Gemini, and Canis Major. There's also a special group called circumpolar constellations. Ursa Major, Ursa Minor, and Cassiopeia are visible all year, circling the North Star night after night. So if you only learn a few patterns, start with those. Up next, we'll explore how the sky moves each night and through the seasons.
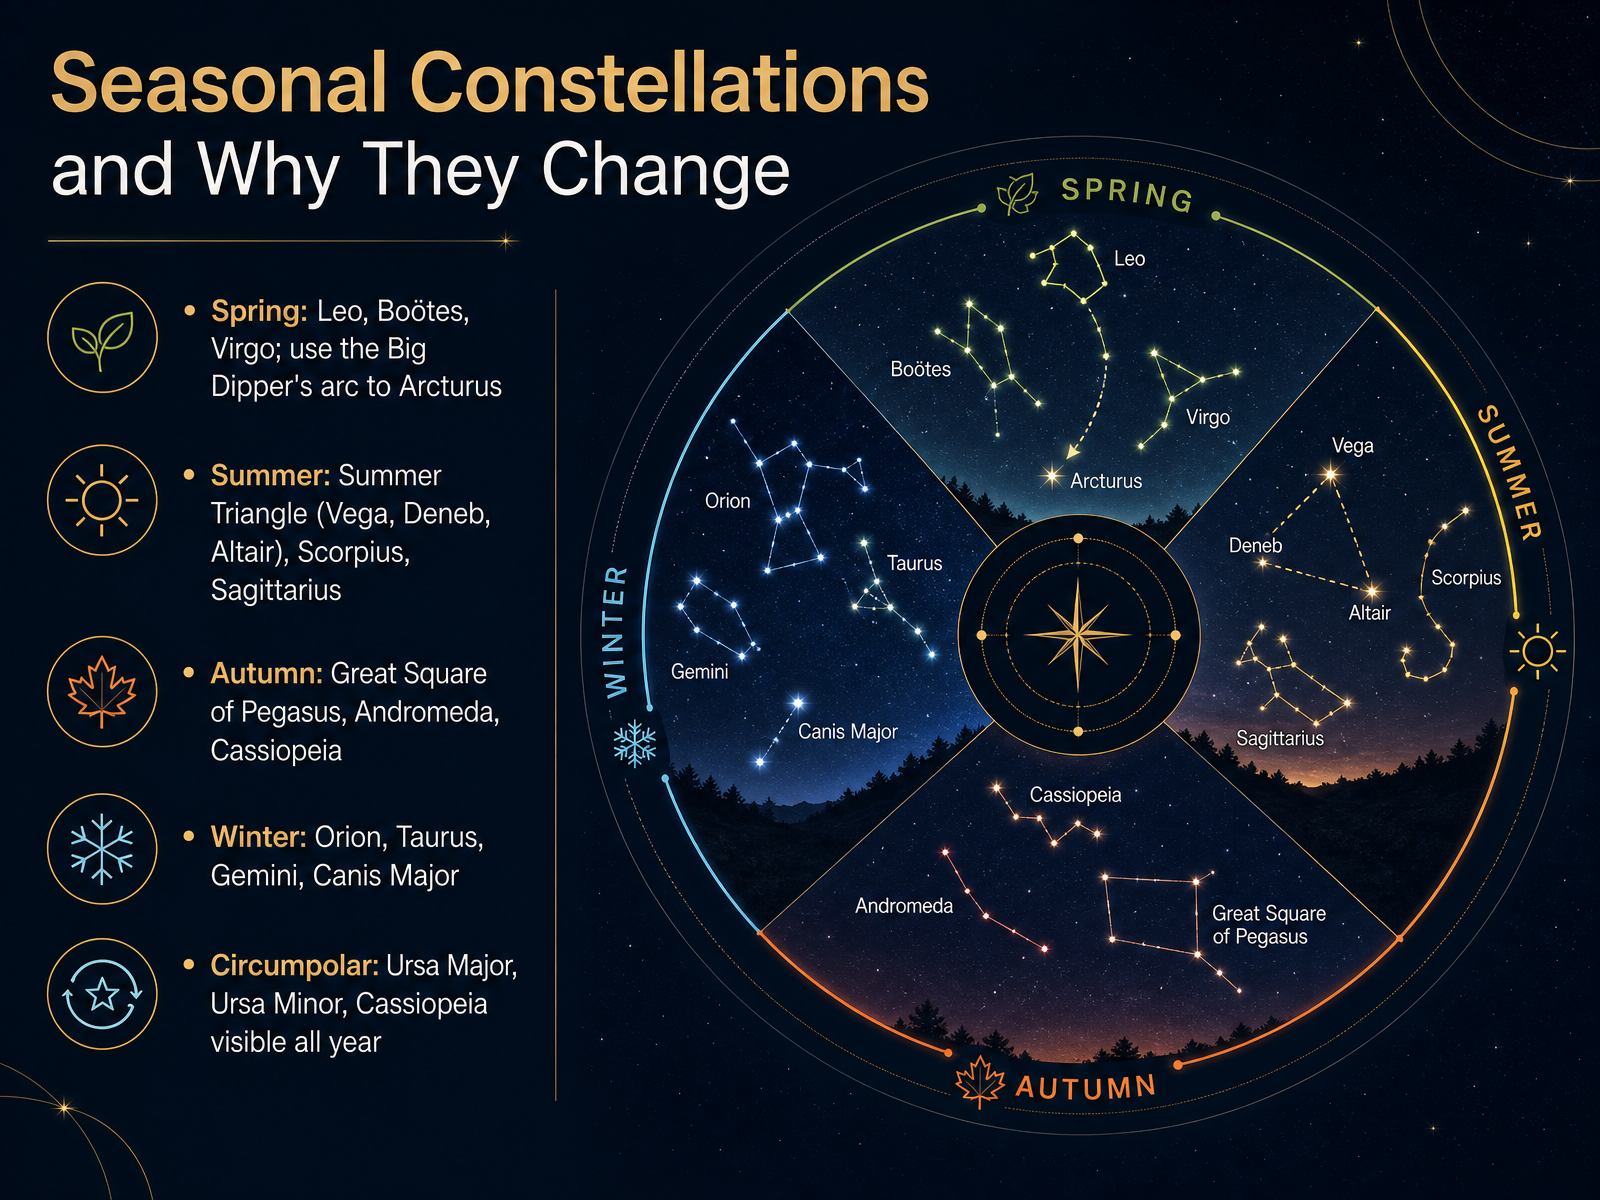 skyatnightmagazine.comhowtogeek.comastronomy.com+22 min
 - 06How the Sky Moves: Daily and Seasonal MotionNow that you know your way around the brightest markers, let's step back and look at why the whole sky seems to be on the move. First, Earth spins like a top once every day. That rotation makes the Sun, the Moon, and the stars all appear to rise in the east and set in the west. It is not the sky moving. It is us. At the same time, Earth is slowly traveling around the Sun. This yearly journey shifts our view of the stars from season to season. The Sun itself traces a path across the background sky called the ecliptic. That path is tilted about twenty three and a half degrees from the celestial equator, an imaginary line stretched out from Earth's own equator. Because of all this motion, most constellations slide westward about one finger width, or one degree, each night. Over weeks and months, familiar groups like Orion come and go. But some constellations, the circumpolar ones, hang close enough to the celestial pole that they never set. They stay with us all year long. So when you go out, remember that the sky has a rhythm. Some patterns are nightly, some are seasonal, and a few loyal friends never leave the stage. Next, we will follow our closest companion through the night as we explore the Moon's phases, path, and timing.
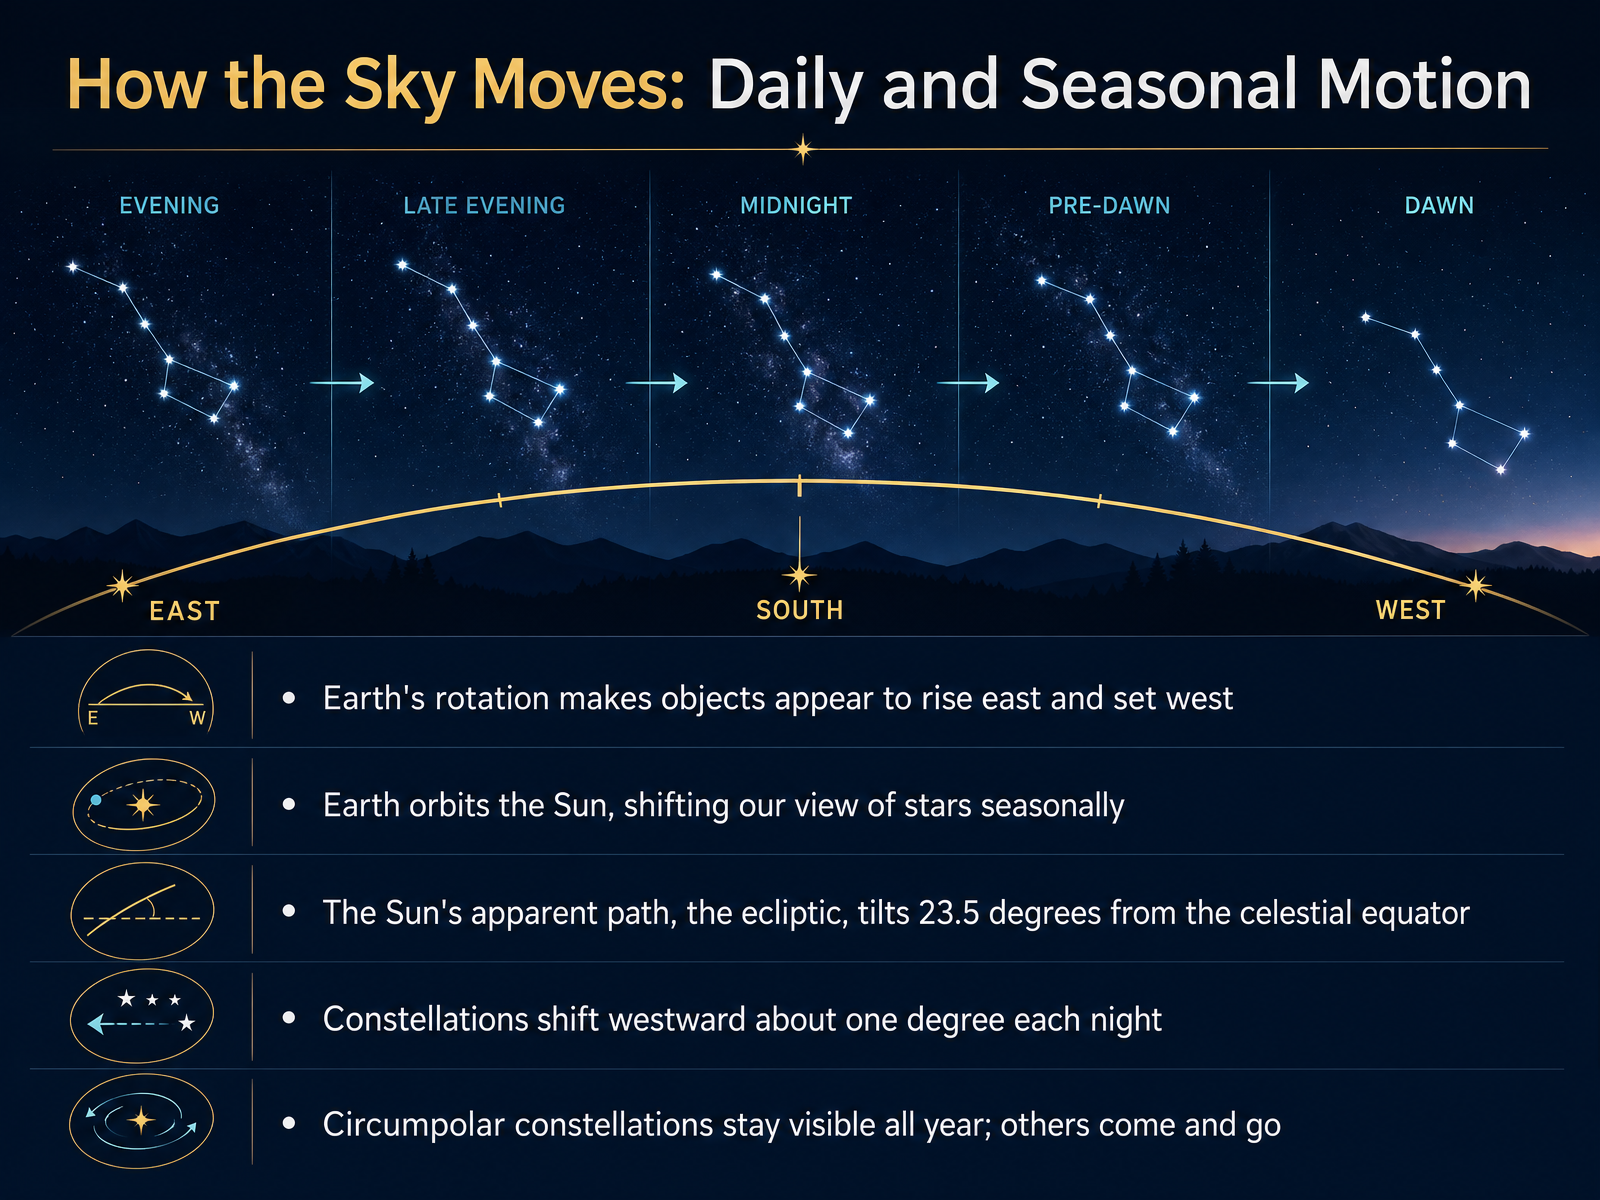 astronomy.ohio-state.eduastronomy.ohio-state.edupeople.astro.umass.edu+22 min
 - 07The Moon: Phases, Path, and TimingLet's turn our attention to the Moon, our closest companion in the night sky. Its phases may seem a bit random at first, but they follow a very dependable rhythm. The key idea is this: the Moon is always half lit by the Sun, but from our viewpoint on Earth, we see different portions of that lit side depending on where the Moon is in its orbit. As it moves around us, its shape in the sky changes, and so does the time it rises and sets. During a New Moon, the Moon is near the Sun, so it rises around sunrise, and its lit face is turned away from us. That makes it essentially invisible, which is actually wonderful news for stargazing. About a week later, at First Quarter, half the disk is lit. This Moon rises around noon and sets around midnight, so you can often spot it in the afternoon sky. The Full Moon is the grand display. It rises at sunset, stays up all night, and sets near sunrise. Then, at Third Quarter, the Moon rises around midnight and sets around noon, with the opposite half lit compared to First Quarter. One useful pattern to remember is that the Moon rises about fifty minutes later each day. That is not much from one night to the next, but over a week it shifts from evening to morning. So if you really want dark skies, plan your deep-sky viewing around the New Moon or the thin crescent phases, when moonlight is least intrusive. Next, we will shift from our Moon to other wandering lights, and look at the bright planets and their patterns.
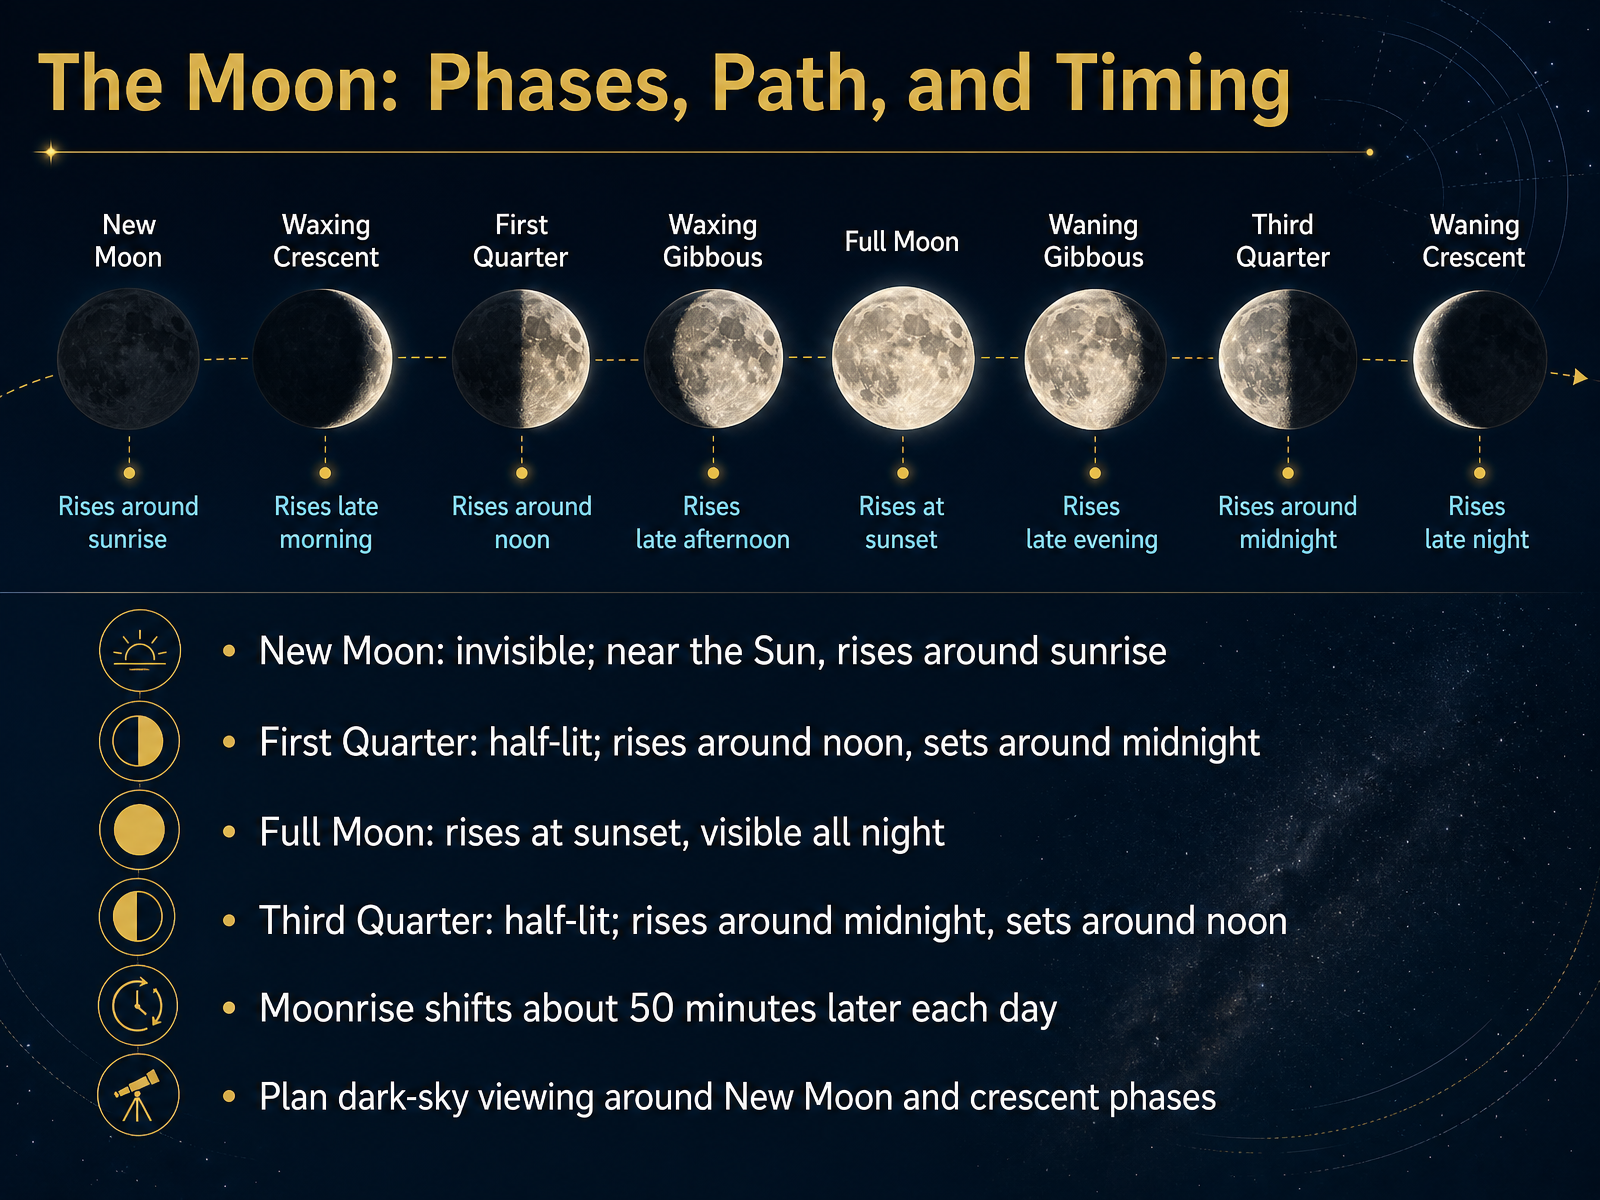 2 min
2 min - 08The Bright Planets and Their PatternsNow let's talk about the bright planets, because once you know what to look for, they are some of the easiest and most rewarding things to find. Here is a quick trick. Stars twinkle because their light is coming from so far away that our moving atmosphere makes it shimmer. Planets are much closer, so their light looks steady. If a point of light is not twinkling, you have probably found a planet. Venus is a great first target. It is brilliant in the western evening sky and is often called the evening star. Mars has a steady reddish hue and is often seen in the morning sky before sunrise. Jupiter and Saturn also travel along a path called the ecliptic, which is the same line in the sky the sun and moon follow. Every few weeks the view changes, because both Earth and the planets are moving around the sun. So a planet that is high tonight might be gone in a month. That is part of the fun. It gives you a new pattern to discover each time you look up. When you are ready, we will move beyond planets and begin exploring deep sky objects and how to find them.
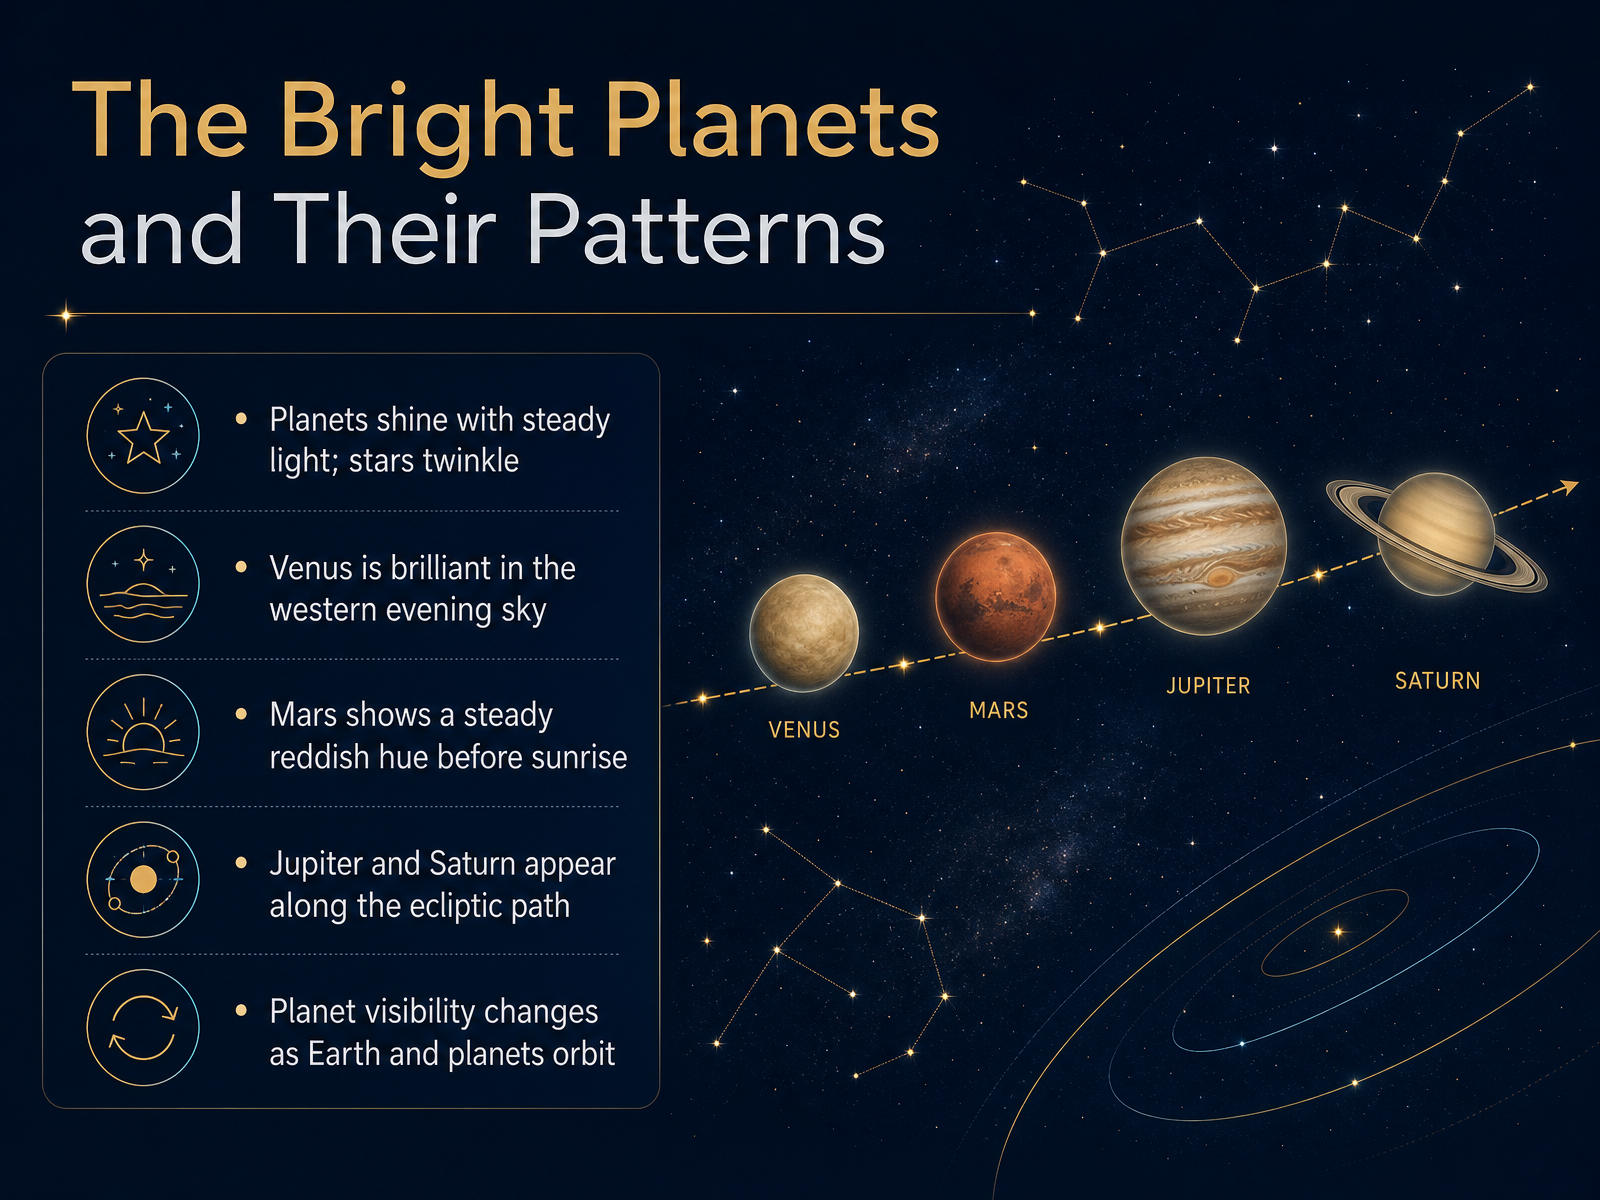 1 min
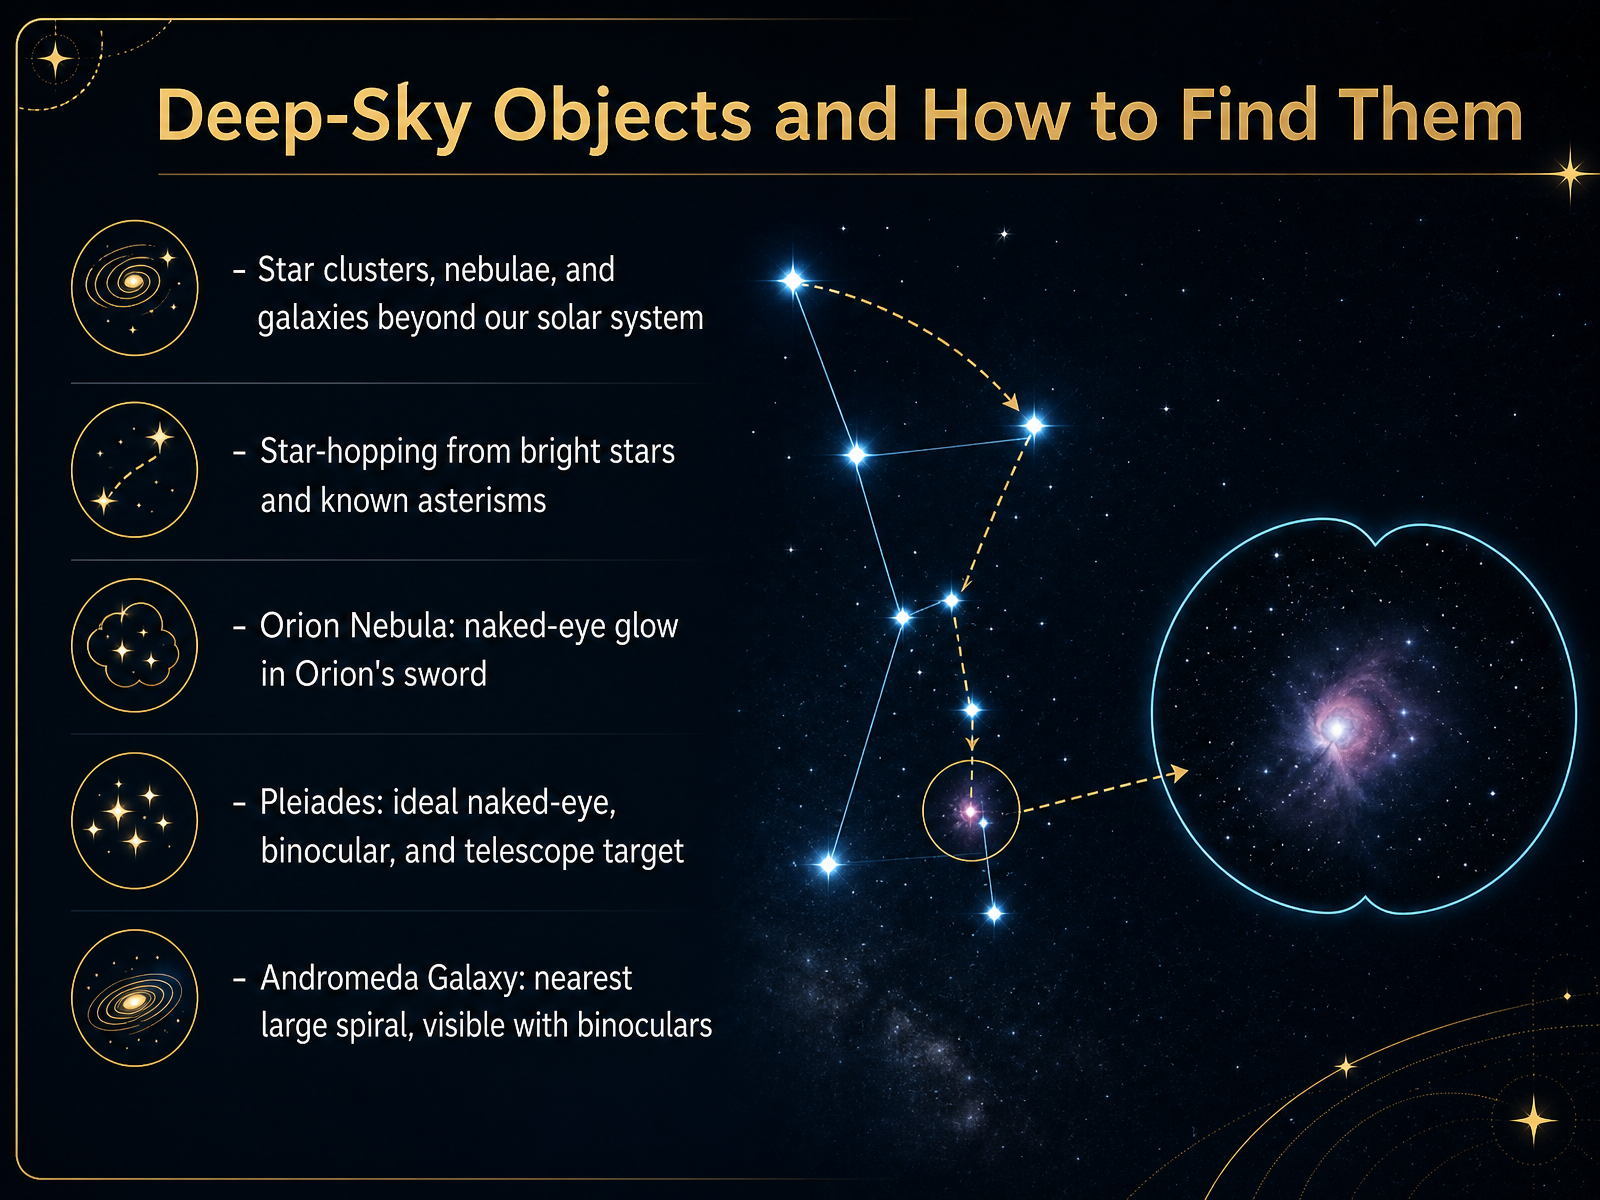
1 min - 09Deep-Sky Objects and How to Find ThemNow, let's push beyond our solar system and visit the deep sky. These objects are far away, but a simple technique called star hopping makes them findable. You start from a bright star you know, then hop step by step to your target. Let's try it with the Orion Nebula. Find Orion's belt, then look just below it at the sword. That soft, fuzzy glow is a vast cloud where new stars are being born. Next, look for the Pleiades, a tiny cluster of jewels that is wonderful with your eyes alone, and even better with binoculars. For a real challenge, we can locate the Andromeda Galaxy, the nearest large spiral galaxy to us. In a dark sky, it looks like a faint smudge of light, and binoculars reveal its bright core. Start with the brightest star in Cassiopeia to point your way. So remember, use bright stars as your guides, and be patient with faint fuzzies. Next, we'll explore the essential tools for the naked-eye observer.
 milwaukeeastro.orgearthsky.orgastronomy.com+22 min
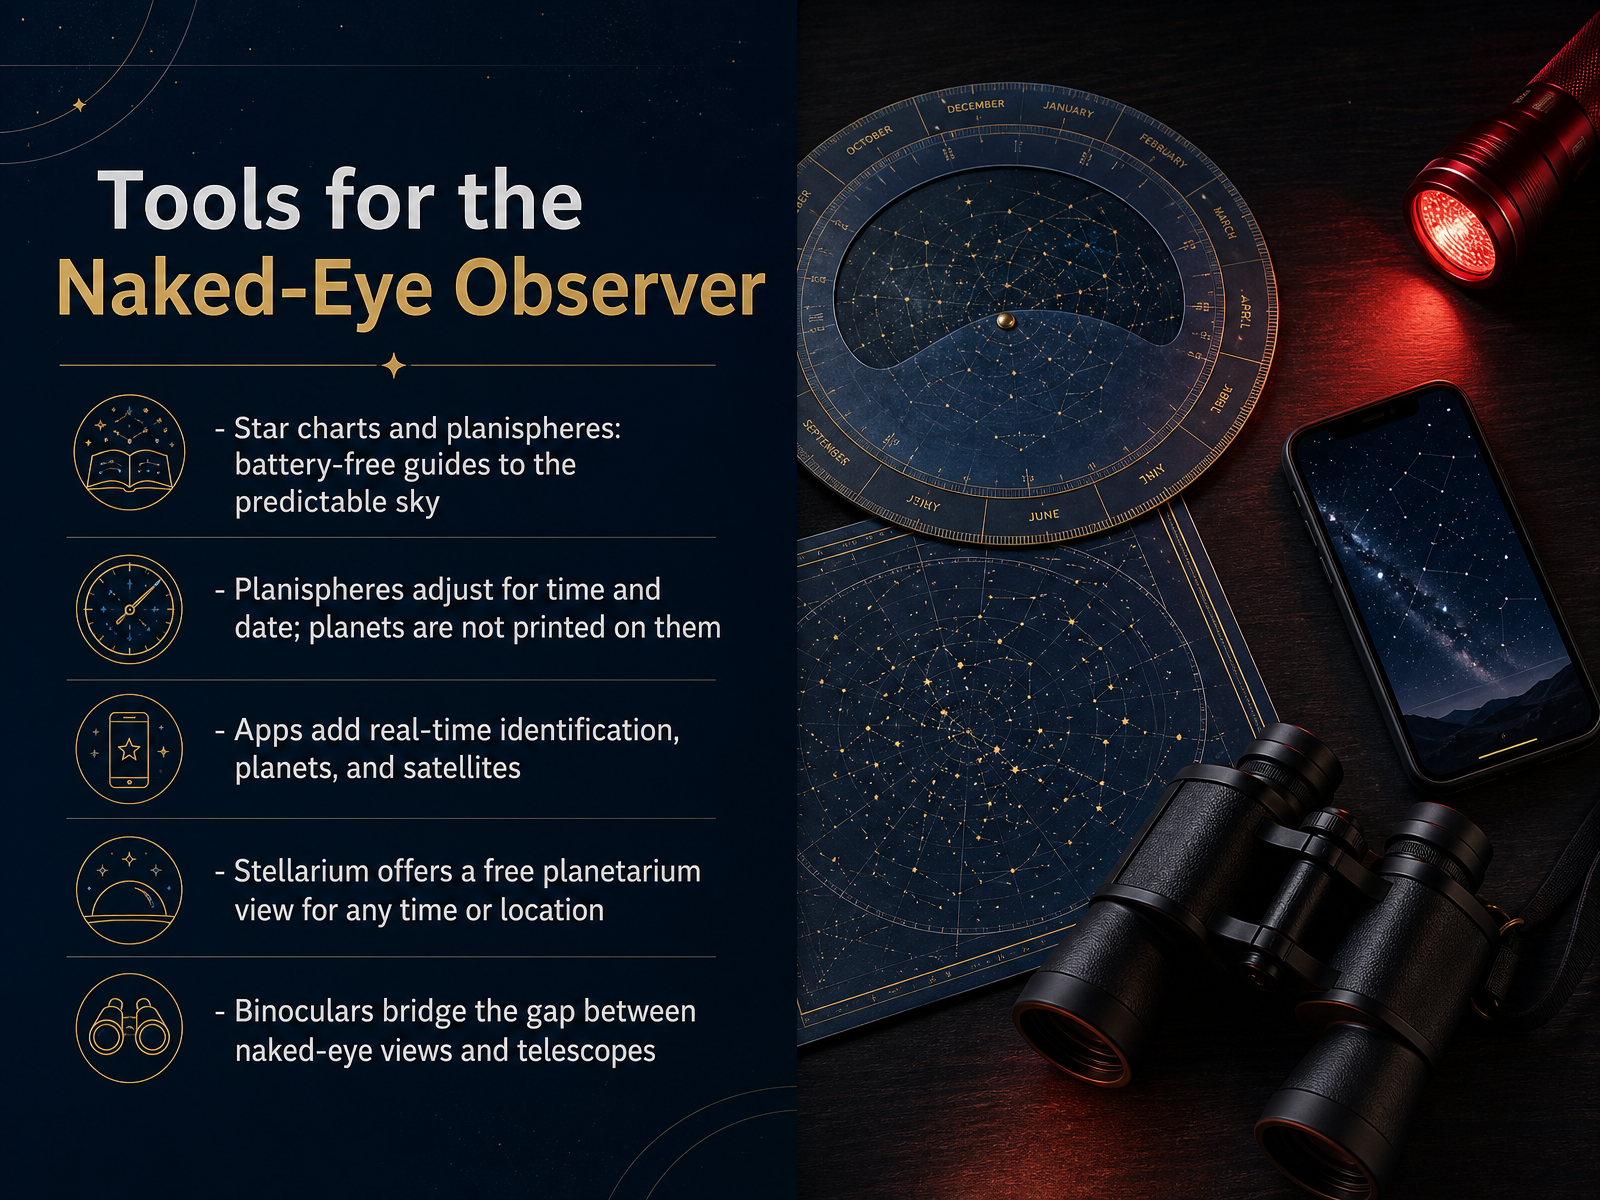
 - 10Tools for the Naked-Eye ObserverWhen you are just getting started, a simple paper star chart or a planisphere can be your best friend. A planisphere is a round star map that you adjust for the current date and time, and it shows you exactly which constellations are overhead. It never runs out of batteries, and it never needs a signal. Just remember that the planets are not printed on it because they slowly wander through the sky. Apps are a wonderful complement. With a free app like Stellarium, you can point your phone at the sky and it will identify stars, planets, and even satellites in real time. It also works for any time or place, so you can preview tonight’s sky from your kitchen. If you want a closer look, binoculars are the perfect next step. They are easy to carry and they reveal craters on the Moon, moons around Jupiter, and star clusters that stay hidden to the unaided eye. Think of them as a gentle bridge between your eyes and a telescope. In our next section, we will talk about light pollution and how to choose a good observing site.
 2 min
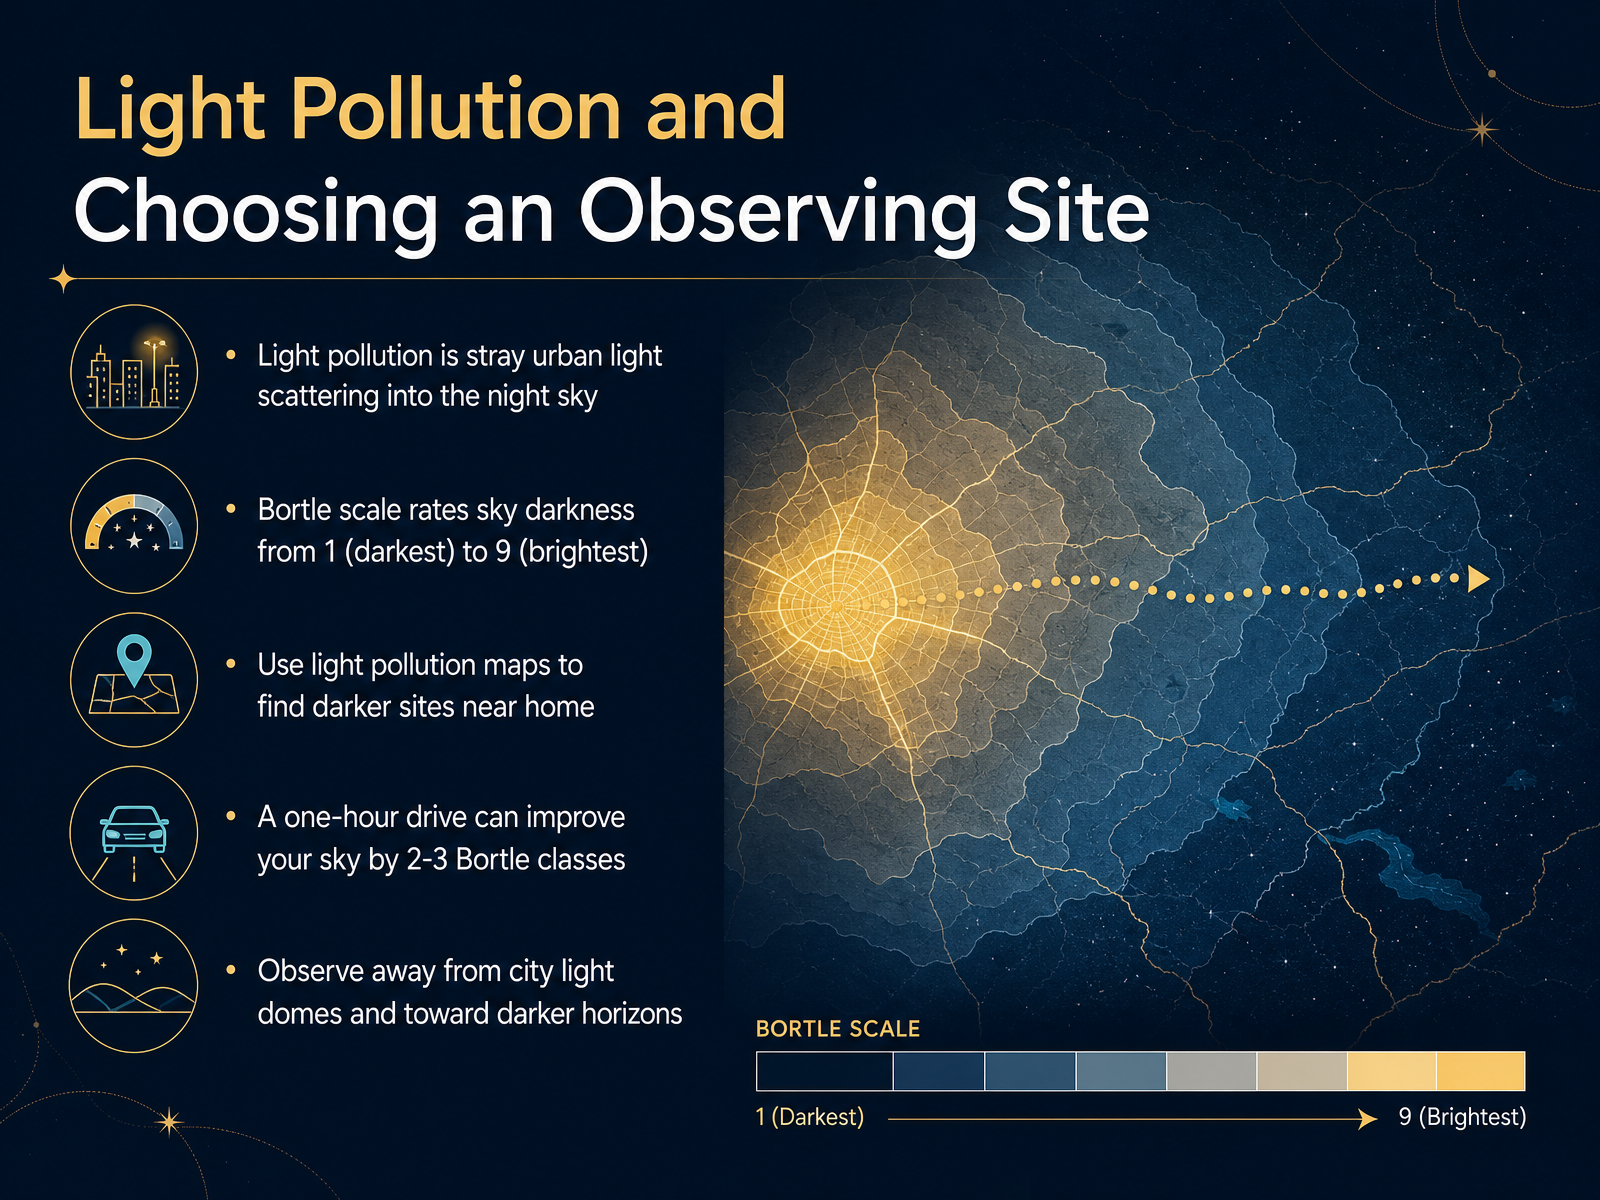
2 min - 11Light Pollution and Choosing an Observing SiteNow, let's talk about one of the biggest challenges for any stargazer: finding a dark sky. Light pollution is simply stray light from cities, streetlights, and buildings that scatters into the atmosphere and washes out the stars. To measure how dark a sky is, astronomers use something called the Bortle scale. Think of it as a report card for the night sky, running from class one, which is a truly dark sky, to class nine, an inner-city sky. The rule is simple: the lower the number, the more stars you can see. You don't need to live in the wilderness to escape the glow, though. I recommend checking a light pollution map online. These maps show you the Bortle rating for your area and can help you find a darker pocket near home. Often, just a one-hour drive away from a city can improve your sky by two or three Bortle classes. That small effort can transform your view. Once you arrive, remember to orient yourself. If a city glows on the horizon, try to observe in the opposite direction. Even in an imperfect spot, facing the darkest part of the sky makes a huge difference. Finding a darker site is the single best upgrade you can make to your stargazing. Next, we'll put this into practice by planning an observing session.
 2 min
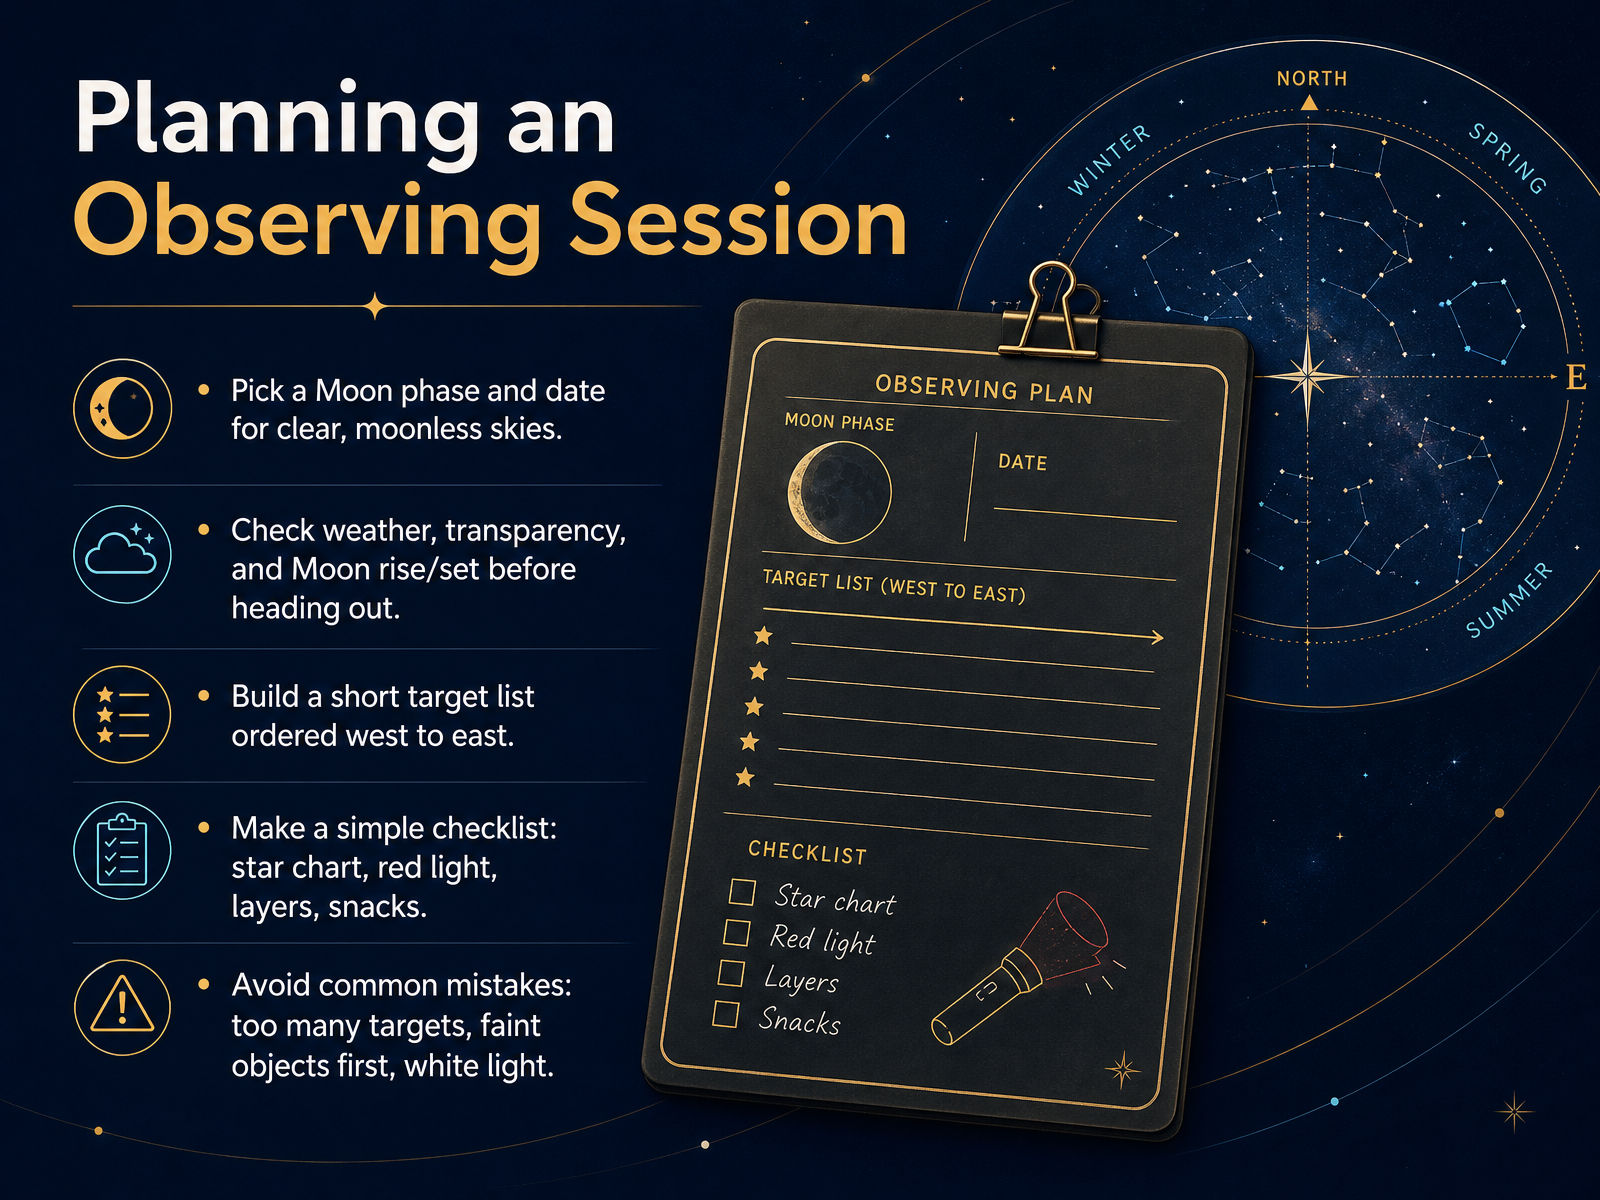
2 min - 12Planning an Observing SessionNow let's turn our careful planning into a smooth, enjoyable night under the stars. The first decision is the date. Try to pick a time when the Moon isn't glaring in the sky. A moonless night lets faint objects shine through, so check the Moon's phase and its rise and set times. Before you head out, also check the weather and something called transparency, which is simply how clear the air is. A transparent sky makes a huge difference. Once you know the night is good, build a short target list. Order your chosen objects from west to east, since western targets will set first, so you'll want to catch them early. Then, make a simple checklist. Bring a star chart, a red flashlight to protect your night vision, extra layers to stay warm, and a few snacks. Avoid three common mistakes. Don't overload your list with too many targets. Don't start with faint, difficult objects, especially at the beginning when your eyes are still adjusting. And never use bright white light, which ruins dark adaptation for many minutes. If you can avoid these, your session will feel far more rewarding. Up next, we'll talk about Recording What You See, so you can keep a lasting memory of your night.
 1 min
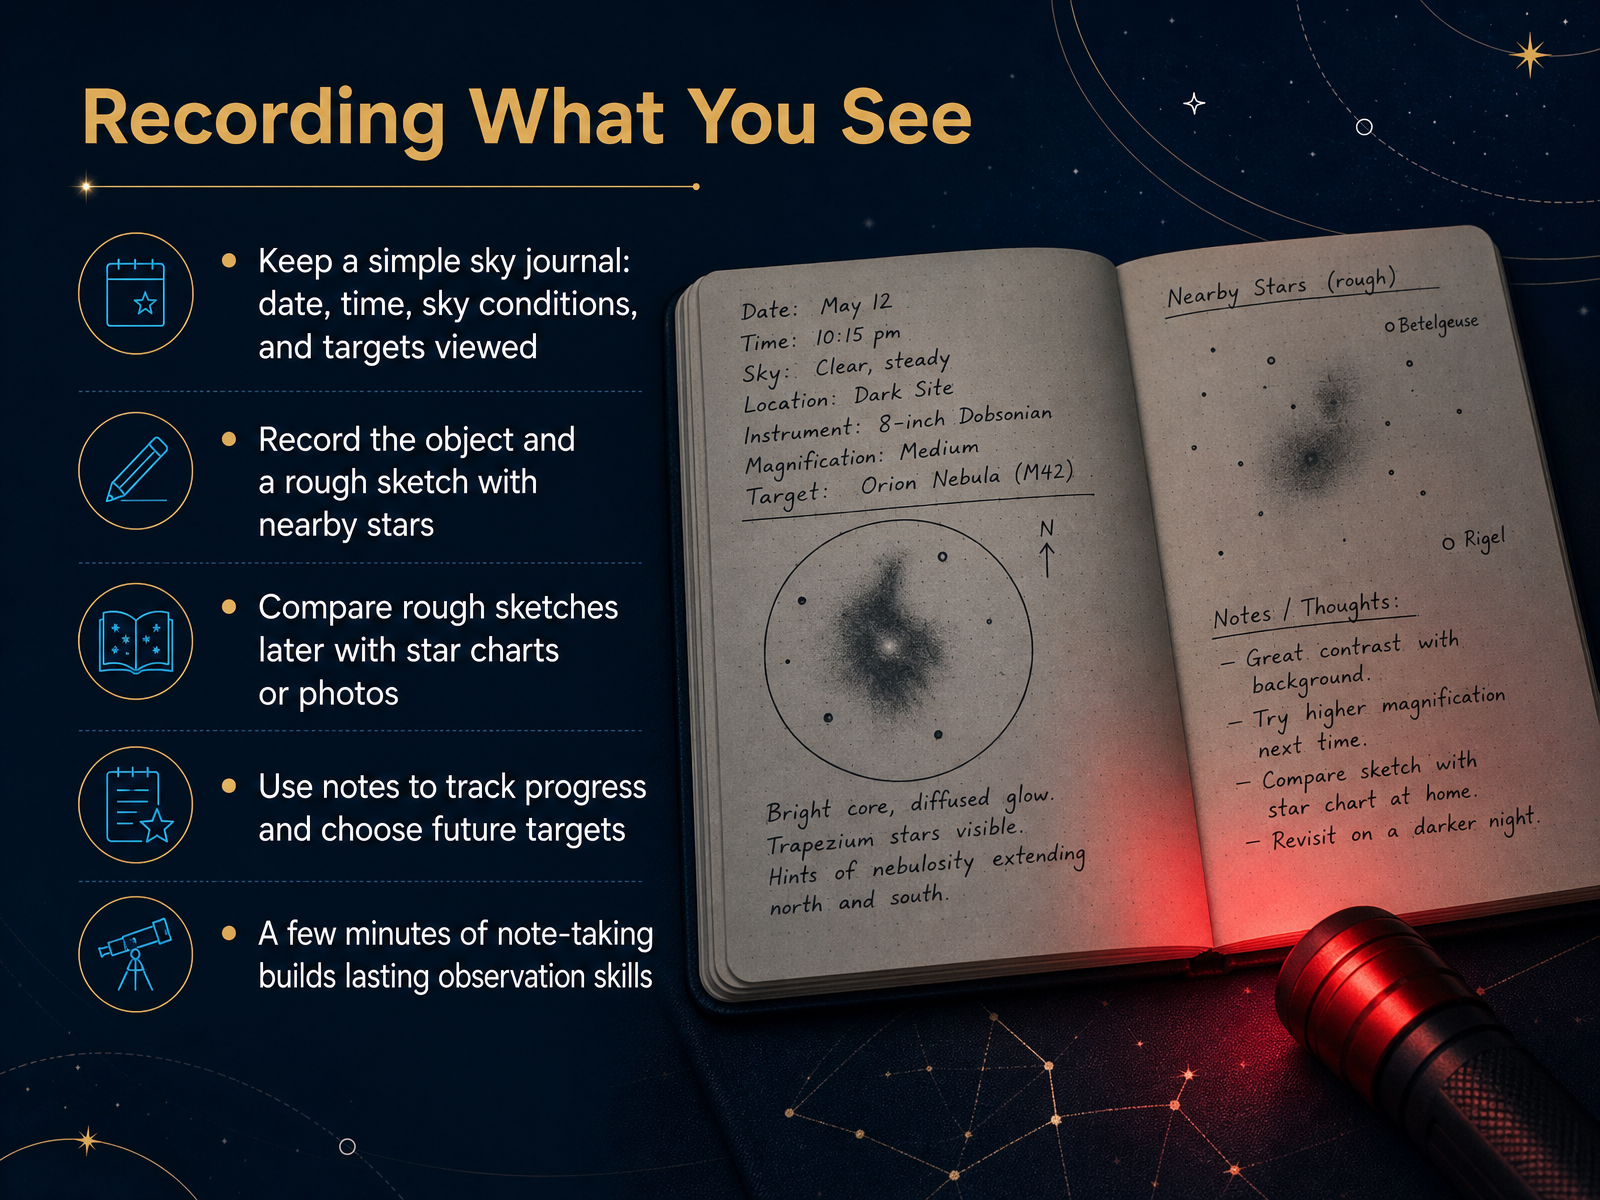
1 min - 13Recording What You SeeNow, let's make those observations stick. Keeping a simple sky journal takes just a few minutes, but it builds real skill over time. Start with the basics: note the date, the time, your sky conditions, and what you aimed to see. Then record the object and make a rough sketch with the nearby stars. Your sketch does not need to be perfect. Just show where the object sits in relation to the stars around it, so you can recognize it again. Later, compare your sketch to a star chart or a photo to confirm what you found. Use your notes to track your progress and choose future targets. Maybe you revisit a favorite, or push yourself toward something new. In just a few minutes of note-taking, you turn a quick look into lasting observation skill. Next, let's put it all together for a complete first night.
 2 min
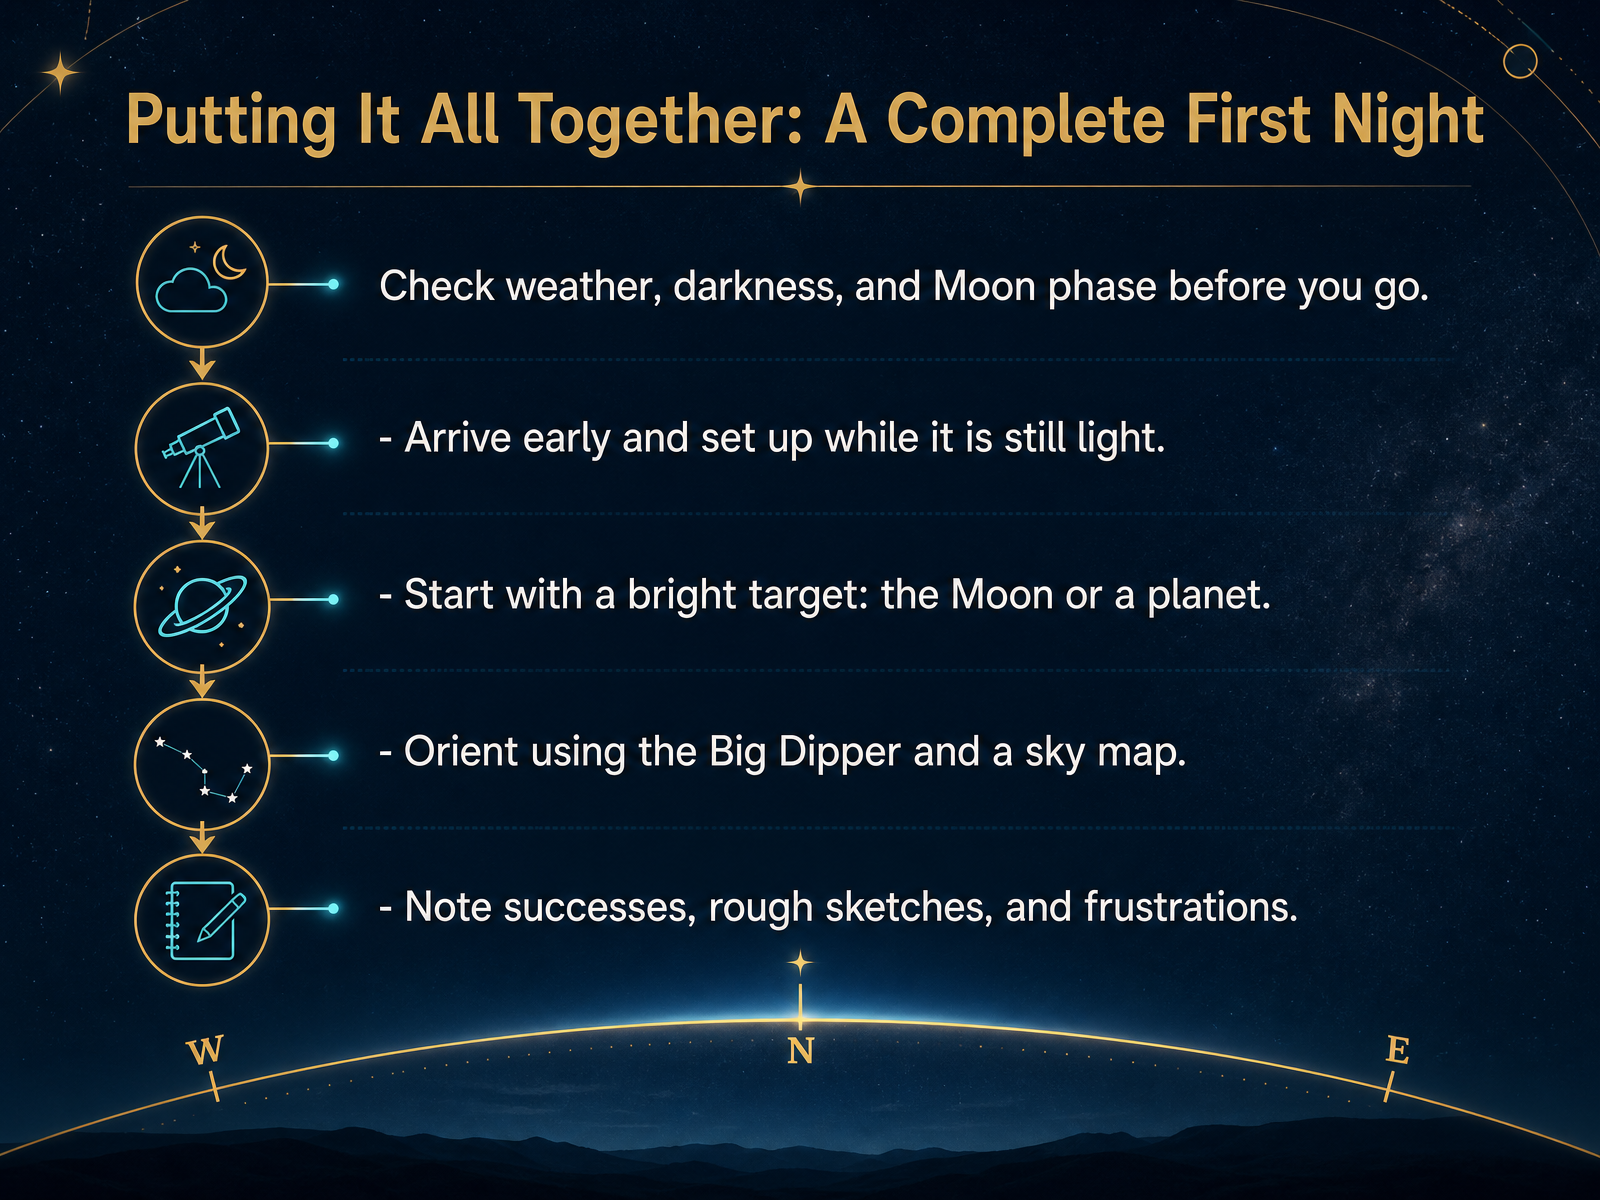
2 min - 14Putting It All Together: A Complete First NightNow let's put everything together for your first complete night under the stars. Before you go, check three things: the weather forecast, how dark your sky will be, and the Moon phase. A bright Moon can wash out fainter targets, so it helps to know what to expect. Once conditions look good, arrive early, while it is still light. Setting up in daylight is much easier and safer than fumbling in the dark. Then begin with a bright target, like the Moon or a bright planet. This gives you a quick, satisfying success before you move on to harder objects. To find your way around, use the Big Dipper as a starting point and keep a simple sky map or planetarium app nearby. And remember to keep a small notebook handy. Jot down what you found, make a rough sketch, and even note what felt confusing. Those notes will help you improve faster than anything else. If your first night feels a little messy, that is completely normal. The goal is simply one successful night, then another. Next, we will look at your next steps and a few helpful resources to keep your momentum going.
 2 min
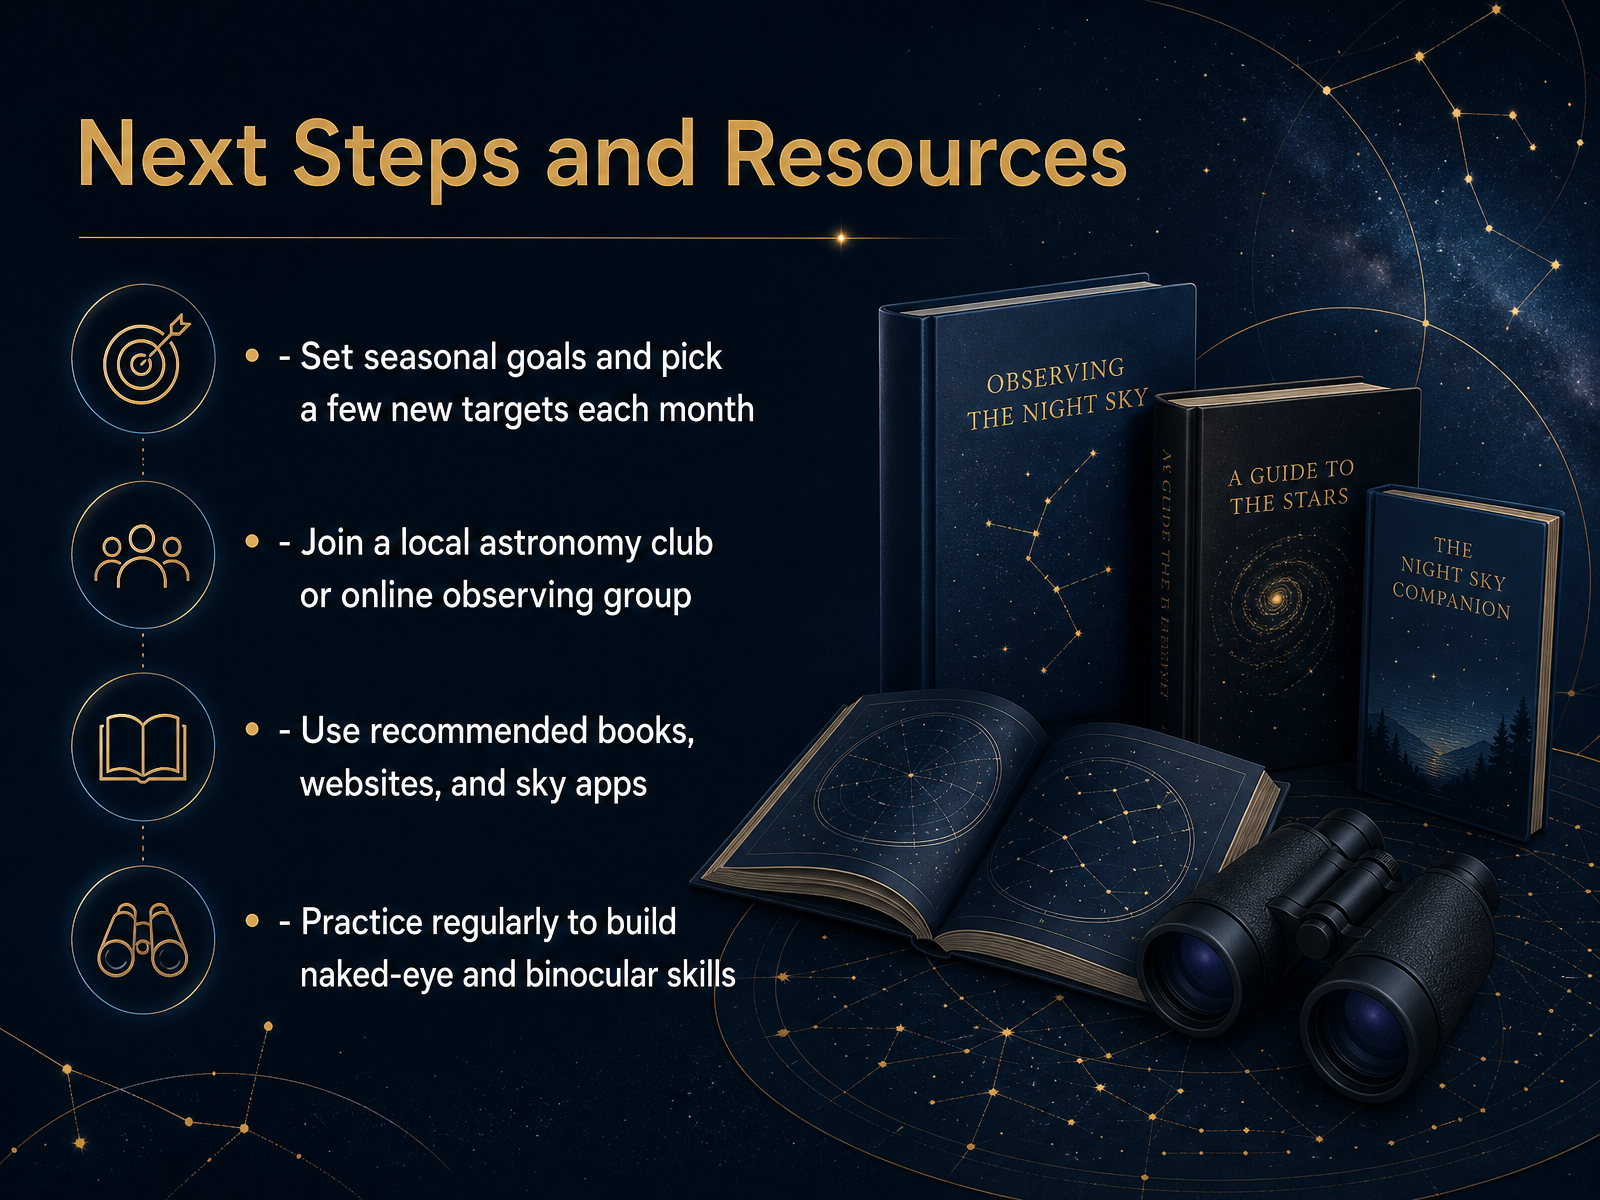
2 min - 15Next Steps and ResourcesSo, where do you go from here? I'd suggest starting simple. Pick one season, and set a goal to learn just two or three new targets each month. Maybe this month you find the brightest star in a constellation, and next month you look for a star cluster you haven't seen before. You don't need to learn the whole sky at once. Another great step is to join a local astronomy club or an online observing group. It's encouraging to share what you're seeing, ask questions, and hear how others found their favorite objects. You can also keep a good sky app or a simple star chart nearby, and use a beginner-friendly book or website when you want to go deeper. Most importantly, practice regularly, even for ten or fifteen minutes. Just stepping outside and noticing one new thing, with your eyes or with binoculars, builds real skill over time. So thank you for joining me on this journey through the night sky. Keep looking up, be patient with yourself, and enjoy every small discovery. Clear skies!
 1 min
1 min
Take the deck with you
Download this course as a file — free, no sign-up needed.
- PDF handoutEvery slide page, ready to print or share.16 pages · 4.4 MBDownload
- Narrated PowerPointThe deck that presents itself — every slide carries the digital human's narration video.16 pages · 16.7 MBDownload
- PowerPoint slidesThe full deck as a .pptx — open it in PowerPoint, Keynote, or Google Slides.16 pages · 4.3 MBDownload
Free to use in your own training — please keep the PersonWise credit page at the end.
Have your own deck? Turn it into a course
Sources consulted
Web sources consulted while building this course.
- Beginner's Guide Deep Sky Objects — milwaukeeastro.org
- Want to find the Andromeda galaxy? Here are 2 ways — earthsky.org
- 10 great spring binocular sights — astronomy.com
- M31, the Andromeda Galaxy, in BinoSky, a guide to astronomy with binoculars. — lightandmatter.com
- How far can you see into space? A deep-sky tour | BBC Sky at Night Magazine — skyatnightmagazine.com
- Altitude & Azimuth: The Horizontal Coordinate System — timeanddate.com
- Sky Coordinates | The Schools' Observatory — schoolsobservatory.org
- Altitude and azimuth | Definition & Facts — britannica.com
- 5.1: Altitude and Azimuth – Your Place in the Sky — phys.libretexts.org
- Positional Astronomy: Coordinate systems: the horizontal or "alt-az" system — sceweb.uhcl.edu
- Best constellations in the night sky, season-by-season | BBC Sky at Night Magazine — skyatnightmagazine.com
- How to Find Constellations in the Night Sky — howtogeek.com
- The starry sky | Astronomy.com — astronomy.com
- Beginner's Constellation Guide: How to Find 5 Easy — telescopeadvisor.com
- How to Learn the Constellations by Season: A Practical Guide for Beginners - Sentinel Mission — sentinelmission.org
- Lecture 6: Daily & Annual Motions — astronomy.ohio-state.edu
- Lecture 6: Daily & Annual Motions — astronomy.ohio-state.edu
- The Celestial Sphere; Apparent Motions of the Sun and Stars — people.astro.umass.edu
- Diurnal motion | Earth’s Rotation, Celestial Sphere & Celestial Equator | Britannica — britannica.com
- Sky Motion Applet — physics.weber.edu