Open Source UI Design Tools
Begin
14 pages · ~28 min
Open Source UI Design Tools
Learn how to design user interfaces using open-source UI design tools. This training is ideal for designers and developers seeking free, practical alternatives to commercial design software.
What you’ll learn
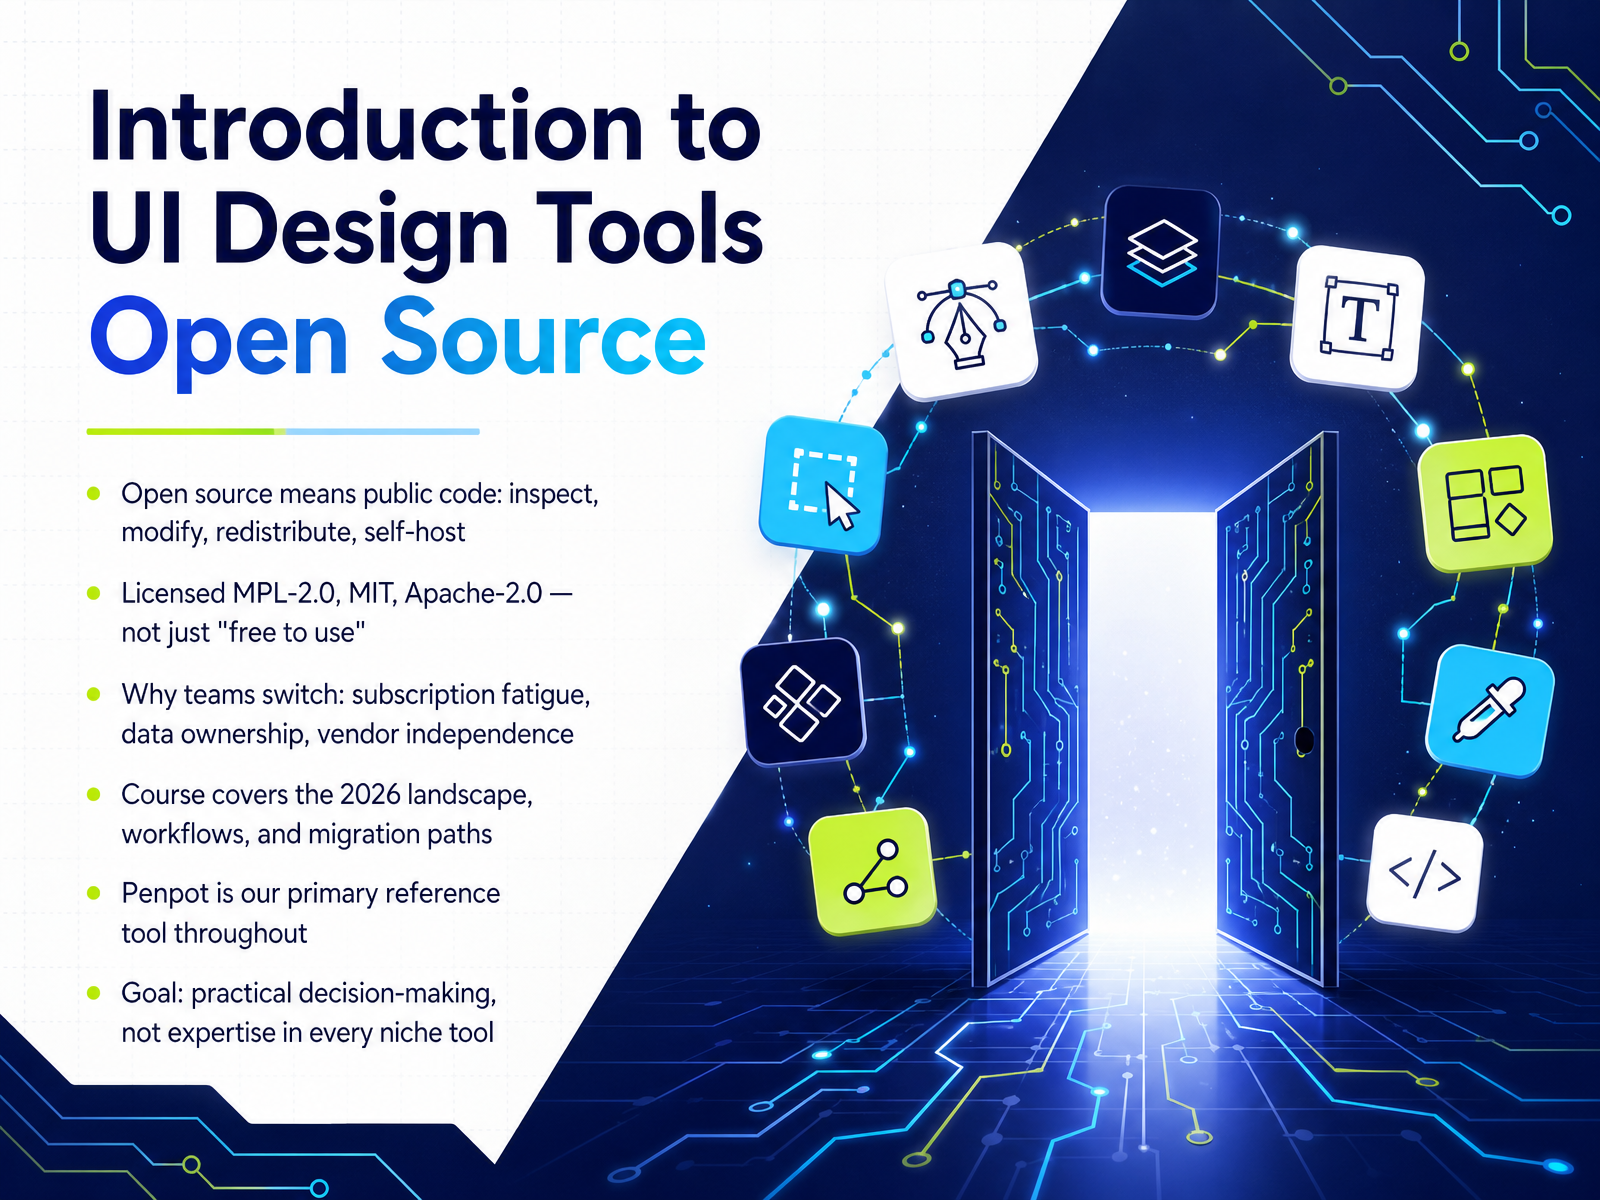
- 01Introduction to UI Design Tools Open SourceWelcome. I'm glad you're here. Over the next fourteen slides, we're going to look at open-source UI design tools, and the goal is practical decision-making, not mastery of every niche tool out there. To start, let's get clear on what open source actually means. It's not just free to use. The source code is public, so anyone can inspect it, modify it, redistribute it, and in many cases self-host it. The license matters here. You'll see names like M P L two point zero, M I T, and Apache two point zero. Those grant real rights over the code, unlike a freemium plan that looks free but stays closed. So why do teams switch? Three common reasons. Subscription fatigue as per-seat pricing adds up, data ownership when files need to stay on your own infrastructure, and vendor independence so a product can't vanish or change terms overnight. Through this course, Penpot will be our primary reference tool. It's a genuinely capable, open-source option for UI design, licensed under M P L two point zero, and it can be self-hosted for free. Keep that as your anchor example as we go. The takeaway for this slide: open source is about control and durability, not just cost. Next, we'll dig into what makes a design tool truly open source.toolradar.comossalt.comcalmops.com+22 min
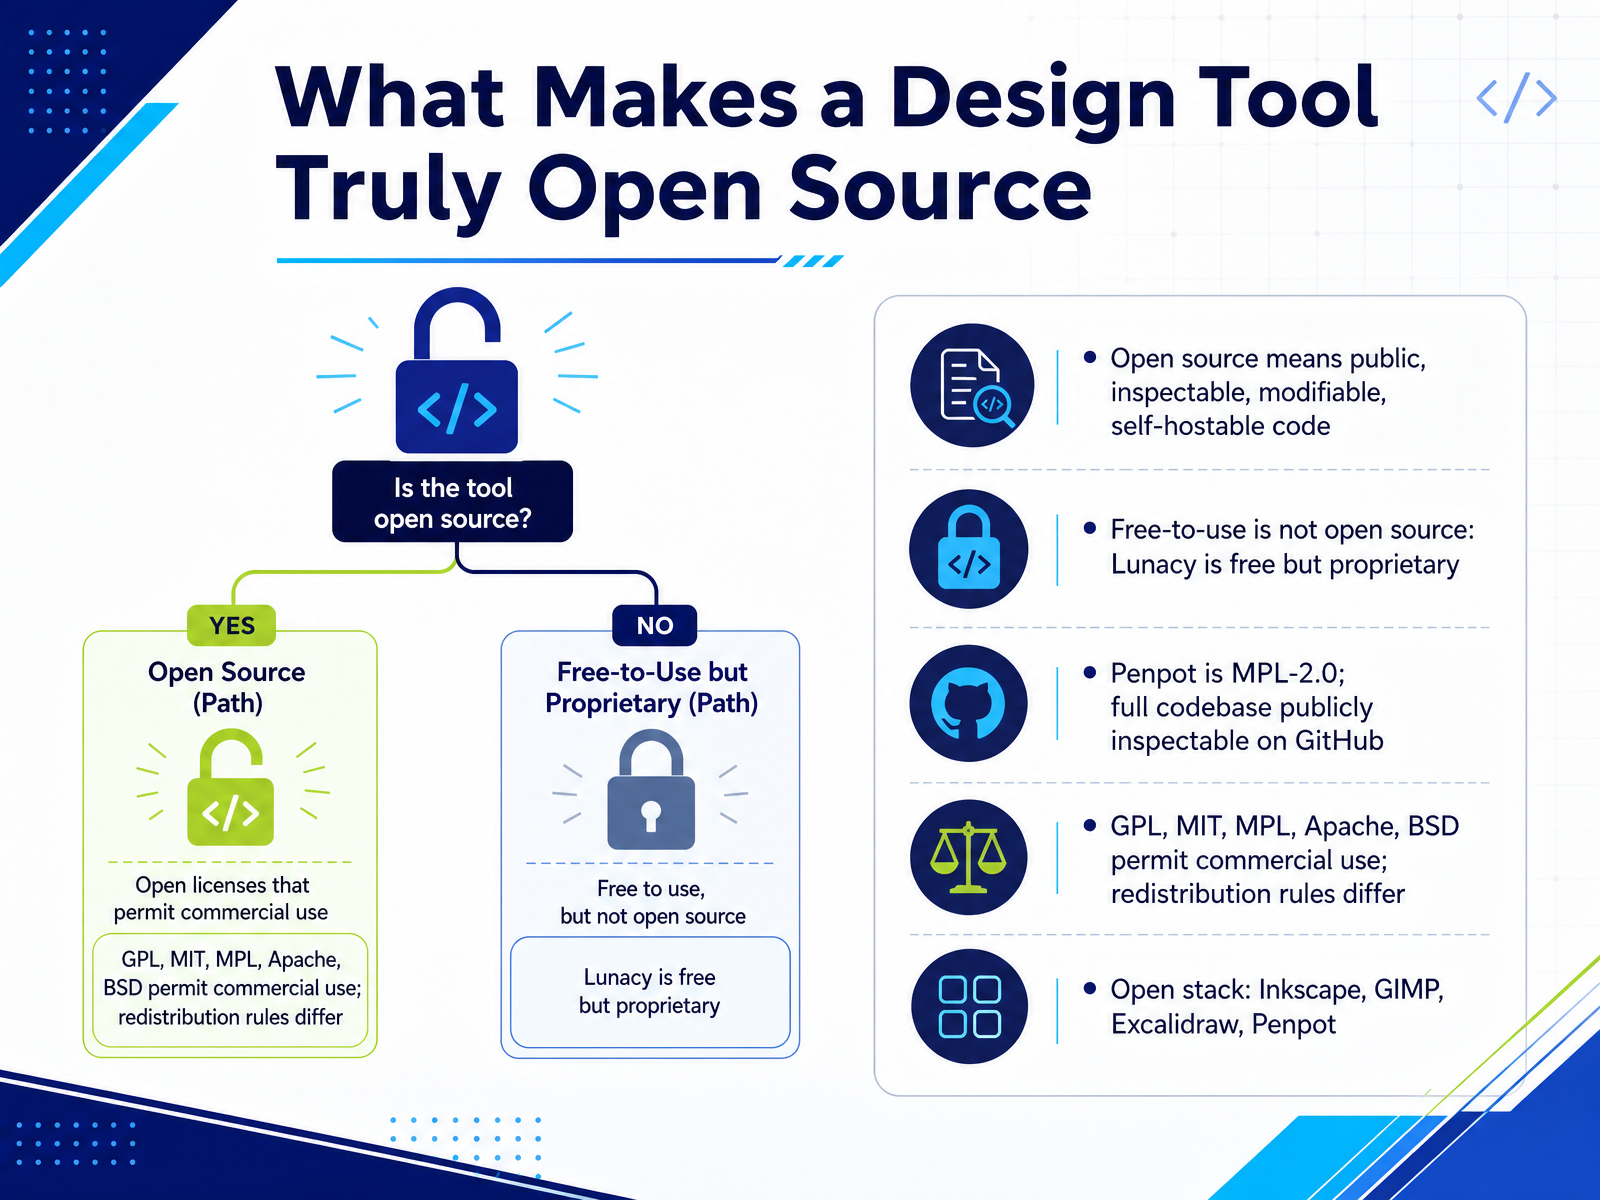
- 02What Makes a Design Tool Truly Open SourceNow, before we compare specific tools, let's settle one distinction that trips people up: what makes a design tool truly open source.
The short definition. Open source means the code is public, inspectable, modifiable, and ideally self-hostable. Think of Penpot, which is licensed under MPL 2.0, with its full codebase sitting publicly on GitHub. You can read it, fork it, or run it on your own servers.
Here's the trap. Free to use is not the same as open source. Lunacy is a good example. It's free, and genuinely capable, but its code is proprietary. You can't inspect it, and you can't self-host the core app. That's still vendor-dependent.
On licenses, the common ones, GPL, MIT, MPL, Apache, and BSD, all permit commercial use. What differs is redistribution and how derivative work must be shared.
So the open stack looks like this: Inkscape, GIMP, Excalidraw, and Penpot. Four tools, four real codebases. Next, we'll look at the 2026 Landscape of Open Source UI Tools.
 toolradar.comossalt.comcalmops.com+22 min
 - 03The 2026 Landscape of Open Source UI ToolsNow, let's map the landscape as it stands in 2026. Penpot is the most mature open-source Figma alternative, and it's the only one shipping native design tokens using the W3C standard, so your tokens live in the file, not in a plugin. Lunacy is free but proprietary. It's a strong pick for Windows and offline workflows, just know you can't audit or fork the code. OpenPencil is offline-first, reads dot fig files natively, and lets you bring your own AI key. Quant-UX pairs prototyping with built-in user testing and heatmaps, which Figma doesn't do natively. Plasmic is a visual builder that outputs production-ready React code. And the honest gaps across all of these are plugin ecosystems, large-file performance, and advanced prototyping. Keep those three trade-offs in mind as we go deeper. Next, we'll look at core capabilities in open source UI design.
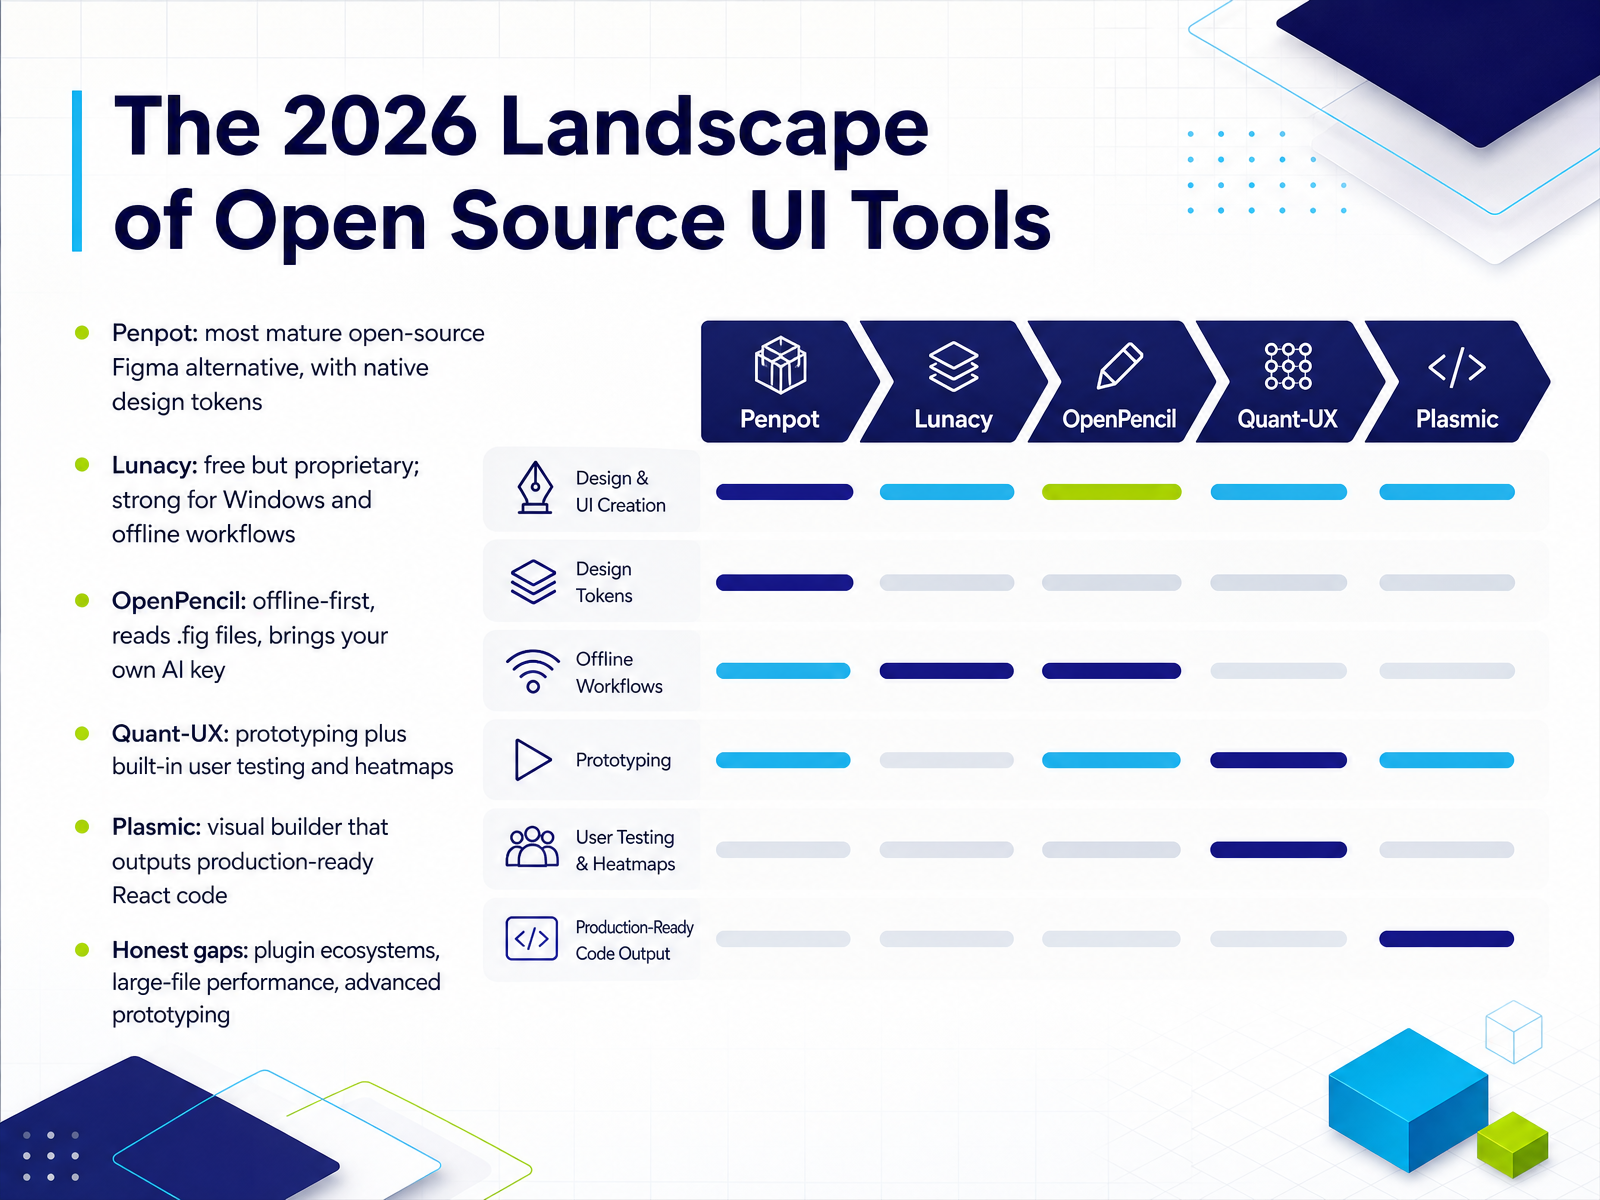 illustration.appossalt.comopen-design.ai+21 min
 - 04Core Capabilities in Open Source UI DesignSo what can open source UI tools actually do in 2026? Penpot, Lunacy, OpenPencil, and Quant-UX all cover the essentials: vector editing, auto-layout, components, and some level of prototyping. The differences show up in the details. Penpot's layout engine is CSS-native, so flexbox and CSS Grid map directly to how the browser behaves. That sounds technical, but the payoff is concrete: your inspect panel gives developers real CSS instead of a translated approximation. And in Penpot, dev inspection is free. No paid seat to read spacing, copy styles, or export SVG. Figma still leads on plugin depth, advanced prototyping, and performance with very large files. Penpot leads on native W3C design tokens and zero-cost developer handoff. So the honest answer is not one winner. It depends on whether your priority is ecosystem depth or open, code-ready output. Next, we look at workflows for UI prototyping and developer handoff.
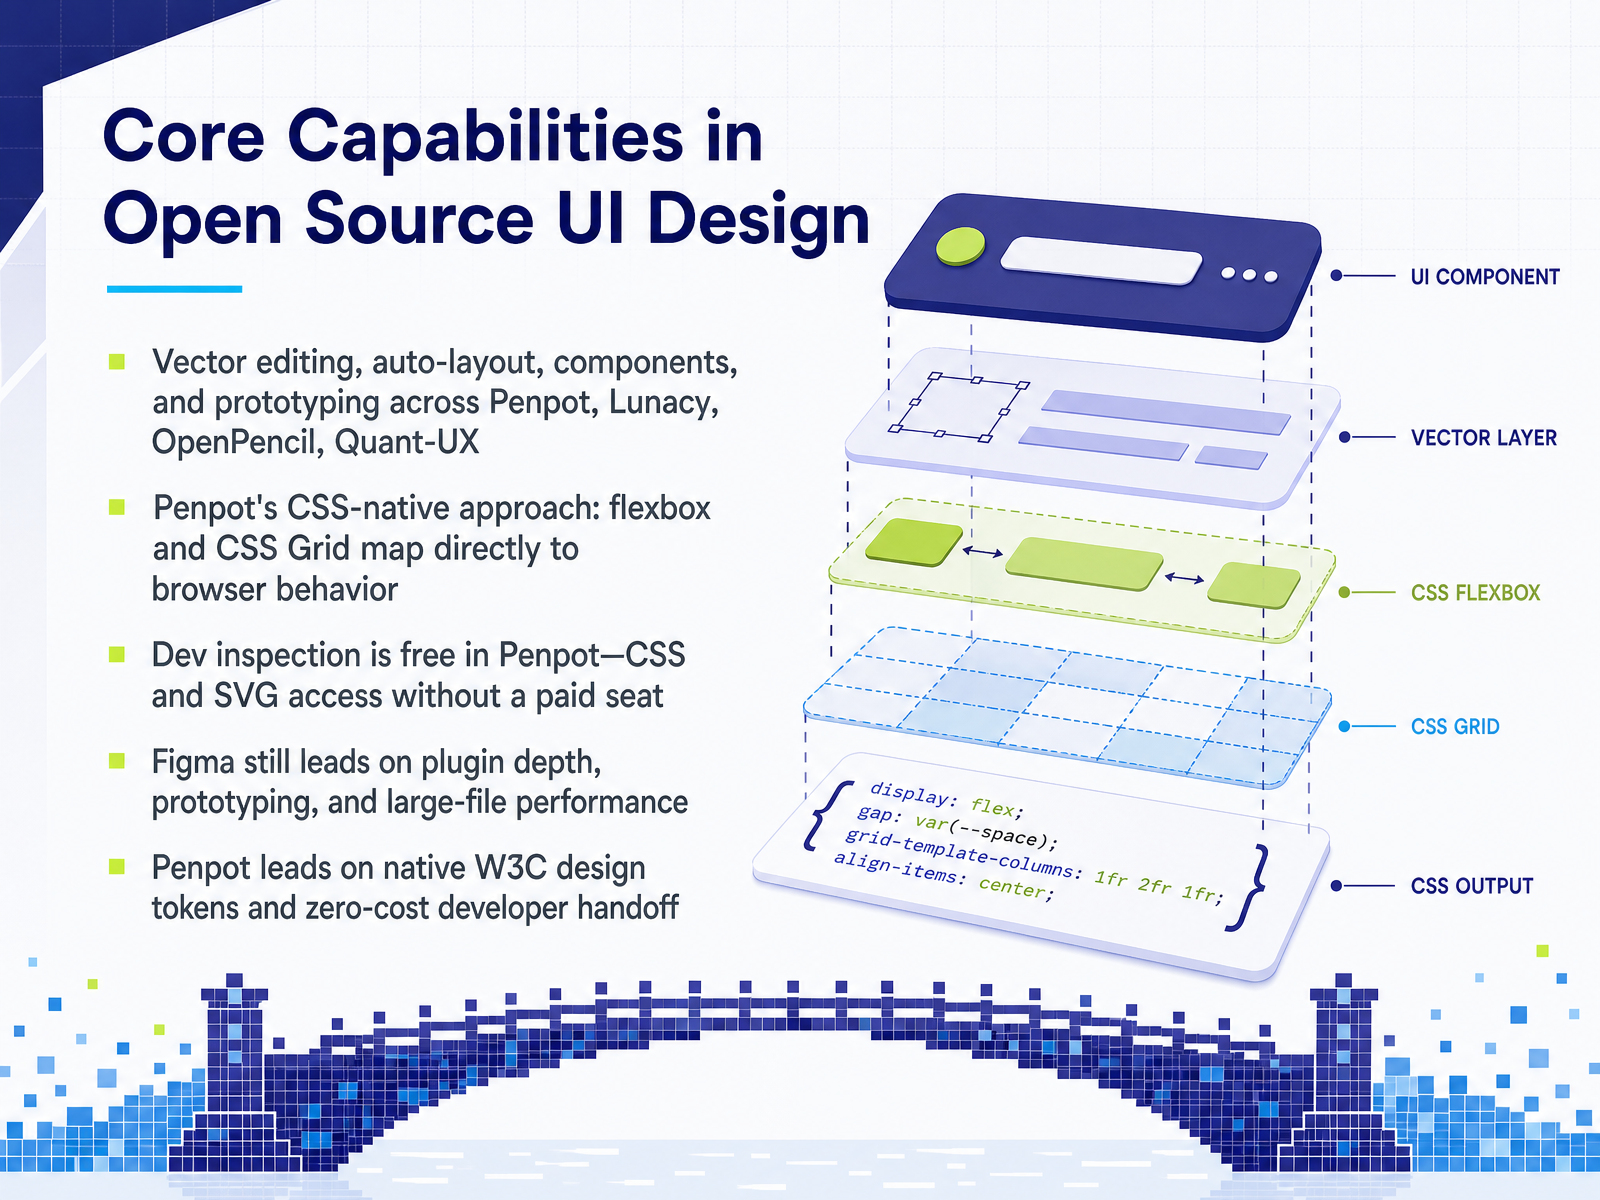 illustration.appossalt.comopen-design.ai+21 min
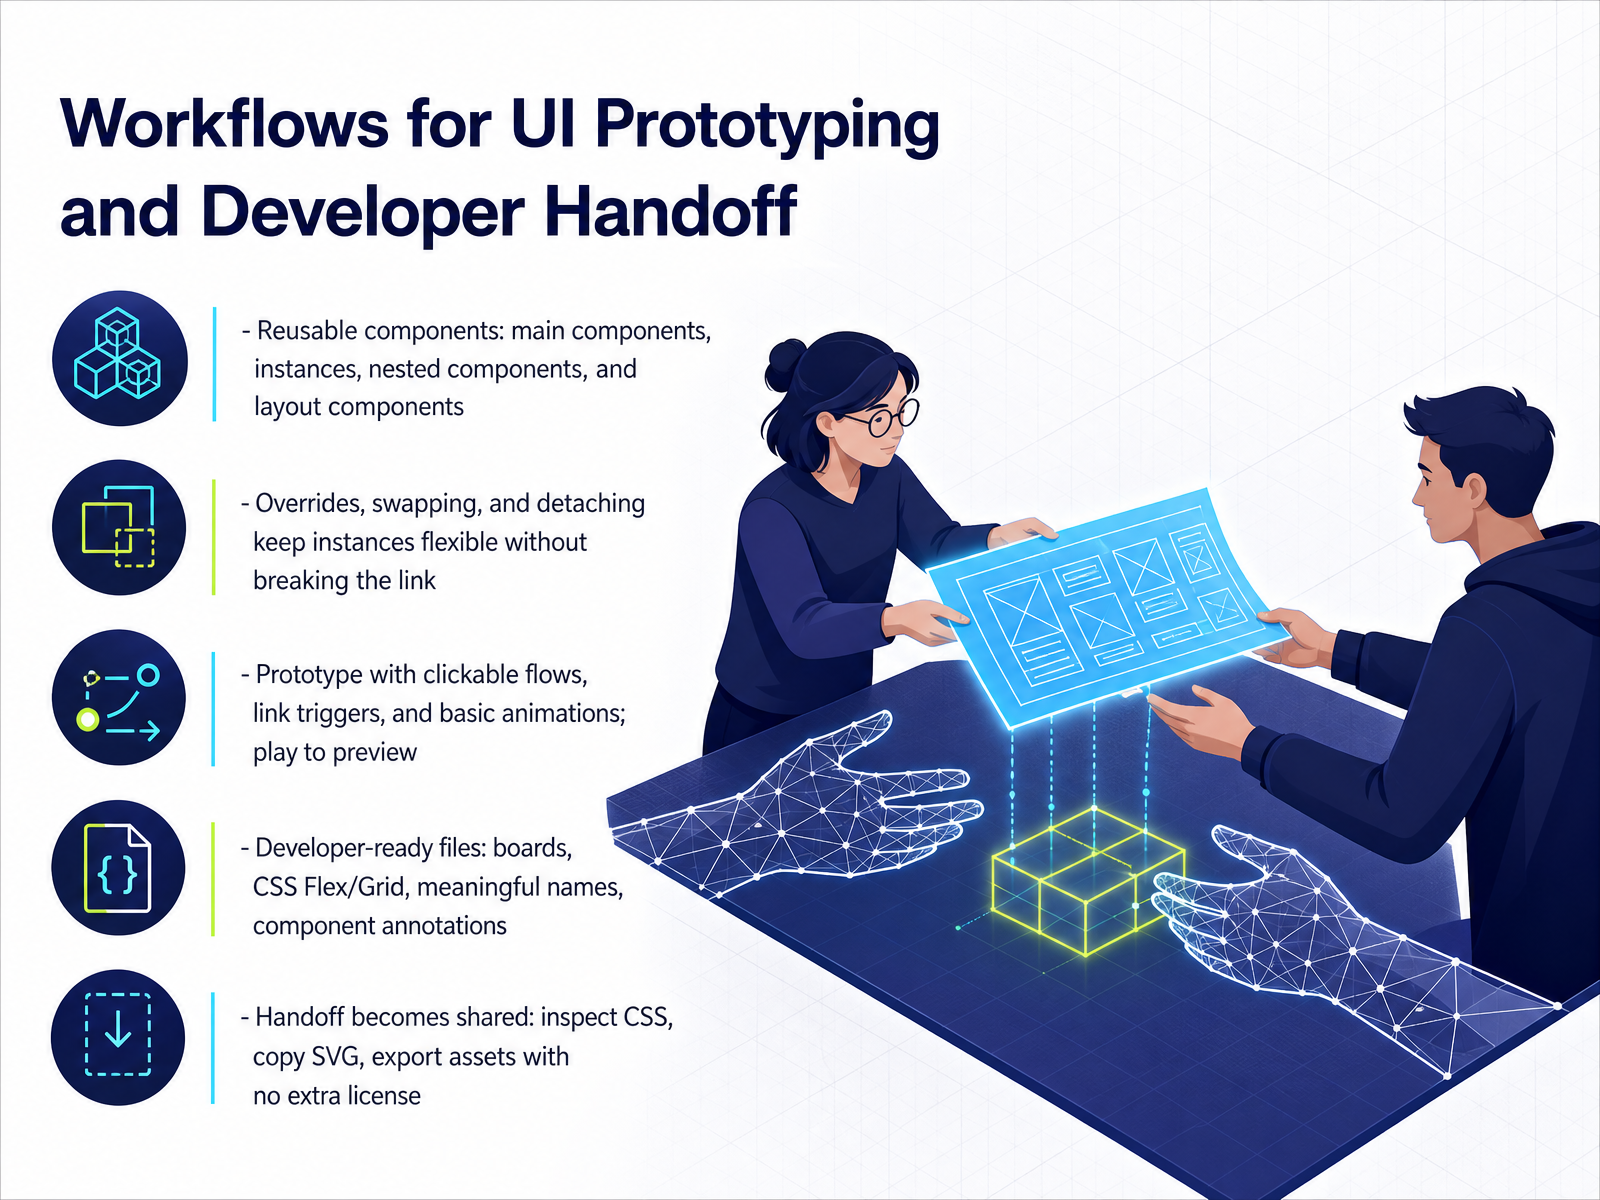
 - 05Workflows for UI Prototyping and Developer HandoffNow let's walk through the workflow itself, from reusable components to a handoff your developers can actually use.
Start with components. In Penpot, a main component is your source of truth. Instances inherit from it, and nested components let you build something like a checkbox with an icon inside it. You can even save Flex and Grid layouts as layout components.
Instances stay flexible. You can override text or color, swap nested components, or detach an instance when you need a one-off. Detaching breaks the link, so save that for exceptions, not the default.
For prototyping, wire up clickable flows and link triggers, add simple animations, then hit play to preview the whole journey before anyone builds it.
Before handoff, make the file developer-ready. Use boards, Flex and Grid layouts, meaningful names, and annotations on your components. Then handoff becomes shared work. In Inspect, developers read the C S S, copy an S V G, and export assets, with no extra license.
Next, we'll look at collaboration and version control.
 penpot.apppenpot.apppenpot.app+22 min
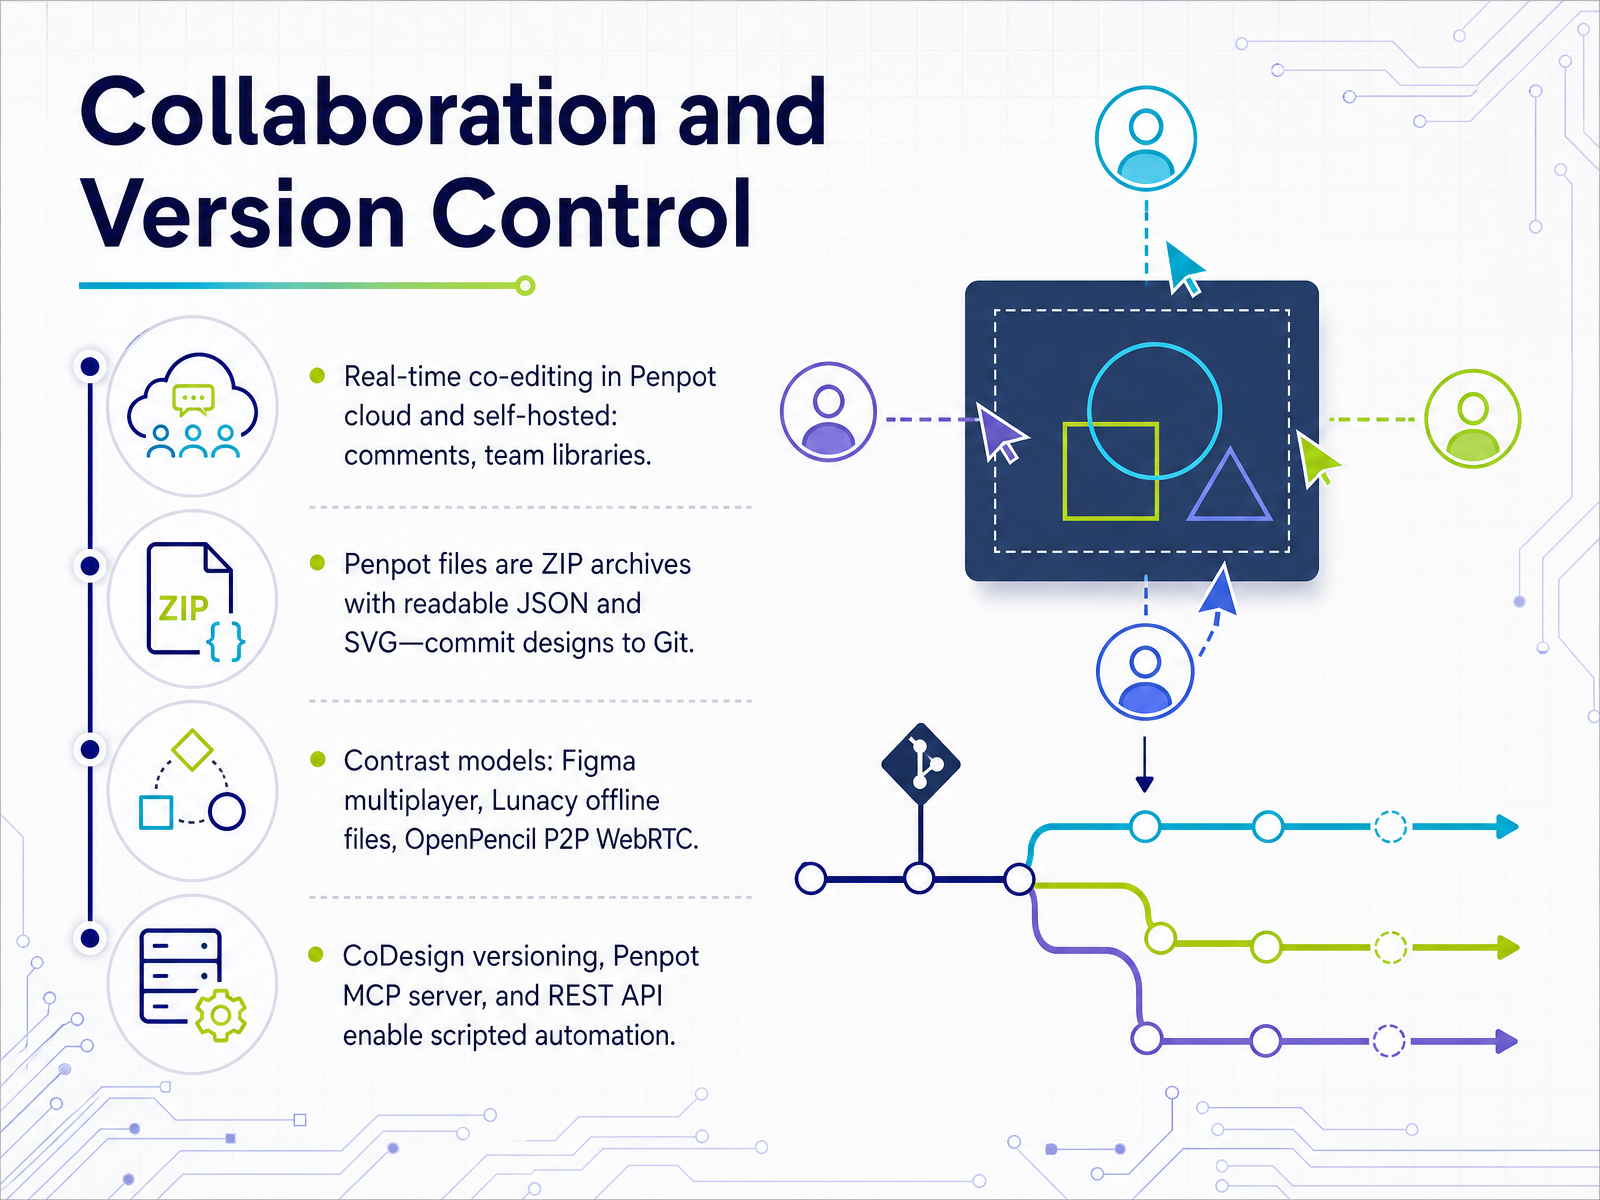
 - 06Collaboration and Version ControlLet's talk about collaboration and version control, because this is where open source tools start to look genuinely different. Penpot supports real-time co-editing, both in its cloud service and in self-hosted deployments, with comments and shared team libraries. So you can leave feedback on a specific element and pull the same component library into every project. Here is the part that matters for developers. A Penpot file is a ZIP archive containing readable JSON and SVG, so you can commit design files to Git and review changes like code. Compare that with other models. Figma offers polished multiplayer on its own servers. Lunacy works as an offline desktop file you sync however you like. OpenPencil uses peer-to-peer WebRTC, with no server and no account. Then think about automation. CoDesign adds versioning and snapshots, and Penpot ships an MCP server plus a REST API, so you can script exports, token updates, and handoff steps. Quick takeaway: if design changes matter to your team, choose a tool whose files you can diff. Next, we look at building a design system with tokens and libraries.
 github.comgithub.comgithub.com+22 min
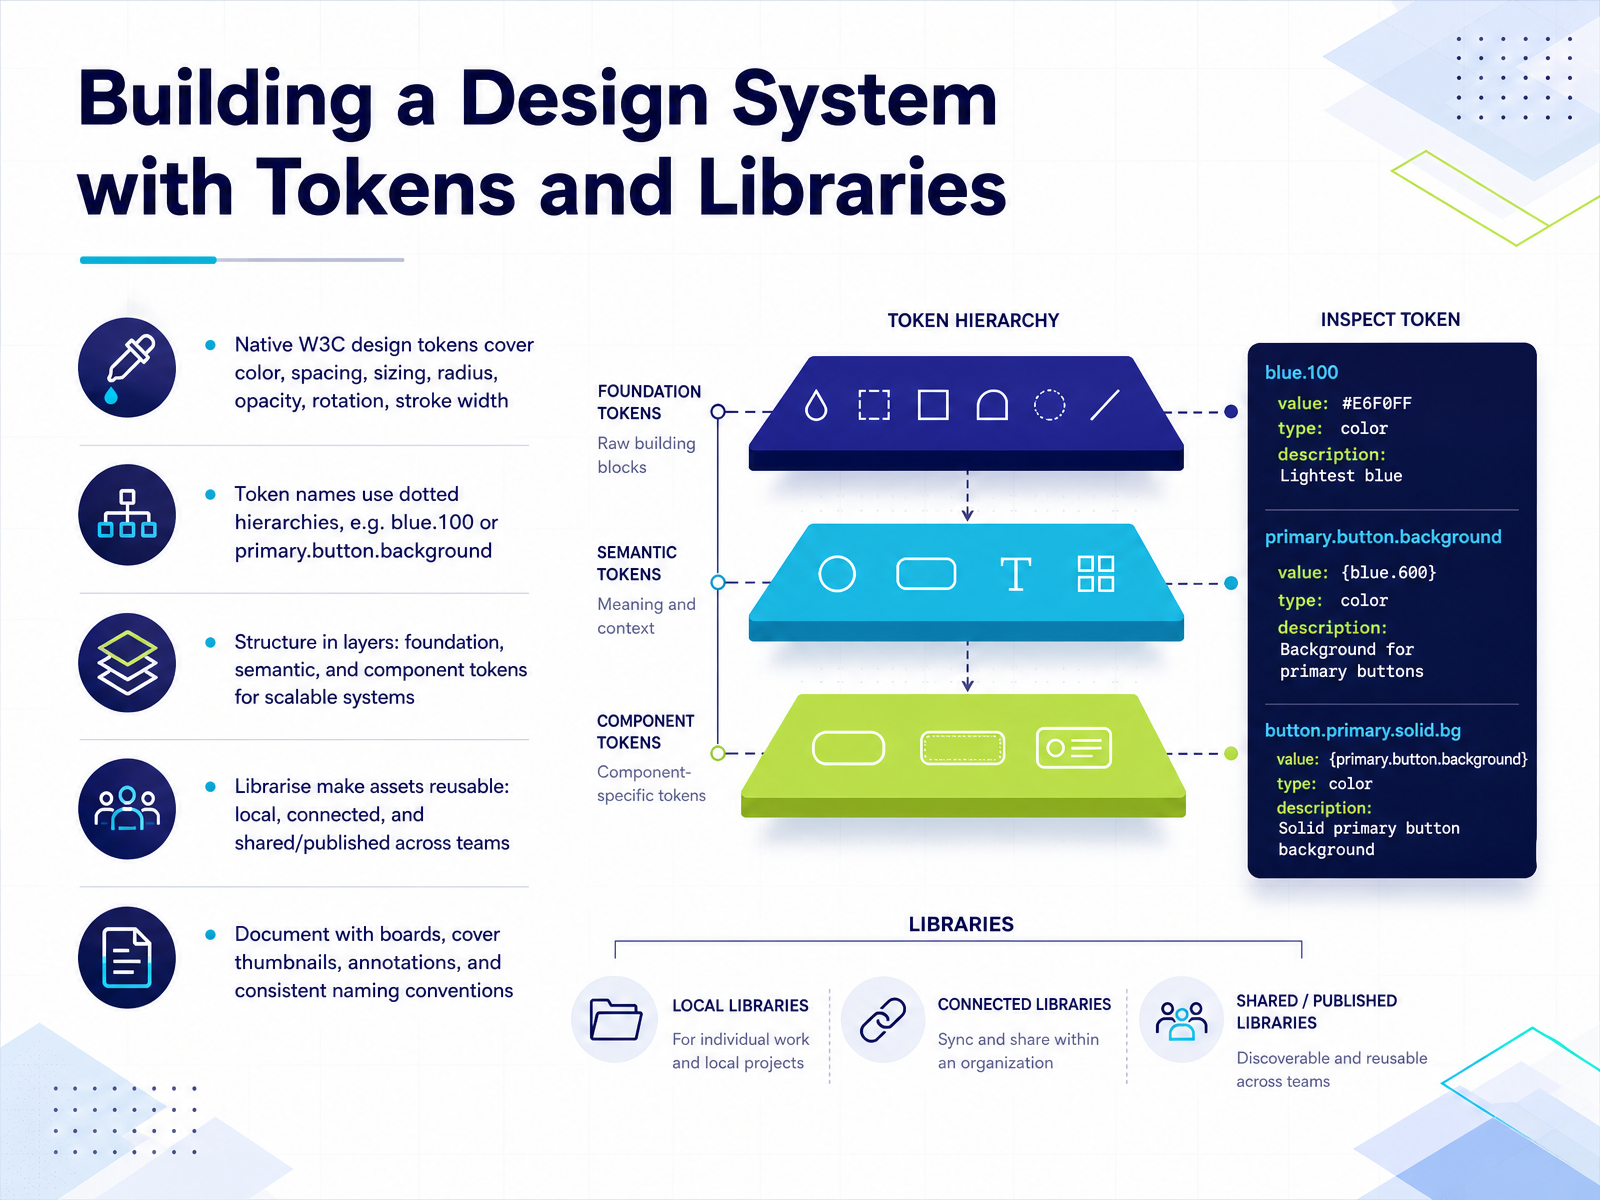
 - 07Building a Design System with Tokens and LibrariesLet's look at how tokens and libraries come together into a real design system. Native design tokens cover color, spacing, sizing, radius, opacity, rotation, and stroke width. Token names use dotted hierarchies, so you'll see blue dot one hundred, or primary dot button dot background. That naming gives you a predictable structure. Build in layers. Foundation tokens hold raw values. Semantic tokens describe intent. Component tokens handle specific elements. Each layer references the one below it, so changing a single foundation value updates everything that depends on it. Libraries make assets reusable. You have local libraries inside a file, connected libraries imported from other files, and shared or published libraries that sync across your whole team. Finally, document as you go. Use boards to demonstrate usage, cover thumbnails to orient people, annotations on components, and consistent naming conventions throughout. Here's your takeaway. Layered tokens plus well documented libraries turn a folder of assets into a system your team can actually maintain. Next, we'll look at Self-Hosting and Data Ownership.
 penpot.apppenpot.apppenpot.app+22 min
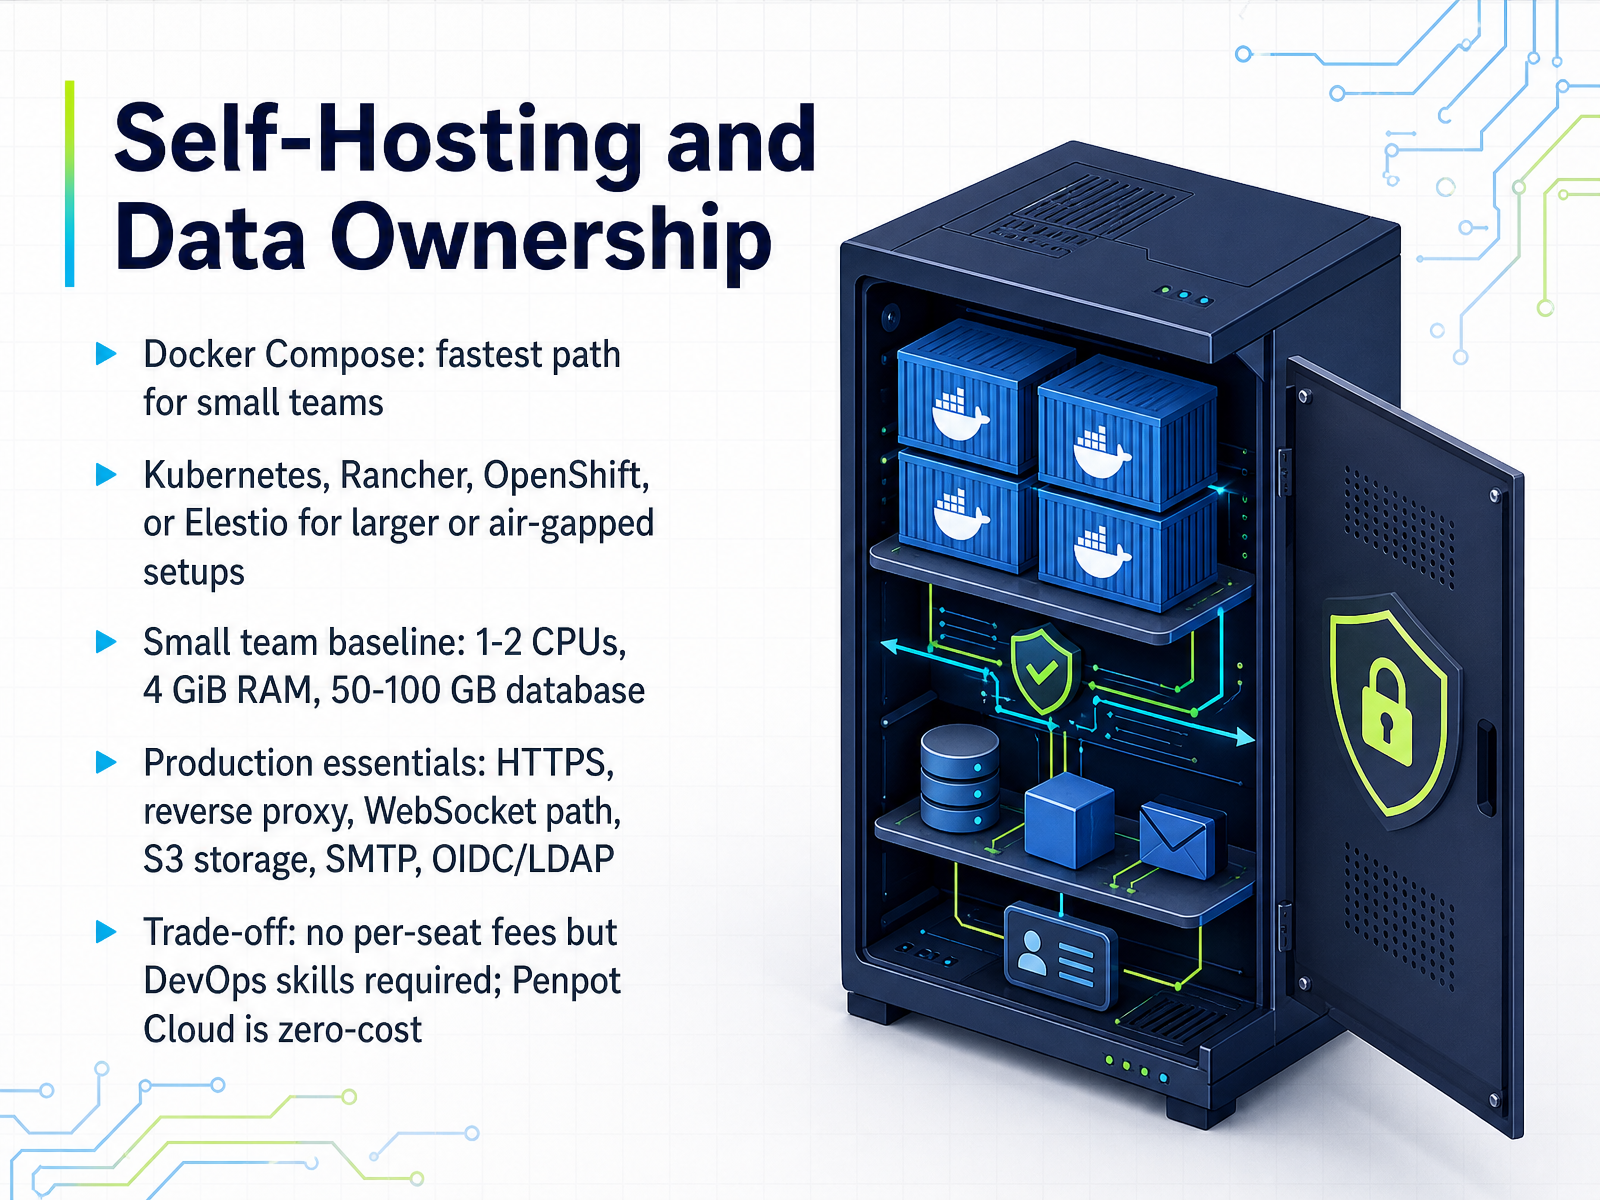
 - 08Self-Hosting and Data OwnershipNext, let's talk about self hosting and data ownership. The fastest path for small teams is Docker Compose. You pull the official compose file, run one command, and it starts on localhost port nine thousand and one. For larger or air gapped setups, look at Kubernetes, Rancher, OpenShift, or Elestio. A small team baseline is one to two CPUs, four gibibytes of RAM, and a fifty to one hundred gigabyte database, with elastic sizing as you grow. If you go to production, you need a few things in place. HTTPS behind a reverse proxy, a WebSocket path for notifications, S3 or filesystem storage, SMTP for email, and OIDC or LDAP for single sign on. Here is the honest trade off. You avoid per seat fees entirely, but you take on DevOps work. You own the backups, the upgrades, and the uptime. If you would rather not manage servers, Penpot Cloud is zero cost to start. So ask yourself one question. Do we have the skills and the time to run this, or do we just need the design work done? Next, let's move on to extending open source design tools.
 toolradar.comossalt.comcalmops.com+22 min
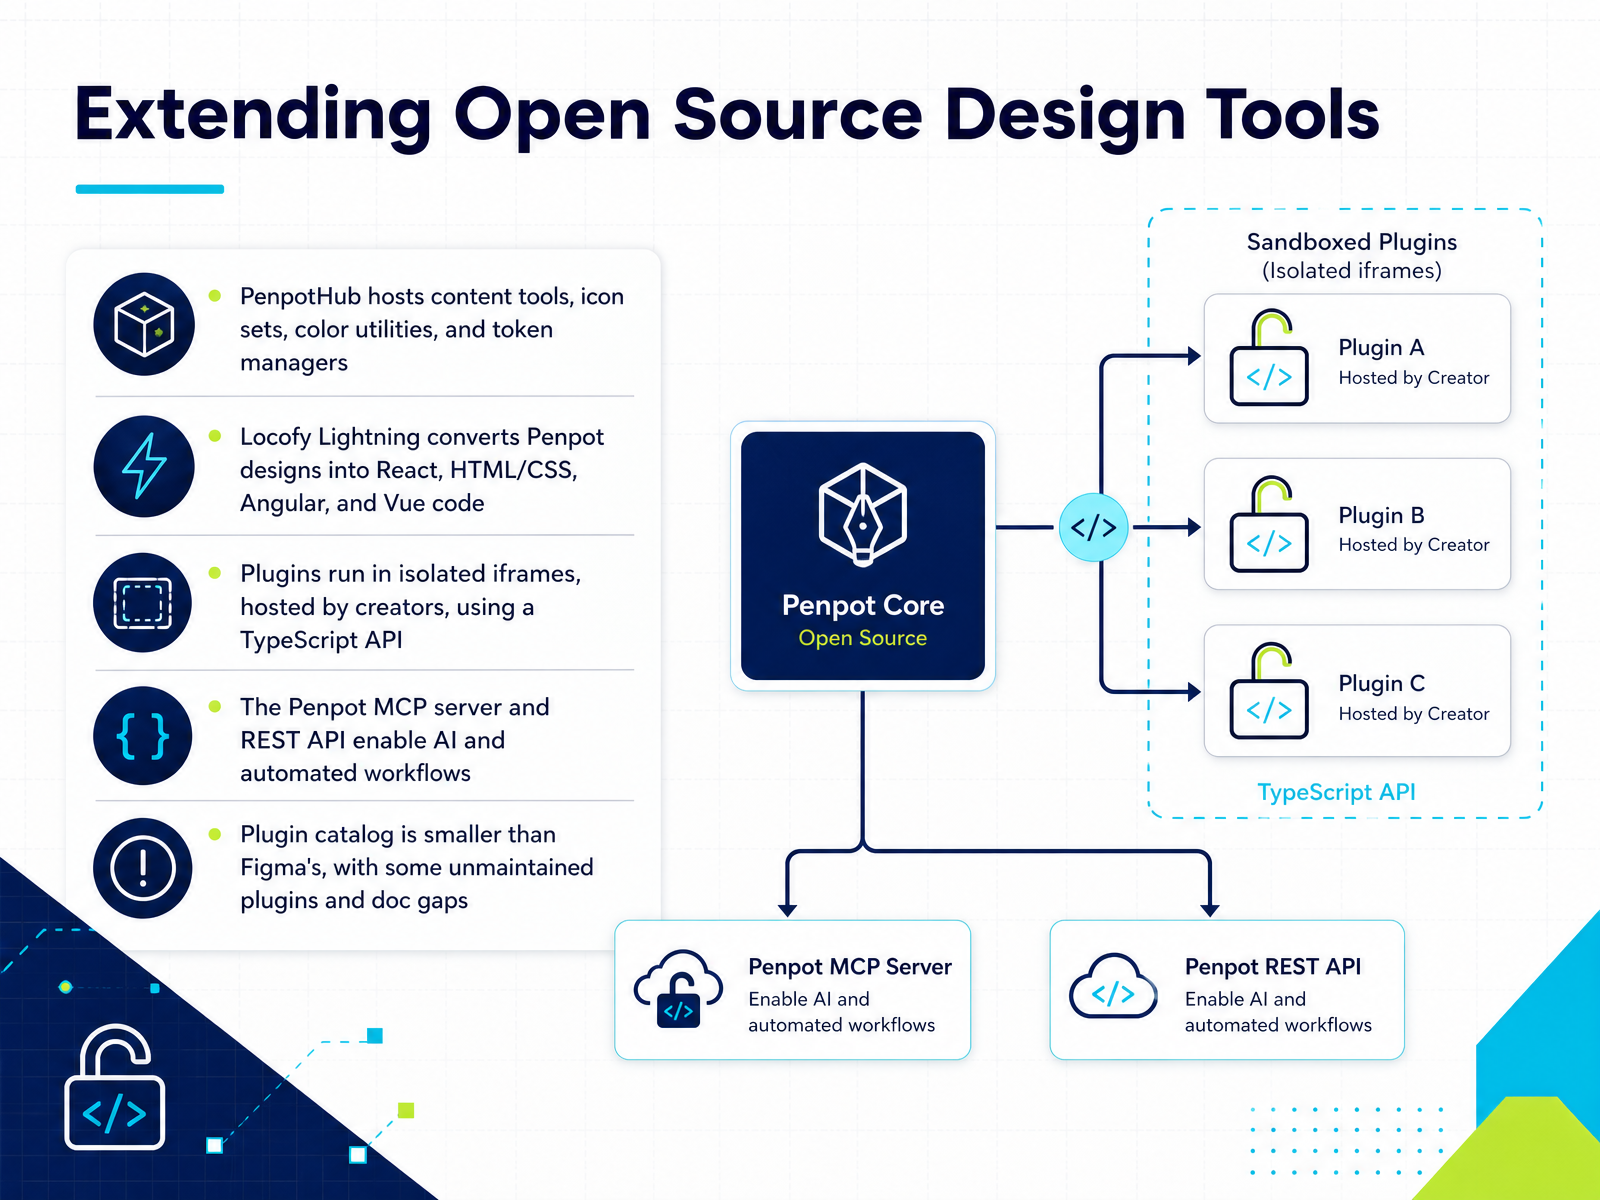
 - 09Extending Open Source Design ToolsNow let's look at how we extend these open source design tools, using Penpot as the concrete example. PenpotHub is the community hub where you find content tools, icon sets, color utilities, and token managers. If you need to import a design token system, for instance, the Design Token Manager plugin lets you create and organize tokens without leaving the workspace.
For code generation, Locofy Lightning converts Penpot designs into React, HTML and CSS, Angular, and Vue. It is free to use, though you do need a credit card on file to access it.
Under the hood, plugins run in isolated iframes and are hosted by their creators, not by Penpot. You build them with a TypeScript API, using the @penpot/plugin-types package for autocompletion, and a manifest dot JSON file defines the plugin's name and permissions. Beyond plugins, the Penpot MCP server and REST API open the door to AI agents and automated workflows.
One honest caveat: the plugin catalog is smaller than Figma's. Some plugins are unmaintained, and the API docs have gaps. So check maintenance before you commit. Next, we'll cover evaluating open source UI tools.
 penpot.apppenpot.apppenpot.app+22 min
 - 10Evaluating Open Source UI ToolsLet's talk about how to evaluate these tools without getting swept up in hype.
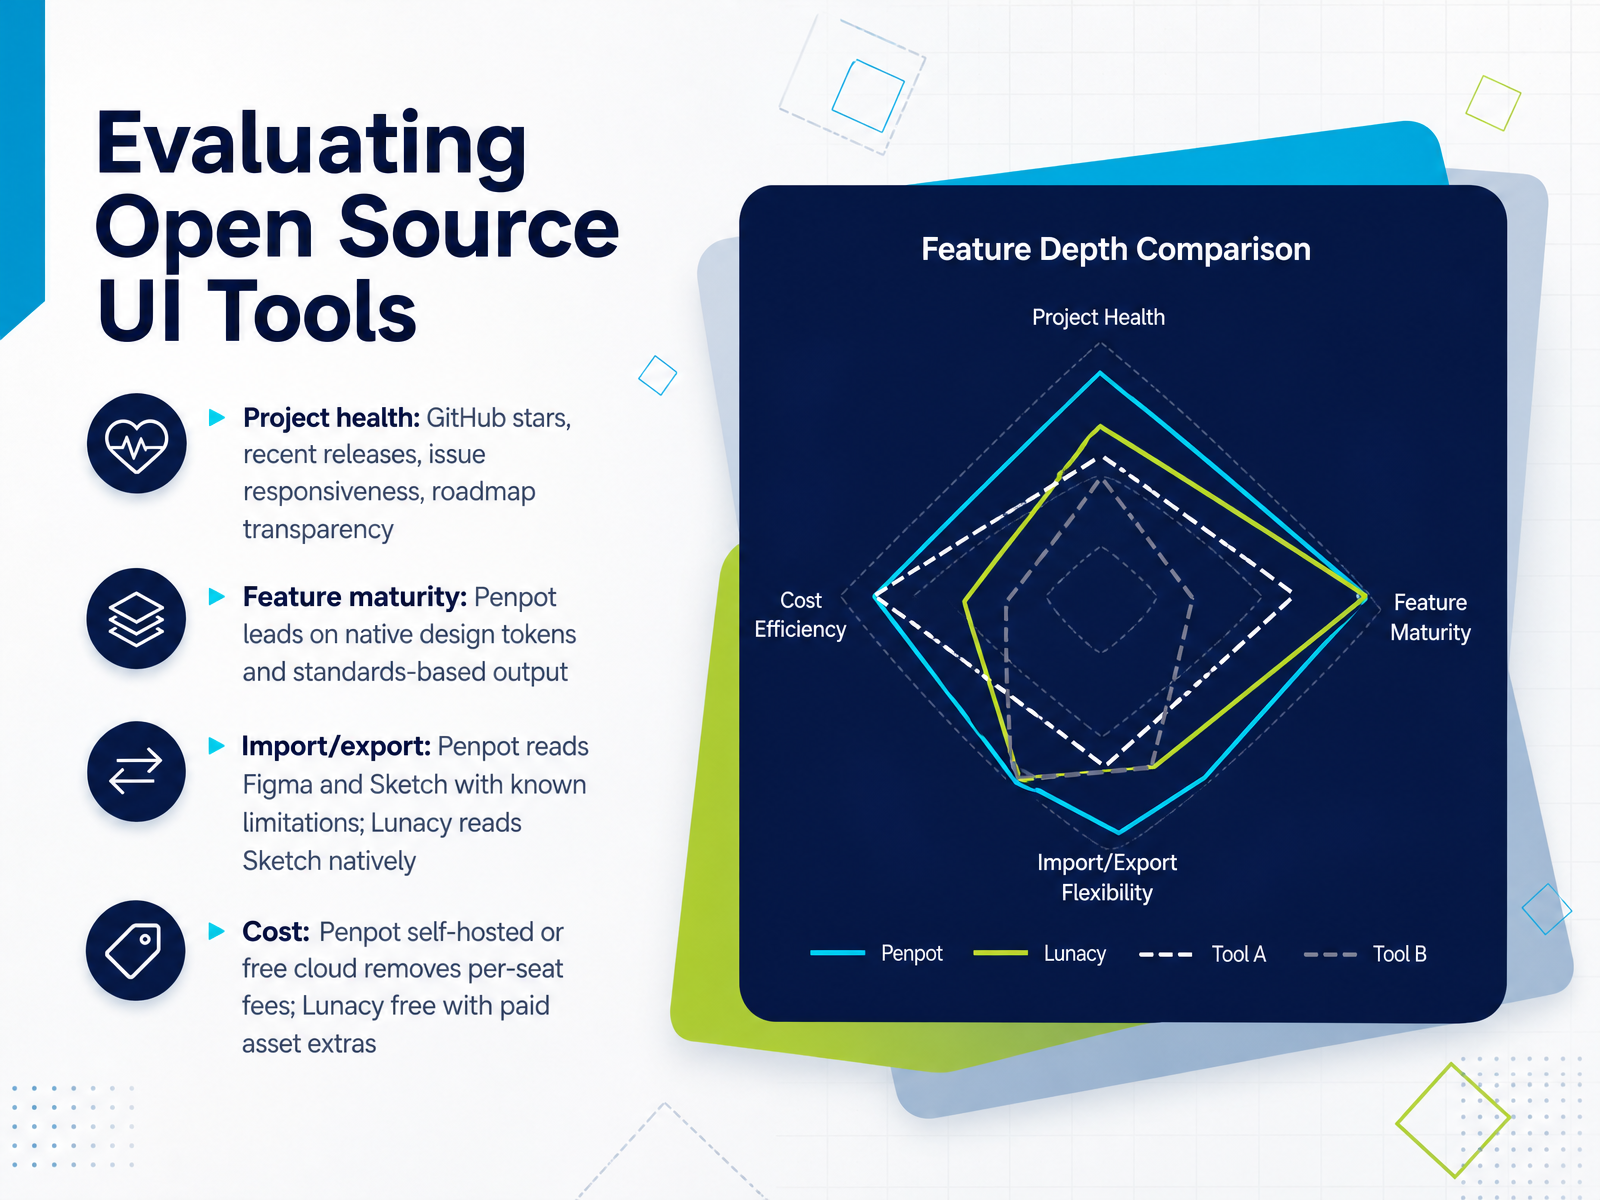
Start with project health. Look at GitHub stars, but treat them as a rough signal, not proof. What matters more: recent releases, how quickly maintainers respond to issues, and whether the roadmap is public. A tool that ships monthly and answers bugs is safer than one with a big audience and a silent team.
Next, feature maturity. Penpot leads here on native design tokens and standards based output. That means tokens live in the file itself, not bolted on through a plugin, and exports map cleanly to CSS and SVG.
Import and export deserve a close look. Penpot reads Figma and Sketch files, but with known limitations, so complex files may need rework. Lunacy reads Sketch natively, which is smoother if Sketch is your source.
Then cost. Penpot self hosted or on the free cloud removes per seat fees entirely. Lunacy is free for core work, with paid extras mainly around assets.
So weigh health, maturity, migration, and cost together. Next, let's walk through migrating from proprietary tools to Penpot.
 artofstyleframe.comillustration.appossalt.com+22 min
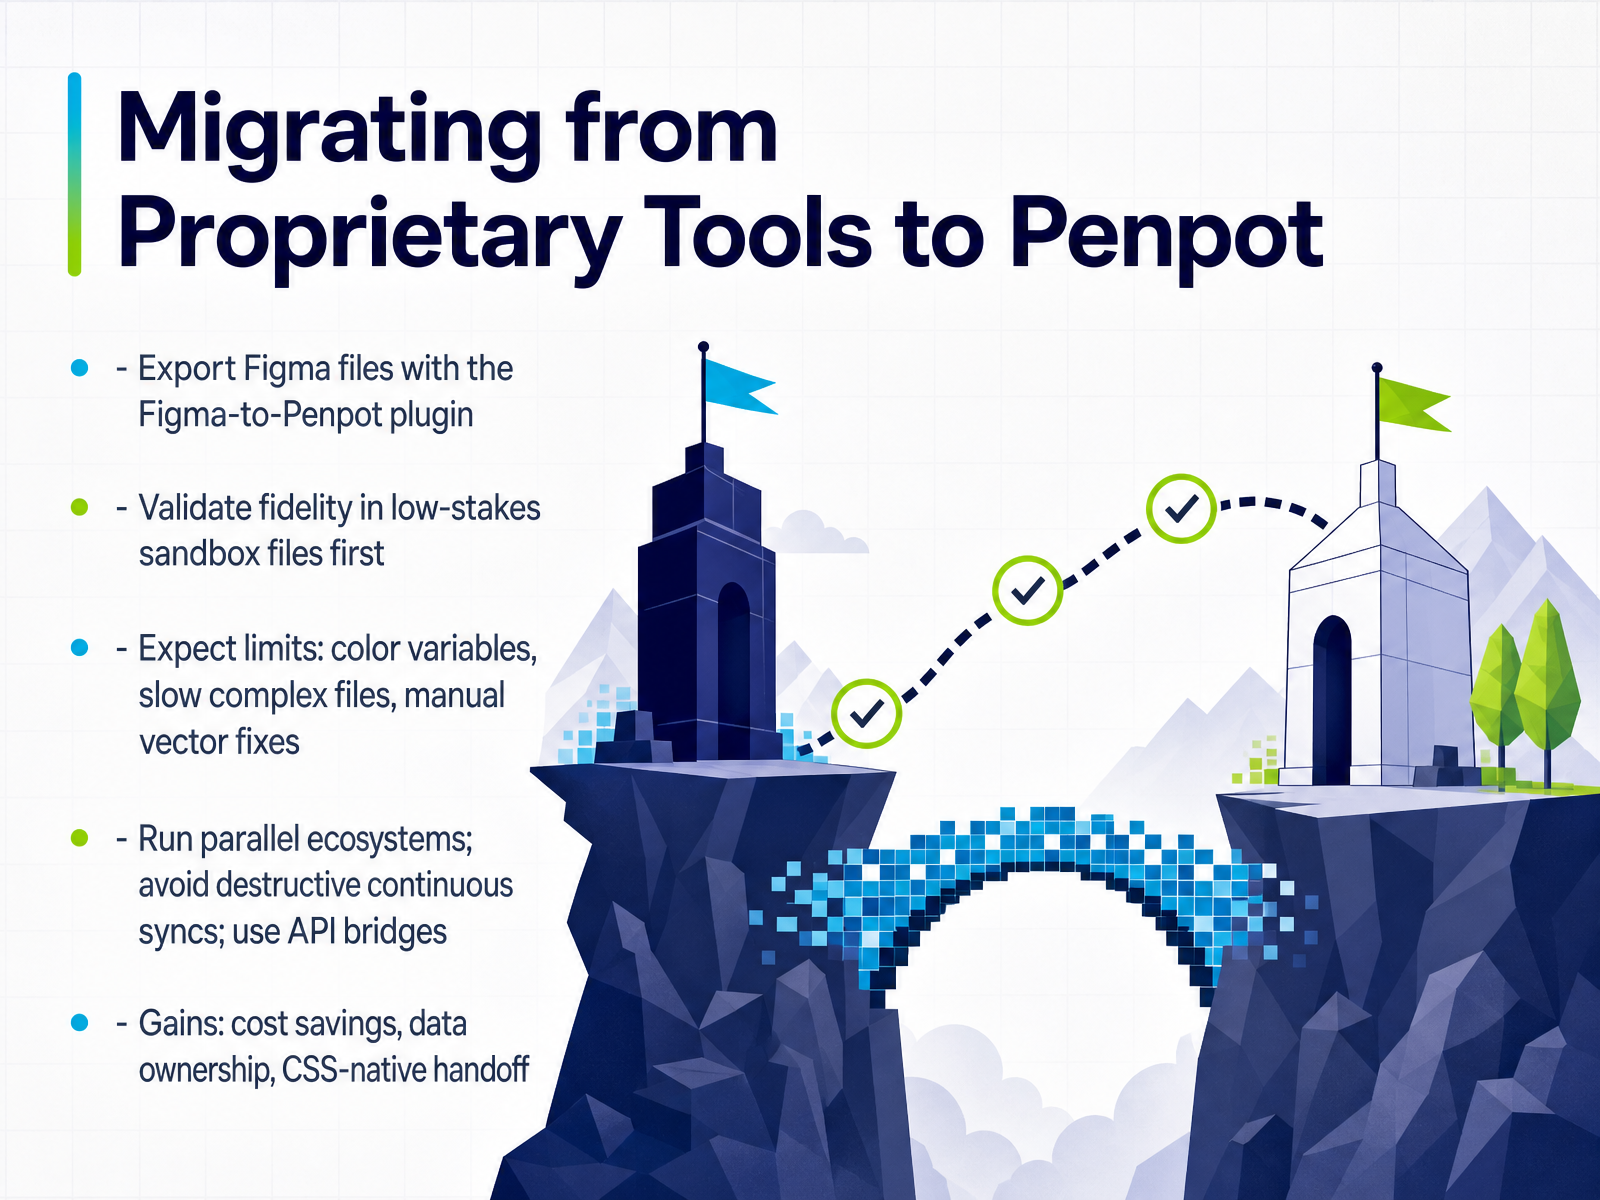
 - 11Migrating from Proprietary Tools to PenpotNow let's talk about moving from a proprietary tool to Penpot. You can export Figma files with the Figma-to-Penpot plugin. It handles components, auto layout, and typography well, but it does not carry over color variables, so plan to remap those. Always validate fidelity in low stakes sandbox files first before touching production work. Expect some limits. Complex files convert slowly, sometimes taking many minutes, and vectors may need small manual fixes. So run parallel ecosystems during the transition. Avoid destructive continuous syncs, and use API bridges when you need them. The gains are real. Cost savings, data ownership, and a CSS native handoff that developers can read directly. Next, let's look at case studies and team experiences.
 artofstyleframe.comillustration.appossalt.com+21 min
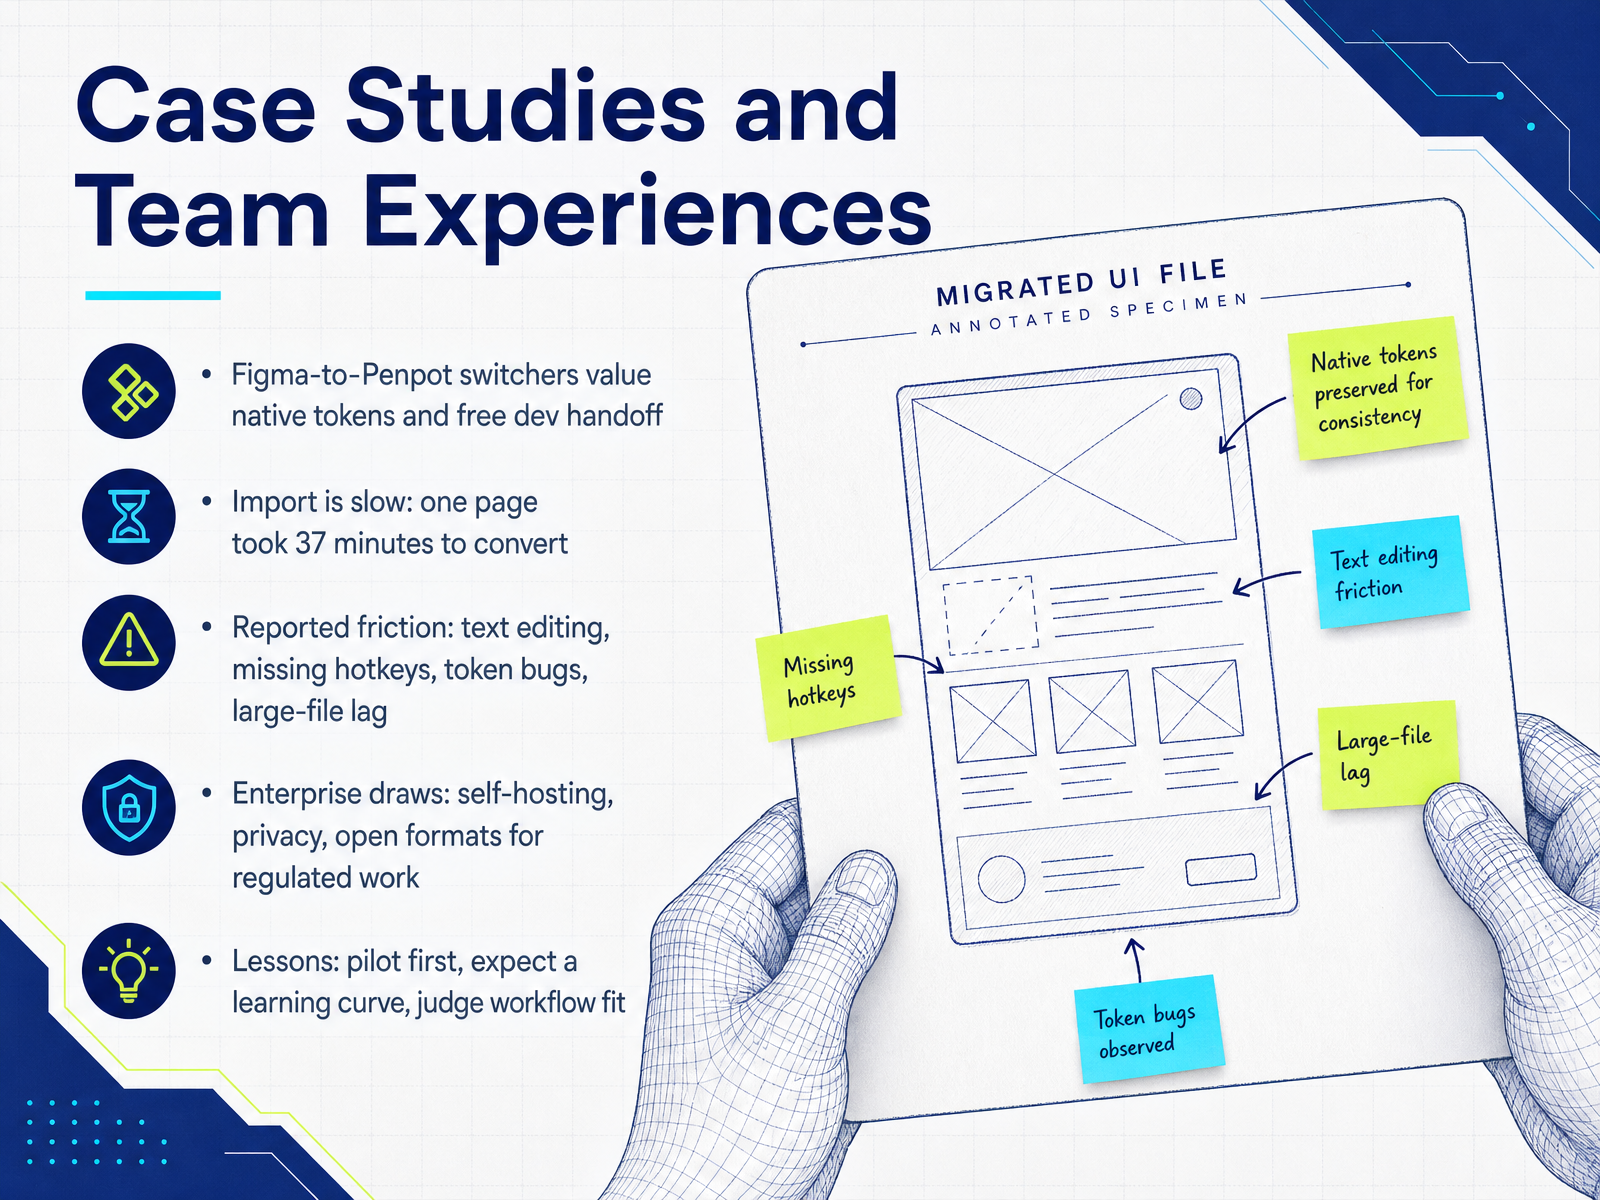
 - 12Case Studies and Team ExperiencesLet's look at what teams actually report when they make this move. Designers switching from Figma to Penpot tend to value two things most: native design tokens, which follow the W3C standard and live in the tool rather than arriving through a plugin, and free developer handoff, so engineers can inspect real CSS without a paid seat. The trade-off is migration speed. One designer imported a single page and it took thirty-seven minutes to convert. The plugin reads linked libraries, caches images, and walks the whole Figma node tree, so large files get slow. Reported friction clusters around a few areas: text editing is clunkier than Figma, some hotkeys differ or cannot be remapped, tokens occasionally fail to apply until you refresh, and big component libraries lag. That said, enterprise teams have a different draw. Self-hosting, privacy, and open formats matter when you work in regulated industries, because your files never leave your infrastructure. So what are the lessons? Pilot with one real project before committing. Expect a learning curve, especially if you have years of Figma muscle memory. And judge workflow fit, not feature checklists, because the gaps are real but they may not touch your daily work. Next, let's map out the Getting Started Roadmap and 30-Day Practice Plan.
 artofstyleframe.comgithub.comgithub.com+22 min
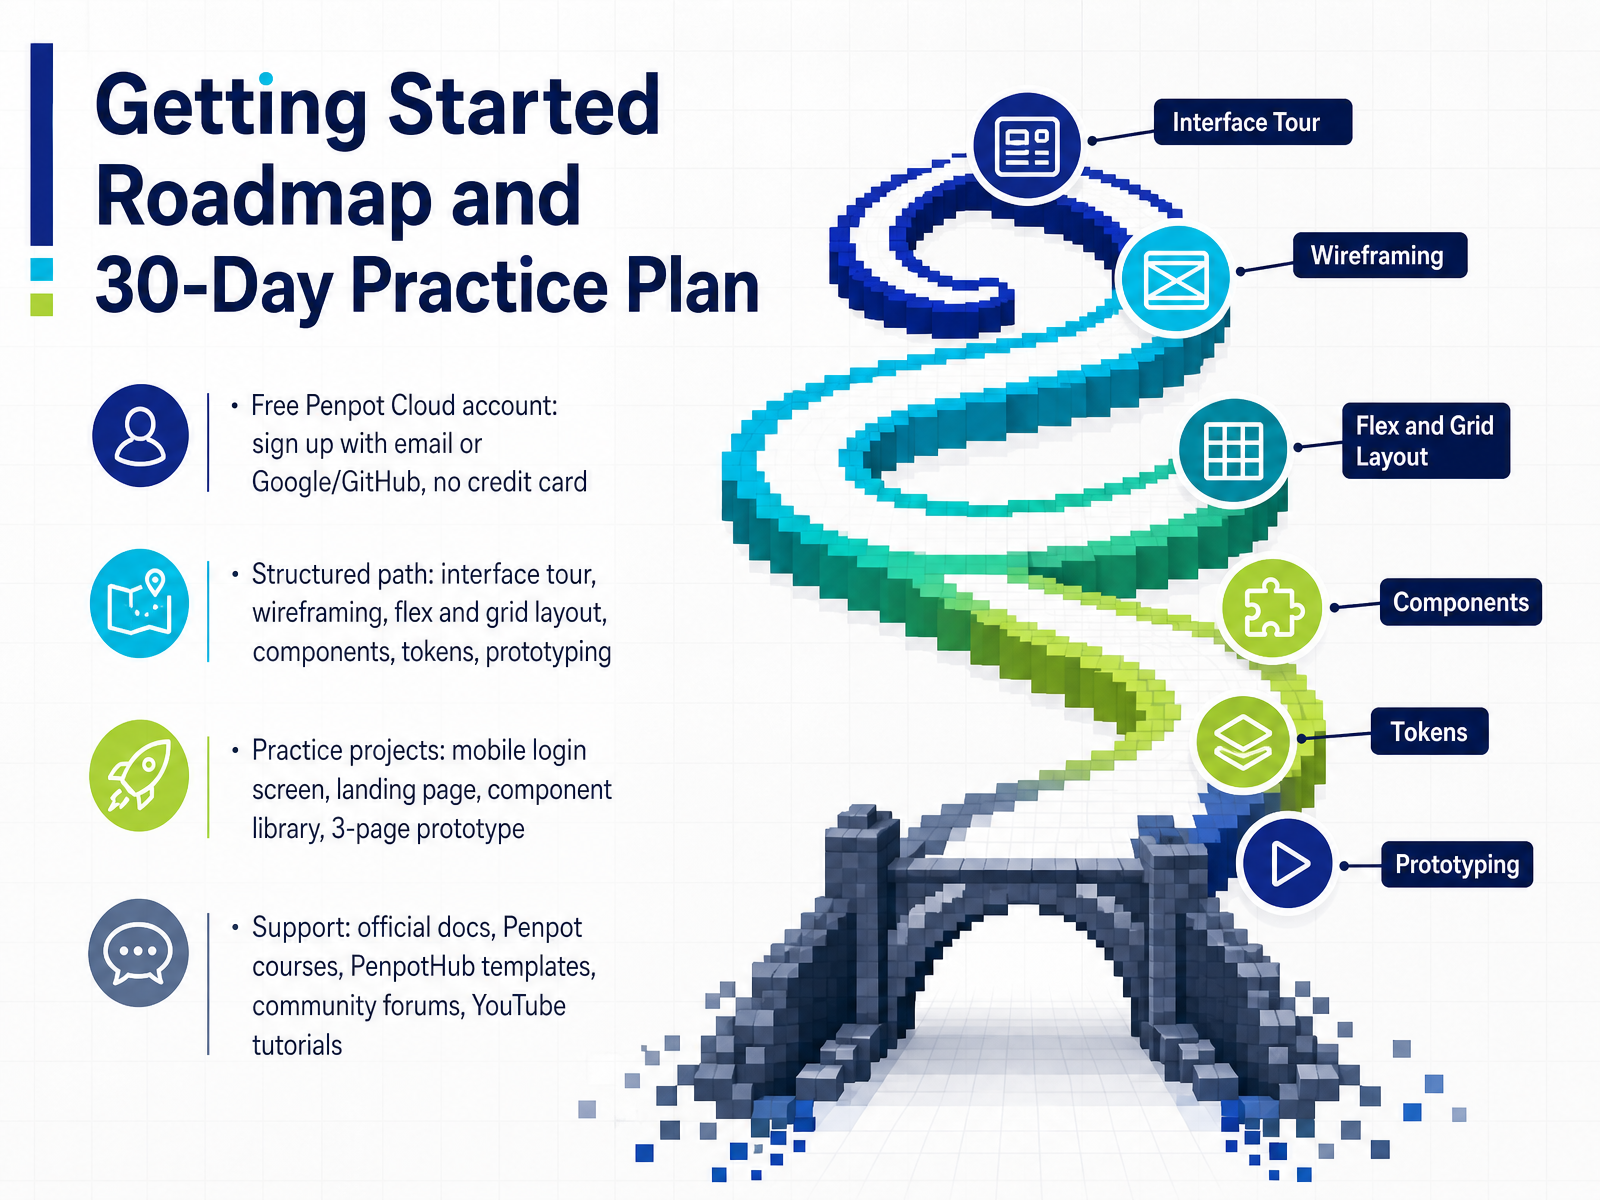
 - 13Getting Started Roadmap and 30-Day Practice PlanNow that you understand the tool landscape, let's map out a practical way to get started. Penpot's free cloud account is the fastest entry point. You can sign up with email or your Google or GitHub login, and no credit card is required. From there, work through a structured path: tour the interface, do some lo-fi wireframing, move into flex and grid layout, then tackle components, design tokens, and prototyping. To make it stick, build four small projects: a mobile login screen, a landing page, a component library, and a three-page interactive prototype. Each one forces you to combine layout, styling, and reusable patterns. When you get stuck, lean on official docs, Penpot courses, PenpotHub templates, community forums, and YouTube tutorials. That combination covers both structured learning and quick fixes. Next, we'll zoom out and look at Future Direction and Making an Informed Choice.
 penpot.apppenpot.apppenpot.app+21 min
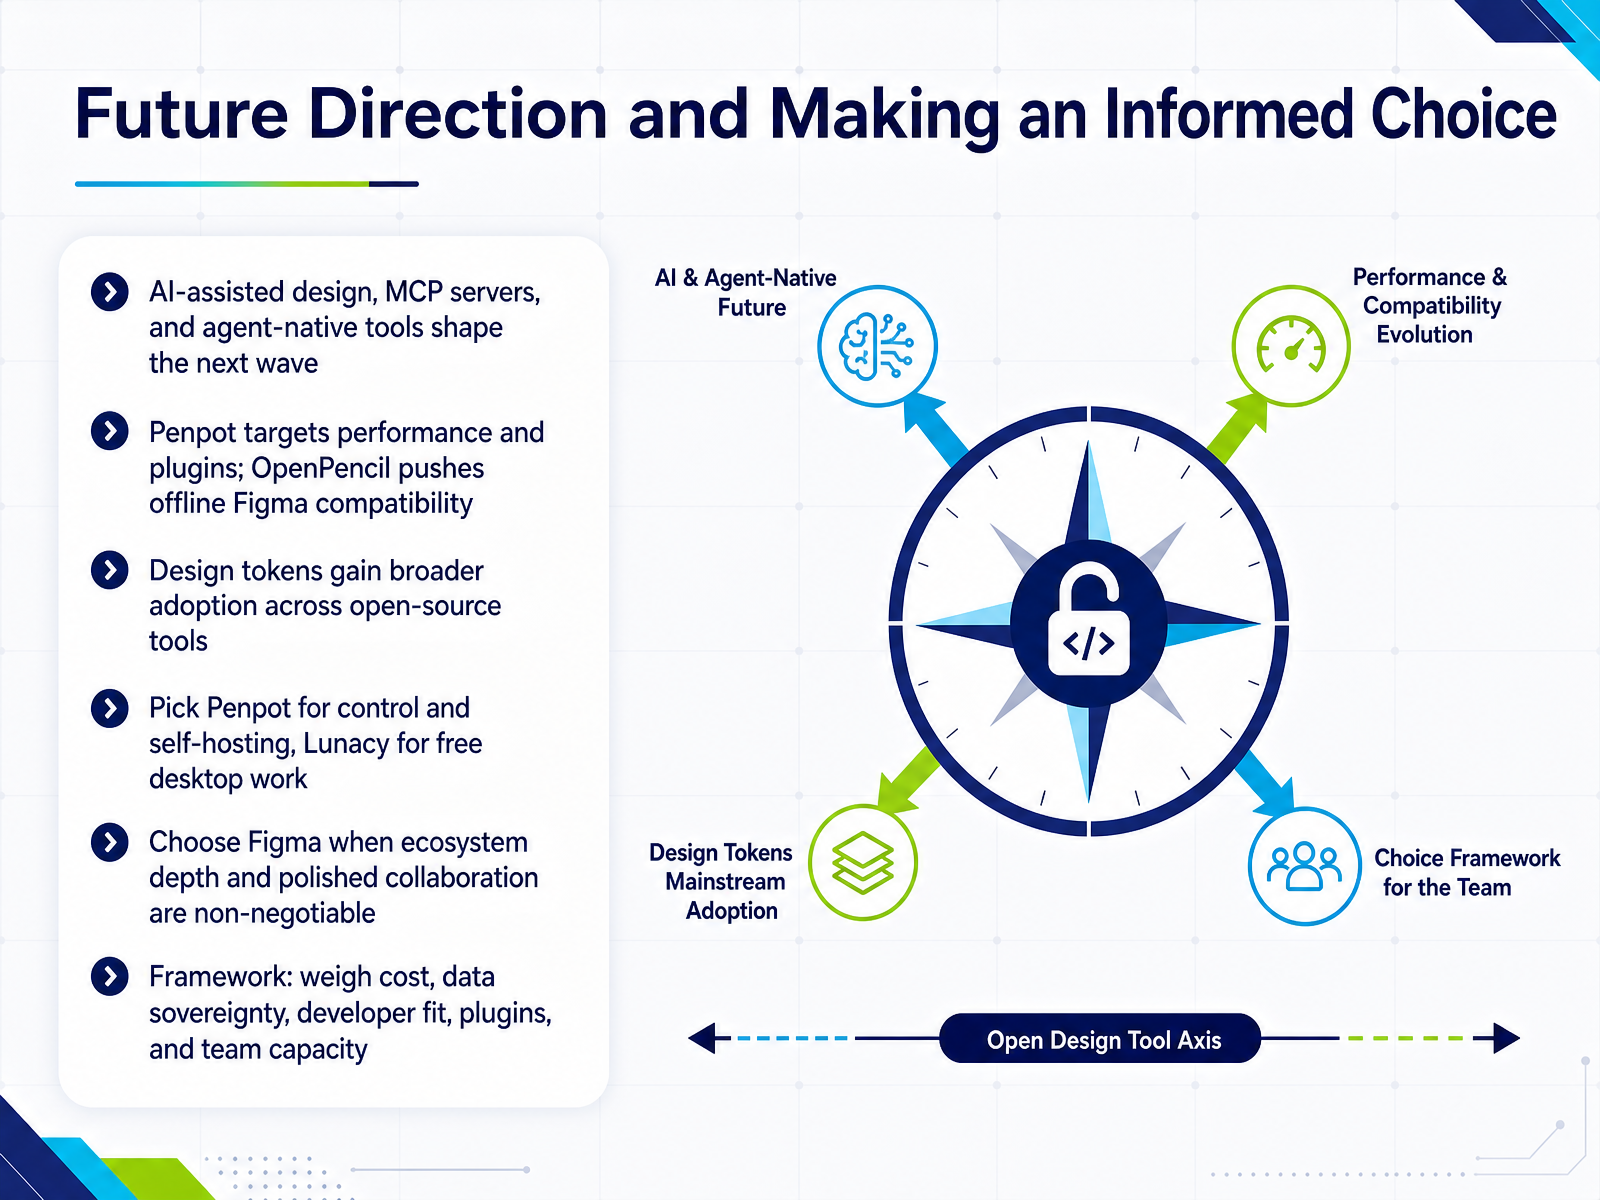
 - 14Future Direction and Making an Informed ChoiceLet's wrap up by looking ahead, then give you a framework for deciding. Three forces are shaping the next wave: AI-assisted design, MCP servers that make design files machine-readable, and agent-native tools that generate real code. Penpot is targeting performance and plugins, while OpenPencil pushes offline Figma file compatibility. Design tokens are also gaining broader adoption across open-source tools, which matters if you're building a design system. So how do you choose? If control and self-hosting matter most, pick Penpot. For free desktop work, Lunacy is a solid fit. And when ecosystem depth and polished collaboration are non-negotiable, choose Figma. Weigh five things: cost, data sovereignty, developer fit, plugins, and your team's capacity to run the tool. There's no single best choice. There's the right fit for your constraints. Thank you for working through this course with me. I hope you leave with a clearer, more confident way to choose your design tools. Go try one. You've got this.
 artofstyleframe.comillustration.appossalt.com+21 min
Take the deck with you
Download this course as a file — free, no sign-up needed.
- PDF handoutEvery slide page, ready to print or share.15 pages · 3.8 MBDownload
- Narrated PowerPointThe deck that presents itself — every slide carries the digital human's narration video.15 pages · 14.2 MBDownload
- PowerPoint slidesThe full deck as a .pptx — open it in PowerPoint, Keynote, or Google Slides.15 pages · 3.7 MBDownload
Free to use in your own training — please keep the PersonWise credit page at the end.
Have your own deck? Turn it into a course
Sources consulted
Web sources consulted while building this course.
- Best Open Source Design Tools (2026): 11 Free Picks — toolradar.com
- Best Open Source Design Tools in 2026 — OSSAlt Guides | OSSAlt — ossalt.com
- Open Source Design Tools: The Best Free Options for 2026 - Calmops | Tech, Business & Indie Hacker Knowledge Base — calmops.com
- Open Source Design Tools in 2026: A Practical Comparison for Professionals | Open Source Alternative Finder — osalfinder.com
- Best UI Design Tools in 2026: Figma, Sketch, and Penpot — artofstyleframe.com
- Figma vs Penpot vs Lunacy for Anti-Subscription Design Workflows — illustration.app
- Best Open Source Alternatives to Figma in 2026 — OSSAlt Guides | OSSAlt — ossalt.com
- Best Figma Alternatives in 2026: An Honest, Tested Guide - OpenDesign — open-design.ai
- I tested 5 open-source Figma replacements — one absolutely crushed the rest — makeuseof.com
- I replaced Figma with four open-source alternatives for a week ... — xda-developers.com
- Tutorial: Create and share components in Penpot — penpot.app
- Design systems best practices with Penpot — penpot.app
- Tutorial: How to use components and shared libraries — penpot.app
- Design Tokens with Penpot — penpot.app
- Build Design Systems With Penpot Components — Smashing Magazine — smashingmagazine.com
- open-pencil/open-pencil — github.com
- amansoomro062/codesign — github.com
- kactus-io/kactus — github.com
- GitHub - penpot/penpot: Penpot: The open-source design tool for design and code collaboration · GitHub — github.com
- nexu-io/open-design — github.com