Begin
14 pages · ~28 min
Presentation Design Tools Workflow
Learn to select the right presentation design tools and build efficient workflows for creating impactful, professional presentations.
A digital instructor presents all 14 pages. Hold “Ask” at any point and ask out loud — the answer comes from this course. No sign-up needed.
What you’ll learn
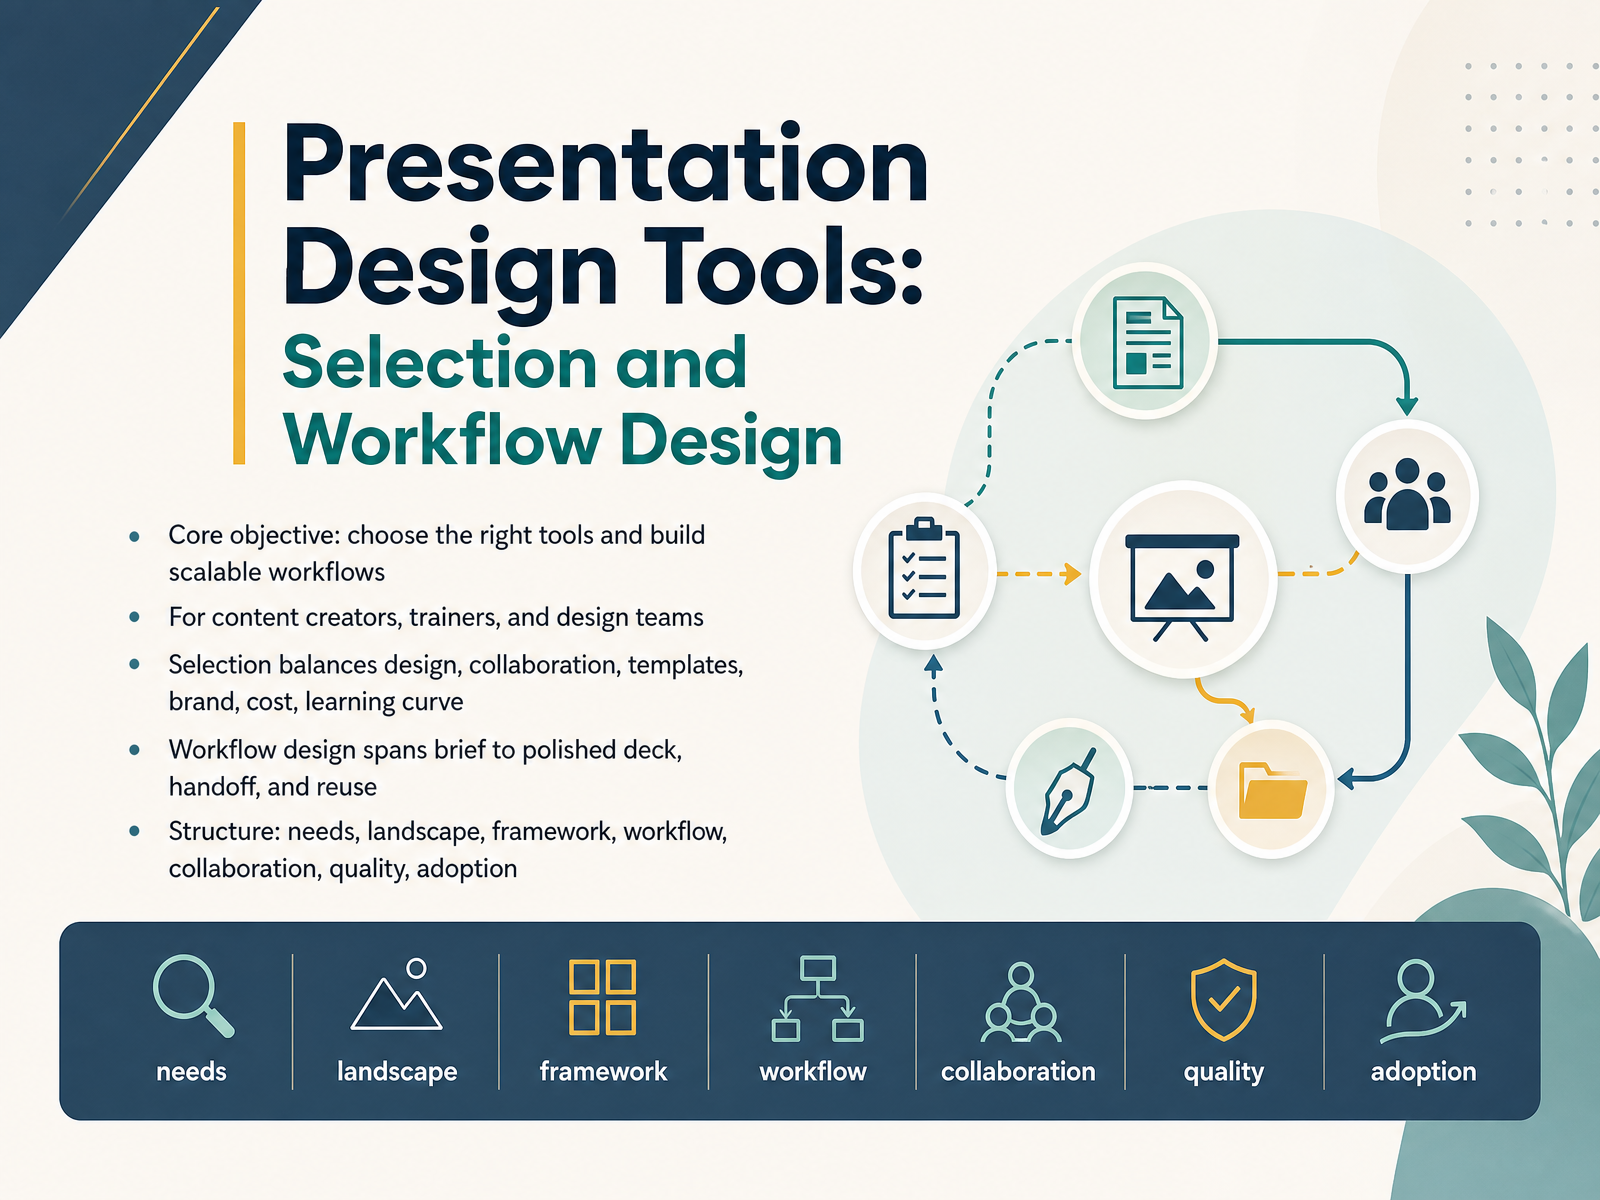
- 01Presentation Design Tools: Selection and Workflow DesignWelcome. This session is about choosing the right presentation design tools and building workflows that actually scale. Whether you are a content creator, a trainer, or part of a design team, the goal is the same: pick tools that balance design quality, collaboration, templates, brand control, cost, and learning curve. But tools are only half the equation. The other half is workflow design — how you move from a rough brief to a polished deck, through review, handoff, and reuse. Here is the core principle to hold onto: start with the workflow, not the tool. The right tool for a solo freelancer is different from the right tool for a fifty-person training team. So we will work through your needs, the current landscape, a selection framework, and practical steps for collaboration, quality control, and adoption. By the end, you will have a clear decision path, not just a feature list. Let's begin with why tool selection is a workflow problem.prezi.compi.incgitnux.org+21 min
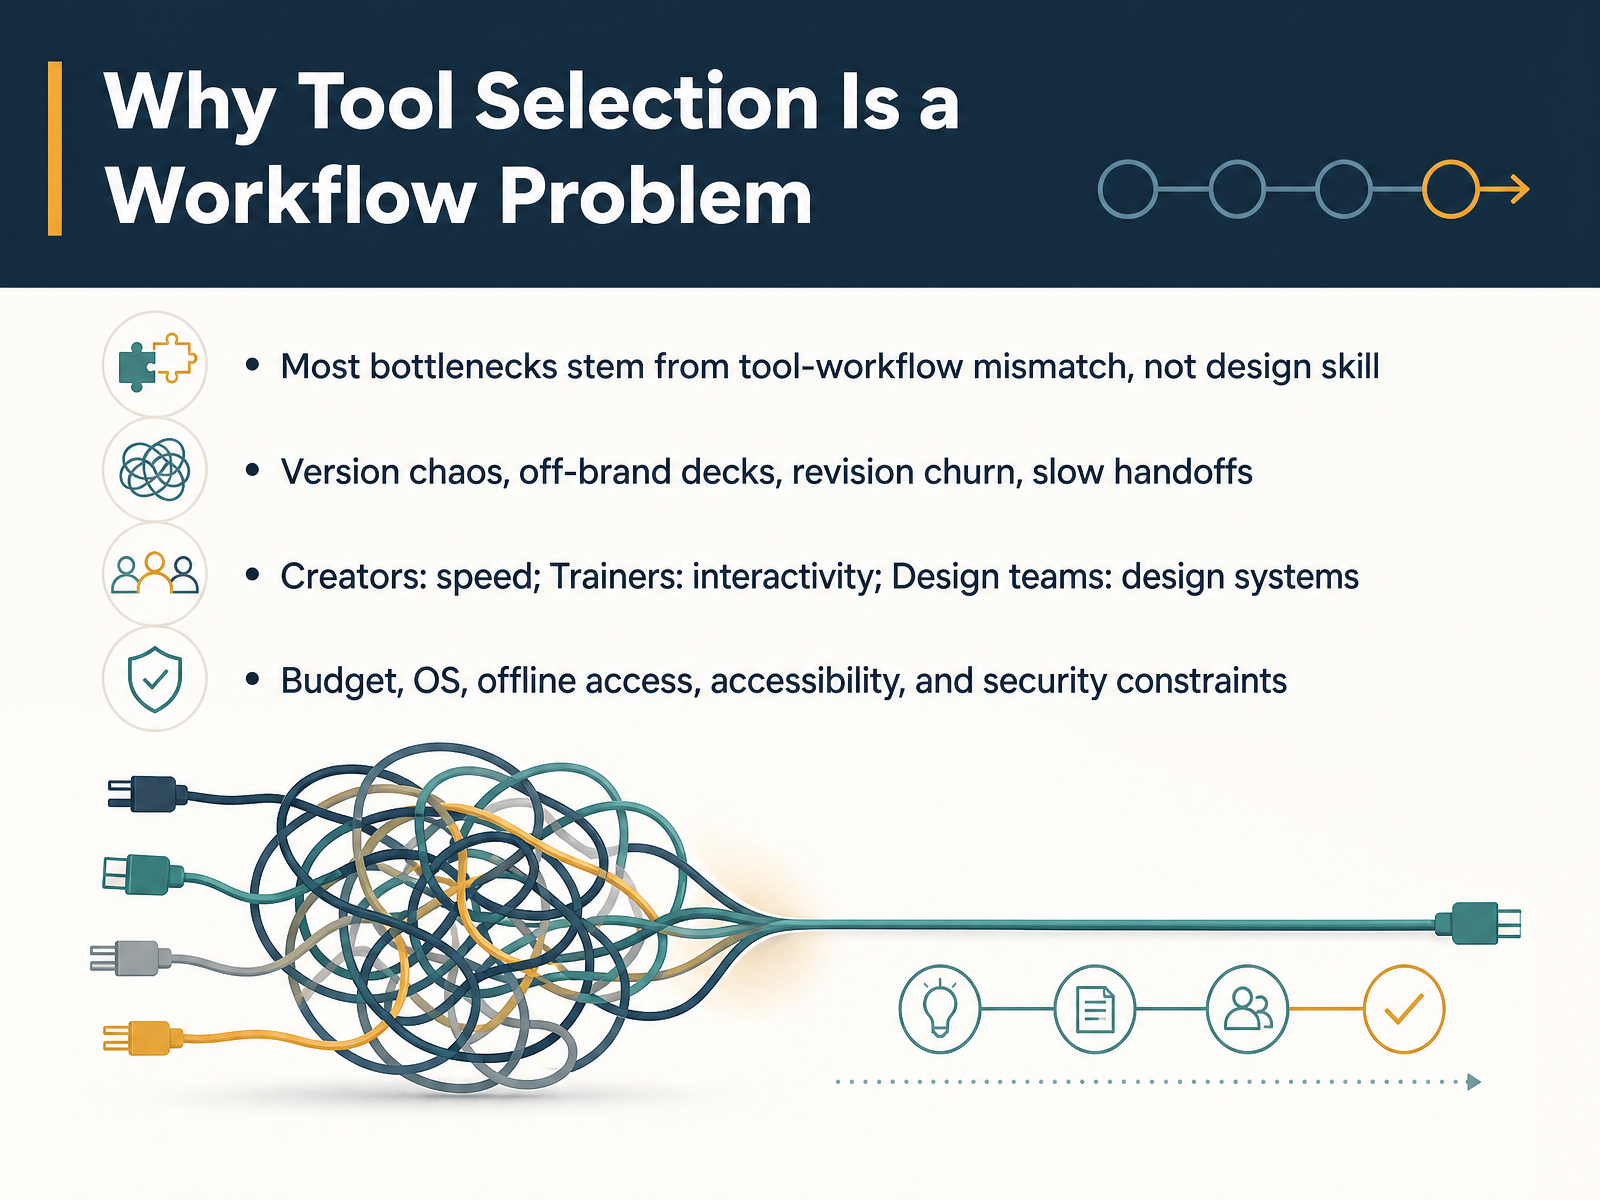
- 02Why Tool Selection Is a Workflow ProblemLet’s reframe how we think about tool selection. Most bottlenecks in presentation work are not design skill problems. They are workflow mismatch problems. Version chaos, off-brand decks, revision churn, and slow handoffs. These are the symptoms. Different roles feel this differently. Creators feel it as lost speed. Trainers feel it as missing interactivity and assessment support. Design teams feel it as broken design systems and inconsistent brand governance. So before you compare features, map your constraints. Budget, operating system, offline access, accessibility, and security requirements. These will narrow the field faster than any feature list. Start with the workflow, not the tool. Once you define the workflow, the tool landscape becomes much easier to navigate. That’s where we’re headed next.
 prezi.compi.incgitnux.org+21 min
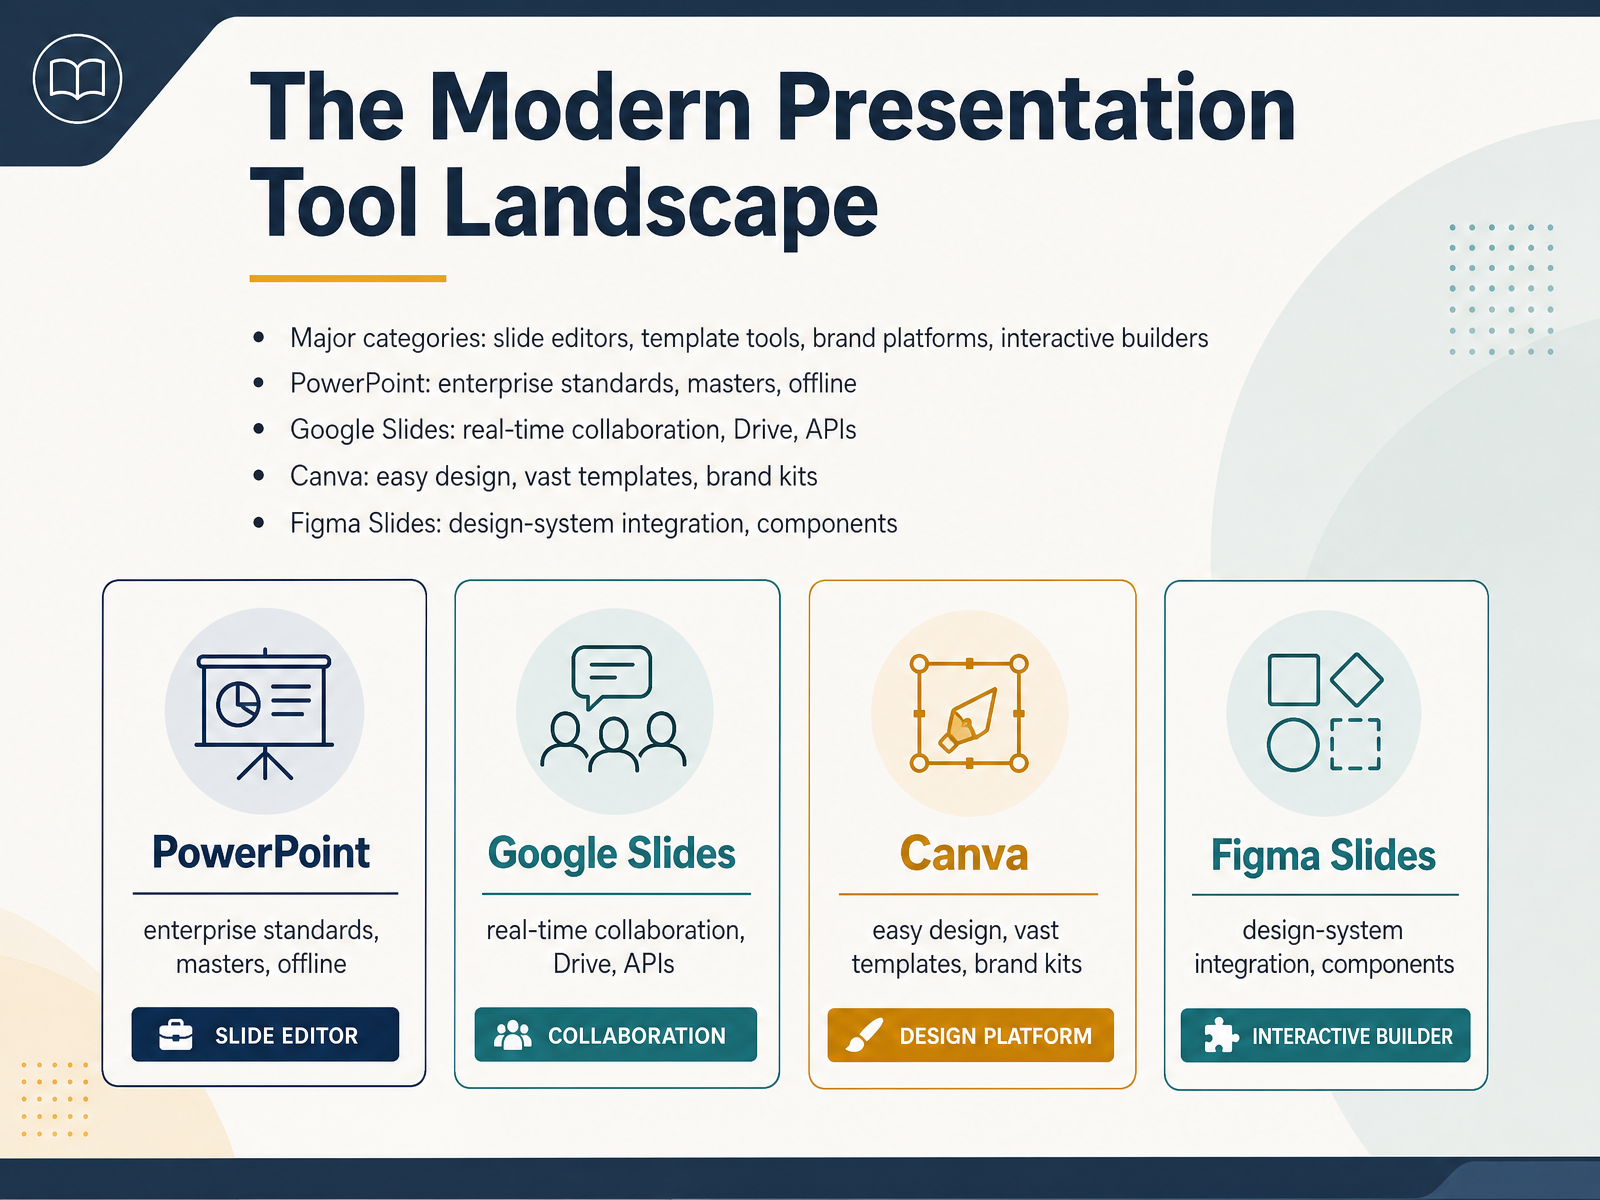
 - 03The Modern Presentation Tool LandscapeThe tool landscape today breaks into four main categories: slide editors, template tools, brand platforms, and interactive builders. Each solves a different problem. Start with the workflow, not the tool. PowerPoint remains the enterprise standard—slide masters, offline access, and deep integration with the Microsoft ecosystem. Google Slides excels at real-time collaboration, with add-ons and APIs that make it easy to share and automate. Canva is the go-to for fast, design-friendly decks, with a massive template library and brand kits built in. And Figma Slides brings design-system integration straight into your deck, using components and variables to keep everything on-brand. Your choice depends on where your team already works, who needs to edit, and what formats you'll export. Keep that lens in mind as we move into a practical selection framework.
 prezi.compi.incgitnux.org+22 min
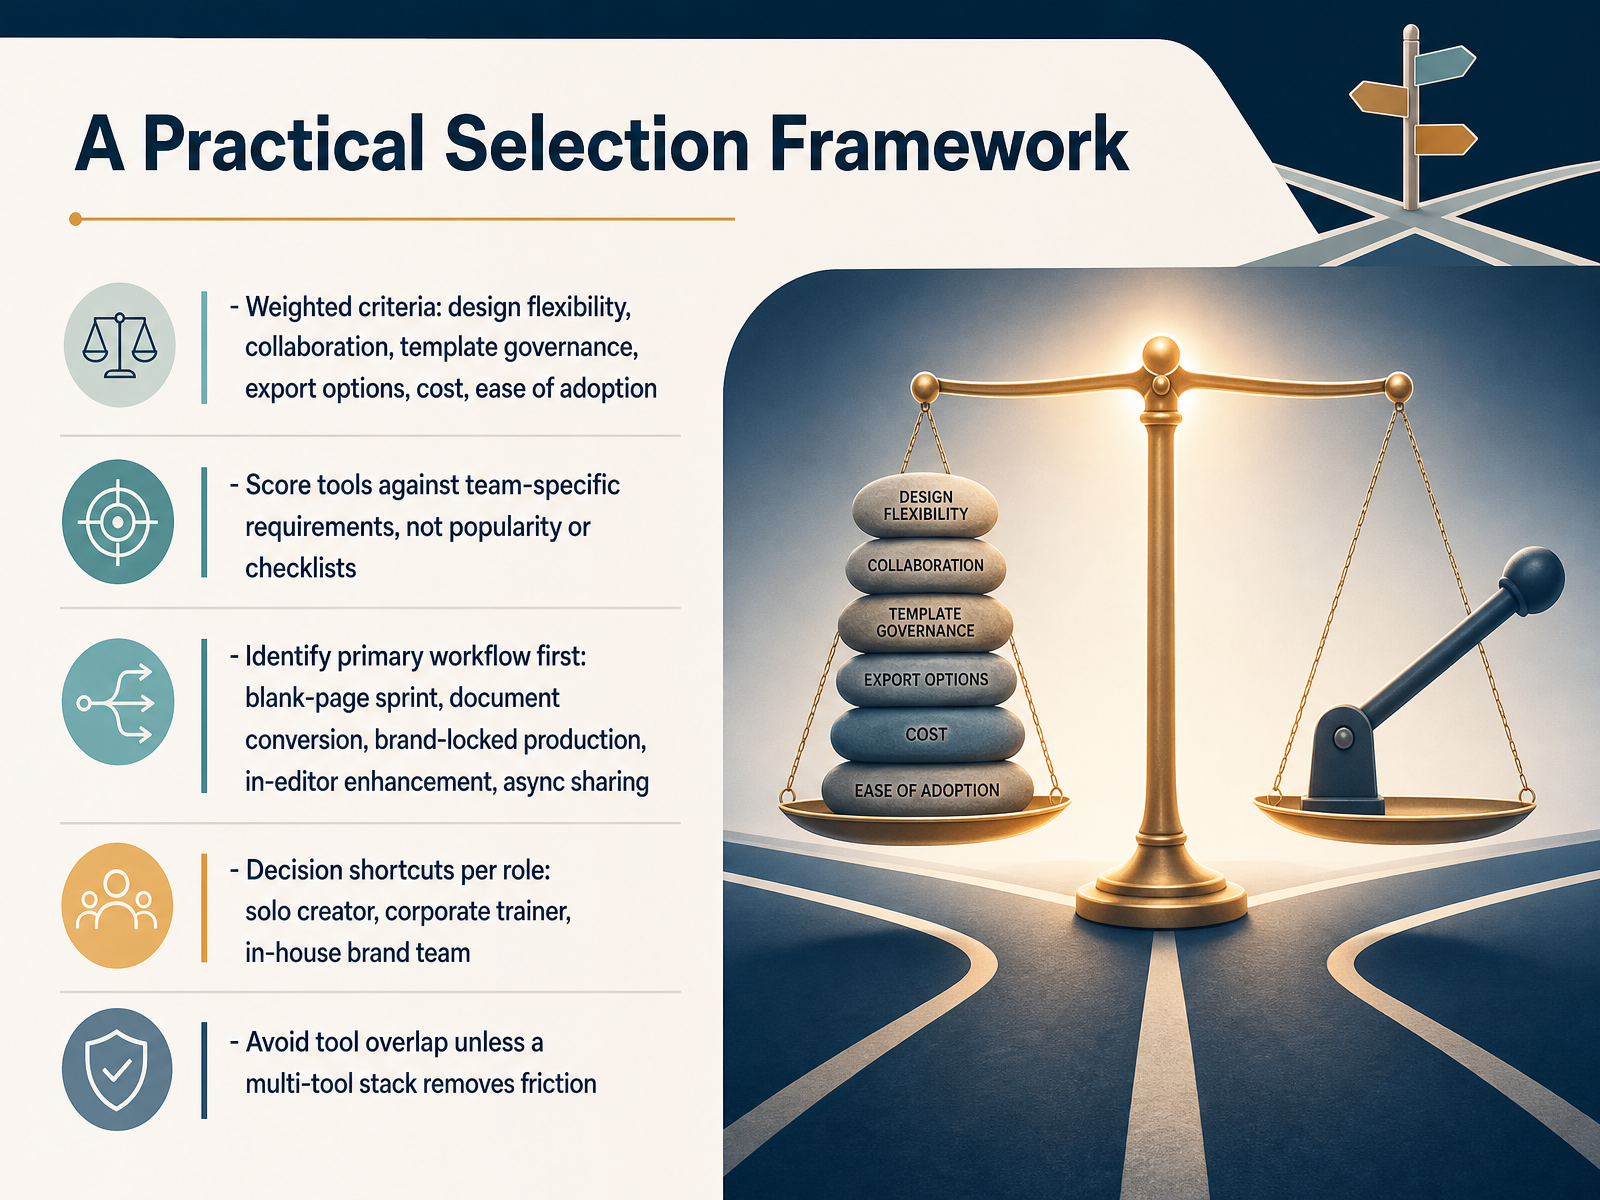
 - 04A Practical Selection FrameworkNow let's turn that into a practical selection framework. Start with the workflow, not the tool. Score tools against six weighted criteria: design flexibility, collaboration, template governance, export options, cost, and ease of adoption. But here's the key point: score them against your team's specific requirements, not popularity or feature checklists. Identify your primary workflow first. Are you doing a blank-page sprint? Document conversion? Brand-locked production? In-editor enhancement? Or async sharing? Each workflow favors a different architecture. For example, a solo creator sprinting on a pitch deck needs speed and original design. A corporate trainer needs LMS integration and accessible output. An in-house brand team needs enforcement of master slides and locked templates. And avoid tool overlap unless a multi-tool stack genuinely removes friction. If two tools do the same thing, cut one. Choose your category first, then compare within it. Next, we'll walk through designing an end-to-end presentation workflow.
 prezi.compi.incgitnux.org+22 min
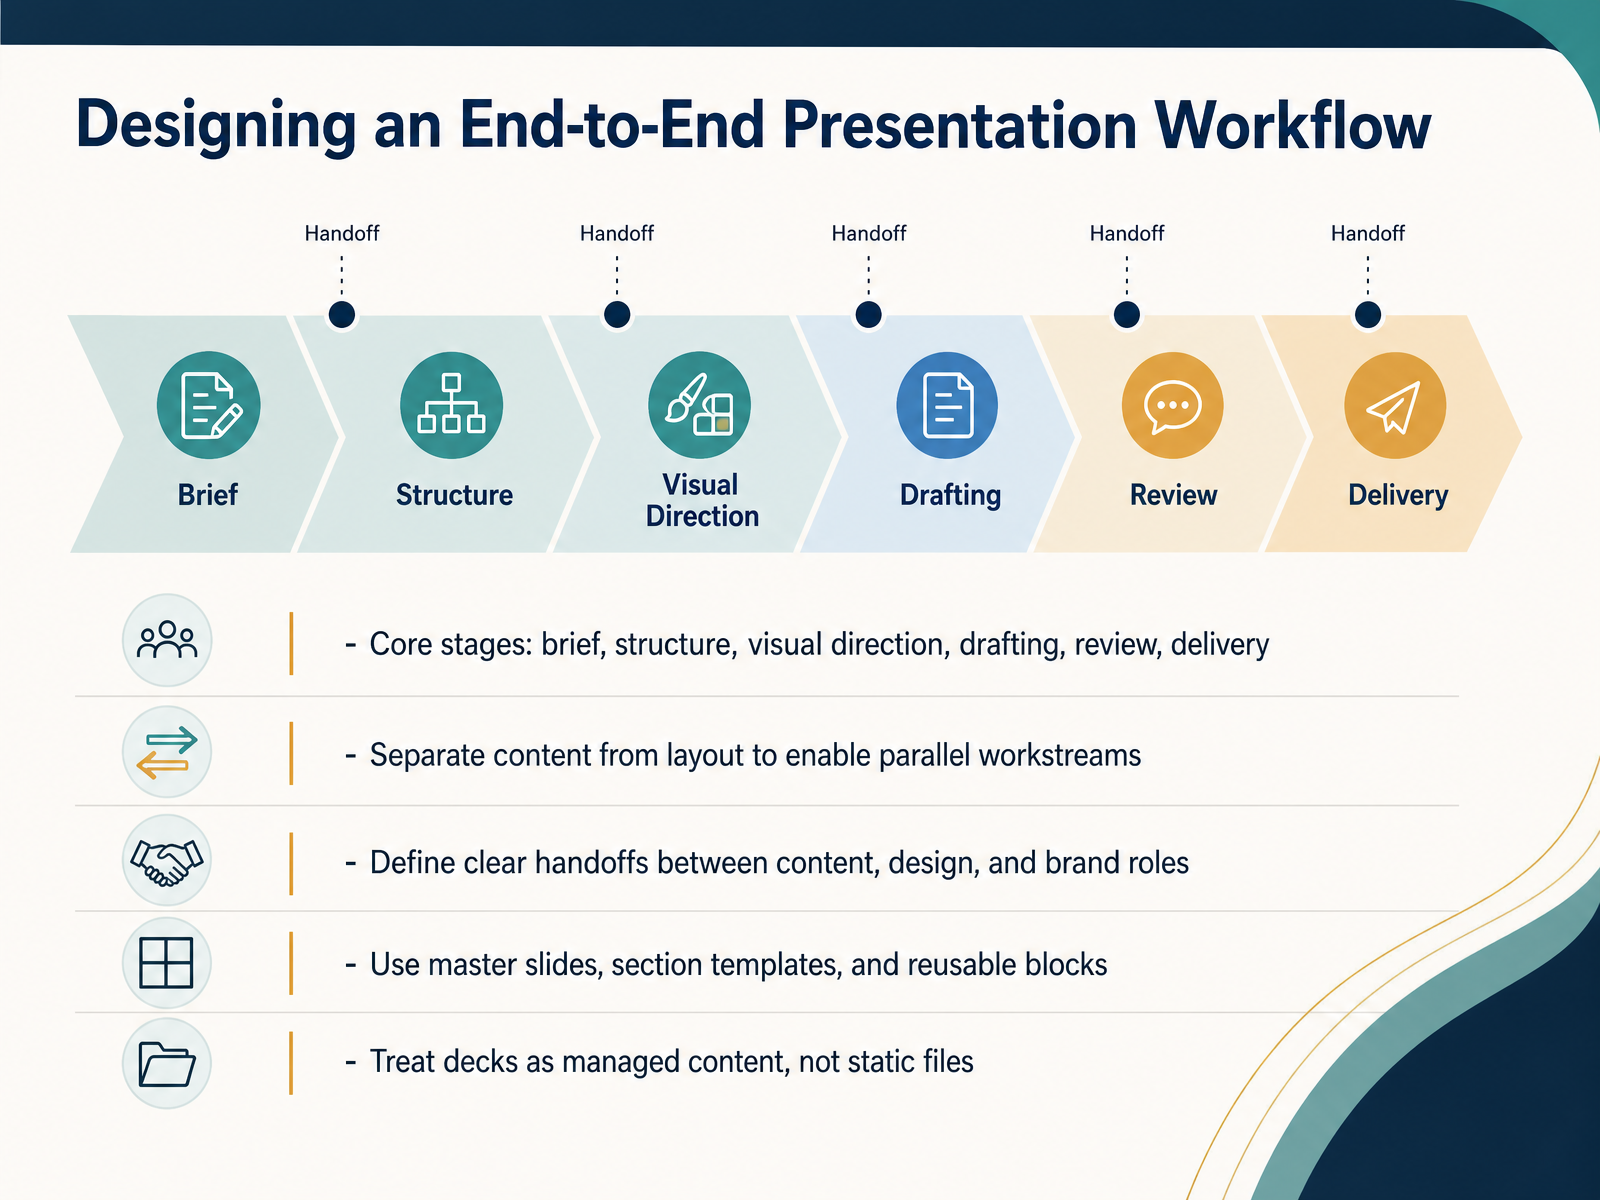
 - 05Designing an End-to-End Presentation WorkflowNow let's look at the end-to-end workflow. The core stages are brief, structure, visual direction, drafting, review, and delivery. Start with the workflow, not the tool. The key move here is to separate content from layout. That lets a writer draft the narrative while a designer builds the visual system in parallel. Define clear handoffs. Someone owns the message, someone owns the visuals, and someone owns brand compliance. When those roles blur, decks stall in review. Build your system on master slides, section templates, and reusable blocks, not on individual slides created from scratch. This turns the deck into managed content instead of a static file. So the practical takeaway: map your stages, assign ownership at each handoff, and build the structure once so every future deck inherits it. Next, we'll get into building effective templates and design systems.
 thedigideck.comslidegenius.comtdsdaas.one+21 min
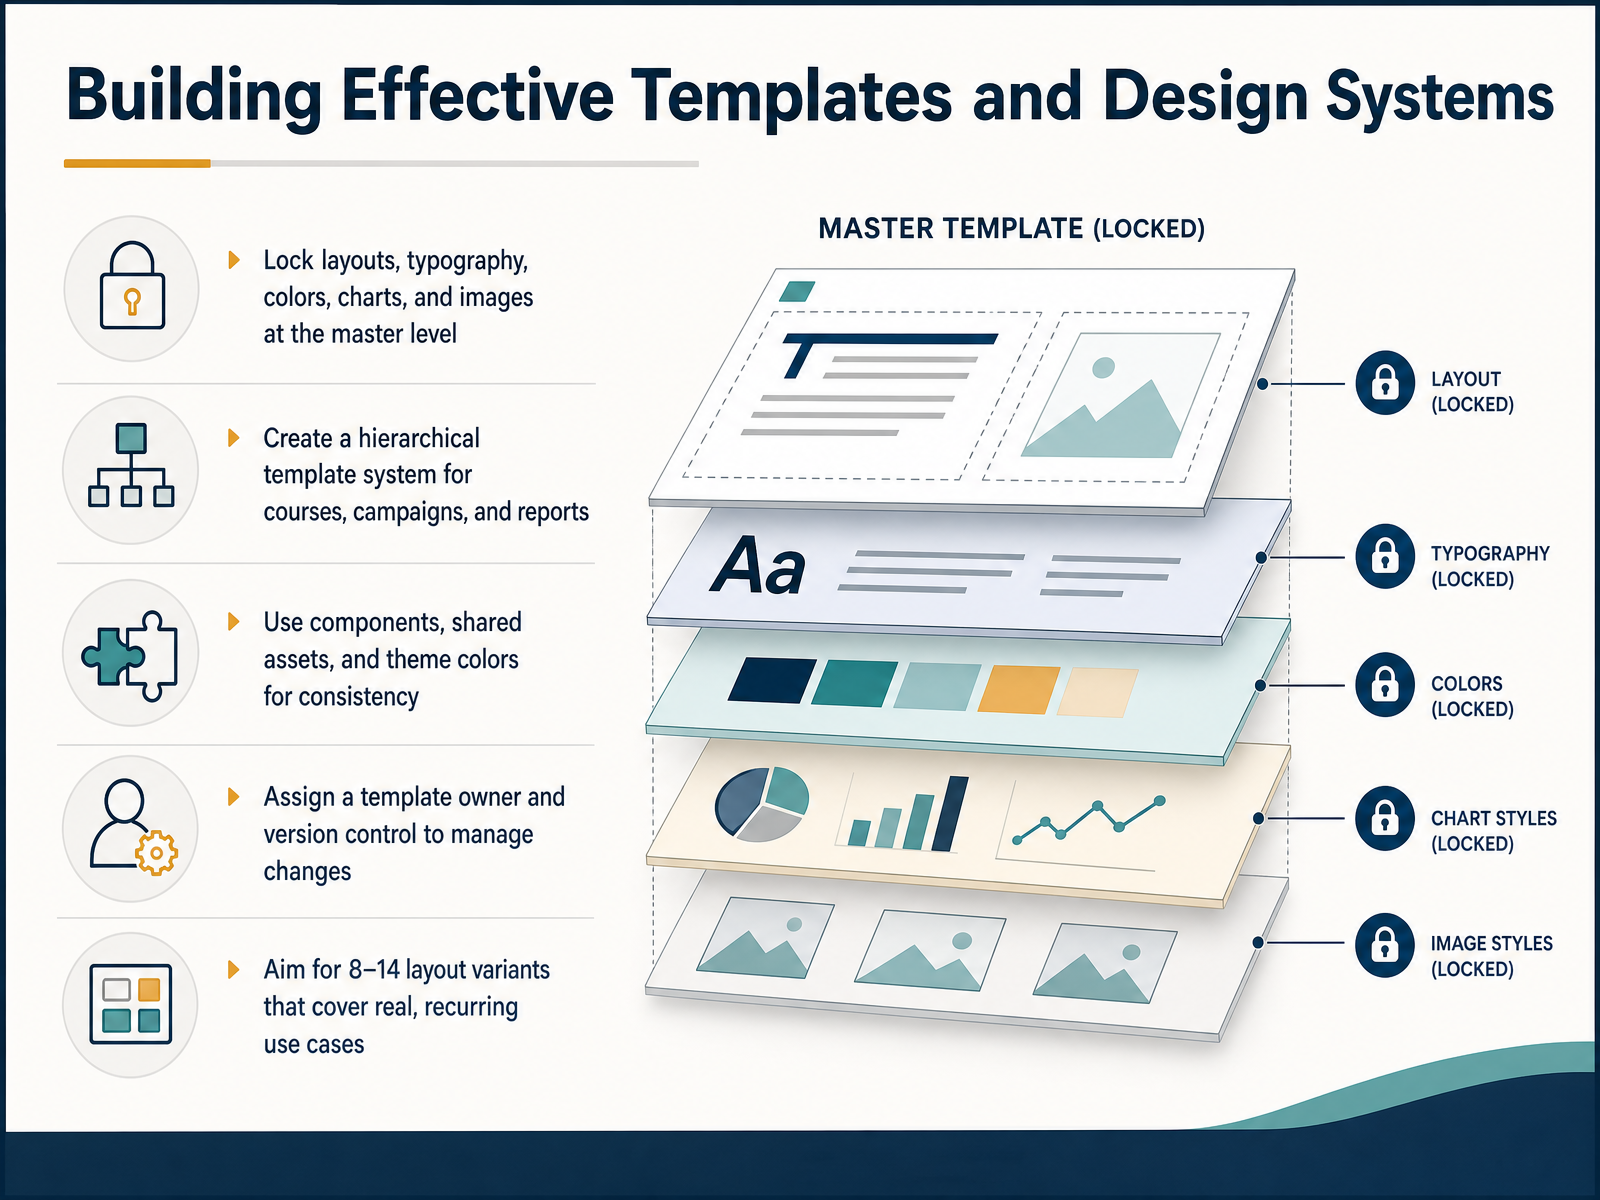
 - 06Building Effective Templates and Design SystemsNow let's talk about building effective templates and design systems. Start with the workflow, not the tool. The key is to lock layouts, typography, colors, charts, and images at the master level. This means setting global defaults once so every new slide inherits the rules automatically. Next, create a hierarchical system for courses, campaigns, and reports. Use components, shared assets, and theme colors to ensure consistency. A practical example: map your primary brand color to accent one, and cap your working palette at four colors plus one neutral. This prevents drift. Assign a template owner and manage versions carefully. A simple naming convention like Template Master v2 point 4 avoids confusion. Finally, aim for eight to fourteen layout variants that cover real, recurring use cases. Audit your last ten decks to see which layouts you actually need. Gaps in your layout library force improvisation, and that's where inconsistency begins. Remember, the tool sets the floor, but your system sets the ceiling. Next, we'll cover brand compliance and accessibility by default.
 prezi.compi.incgitnux.org+22 min
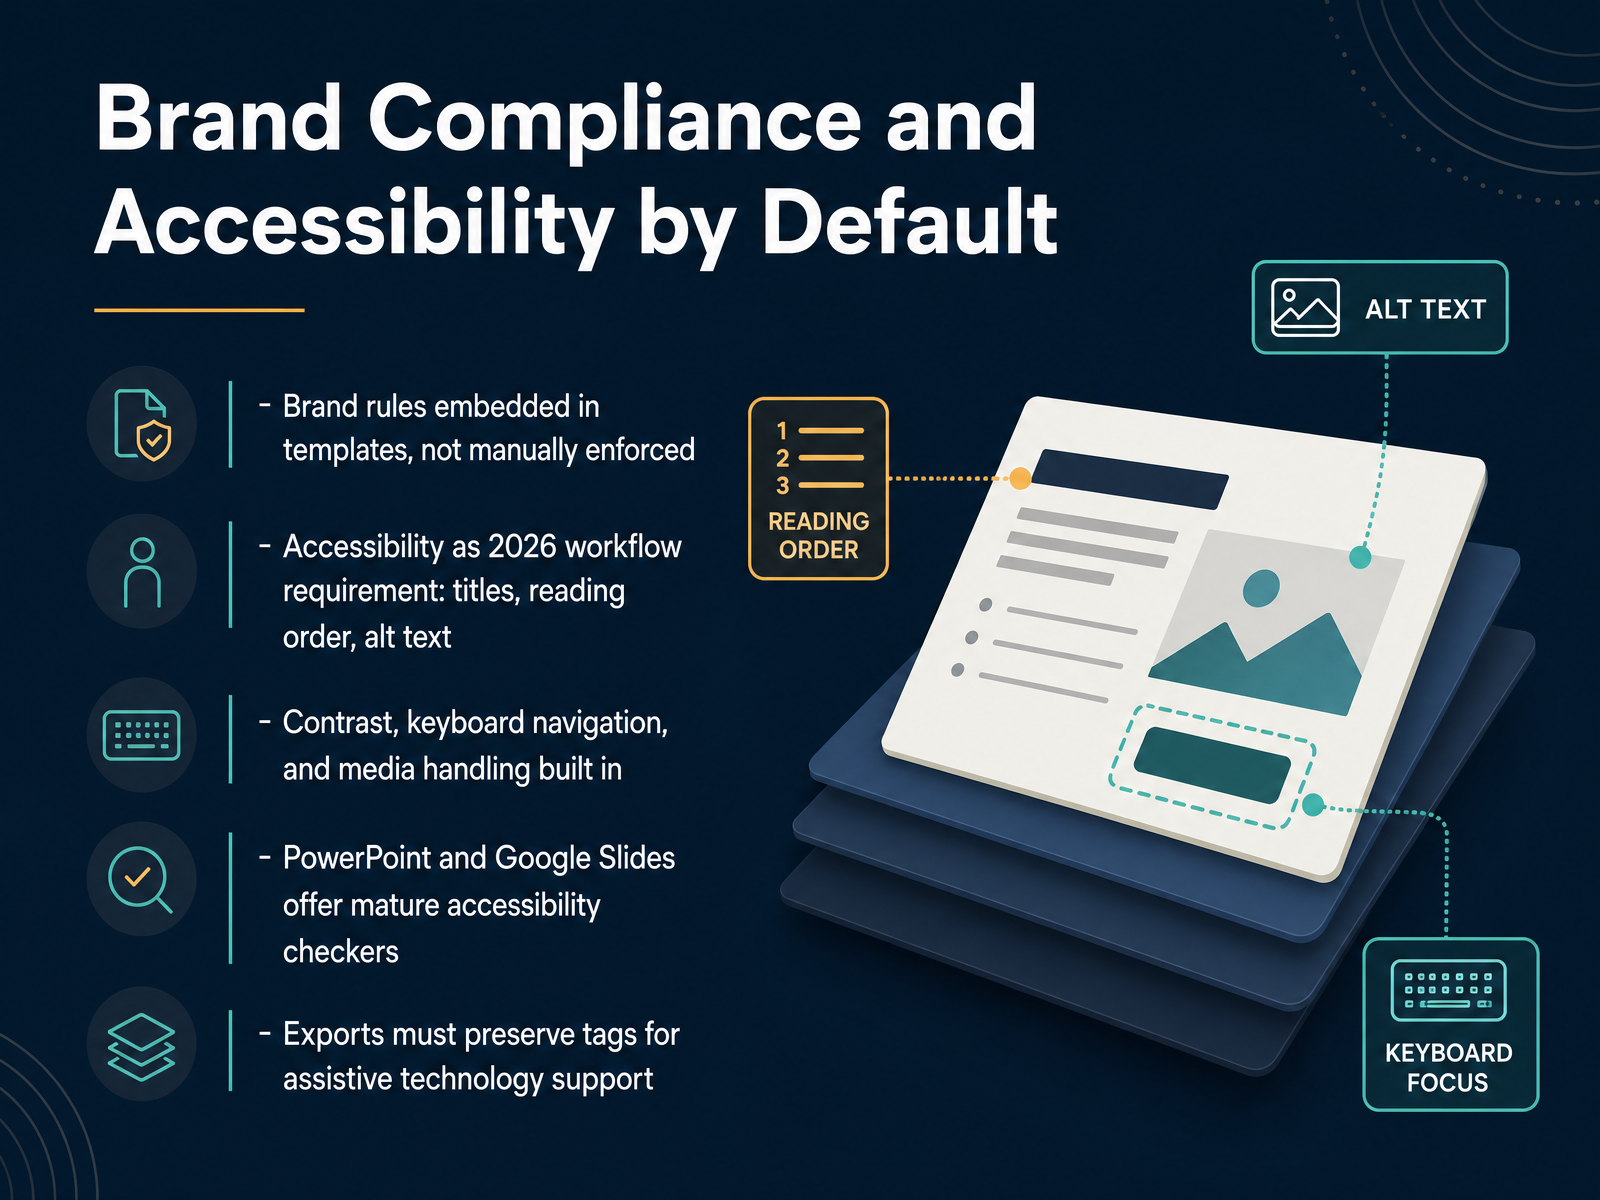
 - 07Brand Compliance and Accessibility by DefaultNow let's talk about brand compliance and accessibility, and why they need to be defaults, not afterthoughts. The key is to embed brand rules directly into your templates, so the system enforces them automatically. Manual enforcement leads to drift and wasted review time. Accessibility is no longer optional; by 2026, it is a workflow requirement. This means every slide needs a unique, descriptive title, a logical reading order, and proper alt text for images. Contrast ratios, keyboard navigation, and media handling should be built into your design system from the start. The good news is that both PowerPoint and Google Slides now have mature accessibility checkers built in. Use them. More importantly, when you export your final files, make sure the tags are preserved. This is crucial for assistive technologies like screen readers. A quick habit to adopt is running the checker on every single deck before you send it out for review. It catches issues early, saving you a full rework later. With these guardrails in place, the next step is figuring out the best tool combination for your specific workflow.
 prezi.compi.incgitnux.org+22 min
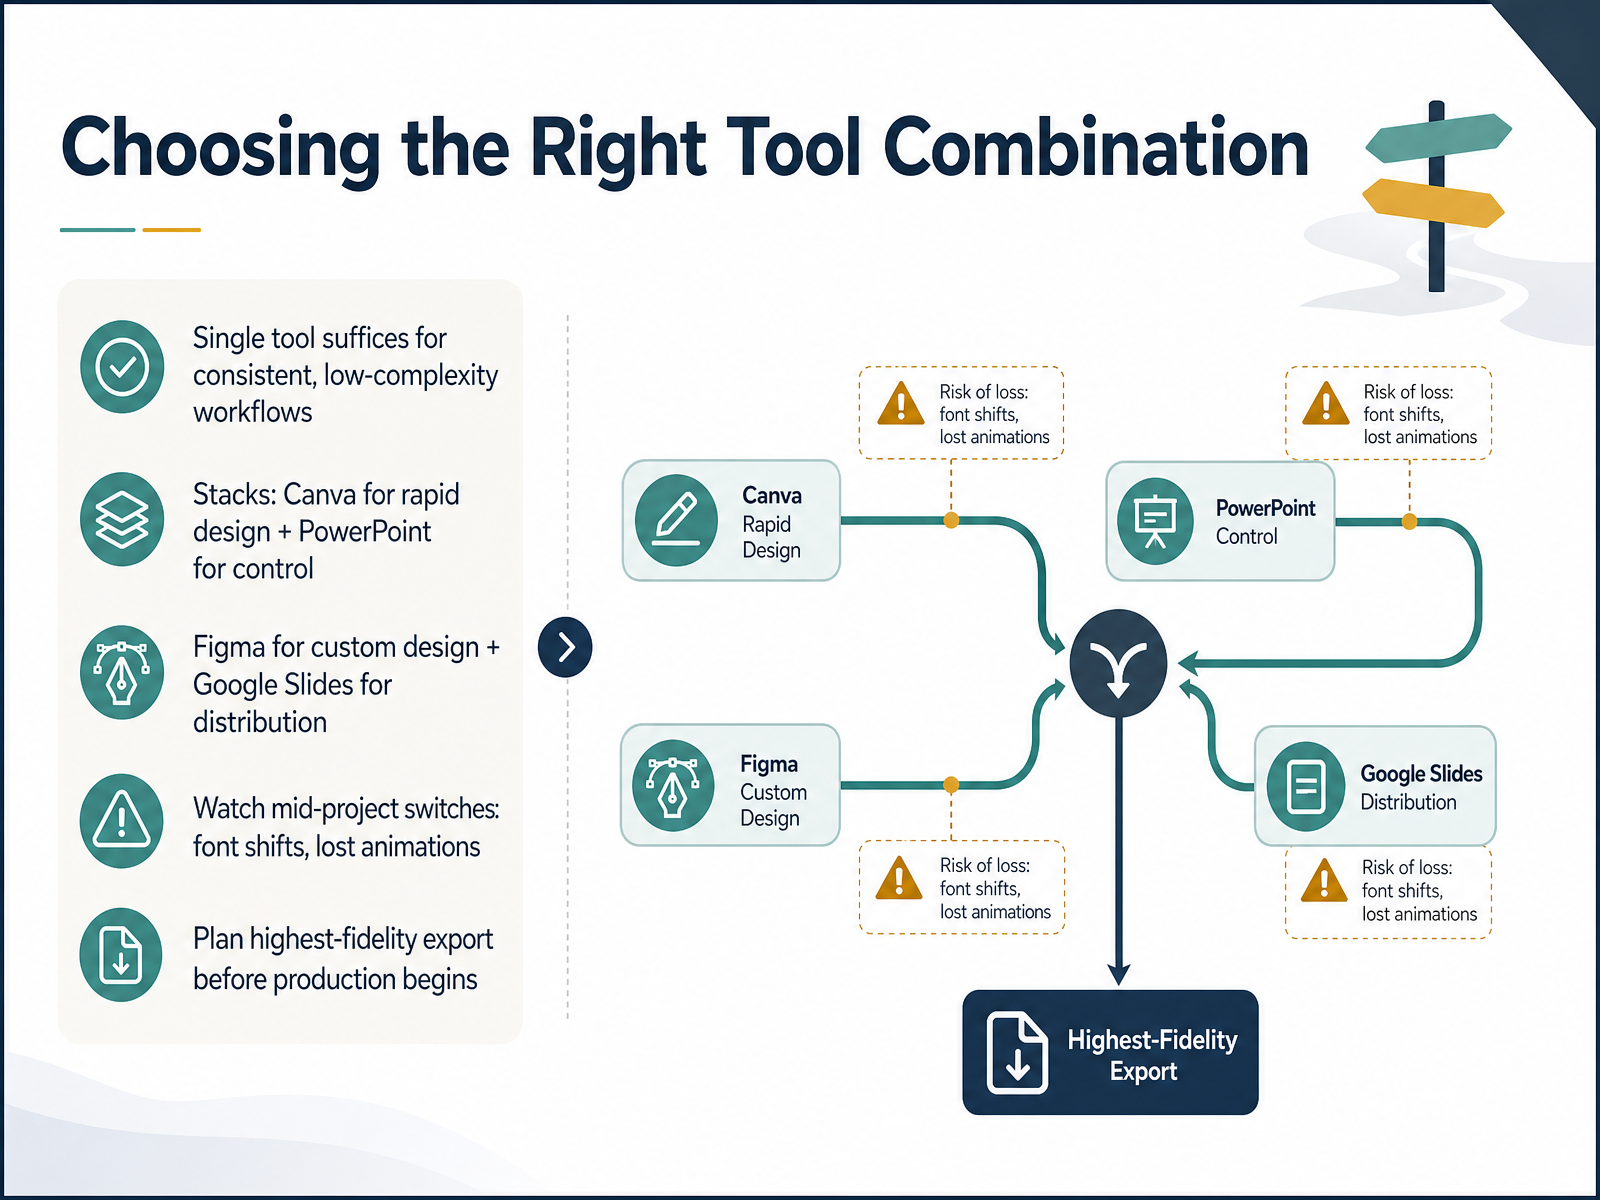
 - 08Choosing the Right Tool CombinationNow let's talk about choosing the right tool combination. The key is to start with the workflow, not the tool. For consistent, low-complexity projects, a single tool often suffices. But when you need more, consider a stack. For rapid design, pair Canva with PowerPoint for control. Use Figma for custom design, then distribute through Google Slides. Just be careful with mid-project switches. Fonts can shift, and animations often get lost. So plan your highest-fidelity export before production begins. That way, you know exactly what you're delivering and to whom. In short, match the stack to the workflow, and always test the handoff. Up next, we'll cover review, feedback, and quality control.
 help.figma.comcanva.comslideegg.com+21 min
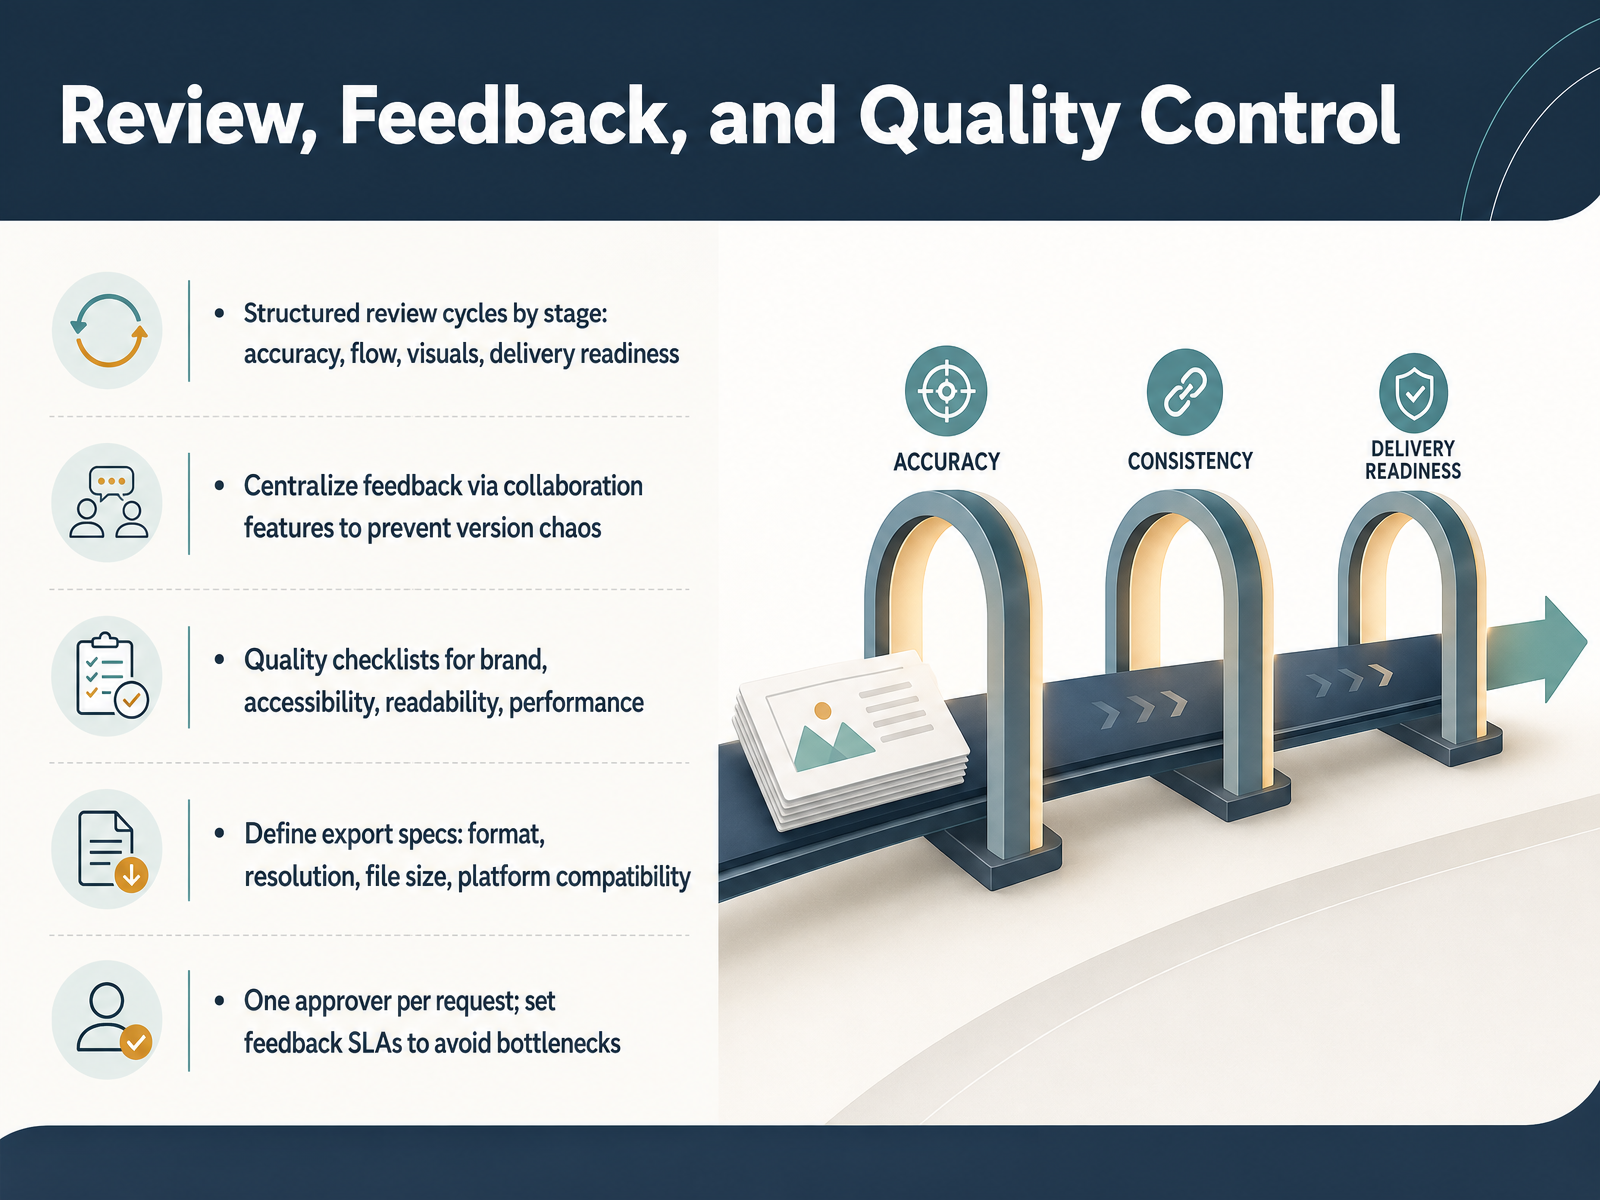
 - 09Review, Feedback, and Quality ControlNow let's talk about review, feedback, and quality control. This is where most workflows either hold up or break down. Structure your review cycles by stage. Check accuracy first, then flow, then visuals, and finally delivery readiness. Each stage has a different focus, so don't mix them. Centralize all feedback in one collaboration space. Comments scattered across email, chat, and notes create version chaos and slow everyone down. Use quality checklists for brand compliance, accessibility, readability, and performance. A simple checklist catches issues that a quick scan will miss. Define your export specifications early: format, resolution, file size, and platform compatibility. These decisions affect the entire production pipeline. And here is the critical rule: appoint one approver per request. When multiple people can approve, nothing gets approved. Set a feedback SLA, say twenty-four hours, so the work keeps moving. Without a deadline, reviews become the bottleneck. Start with the workflow, not the tool. Bring these controls into your process, and the quality bar stays consistent across every deck. Next, we'll look at how to scale this workflow for larger teams.
 thedigideck.comslidegenius.comtdsdaas.one+22 min
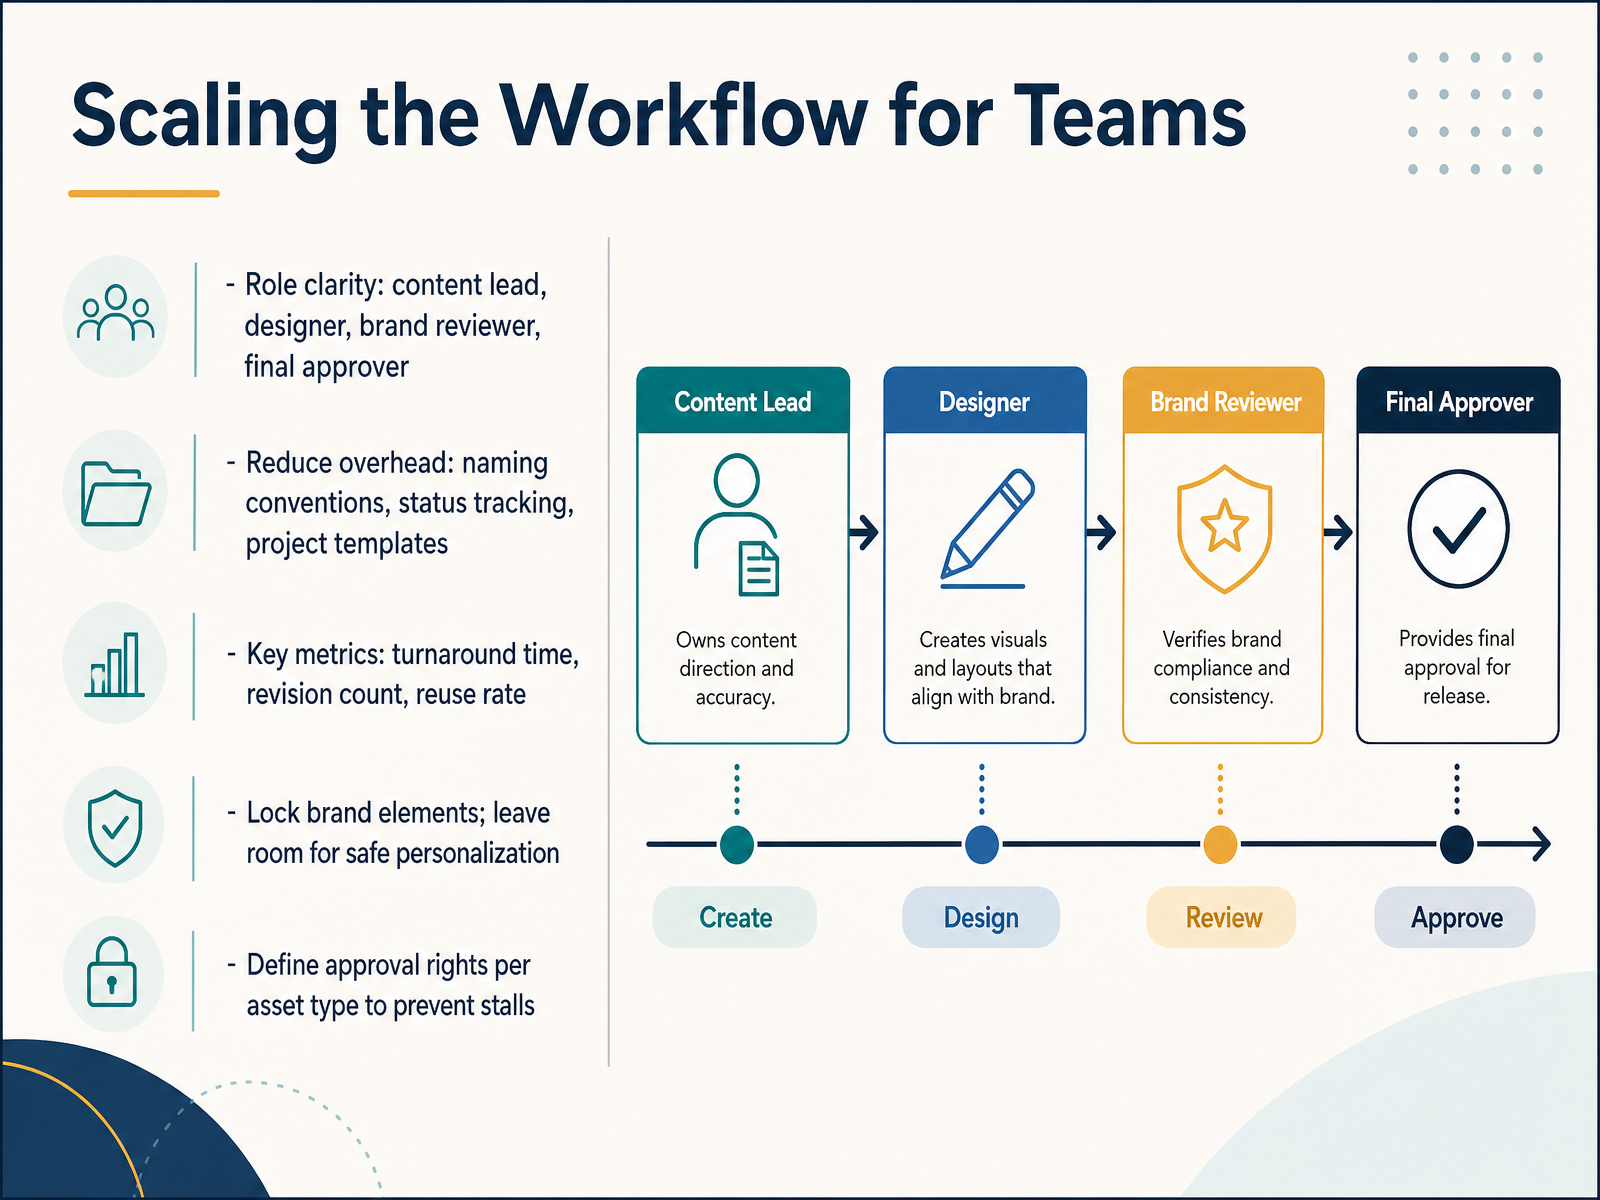
 - 10Scaling the Workflow for TeamsNow let’s talk about scaling that workflow for teams. The first move is role clarity. Decide who is the content lead, who owns design, who reviews for brand, and who gives final approval. When these roles are explicit, you eliminate the biggest source of delay: waiting for someone to decide who should act next. Next, reduce overhead with naming conventions, status tracking, and project templates. A consistent file name like project underscore deck underscore version underscore date makes any file’s status obvious without opening it. Then track three key metrics: turnaround time, revision count, and reuse rate. These numbers tell you where the process is actually breaking down. Lock brand-critical elements like logos, fonts, and disclaimers, but leave room for safe personalization, such as swapping in client logos or pricing. Finally, define approval rights per asset type. A repurposed slide may need no review, while a new deck with pricing claims requires a named approver and a deadline. This prevents approval stalls. Your goal is a system where brand protection is automatic, and creativity happens inside the guardrails. Up next, we’ll look at governance and ownership in more detail.
 thedigideck.comslidegenius.comtdsdaas.one+22 min
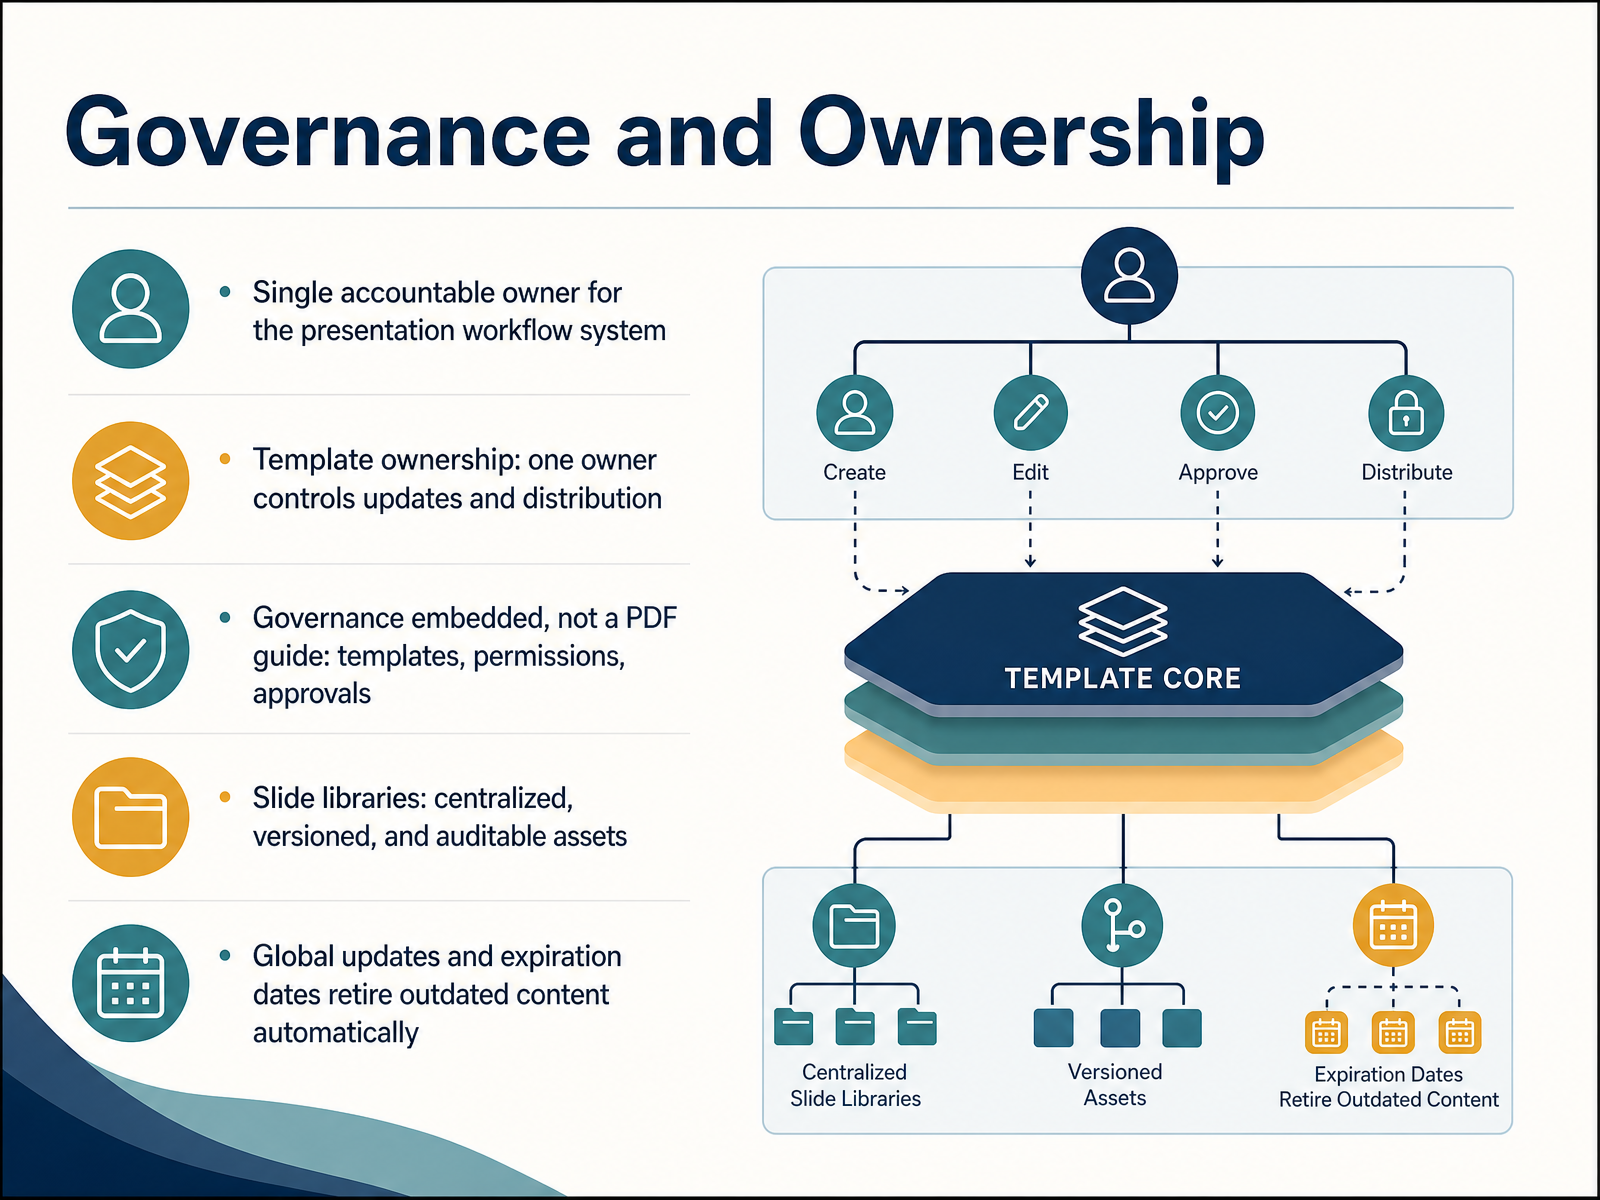
 - 11Governance and OwnershipNow let's talk about governance and ownership. This is where most presentation systems succeed or fail. You need one accountable owner for the entire workflow system. Not a committee. One person who owns the library's health. Template ownership works the same way. One owner controls updates and distribution. When everyone can edit the master file, drift is inevitable. Here's the key principle. Governance must be embedded, not documented. A PDF brand guide no one opens does nothing. Build the rules into the templates, permissions, and approval paths. Then compliance becomes automatic. Slide libraries should be centralized, versioned, and auditable. This is your single source of truth. When someone needs a chart slide, they pull from the library. They don't build from scratch. Finally, set global updates and expiration dates. When a logo changes, update it once. The change pushes to every deck, including ones already sent. Expiration dates retire outdated content automatically. One owner, locked templates, embedded rules, and automated updates. That's how governance protects your brand at scale. Next, let's look at import, export, and migration realities.
 thedigideck.comslidegenius.comtdsdaas.one+22 min
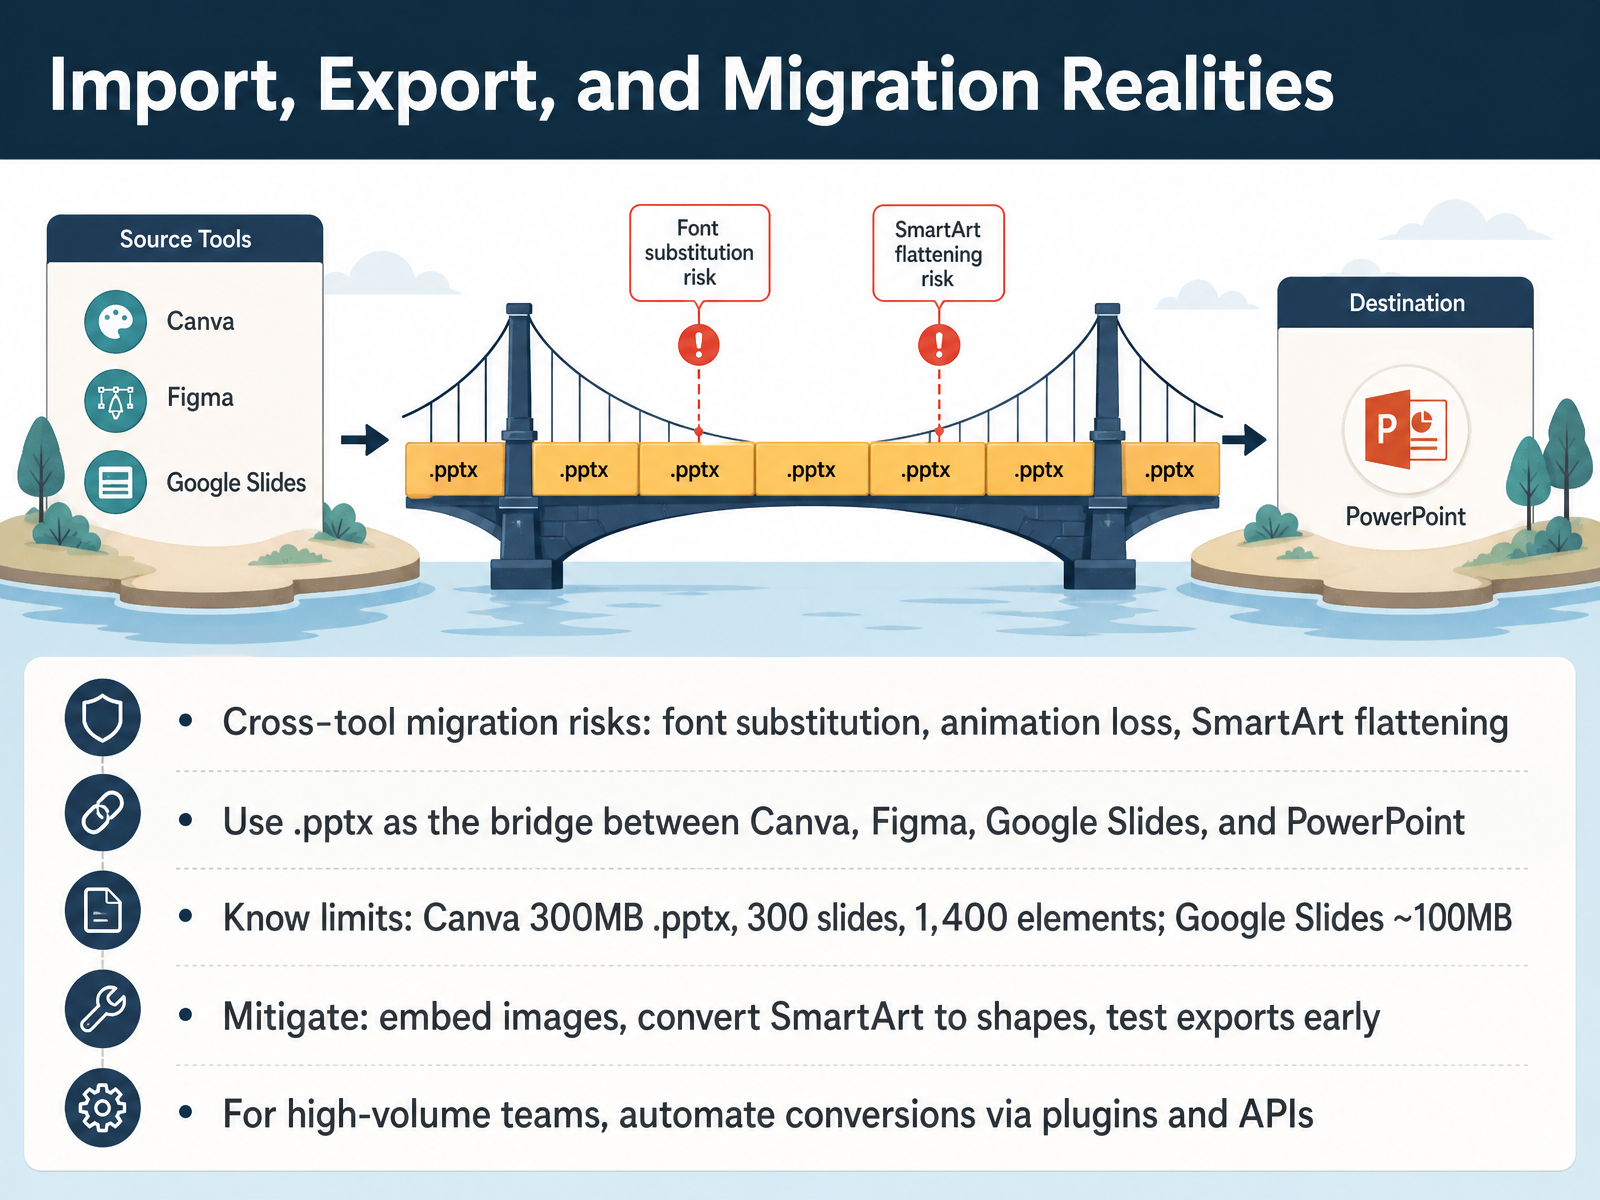
 - 12Import, Export, and Migration RealitiesNow let’s talk about the realities of moving files between tools, because this is where workflows often break down. The biggest risks are font substitution, lost animations, and SmartArt getting flattened into static images. When you migrate, don’t expect a perfect one-to-one transfer. Instead, plan for the conversion. The safest bridge between Canva, Figma, Google Slides, and PowerPoint is the .pptx format. It is the most reliable common denominator. But know your limits. Canva accepts files up to 300 megabytes, 300 slides, and 1,400 elements per deck. Google Slides tends to struggle with files near 100 megabytes. So before you export, embed your images instead of linking them, convert SmartArt to shapes, and run a test export early. That small check saves hours of cleanup later. For teams producing high volumes of decks, automate the conversion using plugins or APIs. Manual round-trips waste time and introduce errors. Start with the workflow, not the tool. Coming up, we’ll look at training-specific considerations you should keep in mind.
 help.figma.comcanva.comslideegg.com+21 min
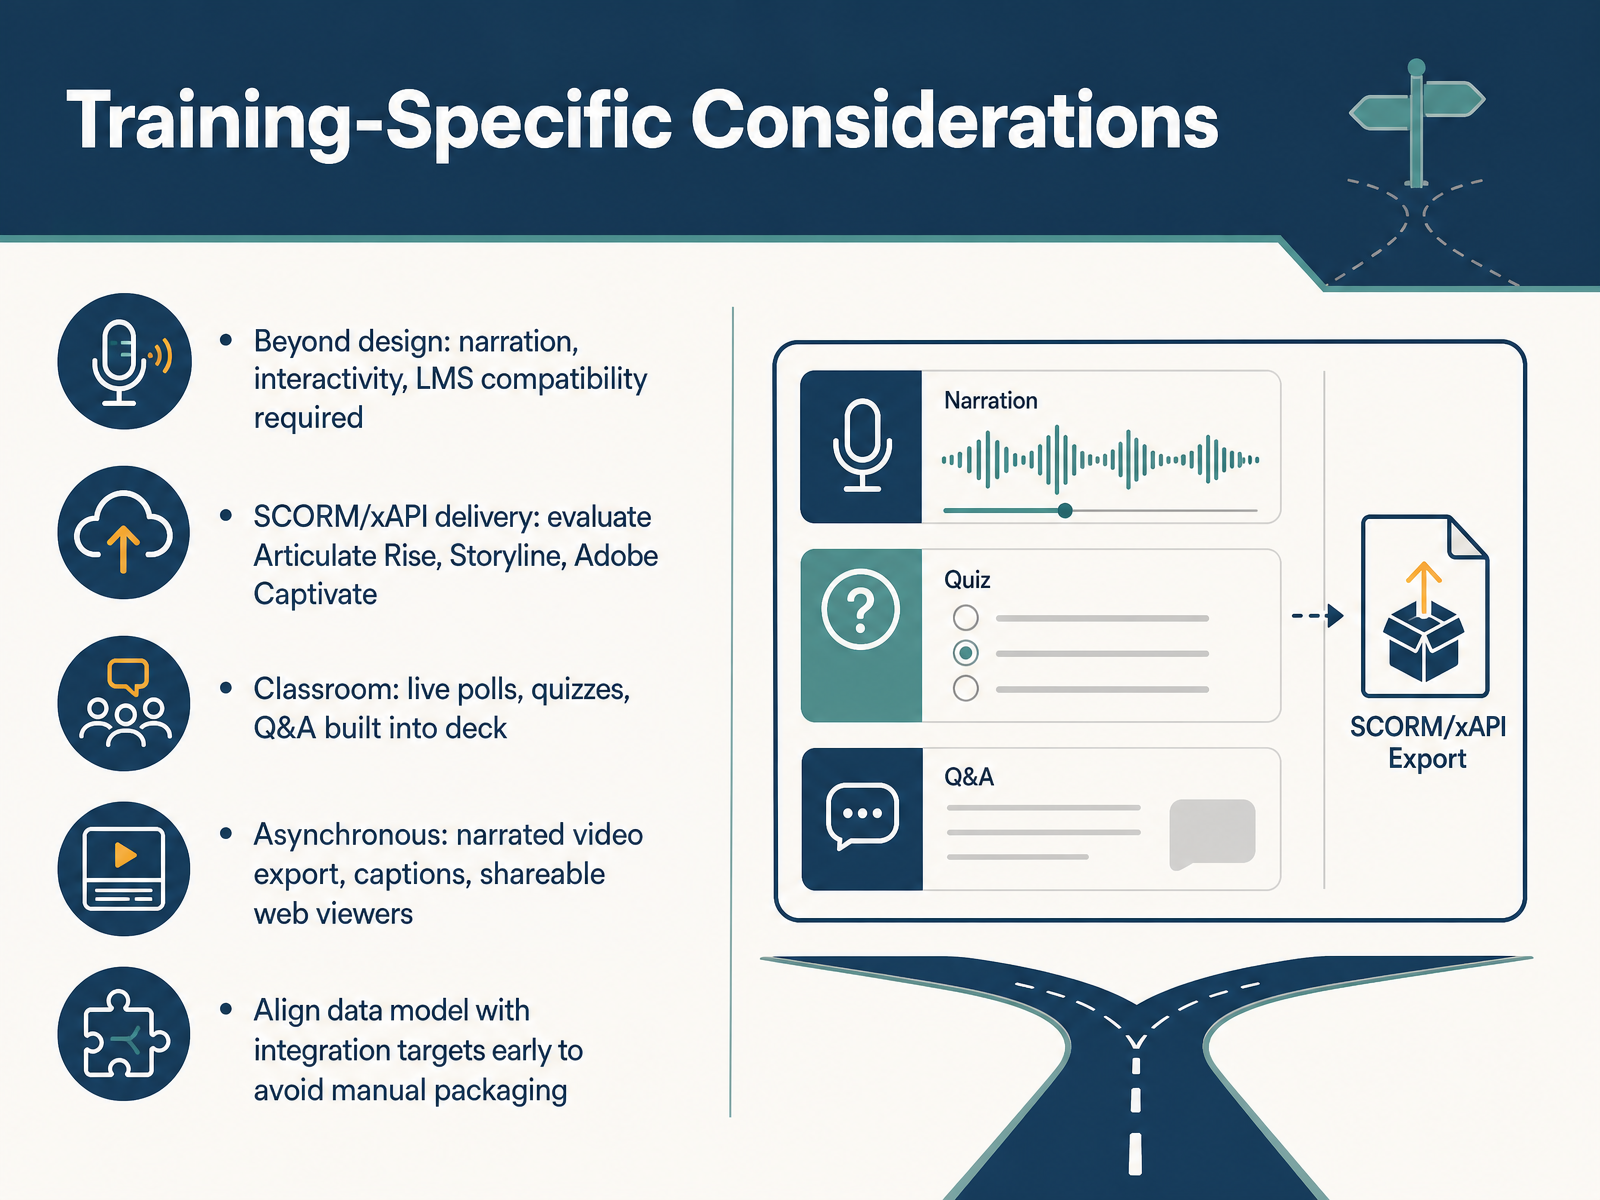
 - 13Training-Specific ConsiderationsWhen the deliverable is training, the design tool choice changes. You now need narration, interactivity, and learning management system compatibility built in, not bolted on. Start by mapping your delivery model. For asynchronous, LMS-based courses, evaluate Articulate Rise, Articulate Storyline, or Adobe Captivate. These publish SCORM or xAPI packages that track completion and quiz scores automatically. For live classroom sessions, use a deck tool with built-in polls, quizzes, and Q and A, so you avoid switching platforms mid-session. For asynchronous video, choose a tool that exports narrated video with editable captions and a shareable web viewer. The critical step is aligning your data model with your integration targets early. Decide what events your LMS must track, and confirm the tool exports that data natively. This avoids manual packaging and rework later. Next, we move to the action plan and tool adoption roadmap.
 prezi.compi.incgitnux.org+21 min
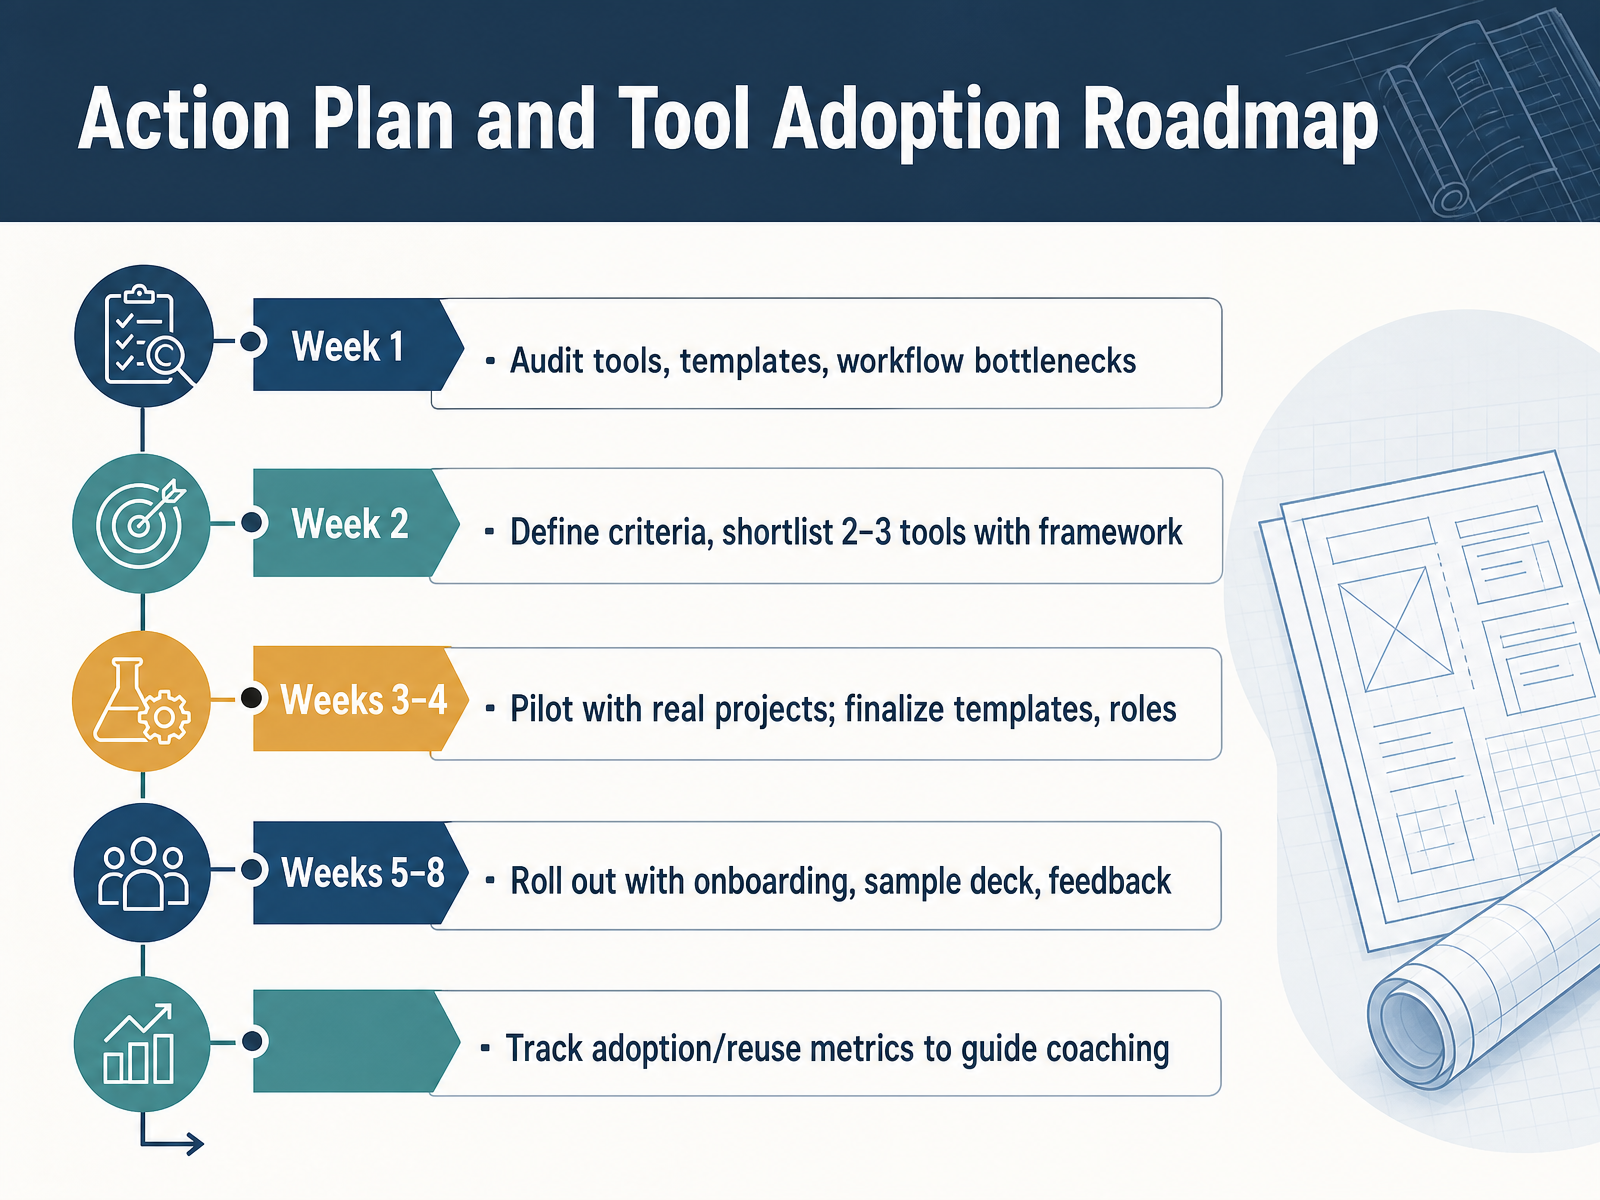
 - 14Action Plan and Tool Adoption RoadmapNow, let's turn all of this into a concrete eight-week action plan. Week one is an audit. Review your current tools, templates, and where the real workflow bottlenecks are. Week two is selection. Define your selection criteria, and shortlist two to three tools that fit your framework. Weeks three and four are the pilot phase. Run the new system on real projects. Finalize your templates, and lock in clear roles and an approval workflow. Weeks five through eight are rollout. Begin with an onboarding session, provide a sample deck, and establish a structured feedback loop. Throughout, track adoption and reuse metrics. Those numbers will tell you where to coach and what to simplify. Start with the workflow, not the tool. The system is your foundation. Good luck, and thank you for investing in this work.
 thedigideck.comslidegenius.comtdsdaas.one+22 min
Take the deck with you
Download this course as a file — free, no sign-up needed.
- PDF handoutEvery slide page, ready to print or share.15 pages · 3.3 MBDownload
- Narrated PowerPointThe deck that presents itself — every slide carries the digital human's narration video.15 pages · 24.7 MBDownload
- PowerPoint slidesThe full deck as a .pptx — open it in PowerPoint, Keynote, or Google Slides.15 pages · 3.1 MBDownload
Free to use in your own training — please keep the PersonWise credit page at the end.
Have your own deck? Turn it into a course
Sources consulted
Web sources consulted while building this course.
- Best AI Presentation Maker for Higher Education Accessibility · Prezi Blog — prezi.com
- How to Choose the Right AI Presentation Tool in 2026: A Workflow-Based Decision Framework — pi.inc
- Best Training Presentation Software – 2026 Buyer's Guide — gitnux.org
- Best presentation software 2026: 15 AI-powered tools tested & ranked - Guideflow Blog — guideflow.com
- Top Training Presentation Software (2026) — wifitalents.com
- How to Scale Presentation Creation in Large Organizations - DIGIDECK — thedigideck.com
- How Large Organizations Scale Presentation Design Across Teams | SlideGenius: Expert PowerPoint Presentation Design Services | Pitch Decks, Sales Presentations & More — slidegenius.com
- The Creative Operations Toolkit: Essential Processes & Templates | TDS Insights — tdsdaas.one
- How to Standardize Creative Scaling Across Teams | Revue | Revue — revuesuite.com
- Design Operations: Scale Creative Output Without Hiring (2026) — manypixels.co
- Import PowerPoint files to Figma Slides – Figma Learn - Help Center — help.figma.com
- Import Figma files - Canva Help Center — canva.com
- How to Import PowerPoint into Canva: A Step-by-Step Guide — slideegg.com
- How to Export Canva to Google Slides Quickly and Easily | Slidestack — slidestack.com
- Figma to PowerPoint: 4 Export Methods (Free & Editable) | Deckary — deckary.com