Begin
14 pages · ~28 min
Computer Networking Tools and Equipment
Learn essential computer networking tools and equipment, covering their functions and uses for aspiring IT professionals.
A digital instructor presents all 14 pages. Hold “Ask” at any point and ask out loud — the answer comes from this course. No sign-up needed.
What you’ll learn
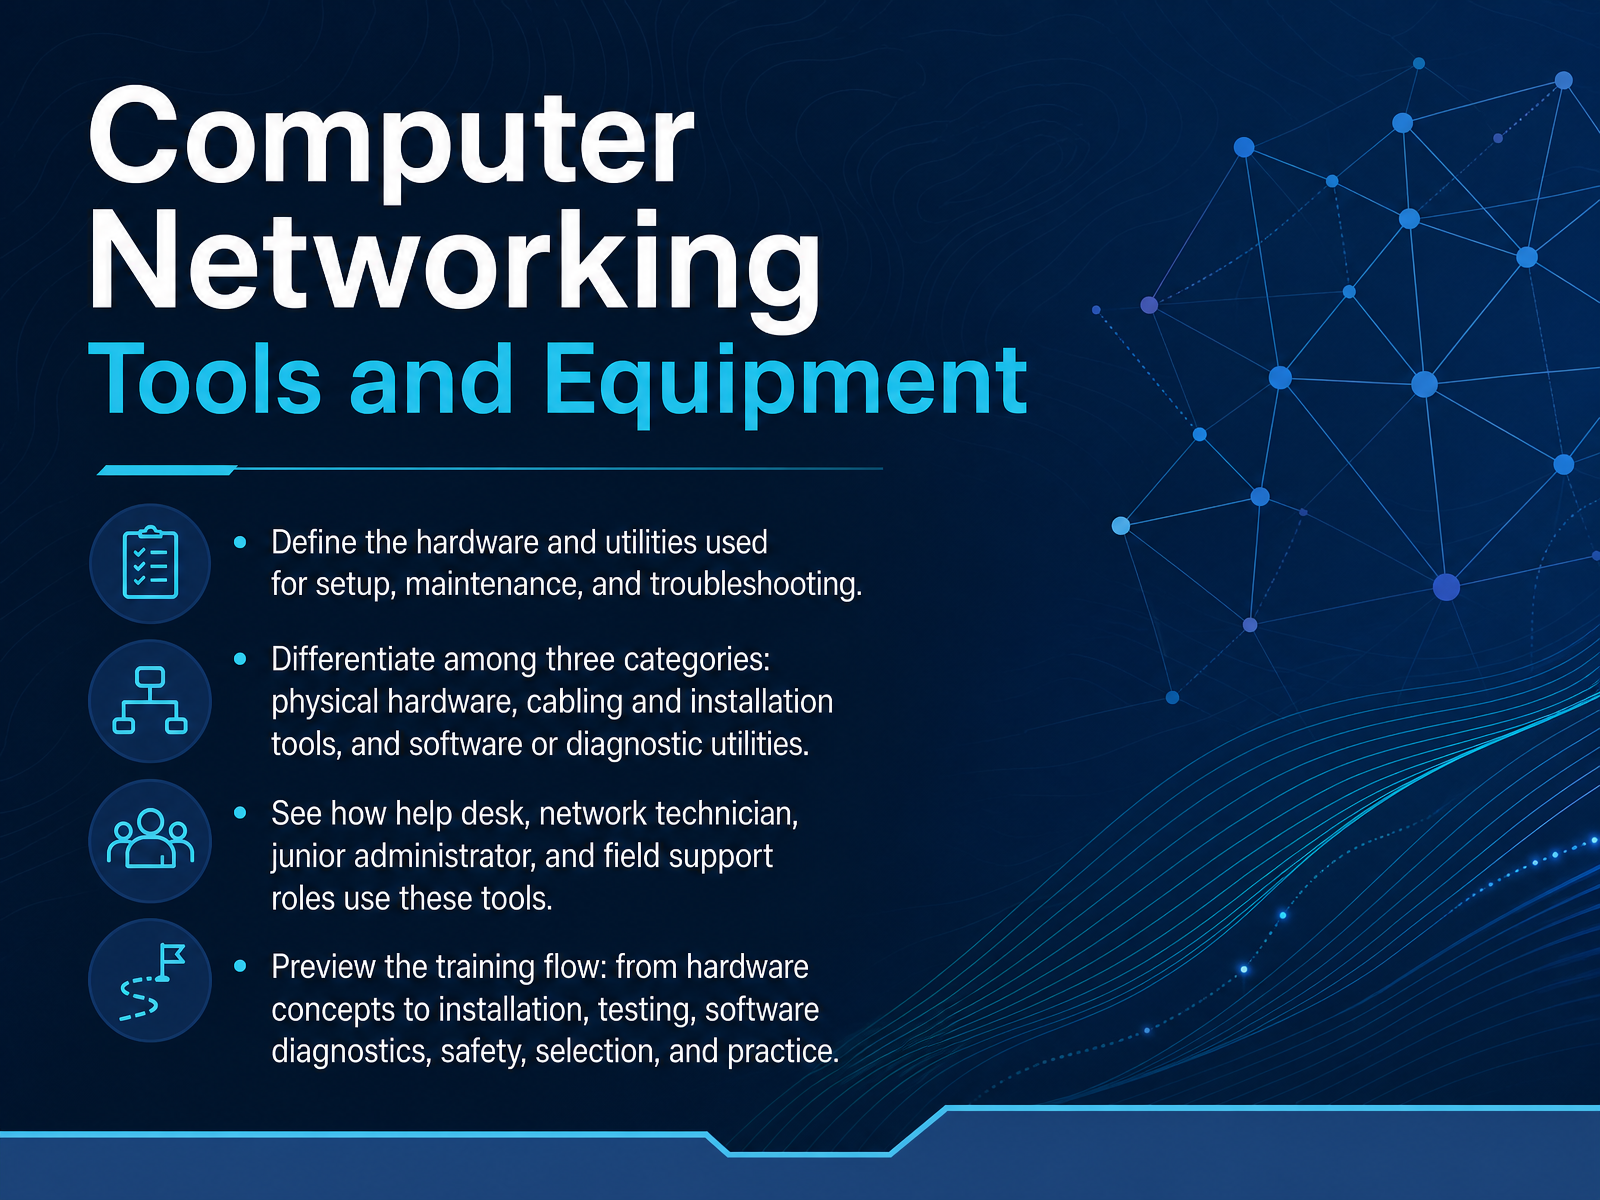
- 01Computer Networking Tools and EquipmentWelcome to Computer Networking Tools and Equipment. This course is designed for people who are just starting out in technical support, or who need a practical understanding of the gear and utilities used to build and repair networks. Our goal is simple: to help you recognize the tools of the trade, understand what problems they solve, and feel comfortable using them safely. We will begin by defining the hardware and software utilities used for setup, maintenance, and troubleshooting. Then we will organize these tools into three groups: physical hardware, cabling and installation tools, and software or diagnostic utilities. For example, a switch is physical hardware, a cable crimper is an installation tool, and a ping utility is a diagnostic tool. We will also look at how different roles, such as help desk, network technician, junior administrator, and field support, rely on these tools in different ways. By the end of this course, you will have a clear path from understanding basic hardware concepts, through installation and testing, software diagnostics, safety practices, selecting the right tool, and applying your knowledge in practice. Let's get started. Up next, we will look at what a network technician actually works with.networklessons.comtechtarget.comcisco.com+22 min
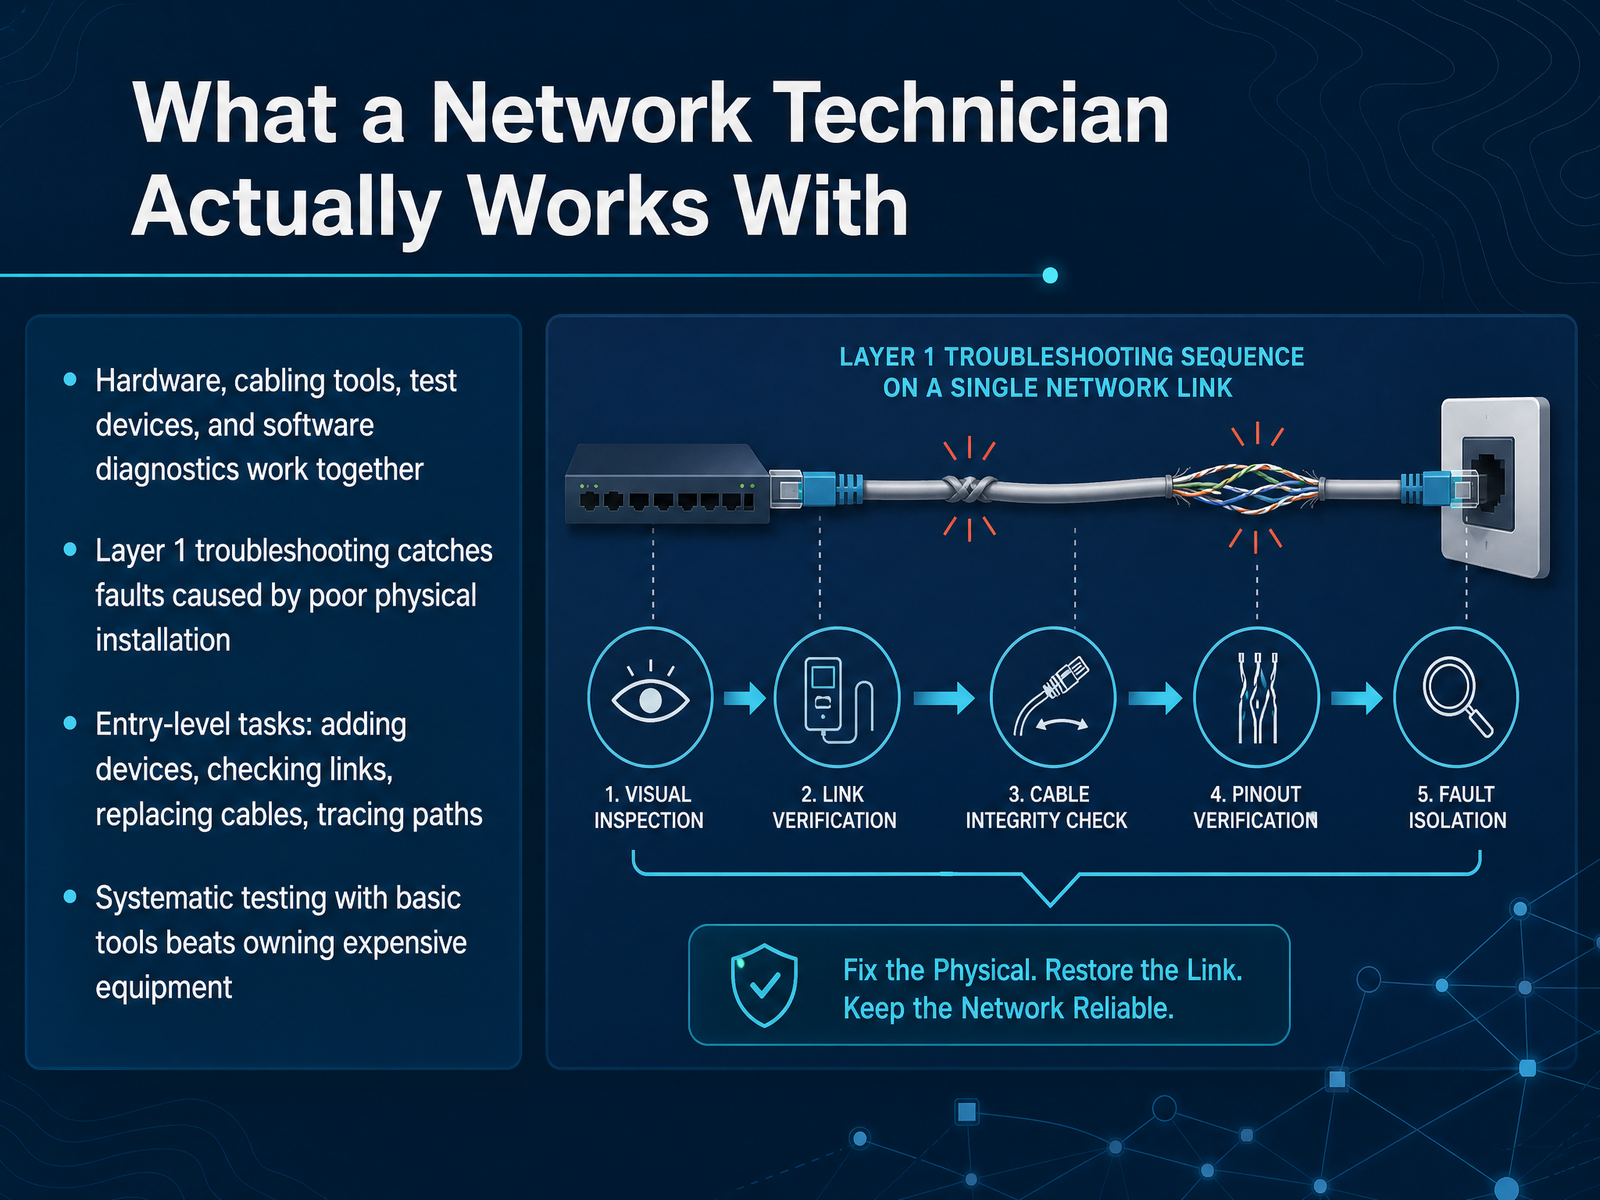
- 02What a Network Technician Actually Works WithSo what does a network technician actually touch and work with day to day? Think of it as a toolbox. You have physical hardware, cables, testing devices, and software diagnostics, and they all work together. A lot of entry-level troubleshooting happens at what we call Layer 1, the physical layer. This is the world of copper and fiber. Many faults are simply caused by a bad cable or a loose connection. Your first tasks will likely involve adding a new device to the network, checking if a link is active, or replacing a suspect cable. It is also about tracing where a wire actually goes. The key takeaway is this: a systematic approach with a few basic tools is far more effective than having a pile of expensive equipment you do not know how to use. Next, we will look at the core network devices and where they sit in a simple topology.
 networklessons.comtechtarget.comcisco.com+21 min
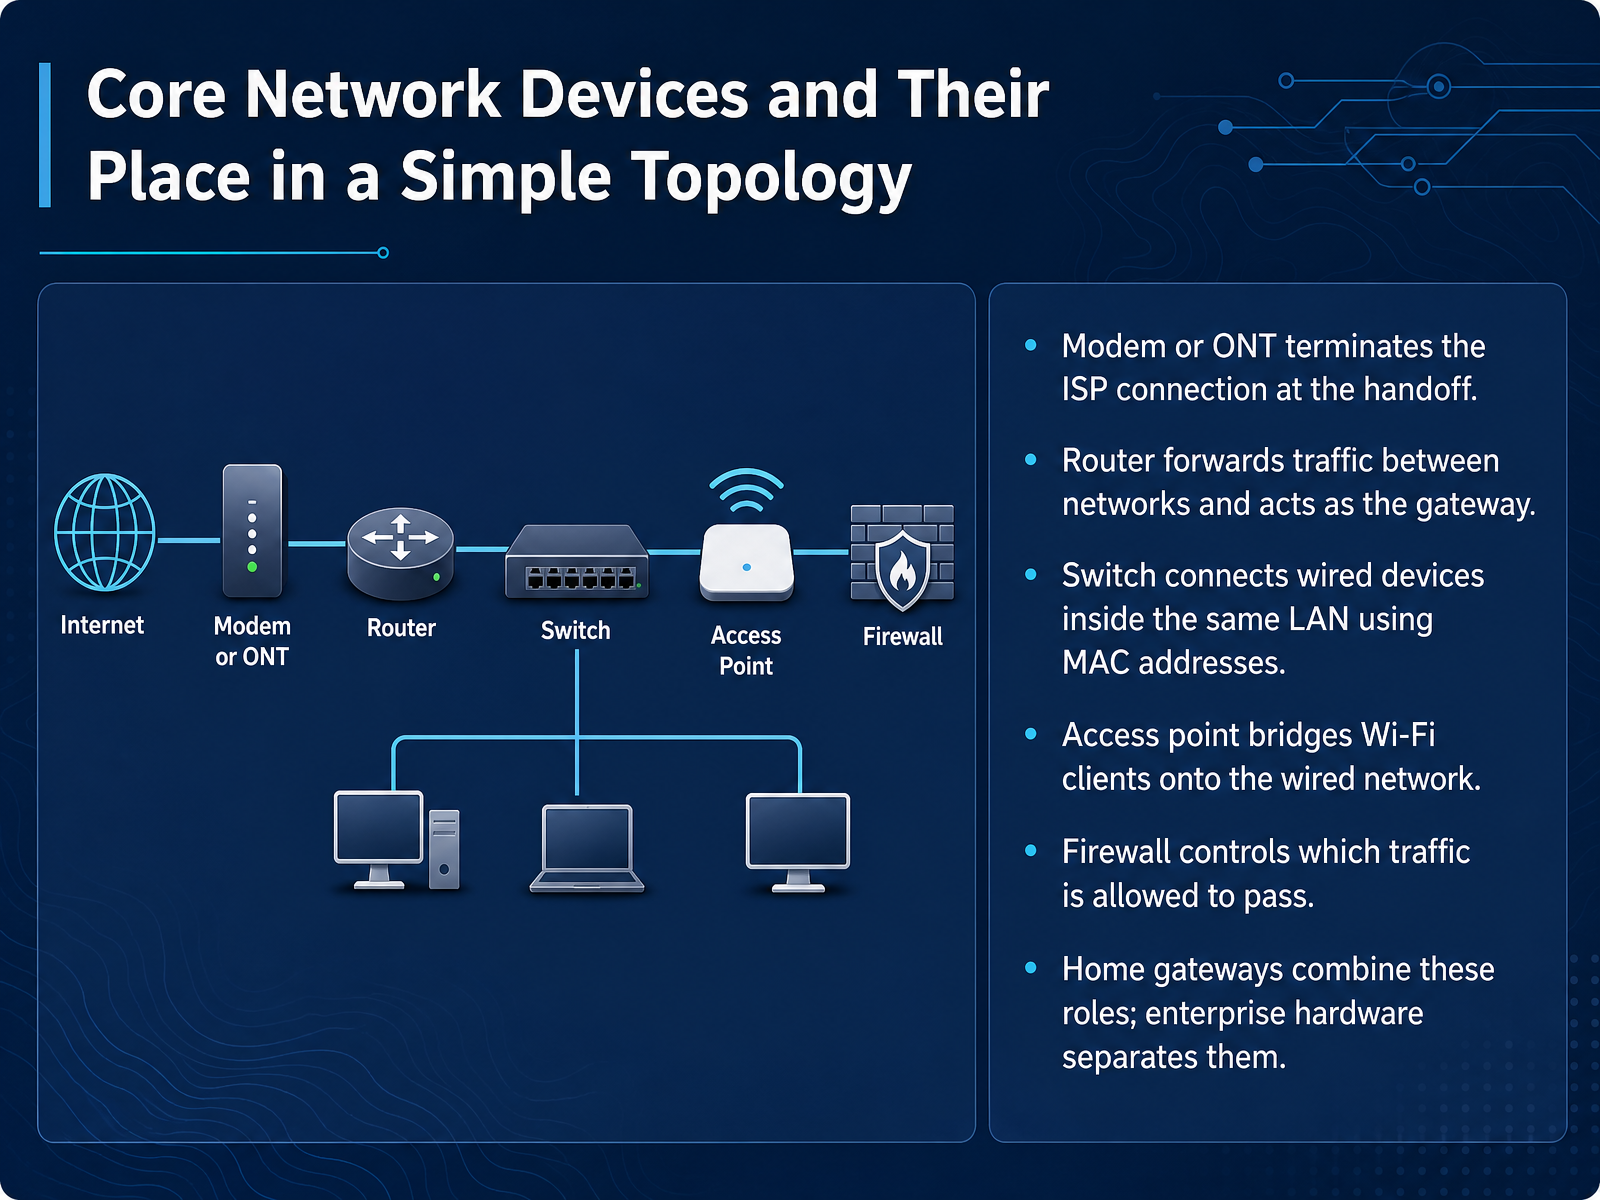
 - 03Core Network Devices and Their Place in a Simple TopologyLet's look at the core network devices and where they sit in a simple topology. First, we have the modem or the ONT. This is the device that terminates the ISP connection at the handoff. Think of it as the point where the outside internet physically enters your building. Next is the router. The router forwards traffic between different networks and acts as the gateway for your local devices. Then there's the switch. The switch connects wired devices inside the same local network using MAC addresses. If you have computers and printers plugged in with cables, they're likely talking through a switch. Now, for wireless connections, we have the access point. Its job is to bridge Wi-Fi clients onto the wired network. We also have the firewall. The firewall controls which traffic is allowed to pass, like a security guard checking IDs at the door. In a home gateway, all these roles are combined into one box. In enterprise hardware, they are separated into dedicated devices. Let's move on to the next topic: copper cabling, Ethernet categories, and RJ45 connectors.
 blog.jazzcybershield.compcmag.combaeldung.com+21 min
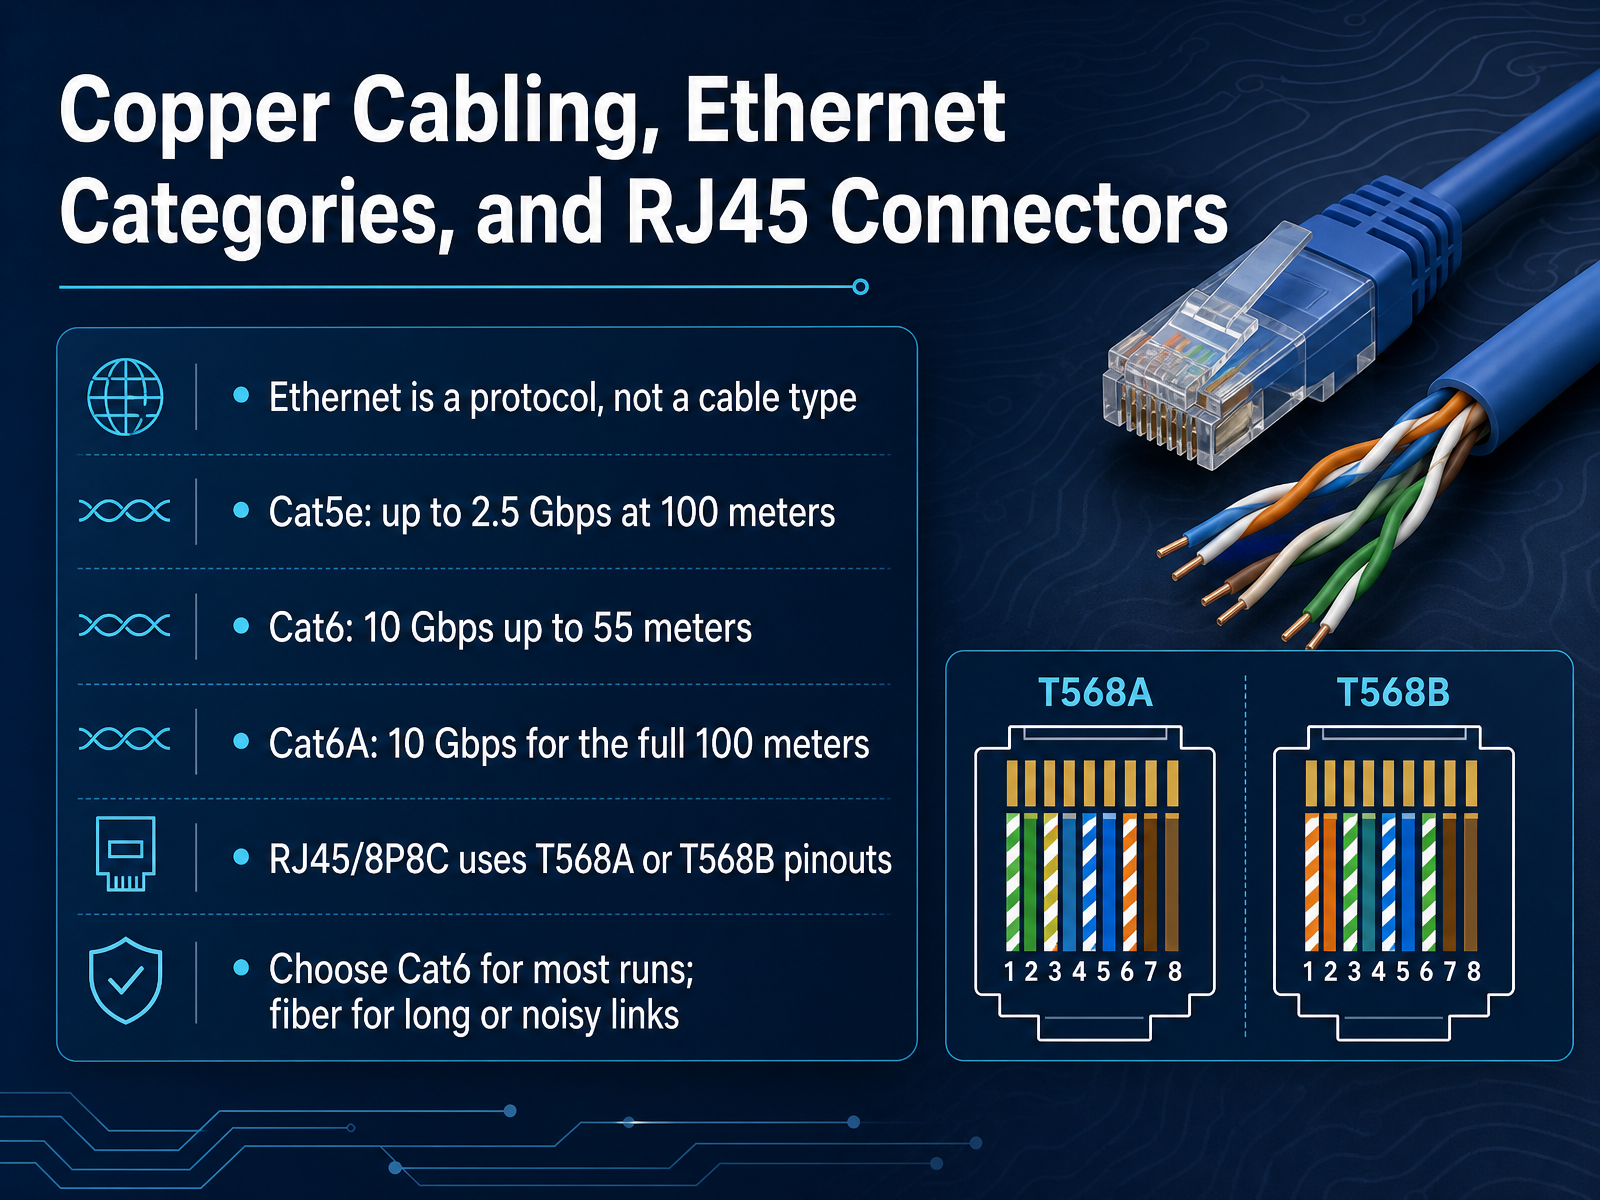
 - 04Copper Cabling, Ethernet Categories, and RJ45 ConnectorsNow let's talk about copper cabling and the connectors you will use most often. First, an important point: Ethernet is a protocol, not a cable type. The protocol defines how data moves, while the cable is the physical path it travels on. For modern copper wiring, you will mostly encounter Cat5e, Cat6, and Cat6A. Cat5e supports speeds up to two point five gigabits per second at one hundred meters. Cat6 can handle ten gigabits, but only up to fifty-five meters. If you need ten gigabit speed across the full one hundred meter run, choose Cat6A. At the end of the cable is the RJ45 connector, technically called an eight P eight C. When you terminate one, the eight wires inside must follow either the T five six eight A or T five six eight B pinout standard. Both ends just need to match. For most runs, Cat6 is a solid balance of cost and performance. For long distances or electrically noisy areas, move to fiber. Next, we will look at fiber optic and coaxial links for modern networks.
 truecable.comwebnotes.sitetechopedia.com+22 min
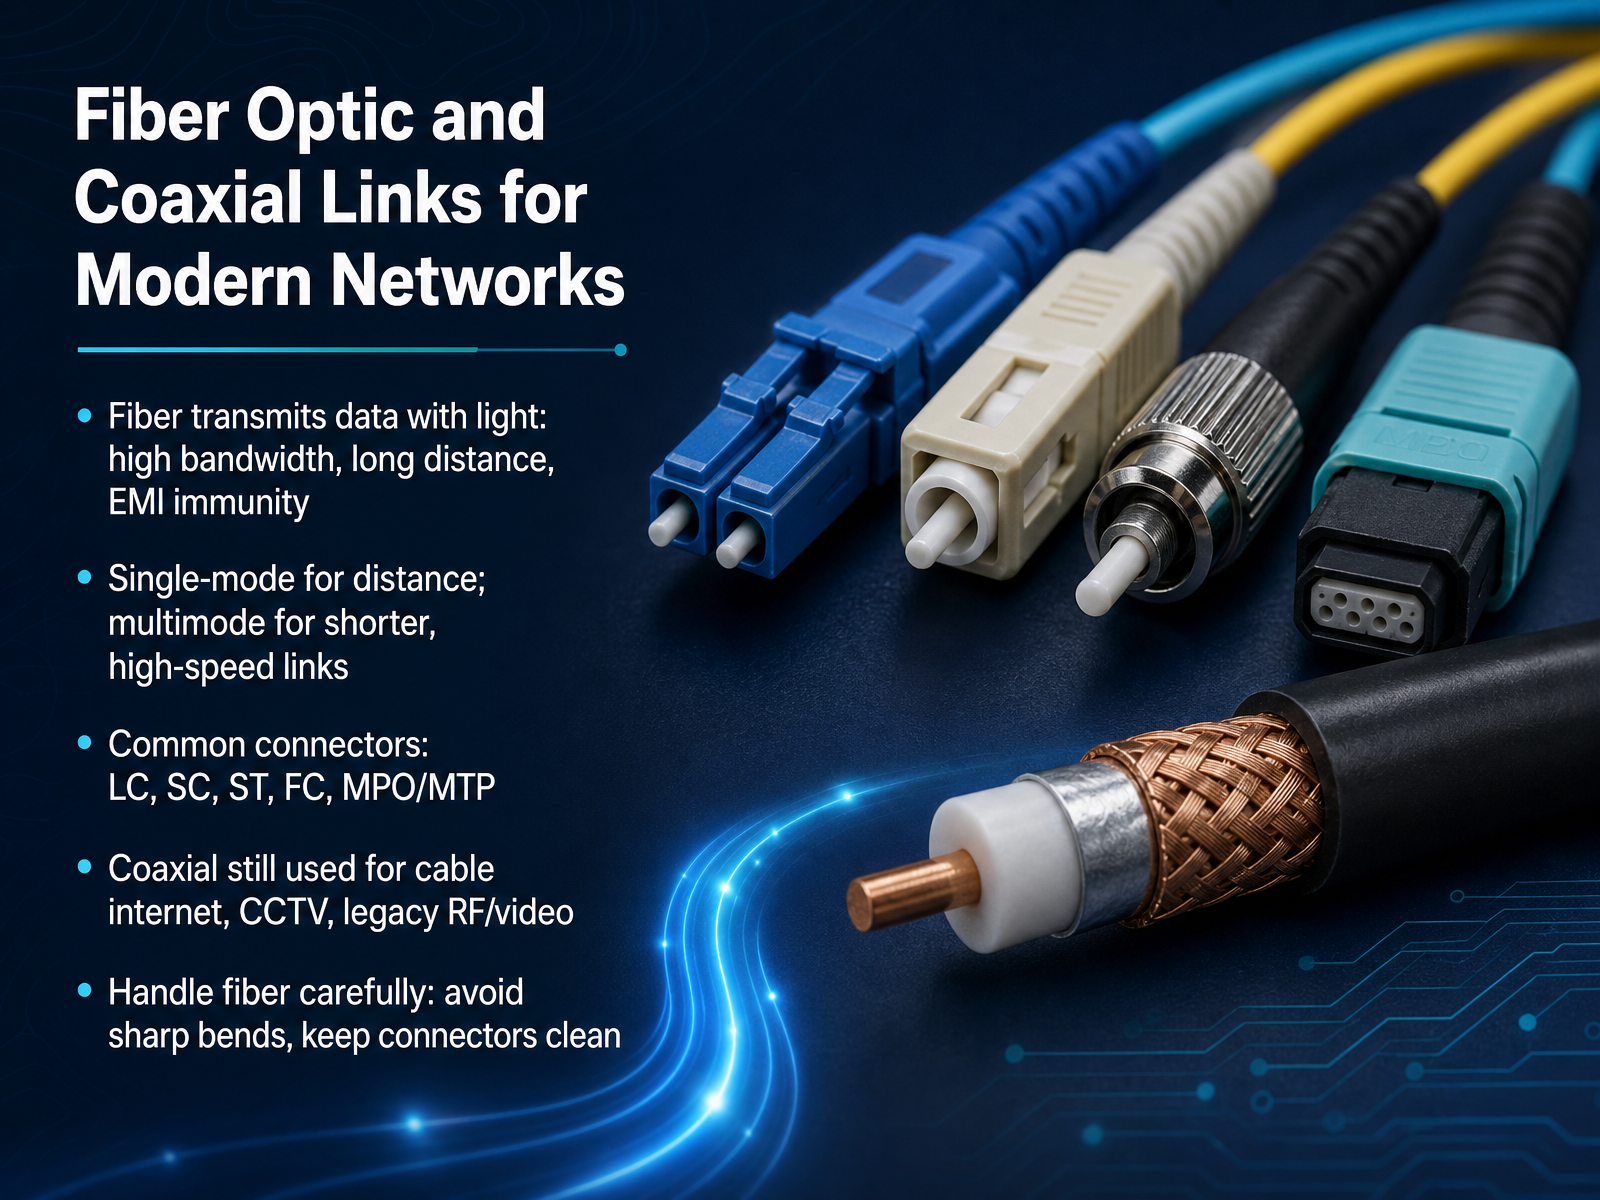
 - 05Fiber Optic and Coaxial Links for Modern NetworksNow let's look at fiber optic and coaxial links, the media that handle higher speeds and longer distances. Fiber optic cables transmit data using light pulses, not electrical signals. This gives them very high bandwidth, support for long distances, and complete immunity to electromagnetic interference. There are two main fiber types. Single mode fiber is designed for long distance runs, while multimode fiber is used for shorter, high speed links inside buildings. Around the hardware, you'll see a few common connectors. LC and SC connectors are widely used in modern networks. ST and FC are older styles you may still find in legacy setups. And MPO and MTP connectors bundle multiple fibers together for high density data center connections. Now let's talk briefly about coaxial cable. It's the older shielded copper technology still used for cable internet, CCTV systems, and legacy RF video. When you handle fiber, treat it gently. Avoid sharp bends, because they can break the glass inside. And always keep the connectors clean, since even a speck of dust can block light and cause failures. Up next, we'll cover the essential hand tools for installing and terminating cables.
 truecable.comwebnotes.sitetechopedia.com+22 min
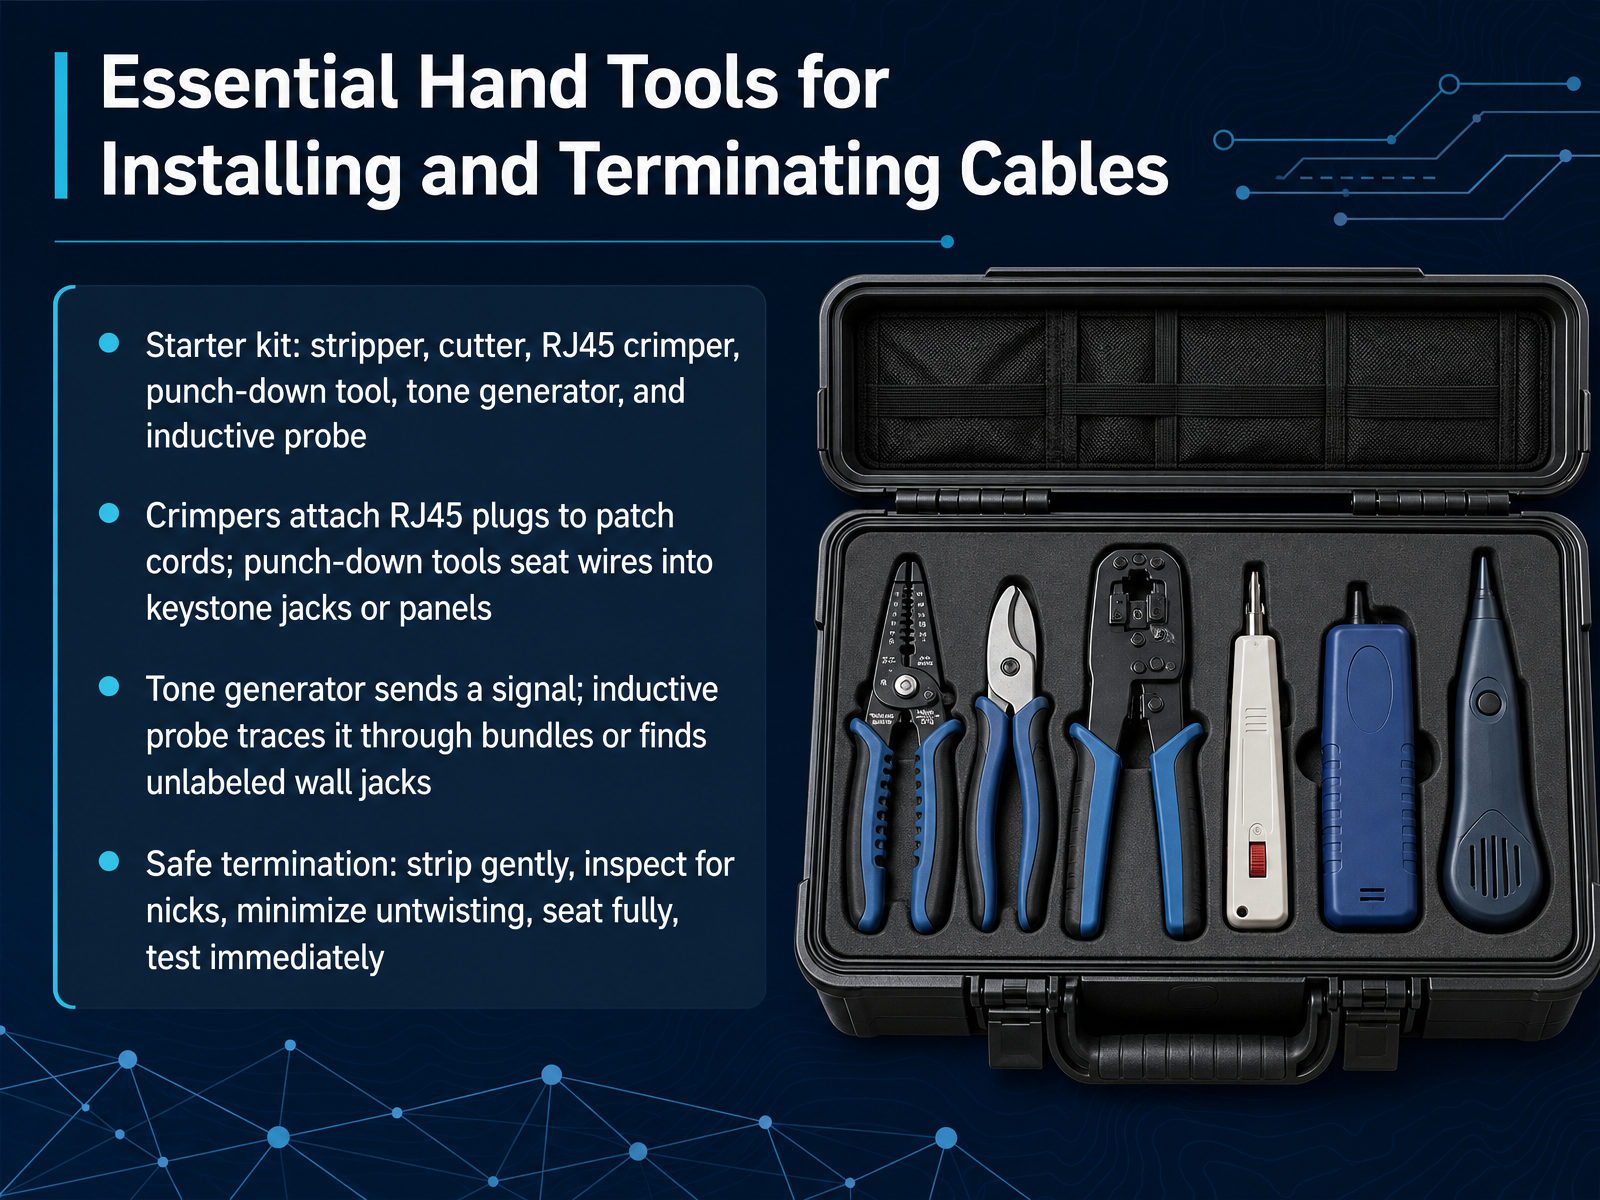
 - 06Essential Hand Tools for Installing and Terminating CablesNow let's get hands on with the essential hand tools for installing and terminating cables. A practical starter kit usually includes a wire stripper, a cutter, an RJ45 crimper, a punch-down tool, and a tone generator with an inductive probe. Think of these as the core tools that solve most physical cabling problems you will meet. A crimper attaches RJ45 plugs to patch cords. It pushes the copper contacts into each of the eight wires to create a reliable connection. A punch-down tool, on the other hand, seats wires into keystone jacks or patch panels. It pushes each wire into its slot and trims the excess in one motion. When you need to find a specific cable in a messy bundle or locate an unlabeled wall jack, you use a tone generator and an inductive probe. The generator sends a signal down the wire, and the probe lets you hear that signal, getting louder as you get closer to the right cable. For safe termination, always strip the jacket gently to avoid nicking the wires inside. Inspect them closely for any cuts. Keep the untwisting to a minimum, ideally under half an inch. Make sure the wire is fully seated in the connector, and then test the cable immediately before you put everything back in the wall. These habits prevent those frustrating intermittent problems. Next, we will move from installation to formal cable verification, qualification, and certification.
 specialized.netassets.tripplite.comhowtonetwork.com+22 min
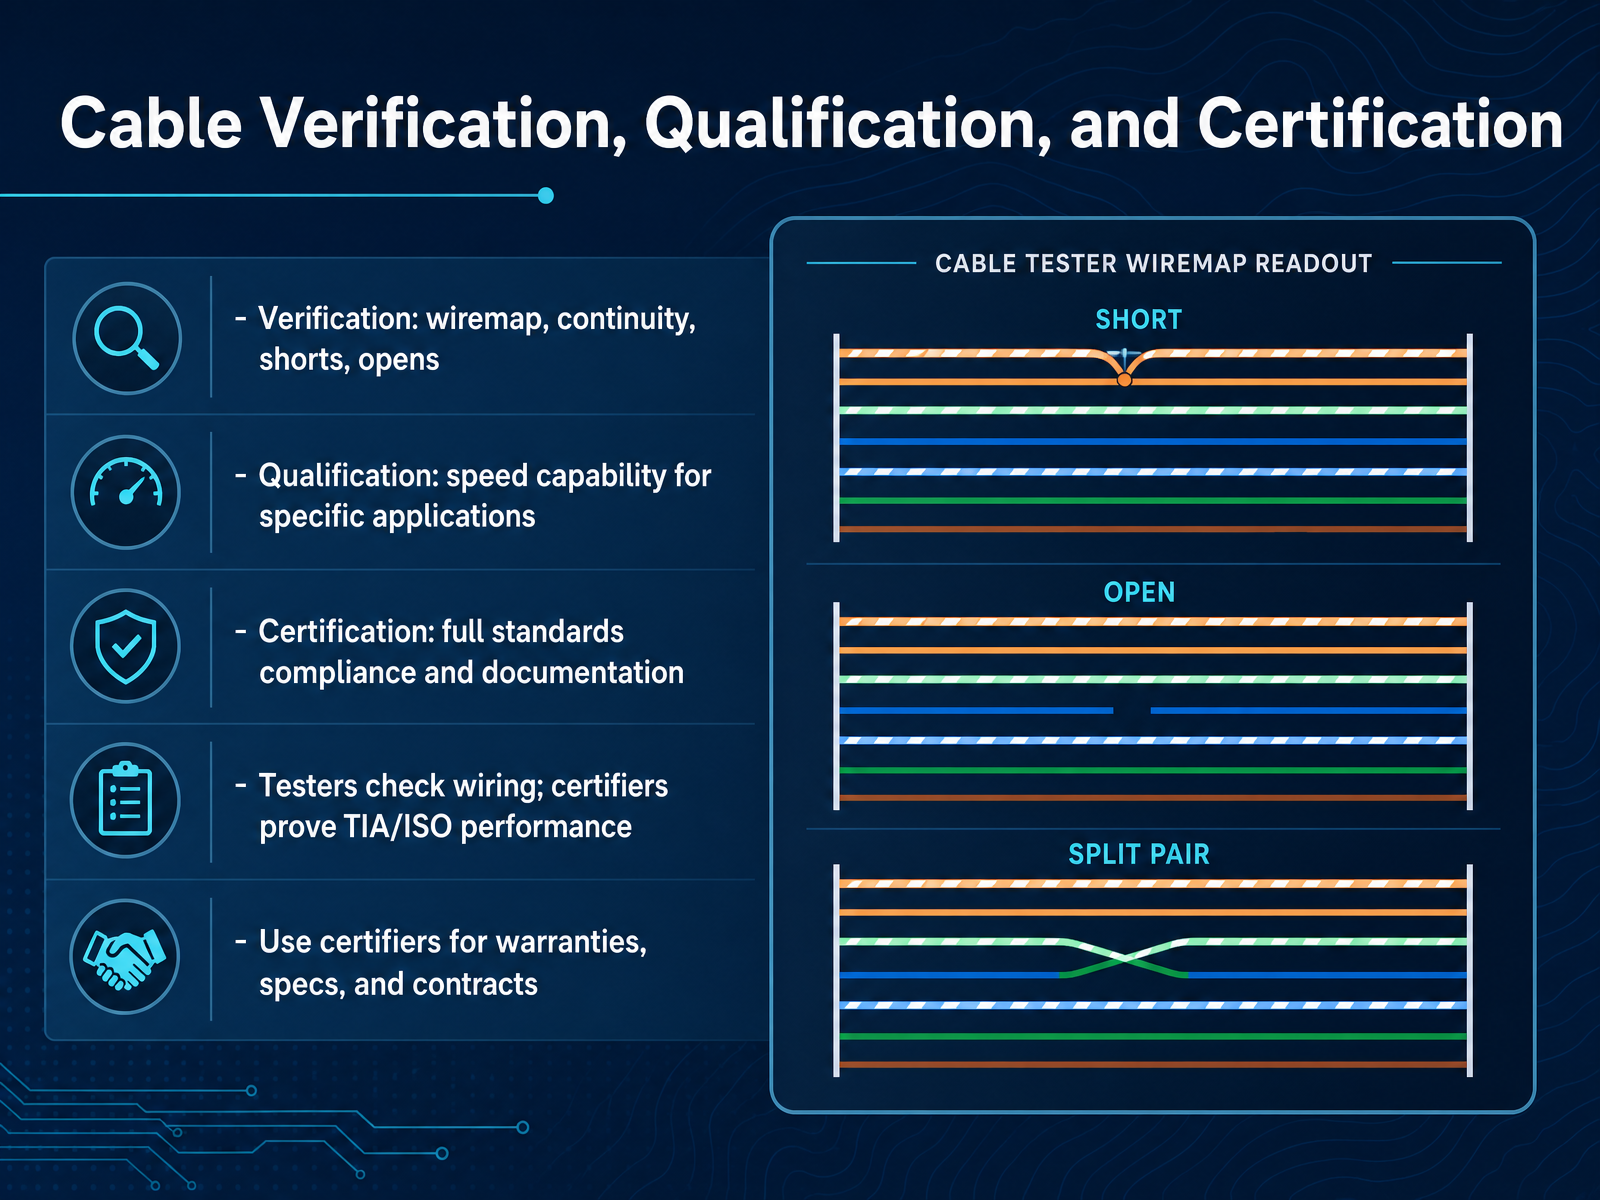
 - 07Cable Verification, Qualification, and CertificationNow let's talk about three levels of cable testing: verification, qualification, and certification. Think of verification as a basic physical health check. A verification tester checks the wiremap, meaning the correct pin to pin wiring, and it looks for continuity, opens, and shorts. It answers the simple question: are the wires connected to the right places? A qualification tester goes a step further. It estimates whether a cable can support a specific application, like Gigabit Ethernet, by measuring things like cable length. It answers the question: can this cable handle the speed we need? Certification is the most rigorous level. A certifier performs a full set of measurements against TIA or ISO standards, like crosstalk and return loss, and produces formal pass or fail documentation. Use a standard tester for everyday wiring checks. Use a certifier when the job requires documented proof of performance for warranties, specifications, or contracts. Next, we'll explore fiber and wireless testing devices.
 specialized.netassets.tripplite.comhowtonetwork.com+22 min
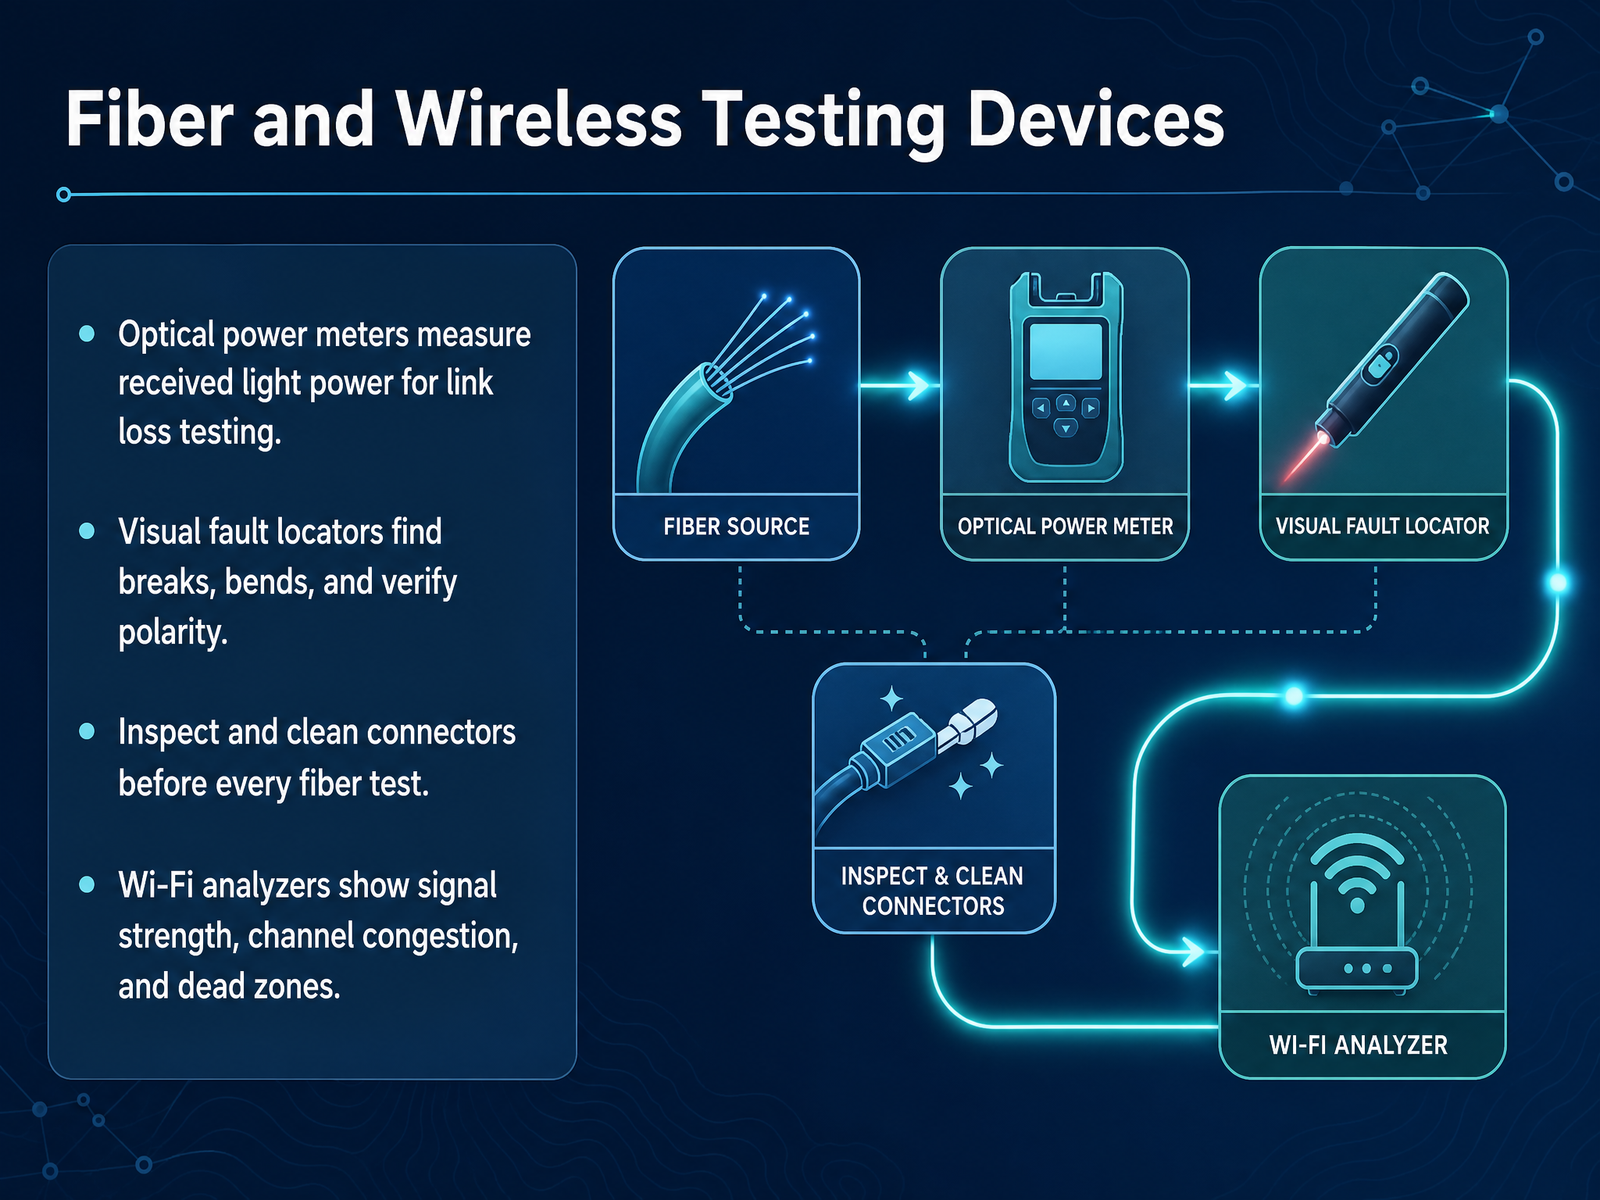
 - 08Fiber and Wireless Testing DevicesNow let's look at the tools we use for fiber and wireless testing. On the fiber side, an optical power meter measures how much light is actually arriving at the end of a connection. This helps us test for link loss, meaning how much signal fades as it travels. It is a basic health check for light. A visual fault locator is even simpler. You connect it to a fiber, and it shines a bright red light through the core. If there is a break or a sharp bend, you will literally see light leaking out. It is also great for checking polarity to make sure the transmit fiber lines up with the receive side. But here is a golden rule: always inspect and clean connectors first. Dust on a connector tip can block light or cause reflection, and it is the number one enemy of good fiber tests. For wireless, we use a Wi-Fi analyzer. This tool scans the air and shows you signal strength, channel congestion, and dead zones. It tells you why a spot might be slow and helps you pick a better channel. Coming up next, we will shift to software tools for connectivity troubleshooting.
 1 min
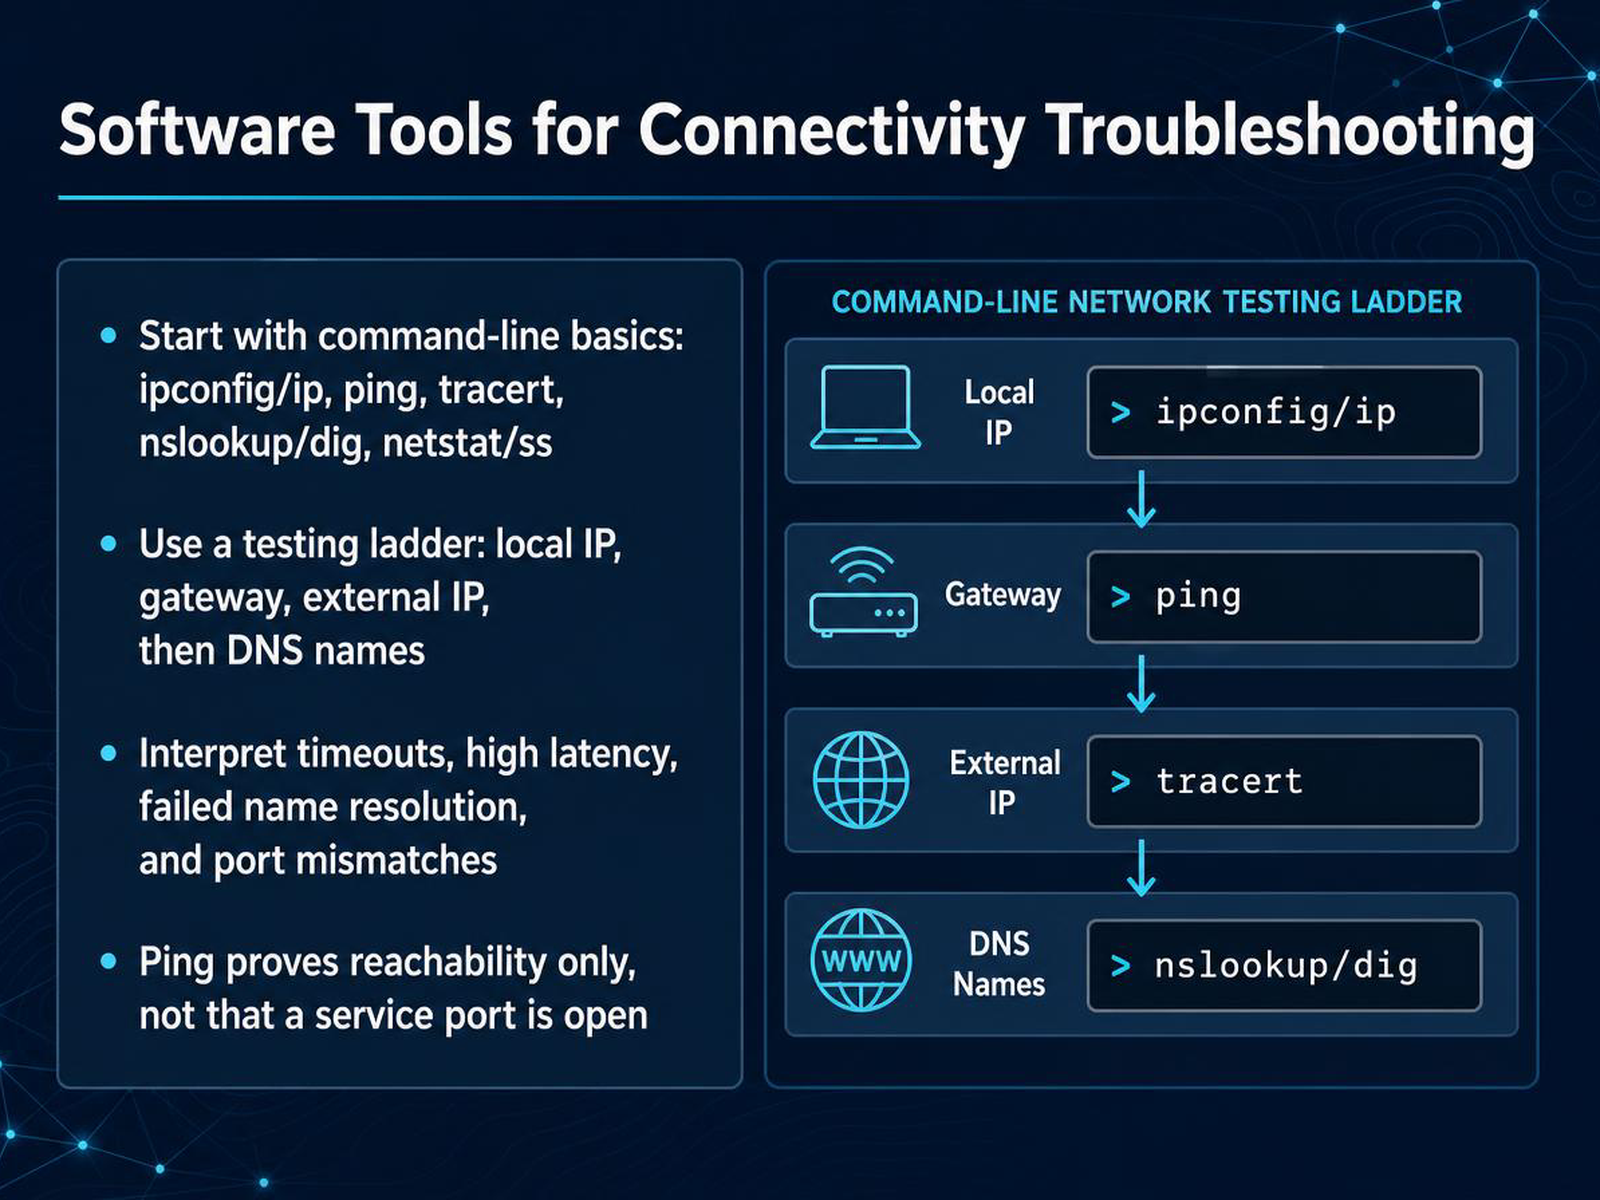
1 min - 09Software Tools for Connectivity TroubleshootingNow, let's turn to software tools for connectivity troubleshooting. First, get familiar with a few command-line basics. Use ipconfig on Windows, or ip on Linux, to check the local address. Use ping to test reachability. Use tracert or traceroute to see the path traffic takes. Use nslookup or dig for DNS checks. And use netstat or ss to inspect ports. A practical way to isolate problems is to follow a testing ladder. Start by pinging the local IP address, then the default gateway. After that, ping an external IP address, and finally, ping a domain name. This sequence separates local issues from routing, internet, and DNS problems. When you see results, learn to interpret them. A timeout means no reply came back. High latency means responses are slow. A failed name resolution points to DNS. And a port mismatch often means the service is not listening where you expect it. Remember, a successful ping proves basic reachability only. It does not prove a specific service port is open. For example, a server may respond to ping while its web port is blocked by a firewall. Next, we'll look at monitoring tools and packet capture for deeper diagnosis.
 2 min
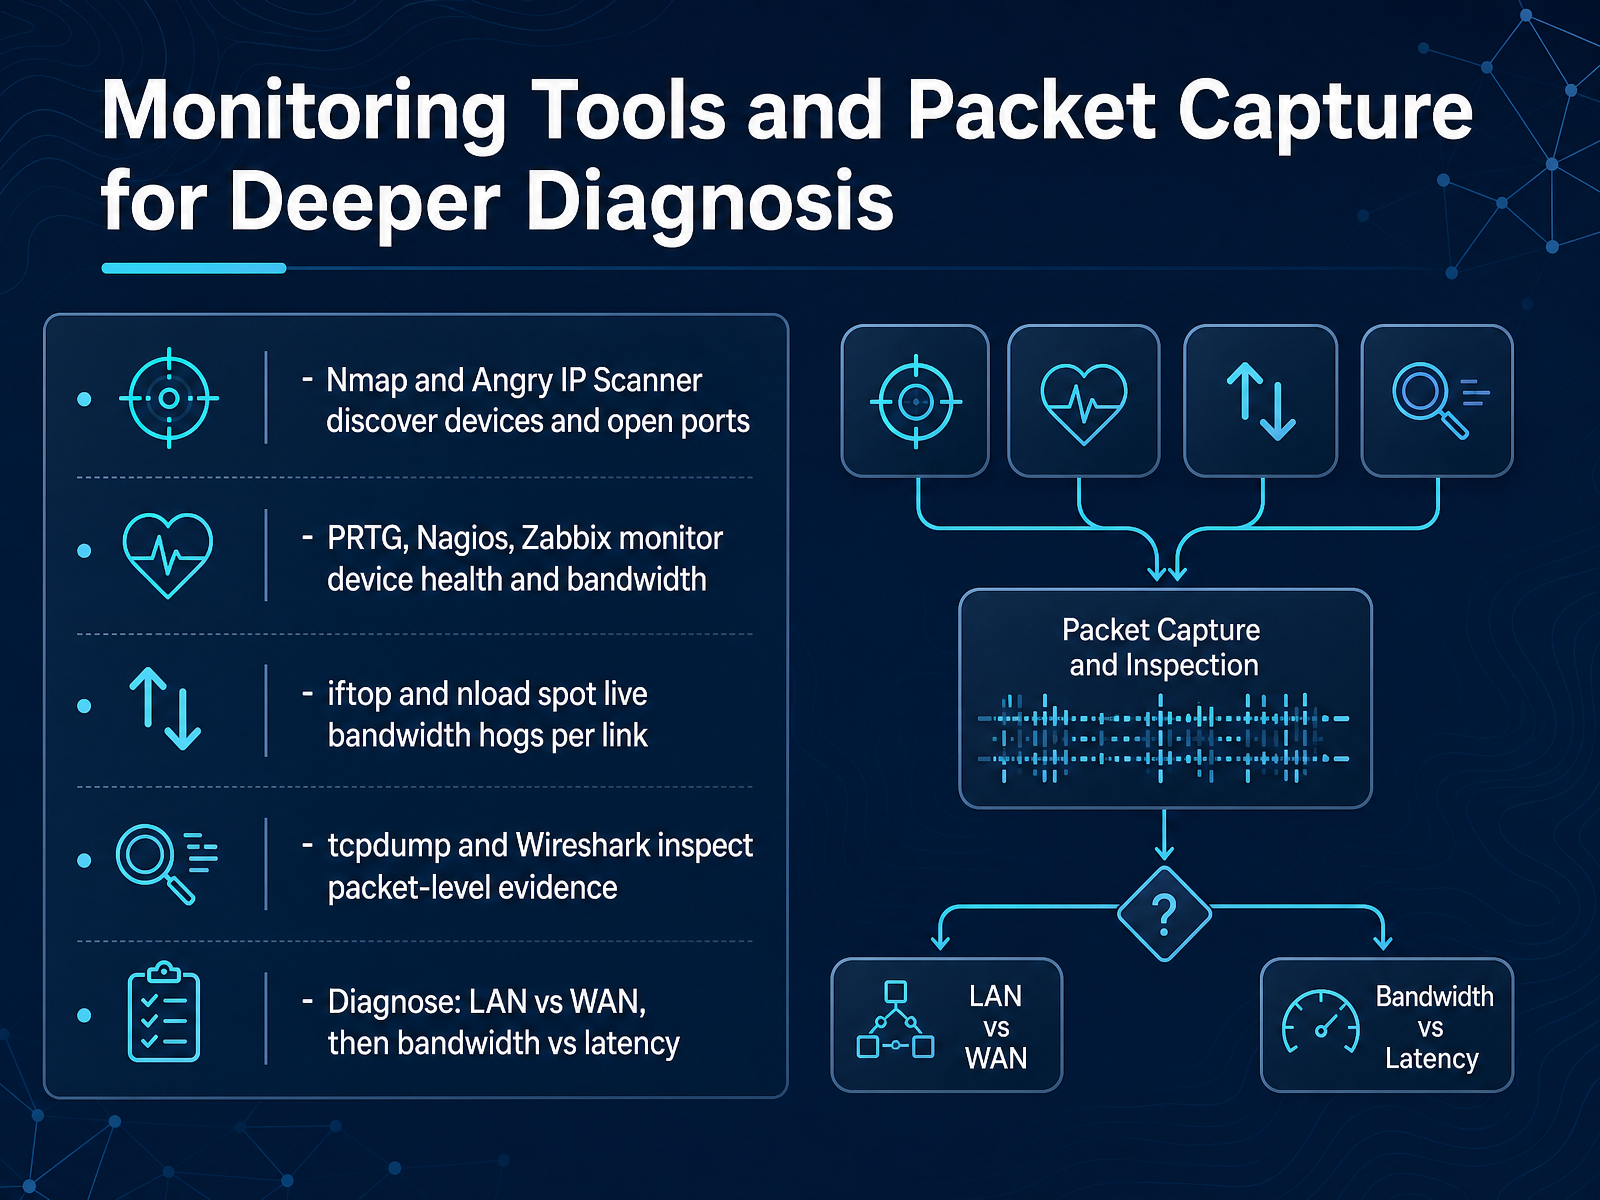
2 min - 10Monitoring Tools and Packet Capture for Deeper DiagnosisNow let's look at the software tools that give us deeper visibility when basic checks aren't enough. Discovery tools like Nmap and Angry IP Scanner first show us what's connected to the network and which ports are open. Next, monitoring platforms like PRTG, Nagios, and Zabbix keep a constant eye on device health and bandwidth use, alerting us to problems before users even notice. When a link feels slow right now, tools like iftop and nload identify the live bandwidth hogs in real time. For the deepest diagnosis, tcpdump and Wireshark capture and inspect packet-level evidence, showing the actual conversation between devices. Remember the diagnostic order: first determine if the issue is on our local network or the wide area network, then decide if it's a bandwidth problem or a latency problem. Coming up next, we'll move from software back to hardware and cover safe handling, ESD protection, and equipment installation.
 1 min
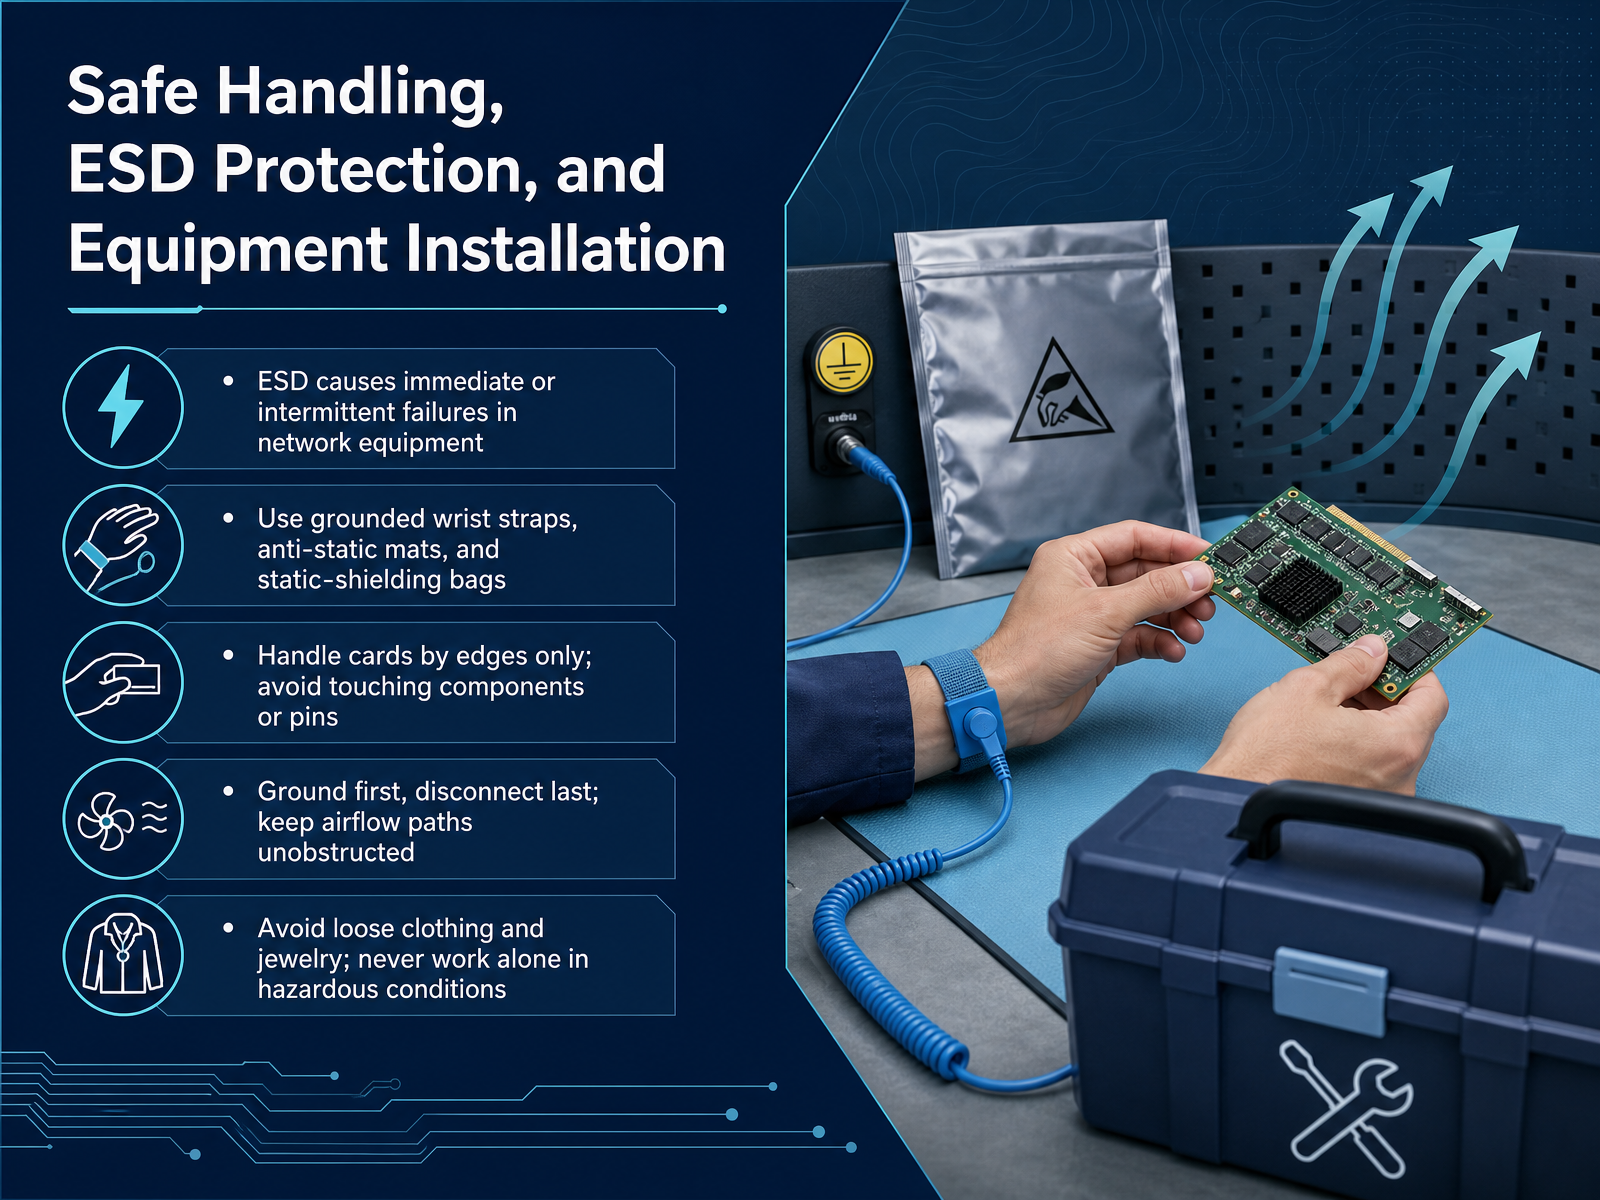
1 min - 11Safe Handling, ESD Protection, and Equipment InstallationLet's talk about handling your equipment safely. Electrostatic discharge, or ESD, is the static shock you sometimes feel after walking across a carpet. That tiny spark can cause immediate failures in network hardware, or worse, intermittent problems that are very hard to diagnose later. To protect against this, always wear a grounded wrist strap when working inside a chassis, and place any cards you remove on an anti-static mat or in a static-shielding bag. When handling cards, hold them by the edges or the metal faceplate only. Avoid touching the gold connector pins or the components on the board. Remember the golden rule for installation: connect the ground first, and disconnect it last. This provides a safe path for any static charge to leave the equipment. Also, keep the airflow paths clear. Blank faceplates and cover panels aren't just cosmetic; they direct cooling air through the chassis and prevent overheating. Before you start working, remove any loose clothing or jewelry like rings and chains that could get caught. And never work alone when there are hazardous conditions like exposed power. These simple habits will protect both you and the equipment. Next, we'll look at choosing the right tool for common tasks.
 2 min
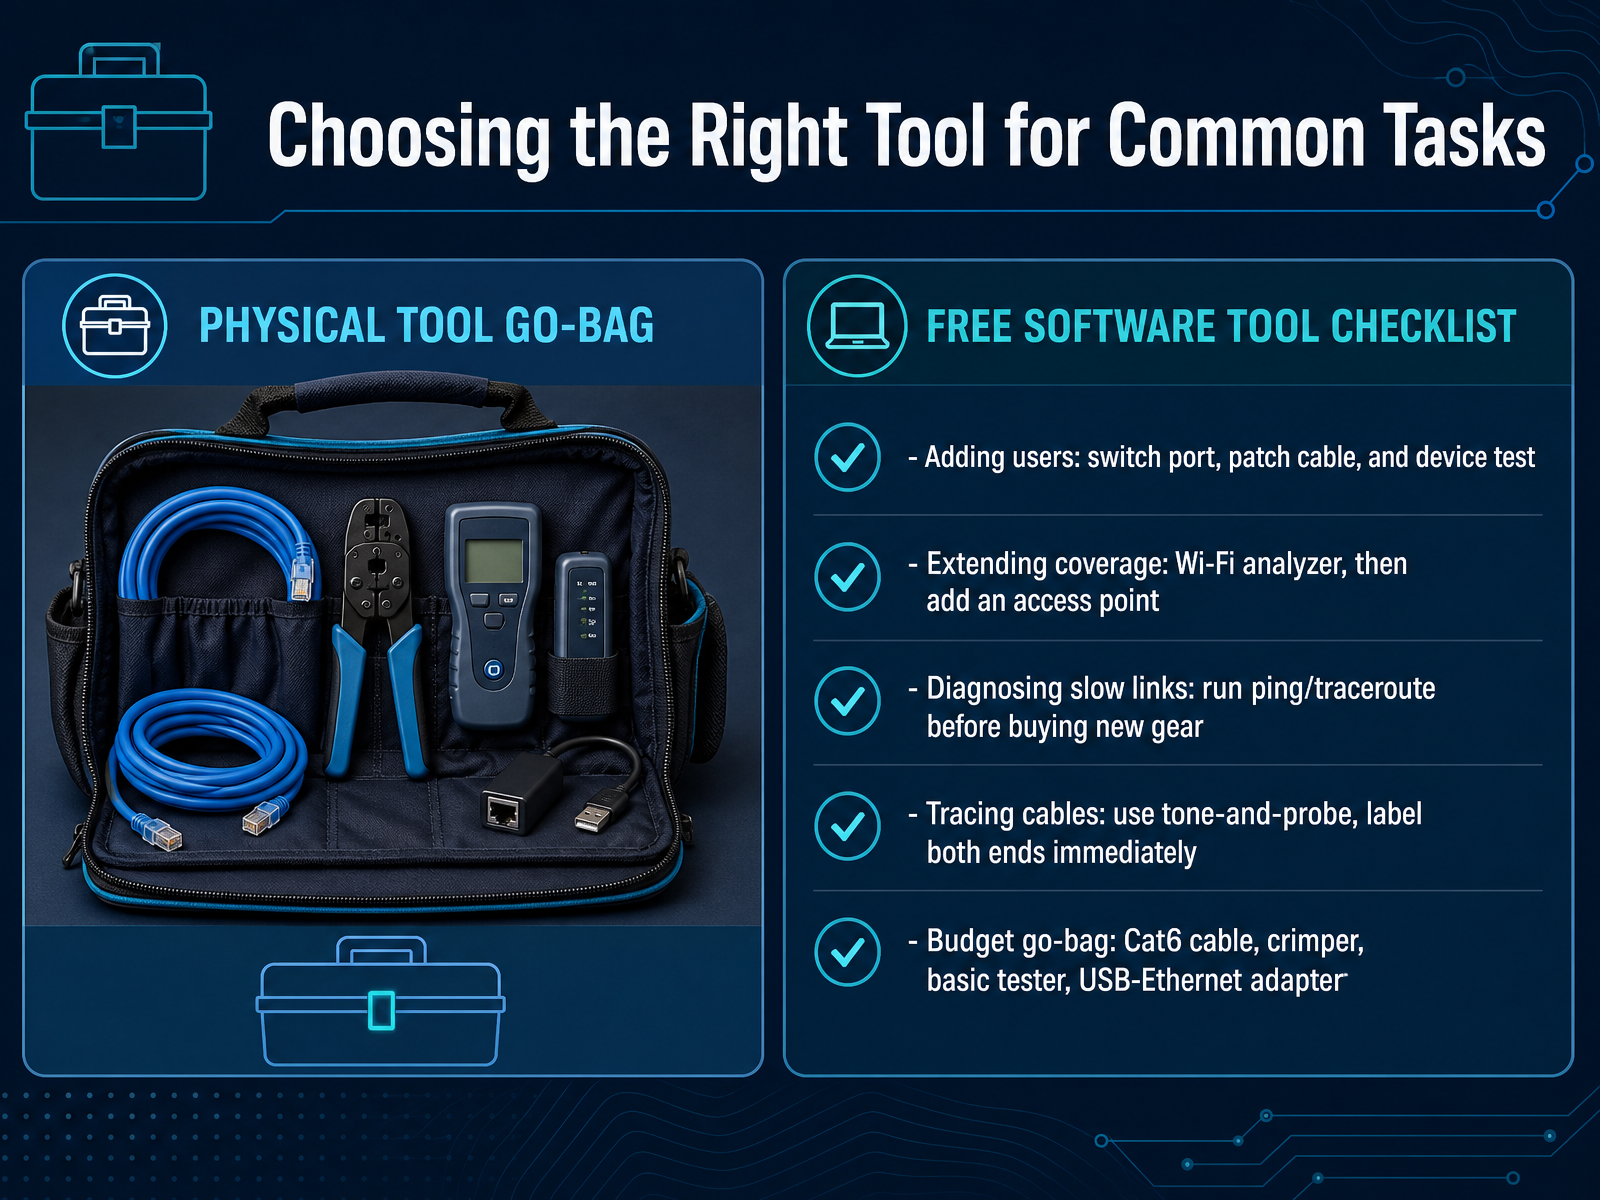
2 min - 12Choosing the Right Tool for Common TasksLet's move from knowing the tools to using them wisely. Choosing the right tool saves time and prevents frustration. When you need to add a user in an office, start by checking the switch port and testing the device with a known-good patch cable. For weak Wi-Fi coverage, don't buy new gear immediately. First, use a Wi-Fi analyzer app to see channel congestion and signal strength, then add an access point only where needed. If a link feels slow, run built-in commands like ping or traceroute before replacing hardware, because the problem is often in the path or device, not the cable. When tracing a cable, use a tone and probe, and label both ends right away to avoid future confusion. For a budget go-bag, keep a short Cat6 cable, a basic crimper, a simple tester, and a USB to Ethernet adapter. This small kit covers most common tasks. In our next part, we will walk through hands-on practice and common beginner mistakes.
 1 min
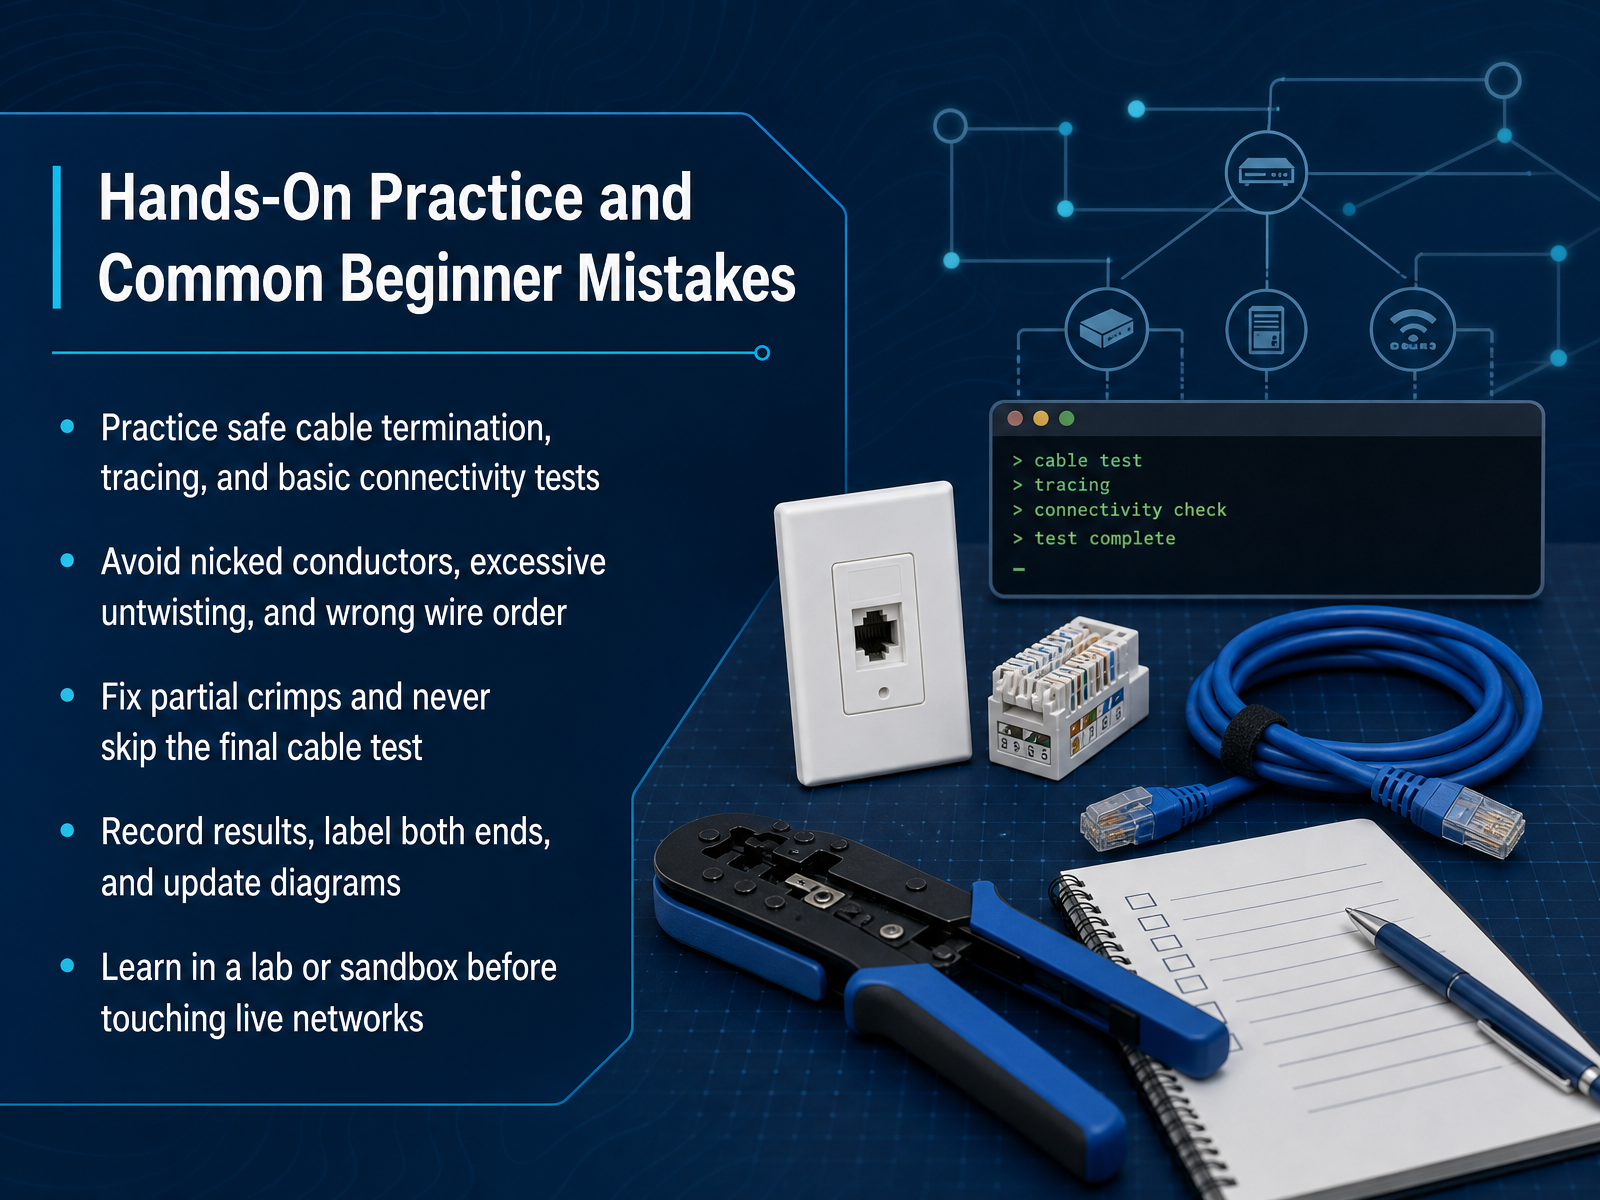
1 min - 13Hands-On Practice and Common Beginner MistakesNow let's shift into a hands-on mindset, because this is where real confidence comes from. When you practice, treat cable termination and testing as a full sequence of careful steps, not just a rush to plug something in. Watch for three classic beginner mistakes. First, nicking the conductor when you strip the outer jacket. That tiny cut can cause intermittent failures later. Second, untwisting the pairs too far. Keep the twist as close to the connector as possible. Third, getting the wire order wrong, which a basic tester may not always catch if pairs are split. If a crimp feels partial, redo it, and never skip the final cable test. That tester is your proof, shows opens, shorts, and miswires in seconds. After the test passes, record the result, label both ends clearly, and update your diagram. Good documentation turns your work into something you and your team can trust. Also remember, learn in a lab or sandbox first. Make your early mistakes where they can't affect users. Next, we'll look at certifications, career paths, and the practical next steps for growing your networking role.
 2 min
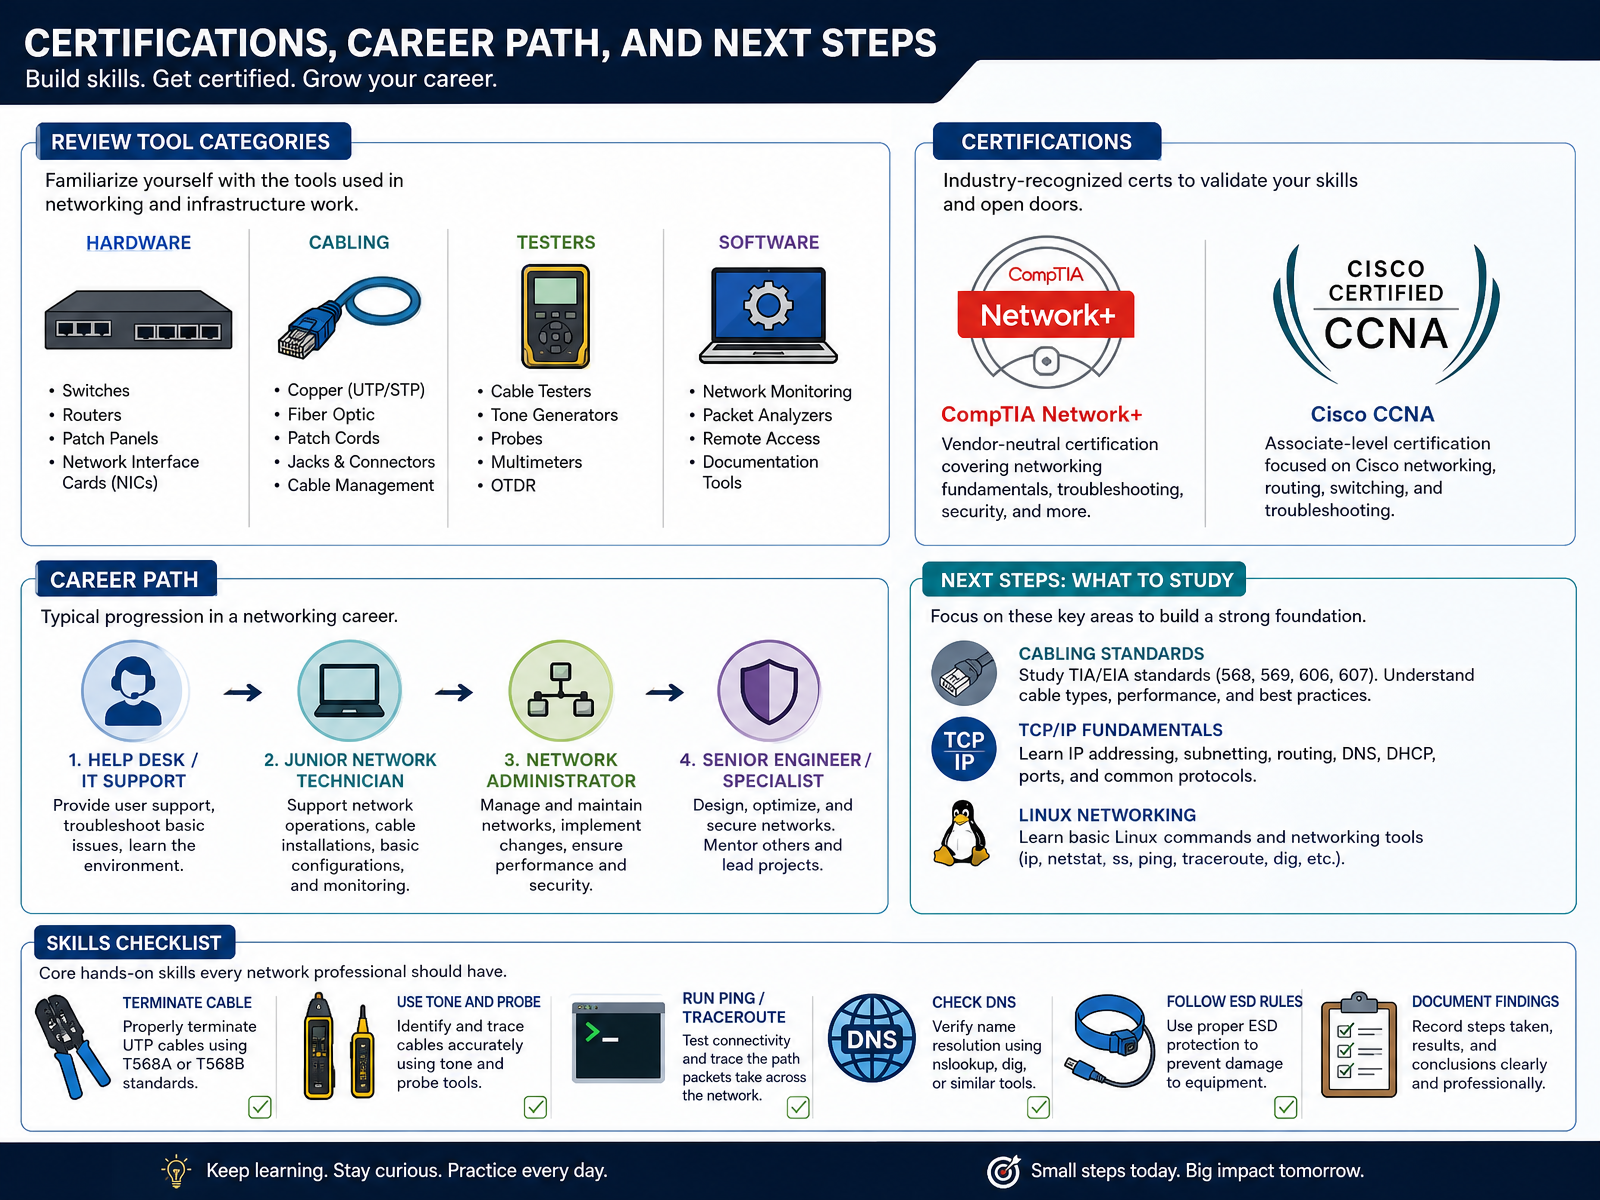
2 min - 14Certifications, Career Path, and Next StepsLet's bring this full circle by reviewing the tool categories we've covered. We looked at physical hardware, cabling, testers, and the software commands that help us see what is actually happening on a network. To move forward in your career, certifications like CompTIA Network+ and the Cisco CCNA are excellent next goals. They validate the fundamentals you have been building here. A common place to begin is on a help desk, then you can move into a junior network or support role as you gain confidence. From there, I recommend studying cabling standards, TCP/IP, and Linux networking. Before you go, keep a simple skills checklist in mind. You should feel comfortable terminating a cable, using a tone and probe to trace wires, and running basic commands like ping and traceroute. You should also know how to check DNS, follow electrostatic discharge safety rules, and document your findings clearly. These are practical, everyday skills that will make you an asset to any team. Thank you for joining this course. Stay curious, keep practicing, and I wish you the very best as you take these next steps.
 2 min
2 min
Take the deck with you
Download this course as a file — free, no sign-up needed.
- PDF handoutEvery slide page, ready to print or share.15 pages · 3.9 MBDownload
- Narrated PowerPointThe deck that presents itself — every slide carries the digital human's narration video.15 pages · 14.6 MBDownload
- PowerPoint slidesThe full deck as a .pptx — open it in PowerPoint, Keynote, or Google Slides.15 pages · 3.8 MBDownload
Free to use in your own training — please keep the PersonWise credit page at the end.
Have your own deck? Turn it into a course
Sources consulted
Web sources consulted while building this course.
- What is Networking — networklessons.com
- Introduction to network hardware components | TechTarget — techtarget.com
- Networking Basics: What You Need To Know - Cisco — cisco.com
- Chapter 3: Hardware — fcit.usf.edu
- Network Devices Explained | Petri.com — petri.com
- Router vs Switch vs Firewall vs Access Point: Understanding the Differences % Jazz Cyber Shield — blog.jazzcybershield.com
- Modem, Router, Switch, and Access Point: What's the Difference? — pcmag.com
- Routers vs. Switches vs. Access Points | Baeldung on Computer Science — baeldung.com
- Network Devices Explained: Routers, Switches, APs | ComputingForGeeks — computingforgeeks.com
- Router vs Switch vs Access Point: What Each Box Actually Does - TechGeeks — techgeeks.org
- Beginner's Guide to Network Cables - trueCABLE — truecable.com
- Connectors and Standards — CompTIA Network+ (Exam N10-009) | Webnotes — webnotes.site
- Cat1 to Cat8 Ethernet Cable Types: All You Need to Know Techopedia — techopedia.com
- Fiber Optic Connector Types: A Beginners Guide - Cable Matters — cablematters.com
- Network Connector Types: How to Choose (2026) — verchilconnect.com
- Tempo PA4932 Ultimate Technician Tool Kit — specialized.net
- 4-Piece Network Installer Tool Kit with Carrying Case — assets.tripplite.com
- Hardware Troubleshooting Tools - howtonetwork.com — howtonetwork.com
- Installation and Verification Tools — CompTIA Network+ N10-009 | Webnotes — webnotes.site
- Jonard Tools 16 Piece Security & Alarm Tool Kit – Cable & Connections — cableandconnections.com