Computer Graphics Fundamentals
Begin
13 pages · ~26 min
Computer Graphics Fundamentals
This training introduces computer graphics fundamentals, including rendering and image generation, for beginners seeking a foundational understanding of visual computing.
What you’ll learn
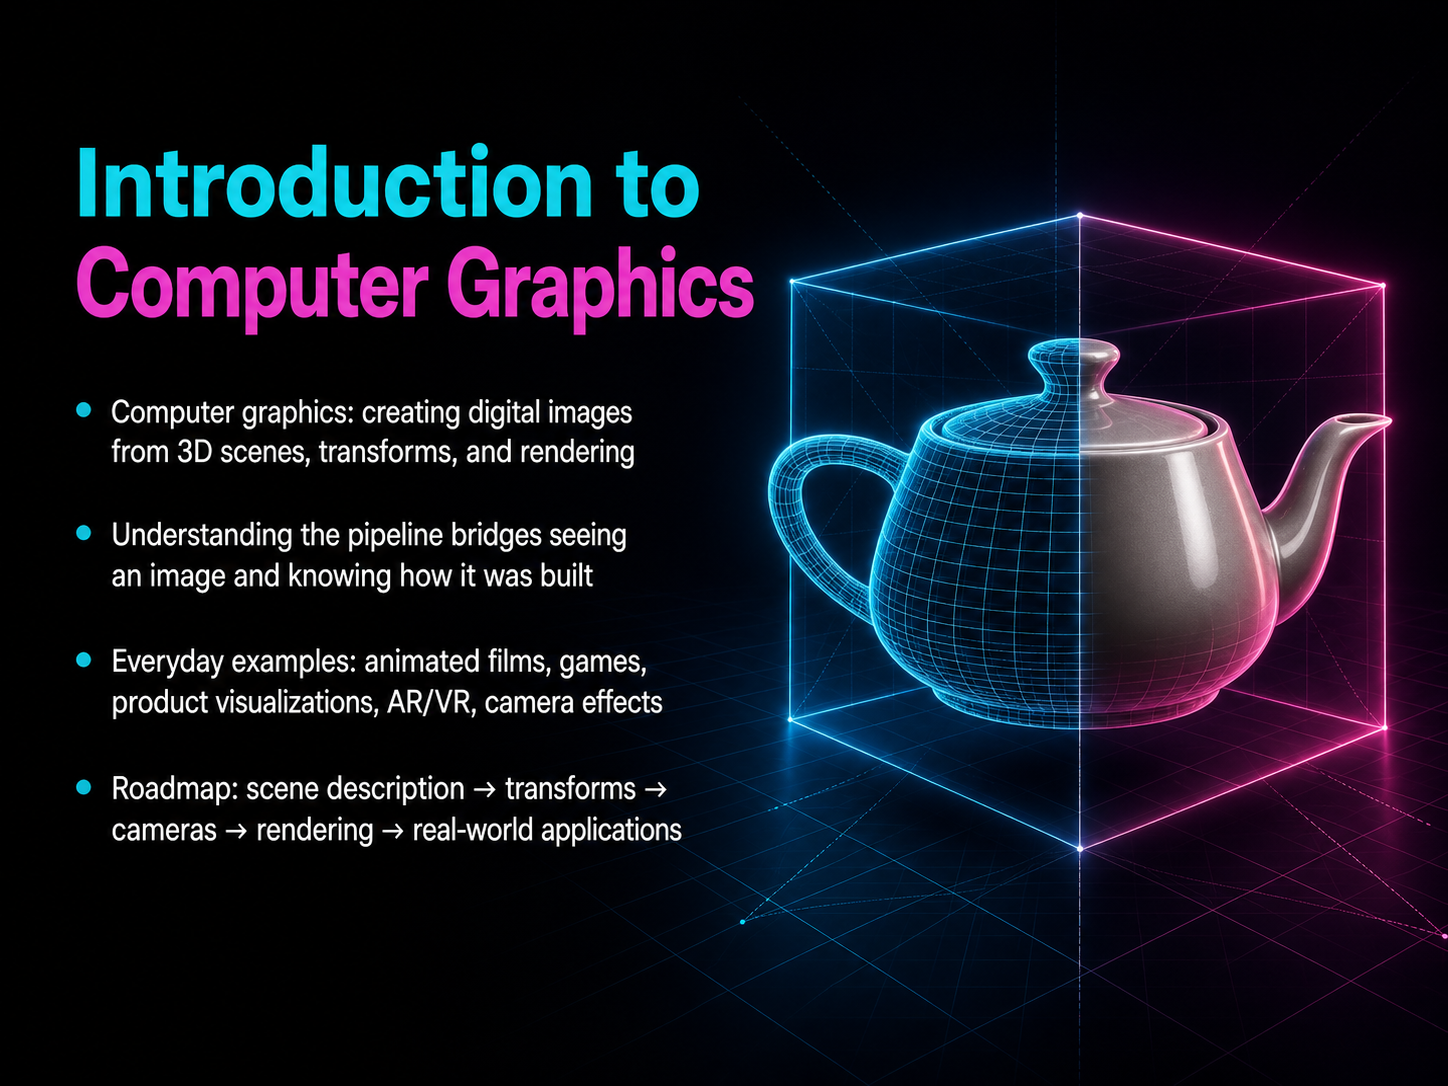
- 01Introduction to Computer GraphicsWelcome to Introduction to Computer Graphics. In this course, I'll guide you through the steps that turn a three-dimensional scene into the digital images you see every day. Think of it like learning how a painting moves from an idea, through careful construction, to the final canvas—but all inside a computer. You encounter computer graphics all the time: in animated films, video games, product visualizations, augmented reality filters, and even camera effects on your phone. Our goal is to help you look at an image and understand how it was built. We'll move through the process step by step, starting with how we describe a scene, then how we position and shape objects with transforms, how a virtual camera captures the view, and finally how rendering creates the pixels you see. By the end, you'll have a clear mental model of the whole pipeline, and we'll connect it to real-world applications. Let's begin with the foundation: what makes a digital image.2 min
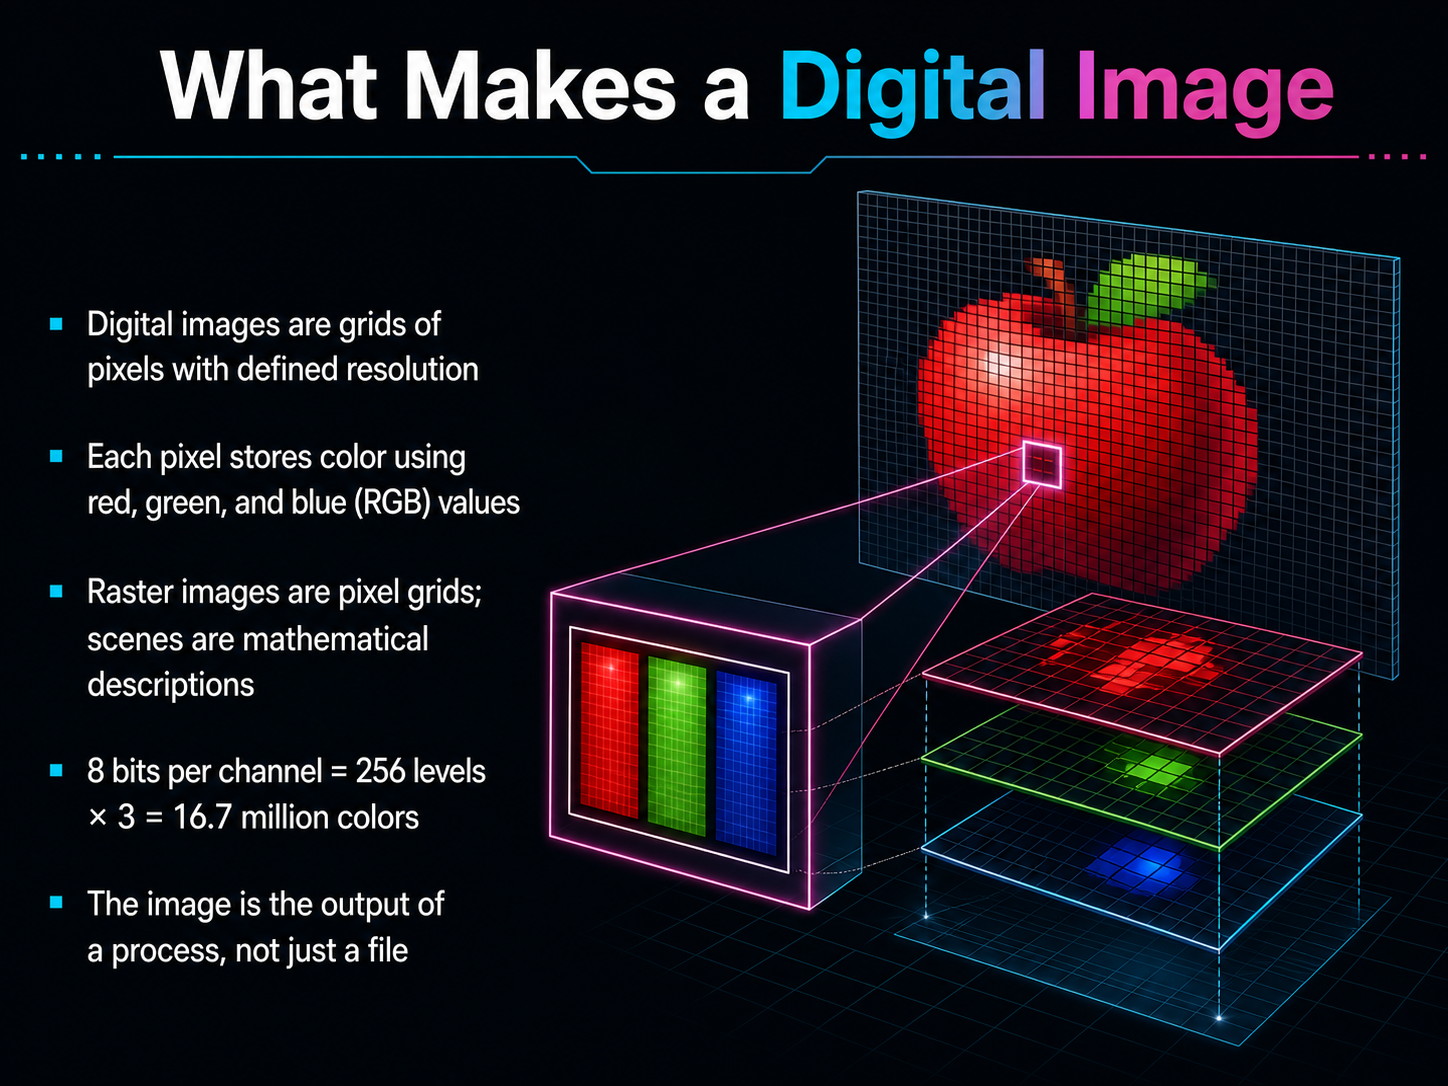
- 02What Makes a Digital ImageNow, let's talk about what a digital image actually is. Imagine a very fine mosaic. A digital image is built the same way, as a grid of tiny squares called pixels. The number of pixels across and down is its resolution. Each one of these pixels stores a single, specific color. That color is defined by mixing three basic components: red, green, and blue light. We call these color channels. A typical image uses eight bits of data for each channel. This gives us two hundred fifty-six possible levels for red, green, and blue. Multiply two hundred fifty-six by itself three times, and you get over sixteen million possible colors for a single pixel. Now, it's important to know that this pixel grid, a raster image, is the final result. What we build first is a scene, which is really just a mathematical description. The image you see is the output of a process that calculates how that math should look. Keep that final pixel grid in mind, because next, we will explore how we describe the mathematical star of the show: the three-dimensional scene.
 2 min
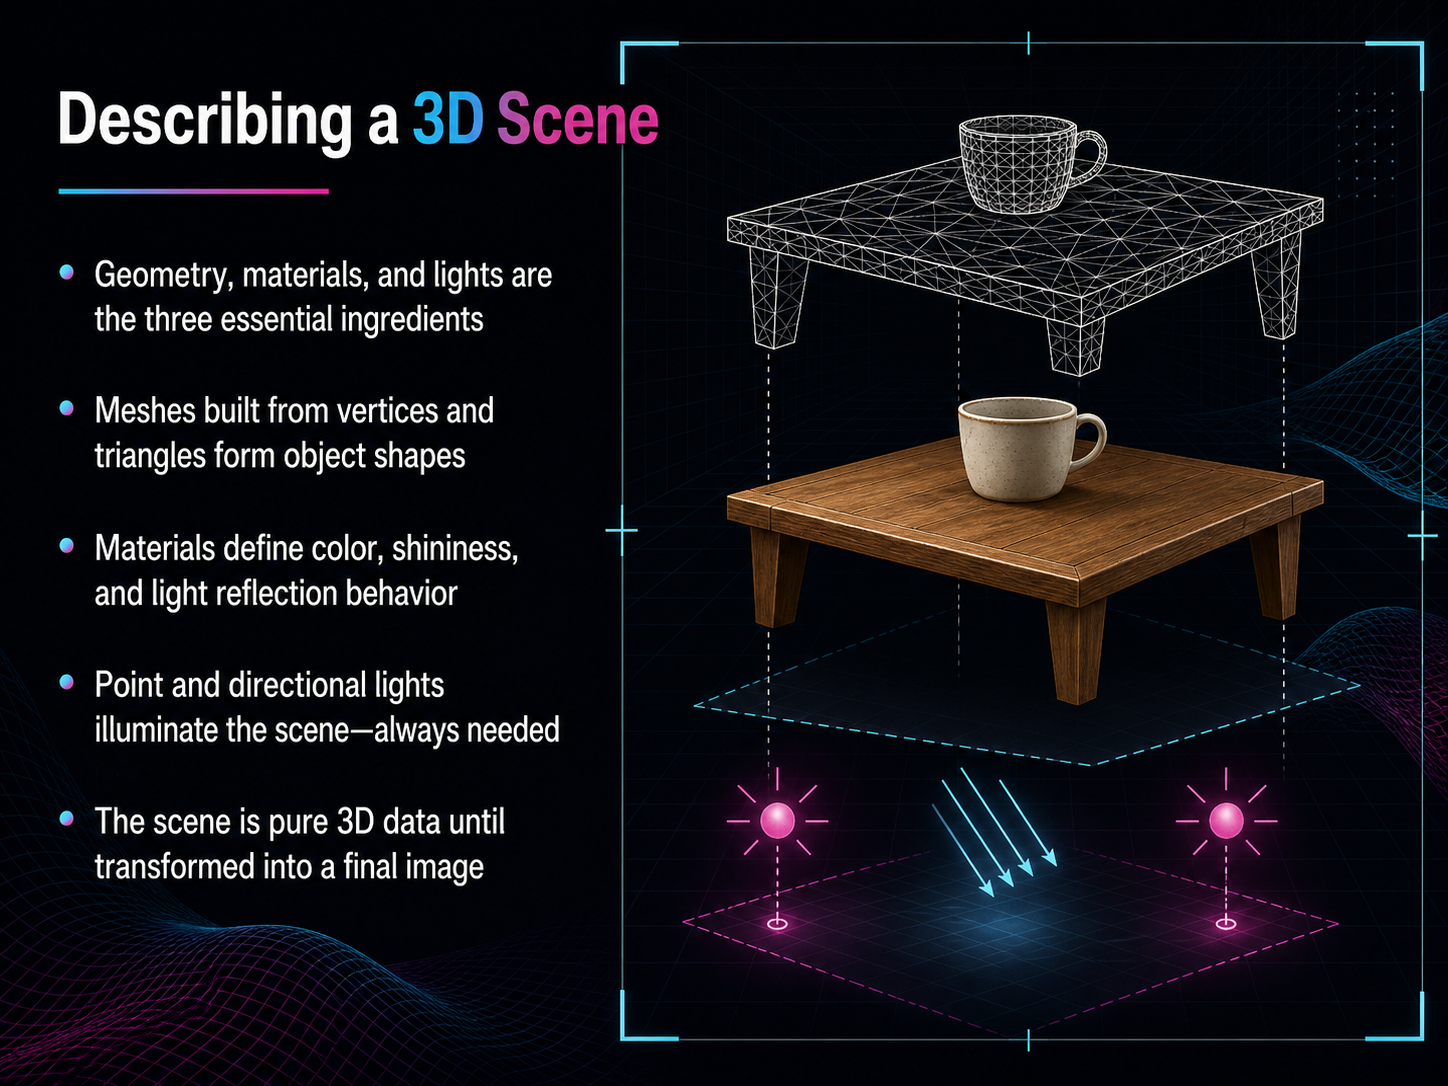
2 min - 03Describing a 3D SceneMoving forward, let's look at the three ingredients that make up any three-dimensional scene. First, we need geometry, which defines the shapes of our objects. Think of these shapes as wireframe models built from tiny points called vertices, connected into flat triangles, and those triangles are assembled into what we call meshes. Next, we need materials to describe how those surfaces look. Materials control properties like color, how shiny an object is, and the way it reflects light. And finally, we need lights. Without lights, we wouldn't see anything at all. We might use a point light, like a bulb radiating in all directions, or a directional light, like the sun casting parallel rays across the scene. Right now, all of this is just pure mathematical data. The scene only becomes a picture we can see when we transform it into a final image later on. Up next, we will see how coordinate systems help us position everything in that space.
 2 min
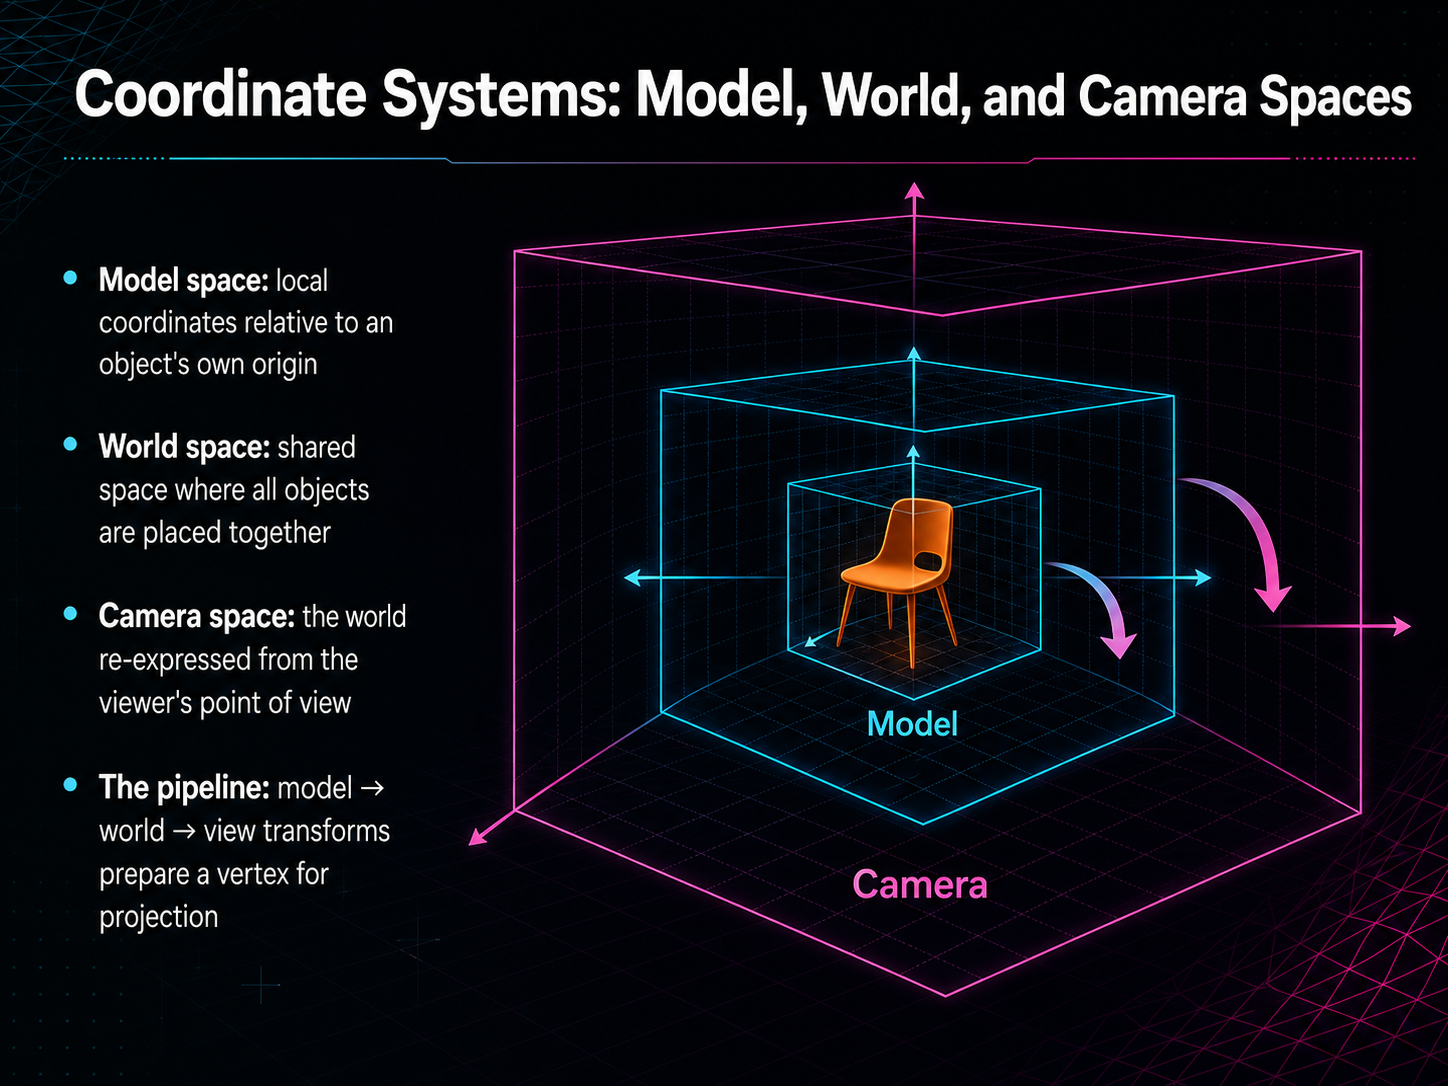
2 min - 04Coordinate Systems: Model, World, and Camera SpacesNow, let's talk about the three main coordinate systems that guide an object on its journey to the screen. Think of them like different ways of giving directions. The first is Model Space. This is the object's personal, local space. Imagine you're building a chair. You design it using measurements relative to the chair's own center, like its own height and width. You don't care where it sits in a room yet; you just care about the chair itself. That's Model Space. Next, we place that chair into a shared room. That room is World Space. Here, every object gets a position, rotation, and scale relative to a single, global origin. This is where we arrange all our chairs, tables, and lamps together to build a single scene. Finally, we need to see the room from a specific viewpoint. That's Camera Space. In this space, the entire world is re-expressed from the viewer's point of view, as if we've moved the whole scene so the camera is at the origin, looking straight down one axis. So, our pipeline takes a vertex from its own local Model Space, positions it in the shared World Space, and then re-orients it for the Camera Space, getting it ready for projection. Next, we'll look at the specific mathematical operations, called transformations, that move, rotate, and scale objects through these spaces.
 thailand4.comscmp.comzamin.uz+22 min
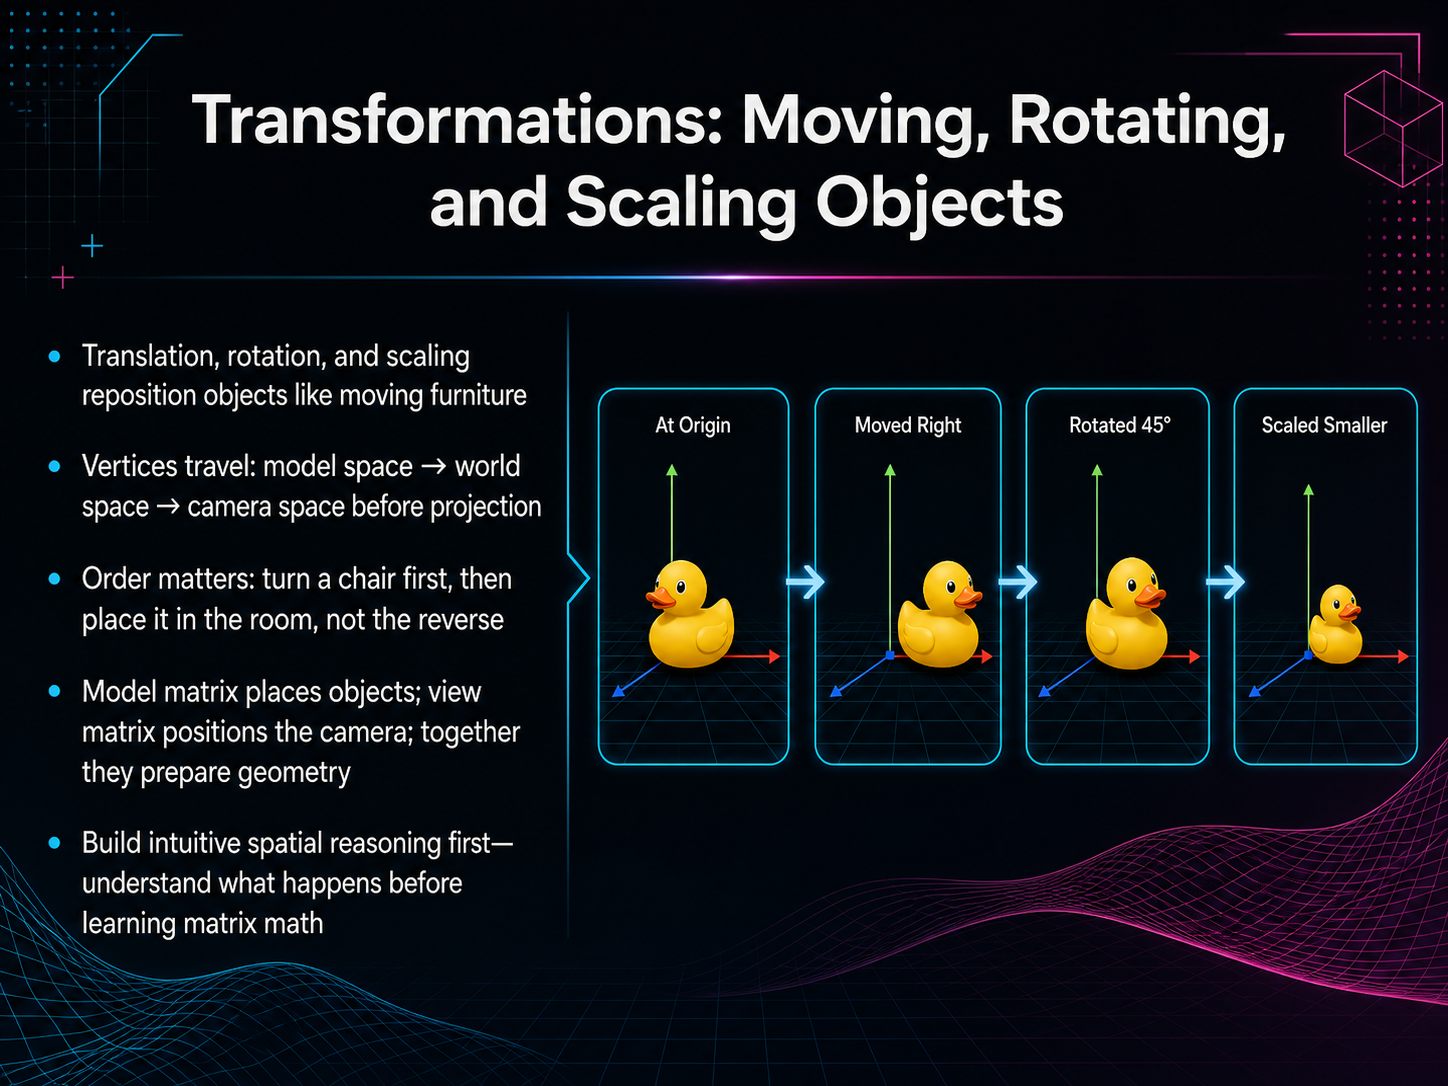
 - 05Transformations: Moving, Rotating, and Scaling ObjectsLet's move on to the second core step: transformations. Think of transformations as the instructions that tell each object where to go and how to sit in your scene. There are three basic moves: translation, which slides an object to a new spot; rotation, which turns it; and scaling, which adjusts its size. It works a lot like arranging furniture. If you imagine placing a chair in a room, you rotate it first to face the right direction while it's still right in front of you. Then you slide it into the corner. The order of these steps really matters; turning it after it's already pushed into a tight spot would just bump it into the wall. In computer graphics, every object starts in its own personal space, which we call model space. A special set of instructions, the model matrix, moves it out into the shared world space. Then, another set of instructions, the view matrix, repositions the entire world relative to a camera. Together, these steps prepare the geometry so the camera can see everything from the right angle. For now, the most important thing is to build a strong gut feeling for how these moves work in space. The math behind it, the matrices, comes later. Next, we will explore how a camera captures this prepared 3D world and flattens it into a 2D image in the step called projection.
 thailand4.comscmp.comzamin.uz+22 min
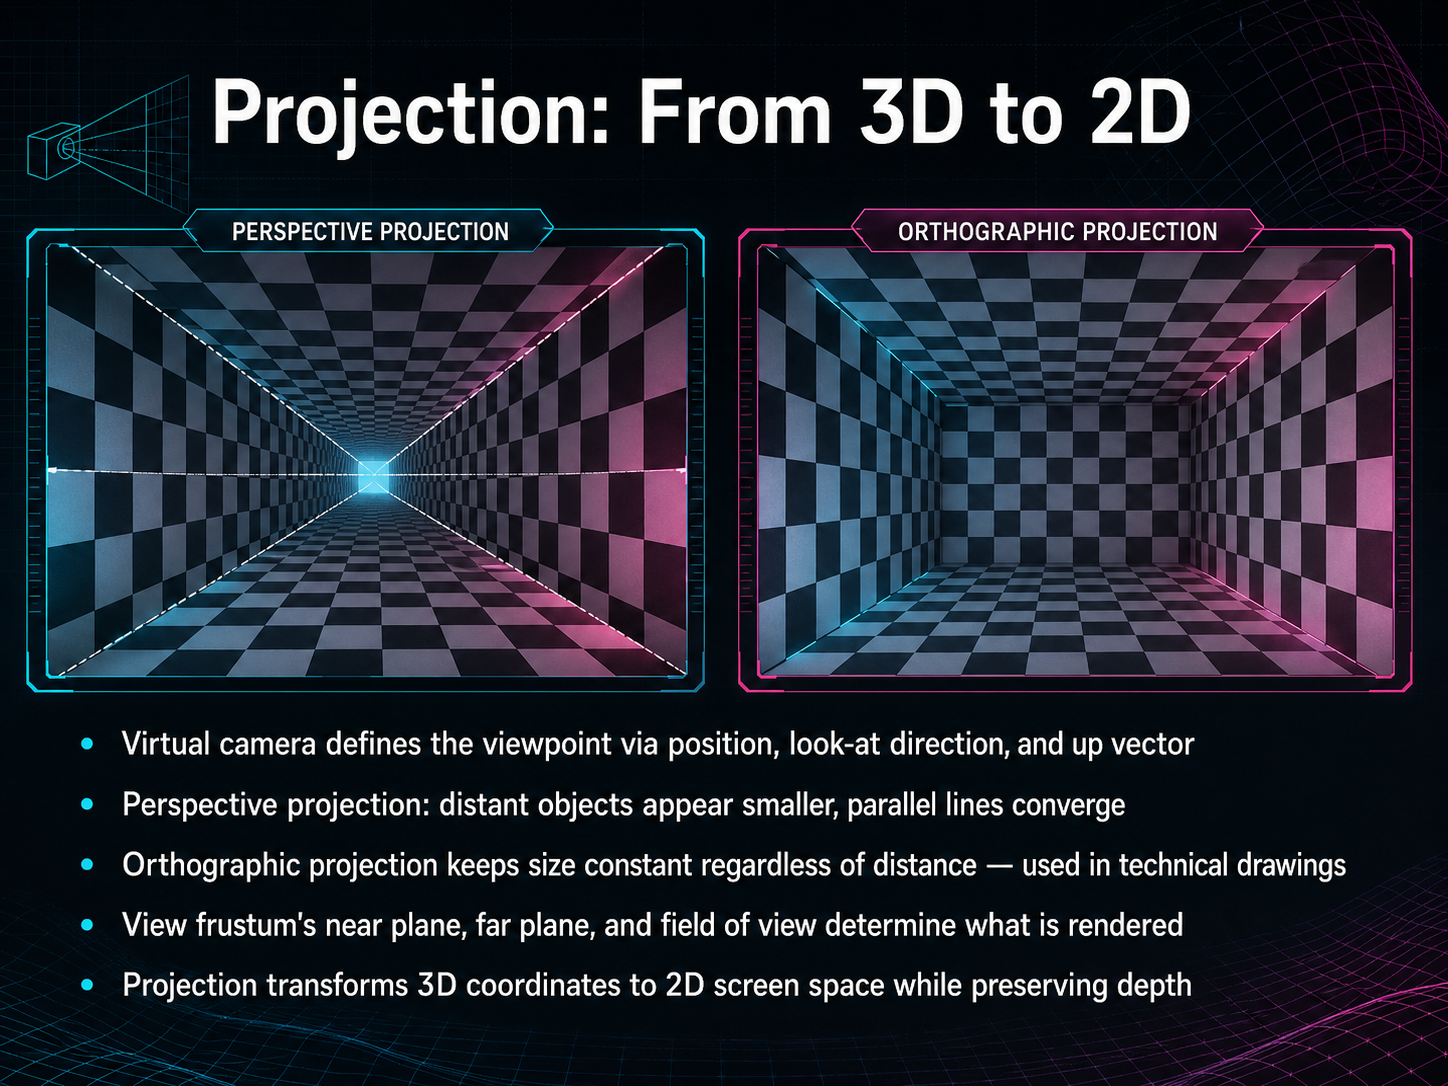
 - 06Projection: From 3D to 2DNow let's look at how we move from a three-dimensional world to a flat two-dimensional picture. This step is called projection, and the key tool here is a virtual camera. We define its position in space, the point it's looking at, and which direction is up. It's very similar to how a photographer chooses a spot, aims the lens, and levels the camera. The two main types of projection we work with are perspective and orthographic. Perspective projection mimics our own eyes and regular photography. Objects farther away get smaller, and parallel lines like train tracks seem to meet at a point on the horizon. In contrast, orthographic projection keeps an object's size the same no matter how far away it is. This is perfect for technical or architectural drawings, where you need precise measurements without any distortion. To control exactly what the camera sees, we use something called a view frustum. Imagine it as a four-sided pyramid with its tip cut off. The cut tip is the near plane, the base is the far plane, and the pyramid's angle is the field of view. Only the objects inside this space get rendered. The projection step then mathematically maps all those visible three-dimensional coordinates down to two-dimensional screen positions, while carefully keeping a record of the original depth. We'll use that depth information soon to figure out what actually ends up visible on your screen, which is exactly what rasterization is all about. Let's turn triangles into pixels next.
 2 min
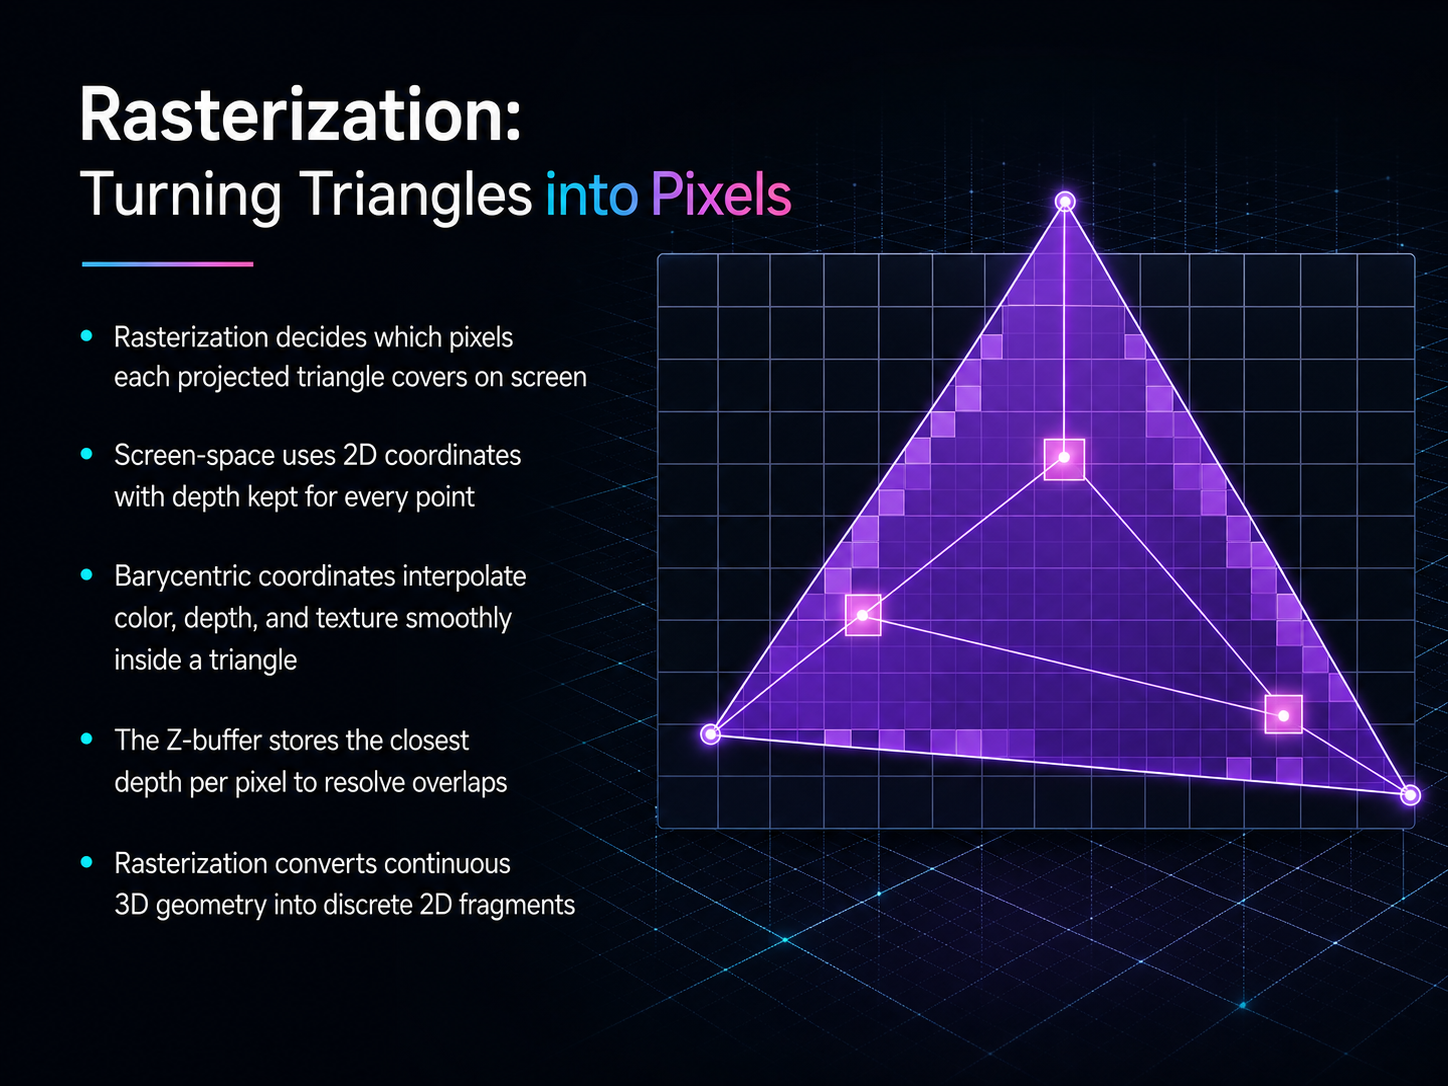
2 min - 07Rasterization: Turning Triangles into PixelsNow we come to the step that finally turns our 3D scene into the pixels on your screen. This step is called rasterization. Think of each triangle we have projected into our 2D viewport. Rasterization decides exactly which screen pixels that triangle covers. It works in screen space, which uses simple x and y coordinates for positions, but it carefully keeps a depth value, a z value, for every single point. Once the pixels inside a triangle are found, how do we get smooth colors and textures? We use something called barycentric coordinates. These are just blending weights that smoothly interpolate, or mix, values like color, depth, and texture details from the triangle's three corners across its whole surface. But what happens when triangles overlap? We need to keep track of depth to make sure the frontmost surface is seen. The Z-buffer, or depth buffer, is a special memory area that stores the depth of the closest surface found so far for every pixel. Before we draw a new fragment, we compare its depth to the stored depth. If it is closer, we update both the color on screen and the depth in the buffer; if it is farther away, we simply discard it. Doing this for every triangle automatically resolves all overlapping objects. In short, rasterization is the engine that converts our continuous 3D geometry into a set of discrete, colored 2D fragments ready to be displayed. Next, we will dive a bit deeper into that Z-buffer and see how it elegantly solves the hidden surface problem by acting as a visual tie-breaker.
 geeksforgeeks.orgen.wikipedia.orgmedium.com+22 min
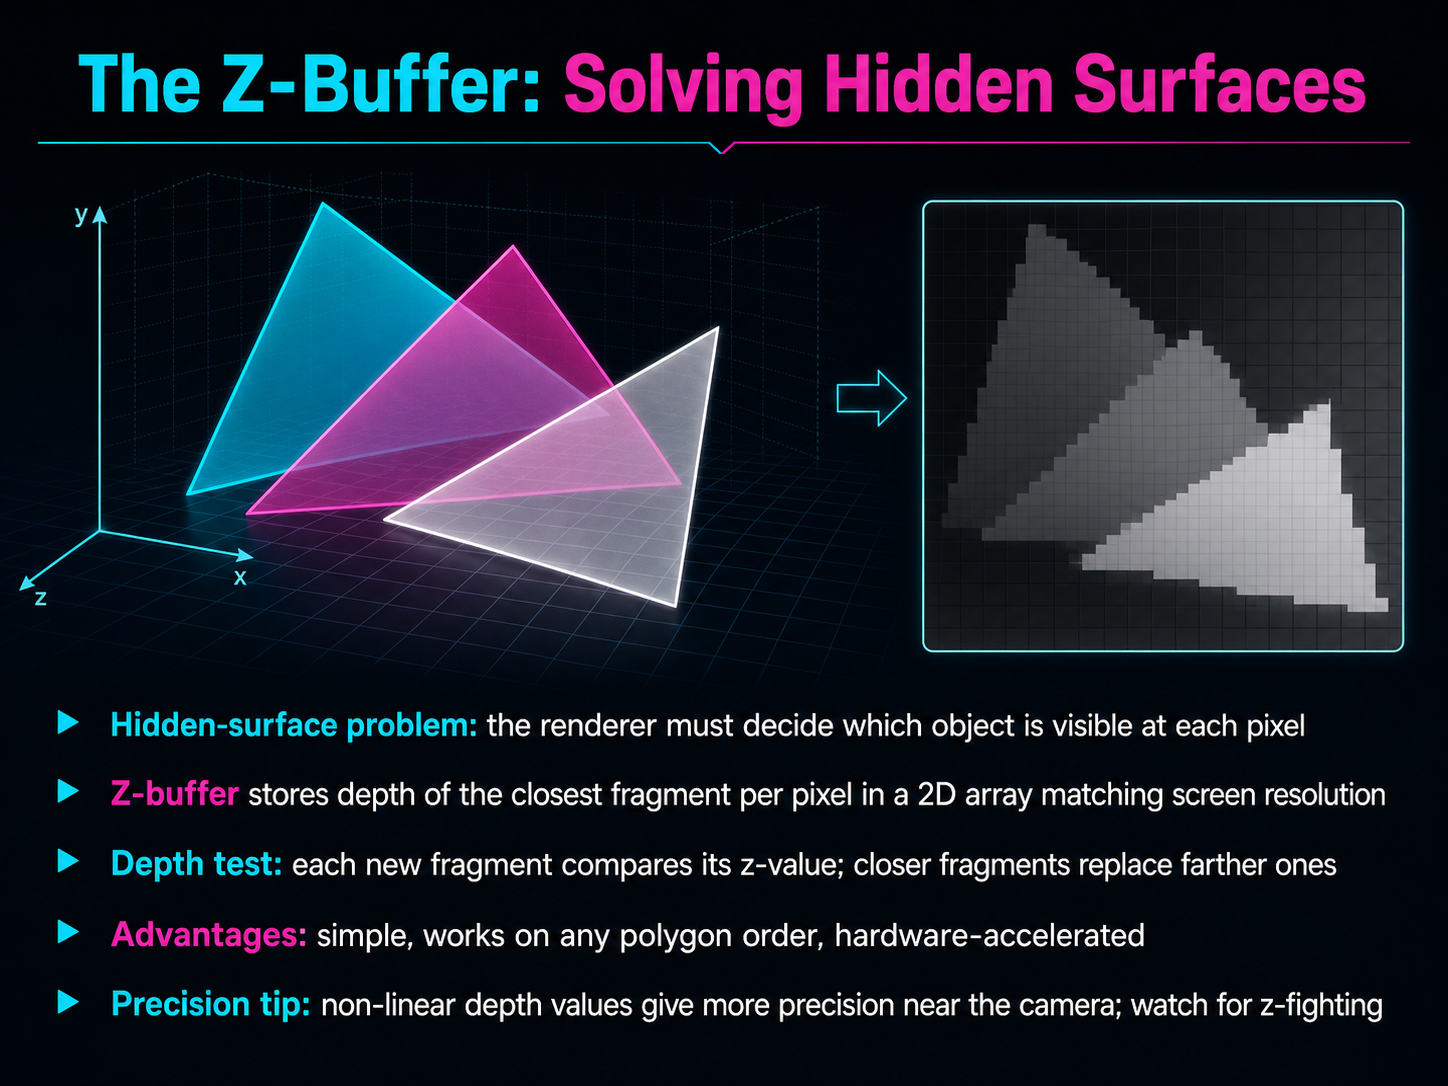
 - 08The Z-Buffer: Solving Hidden SurfacesNow we come to one of the cleverest ideas in rendering: the Z-buffer. It solves what is called the hidden-surface problem. When you look at a scene, objects closer to you should block the ones behind them. The renderer has to decide, for every single pixel on the screen, which object is actually visible. The Z-buffer handles this by storing a depth value for each pixel in a two-dimensional grid that matches the screen resolution. At the start, every pixel depth is set to infinity, as if nothing has been drawn yet. Then, for each object, the renderer calculates how far away each fragment is from the camera. We call this its z-value. A simple depth test compares the new z-value with what is already in the buffer. If the new fragment is closer, its color replaces the old one and its depth replaces the old depth. If it is farther away, it is simply discarded. This method has huge advantages. It is simple, it works no matter what order you draw objects, and modern hardware is built to accelerate it. One thing to keep in mind is how the depth values are stored. They are not linear. More precision is packed near the camera, where you need fine detail, with less farther away. This is efficient, but it can cause an artifact called z-fighting, where two surfaces very close together seem to flicker. Setting a good near-clipping plane helps avoid that. Up next, we will see how shading gives surfaces their final look.
 geeksforgeeks.orgen.wikipedia.orgmedium.com+22 min
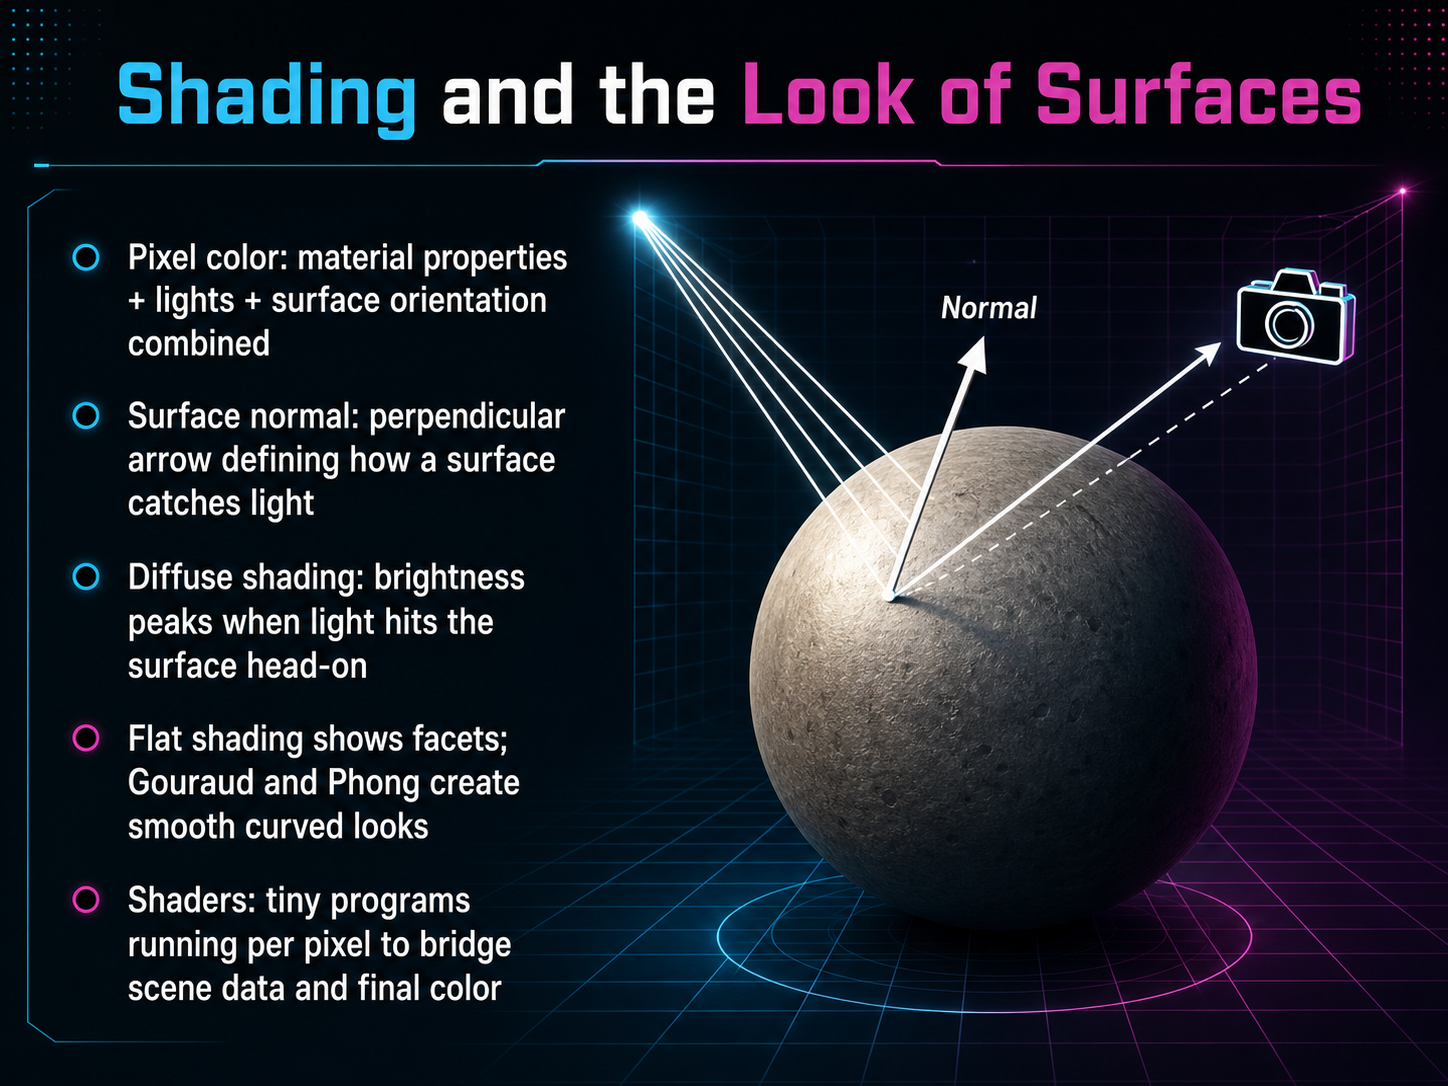
 - 09Shading and the Look of SurfacesNow that we have shapes in our scene, let's talk about how their surfaces actually look. We call this shading. A pixel's final color isn't random. It's a calculation that blends the material properties, like whether something is red plastic or shiny metal, with the lights in the scene and the orientation of the surface itself. The key to surface orientation is a concept called the surface normal. You can picture it as a tiny, invisible arrow pointing straight out from any point on a surface, perfectly perpendicular. This little arrow tells the computer exactly how that spot catches the light. The most basic lighting rule is called diffuse shading. Imagine a flashlight pointed at a wall. The brightness is strongest where the light hits head-on, and it fades as the surface turns away. Early computer graphics used flat shading, where every polygon gets a single color. This makes the individual facets very visible. To get a smooth, curved look, we use techniques like Gouraud and Phong shading. These cleverly blend colors and normals across the surface. Under the hood, all of this is handled by shaders. Think of a shader as a tiny program that runs millions of times, once for every single pixel, to bridge the raw scene data and the final color you see on screen. Next, we'll walk through the entire pipeline to see how all these pieces fit together.
 2 min
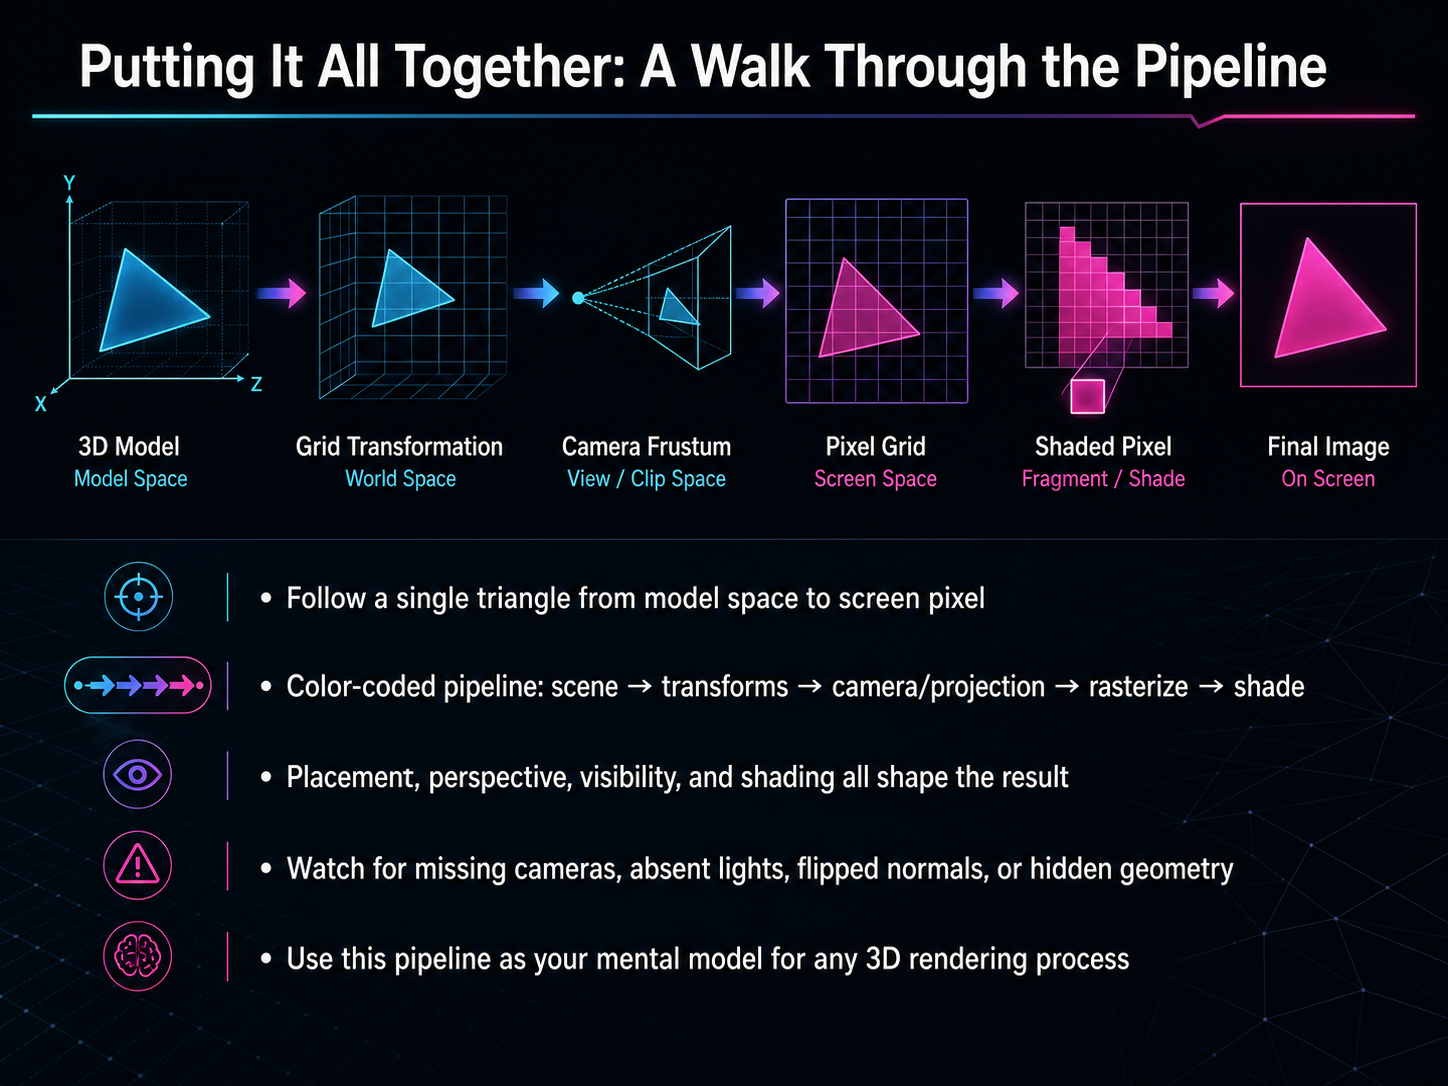
2 min - 10Putting It All Together: A Walk Through the PipelineNow let's follow one triangle all the way through the pipeline. Imagine a simple triangle defined in its own model space. First, the scene transform places it into the world. Then the view transform moves everything relative to a camera. After that, projection flattens the 3D scene onto a 2D plane, like a painter choosing a viewpoint. Rasterization decides which pixels the triangle actually covers. Finally, shading calculates the color for each of those pixels based on lights and materials. Along the way, placement, perspective, visibility, and shading all shape the final image. If something looks wrong, think about common pitfalls: a missing camera, no lights, flipped surface normals, or geometry accidentally hidden behind something else. Keeping this pipeline in mind gives you a reliable mental model for troubleshooting almost any 3D rendering issue. Next, we'll compare two major approaches to this process: real-time versus offline rendering.
 2 min
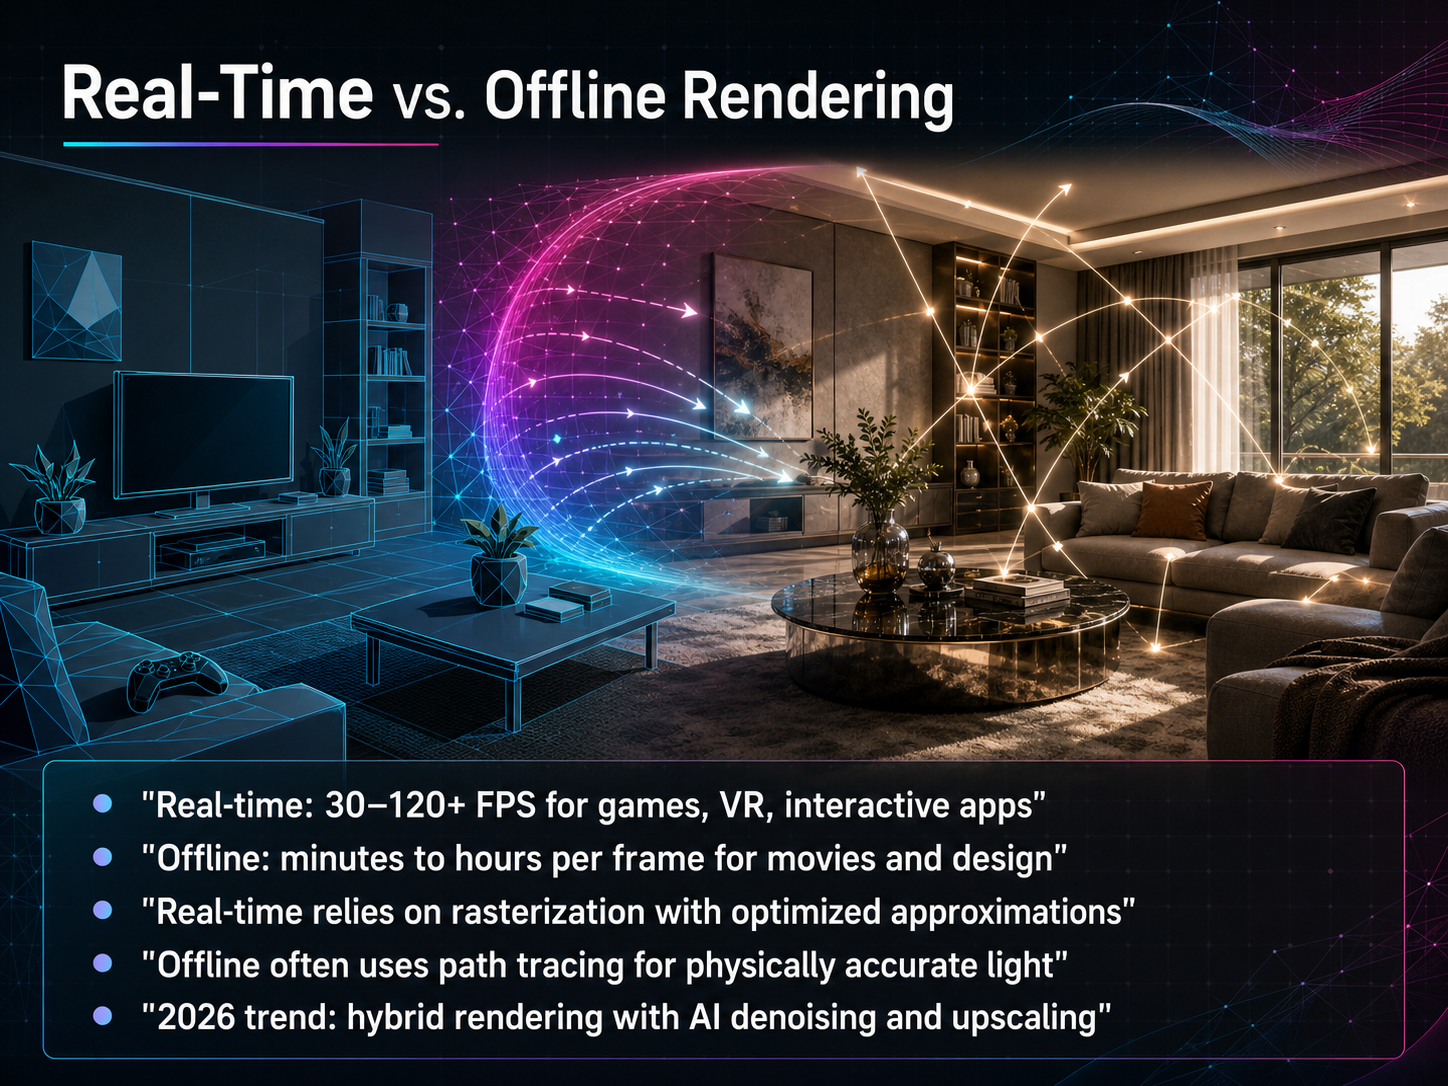
2 min - 11Real-Time vs. Offline RenderingNow let’s talk about real-time versus offline rendering, because the same scene can take vastly different amounts of time to finish. Real-time rendering powers video games, virtual reality, and interactive apps. It updates thirty to over one hundred twenty frames every second. To keep that pace, it uses rasterization and relies on clever optimizations. Offline rendering takes the opposite approach: each frame might need minutes or even hours. Movie studios and product designers use offline rendering because it can afford to trace light much more carefully. The technique they often reach for is path tracing, which simulates how light actually bounces through a scene, giving you physically accurate shadows and reflections. But real-time graphics are now borrowing from that same playbook. In twenty twenty-six, a major trend is hybrid rendering: starting with a fast rasterized base, then adding path tracing for key lighting effects, and finishing with AI-powered denoising and upscaling. AI acts like the patient assistant that smooths out any remaining grain and sharpens the picture, so you get a film-like result without waiting for hours. As we look at where this technology lives, the next slide covers the hardware and tools that make it possible: Rendering in the Real World: GPUs, Tools, and Current Trends.
 developer.nvidia.comvibetric.comtechgpu.net+22 min
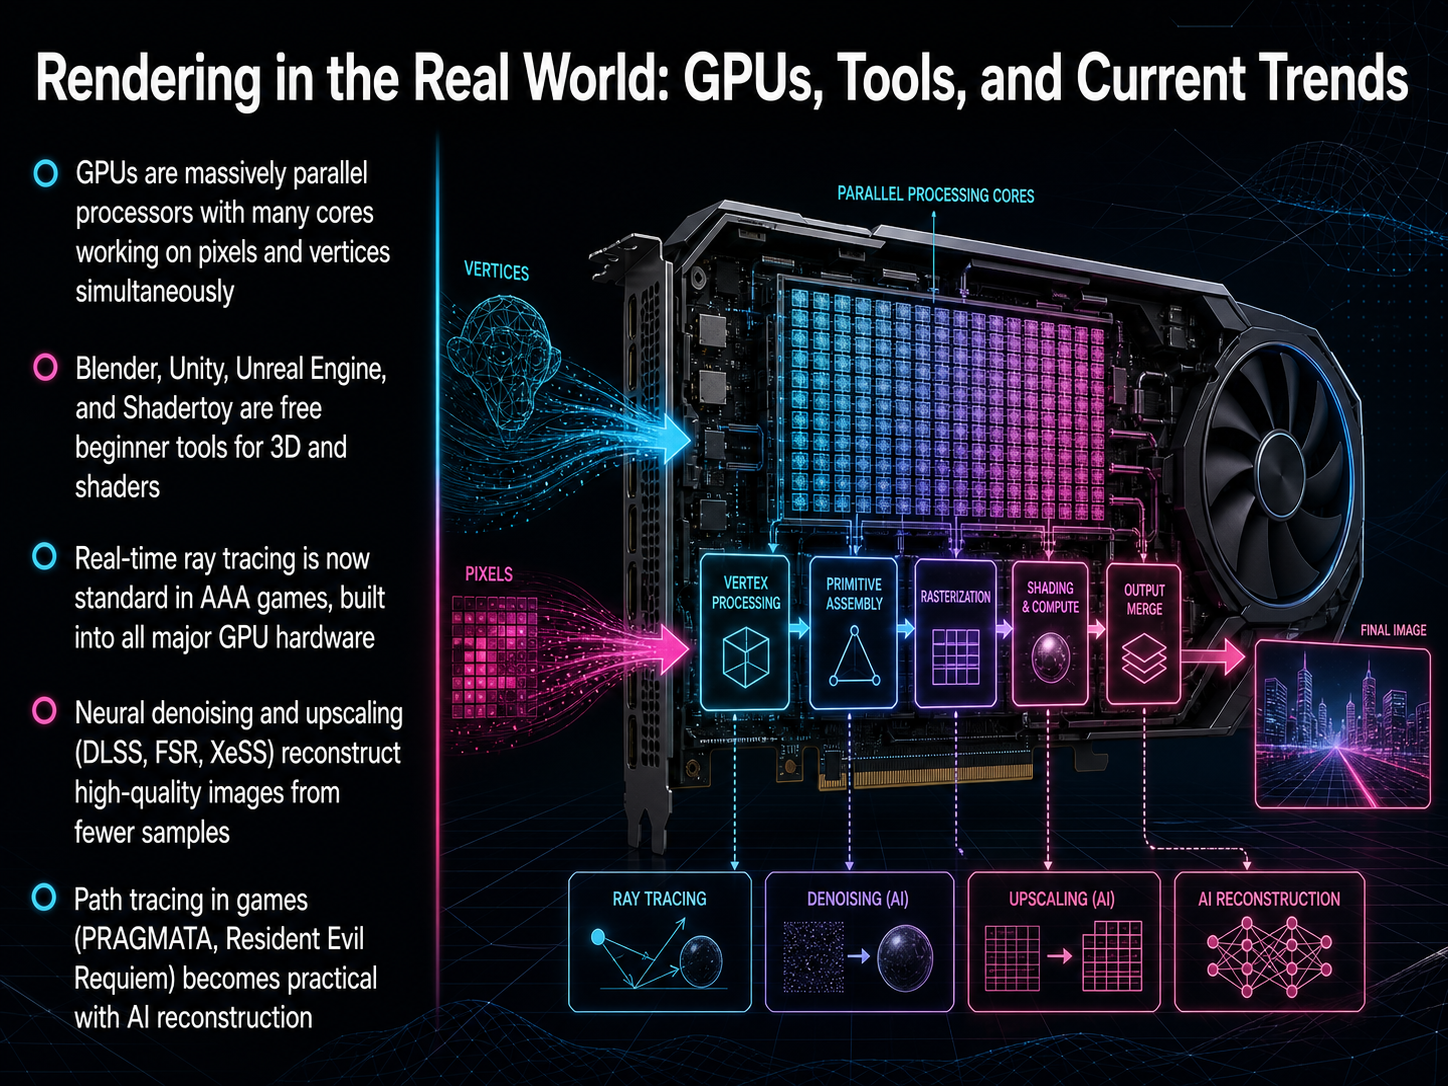
 - 12Rendering in the Real World: GPUs, Tools, and Current TrendsNow let's pull all of this together and see how rendering lives in the real world today. The workhorses behind everything we've discussed are GPUs, which are essentially thousands of tiny processors working side by side, calculating millions of pixels and vertices at the same time. If you want to start experimenting yourself, you don't need expensive software; free creative tools like Blender, Unity, Unreal Engine, and the web-based Shadertoy are perfect for beginners. One of the biggest shifts in recent years is that real-time ray tracing, once a distant dream, is now standard in top-tier games. This is possible because modern GPUs have dedicated hardware to accelerate the process. However, tracing rays is noisy, so engineers use clever AI techniques like neural denoising and upscaling. Technologies you may have heard of, like NVIDIA DLSS, AMD FSR, and Intel XeSS, reconstruct a clean, high-quality image from just a fraction of the light samples, making the experience much smoother. This has even made full path tracing practical in visually stunning games like PRAGMATA and Resident Evil Requiem, where AI reconstruction helps bridge the gap between real-time action and cinematic quality. That covers the hardware and trends shaping the field. Let's move on to our final thoughts, from viewer to creator: next steps.
 developer.nvidia.comvibetric.comtechgpu.net+22 min
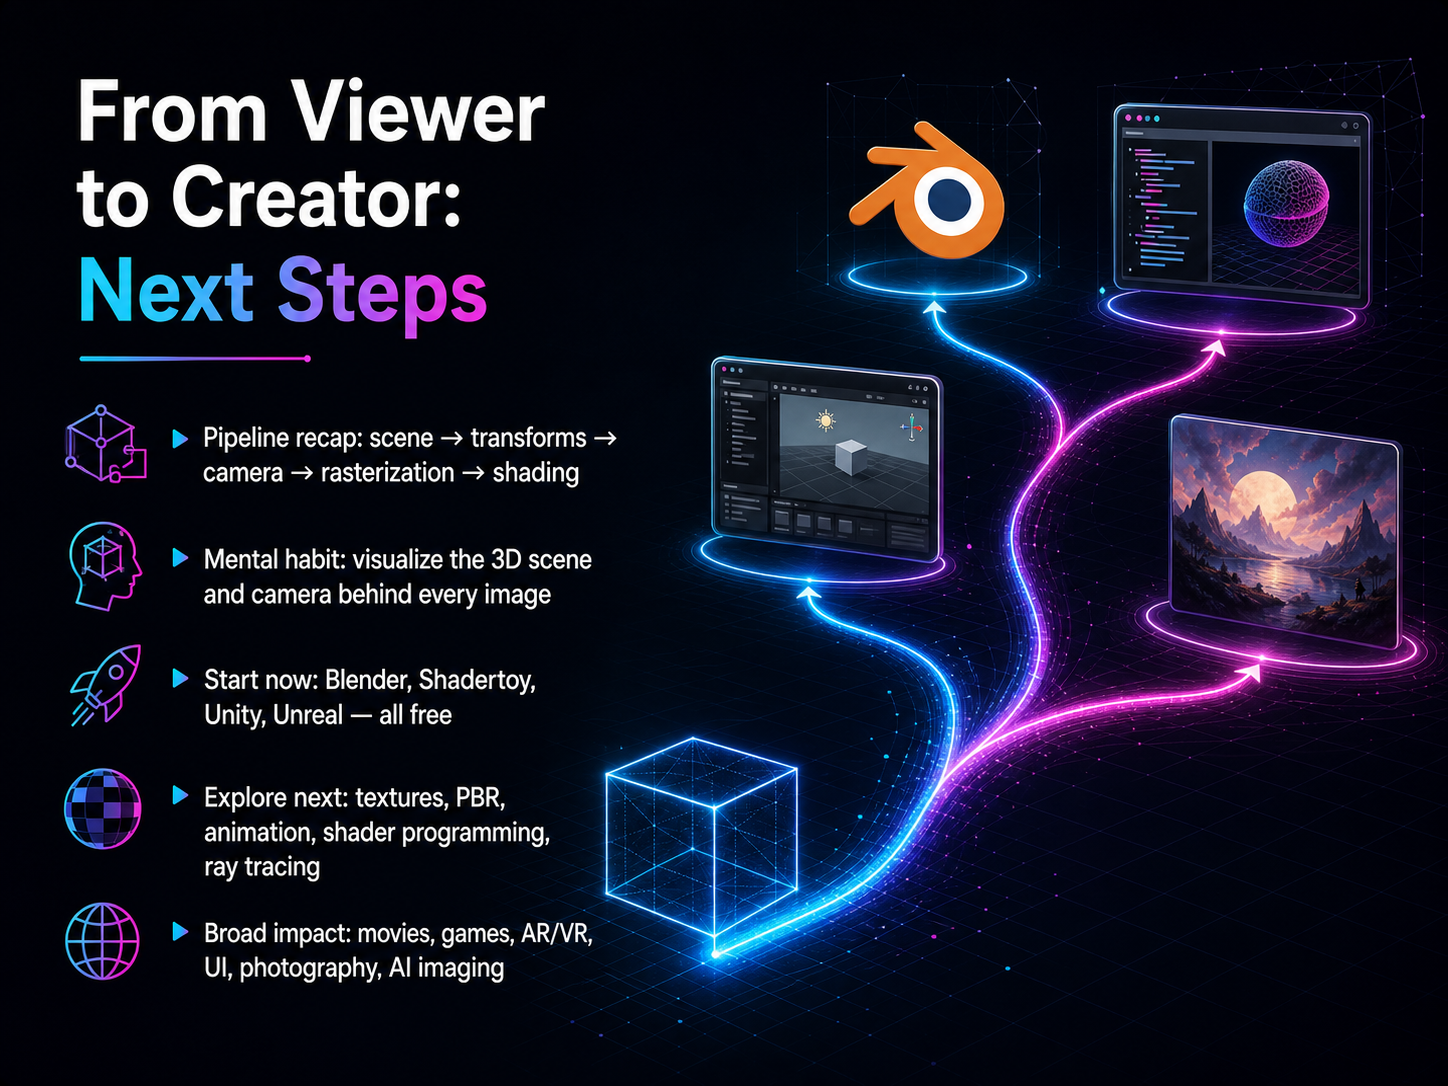
 - 13From Viewer to Creator: Next StepsWe have reached the final slide, so let us bring everything together. The pipeline we walked through is your new mental map: a 3D scene is defined, vertices are transformed through space, a virtual camera captures the view, the surface is rasterized into pixels, and finally those pixels are shaded to create the final color. From now on, when you look at any digital image, try to imagine the invisible scene and camera behind it. That simple habit will turn everyday viewing into a deeper understanding. To start creating yourself, pick up a free tool like Blender, Shadertoy, Unity, or Unreal Engine. Even a few minutes of experimentation will make these concepts real. When you are ready, you can explore textures, physically based rendering, animation, shader programming, and ray tracing. These ideas power movies, games, augmented and virtual reality, user interfaces, photography, and AI imaging. Thank you for learning with me. Carry that curiosity forward, open a blank canvas, and build the first scene that exists only in your imagination.
 2 min
2 min
Take the deck with you
Download this course as a file — free, no sign-up needed.
- PDF handoutEvery slide page, ready to print or share.14 pages · 3.7 MBDownload
- Narrated PowerPointThe deck that presents itself — every slide carries the digital human's narration video.14 pages · 14.6 MBDownload
- PowerPoint slidesThe full deck as a .pptx — open it in PowerPoint, Keynote, or Google Slides.14 pages · 3.6 MBDownload
Free to use in your own training — please keep the PersonWise credit page at the end.
Have your own deck? Turn it into a course
Sources consulted
Web sources consulted while building this course.
- Chula's CUSAT Team Achieves Global Space Milestone, Prepares to Launch CUSAT-1 Satellite in 2028 -- Thailand4 News — thailand4.com
- The next frontier of AI: how ‘world models’ are simulating reality and virtual spaces | South China Morning Post — scmp.com
- Innovation in Space Technology: Roscosmos Unveils Massive 12-Meter Antenna – Zamin.uz, 20.07.2026 — zamin.uz
- LearnOpenGL - Coordinate Systems — learnopengl.com
- Coordinate Systems — vis.uni-jena.de
- Z-Buffer or Depth-Buffer method — geeksforgeeks.org
- Z-buffering — en.wikipedia.org
- Z-Buffer Algorithm Explained — medium.com
- Depth Buffer Method | PPTX — slideshare.net
- LearnOpenGL - Depth testing — learnopengl.com
- Q&A: How Capcom Brought Path Tracing to RE ENGINE Across PRAGMATA and Resident Evil Requiem | NVIDIA Technical Blog — developer.nvidia.com
- Ray Tracing in 2026: The Powerful Shift From Experimental to Standard Graphics — vibetric.com
- Ray Tracing Reality Check: Is It Worth the Upgrade Yet? - Tech GPU — techgpu.net
- Vulkan Ray Tracing: Deprecating Host-Side Acceleration Structure Builds — khronos.org
- Ray Tracing On vs Off in 2026: Which Is Better for Premium Gaming PCs Gaming PC Guru — gamingpcguru.com