Digital Accessibility Audit Checklist
Begin
14 pages · ~28 min
Digital Accessibility Audit Checklist
Learn to conduct a systematic digital accessibility audit using a step-by-step checklist, identifying compliance issues and improvement opportunities. Ideal for web developers and QA testers.
What you’ll learn
- 01Digital Accessibility Audit Checklist: A Step-by-Step ReviewWelcome. If you are here, you already know that accessibility is not a checkbox—it is a quality standard. This course gives you a structured, evidence-based review process against WCAG 2.2. No guesswork. You will get role-specific tasks, whether you design, develop, publish content, or lead the team. We turn broad requirements into executable review steps. Here is the path: prepare, inspect, report, remediate, verify, and sustain. By the end, you will have prioritized findings, a shared language across your team, and a clear remediation roadmap. You will know exactly what to fix and why it matters. Let's begin by looking at why unstructured audits fail.w3.orgexceedability.comexceedability.com+21 min
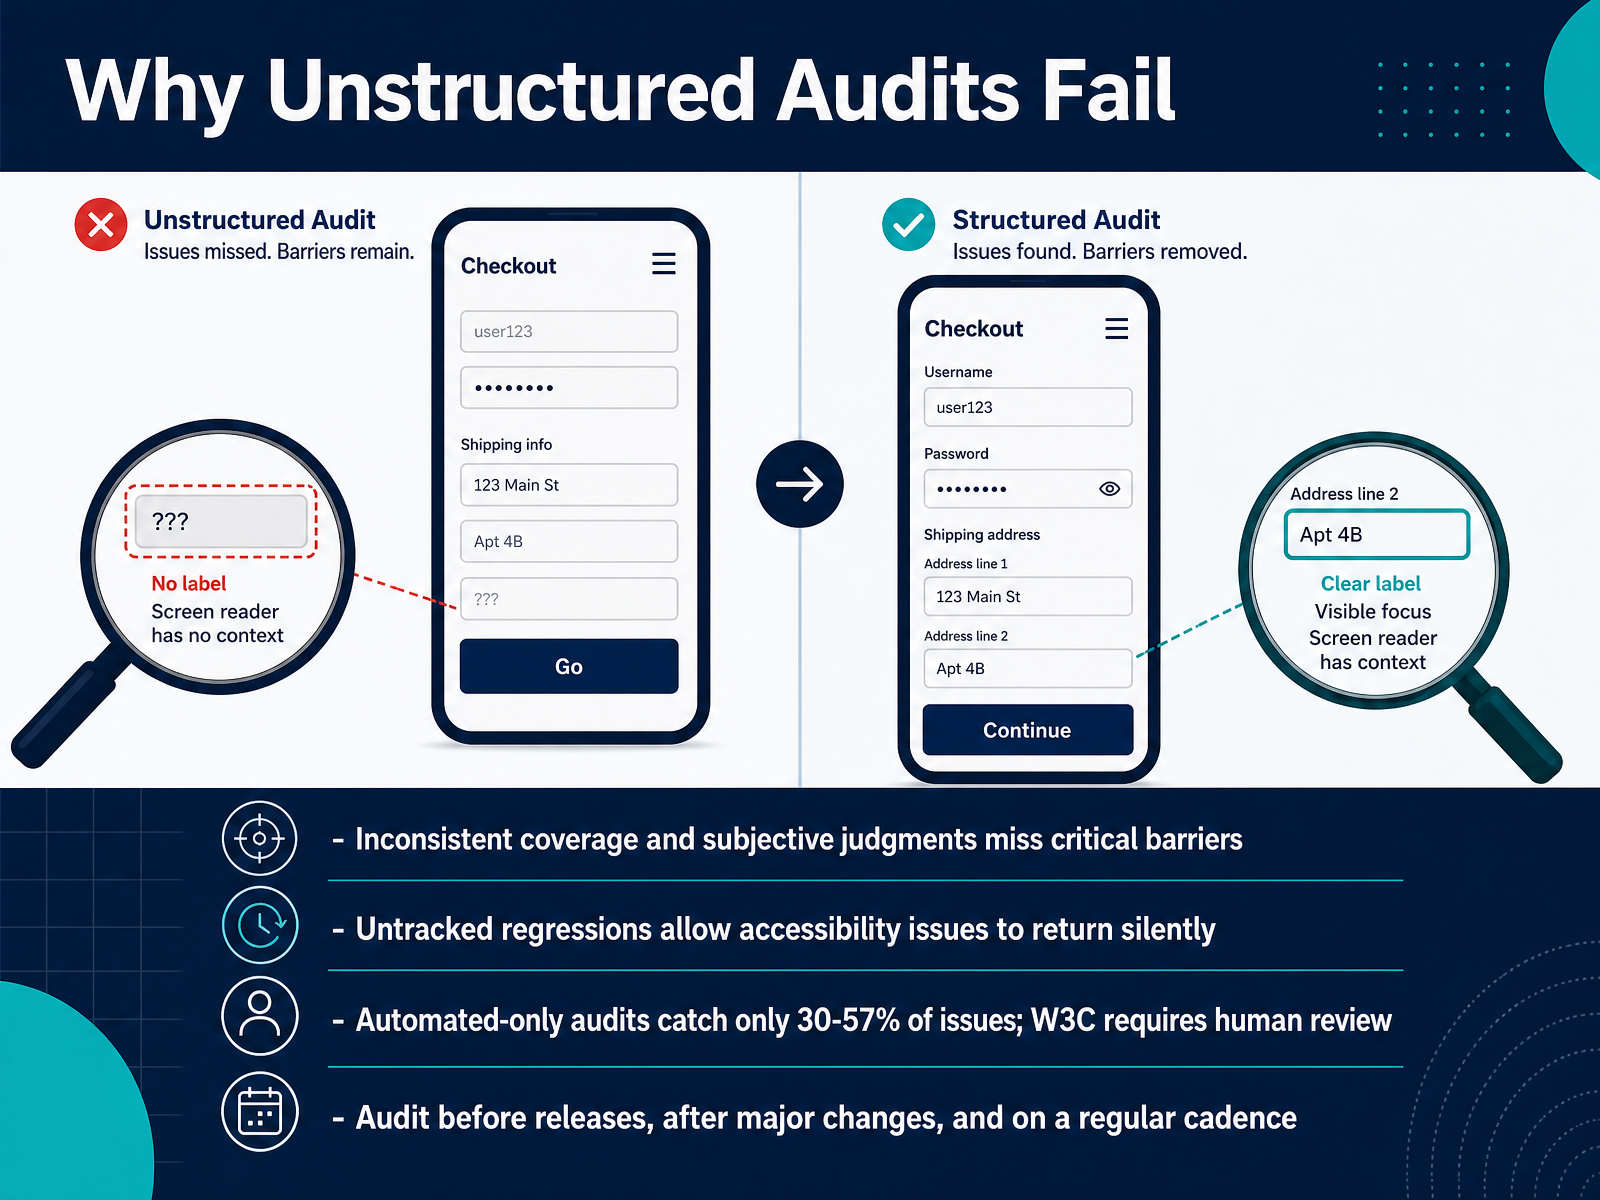
- 02Why Unstructured Audits FailLet's be direct about why the old way of auditing fails. Unstructured audits rely on whoever happens to be testing that week. Coverage becomes inconsistent. Subjective judgments slip in. And critical barriers get missed because no one checked the same thing twice. Second, without a structured process, regressions go untracked. Accessibility issues you already fixed can silently return after the next release. And third, if you are relying on automated tools alone, know the hard numbers. They catch only about thirty to fifty-seven percent of issues. The W3C is clear: no tool alone can determine if a site is accessible. Human review is required. So, build your audit schedule with intent. Run it before releases. Run it after major design changes. And run it on a regular cadence, not as a one-time event. A structured checklist turns this from guesswork into a repeatable process. Next, let's align on the WCAG 2.2 baseline and common conformance targets.
 adacompliancepros.comiaapaudit.coma11yflow.dev+22 min
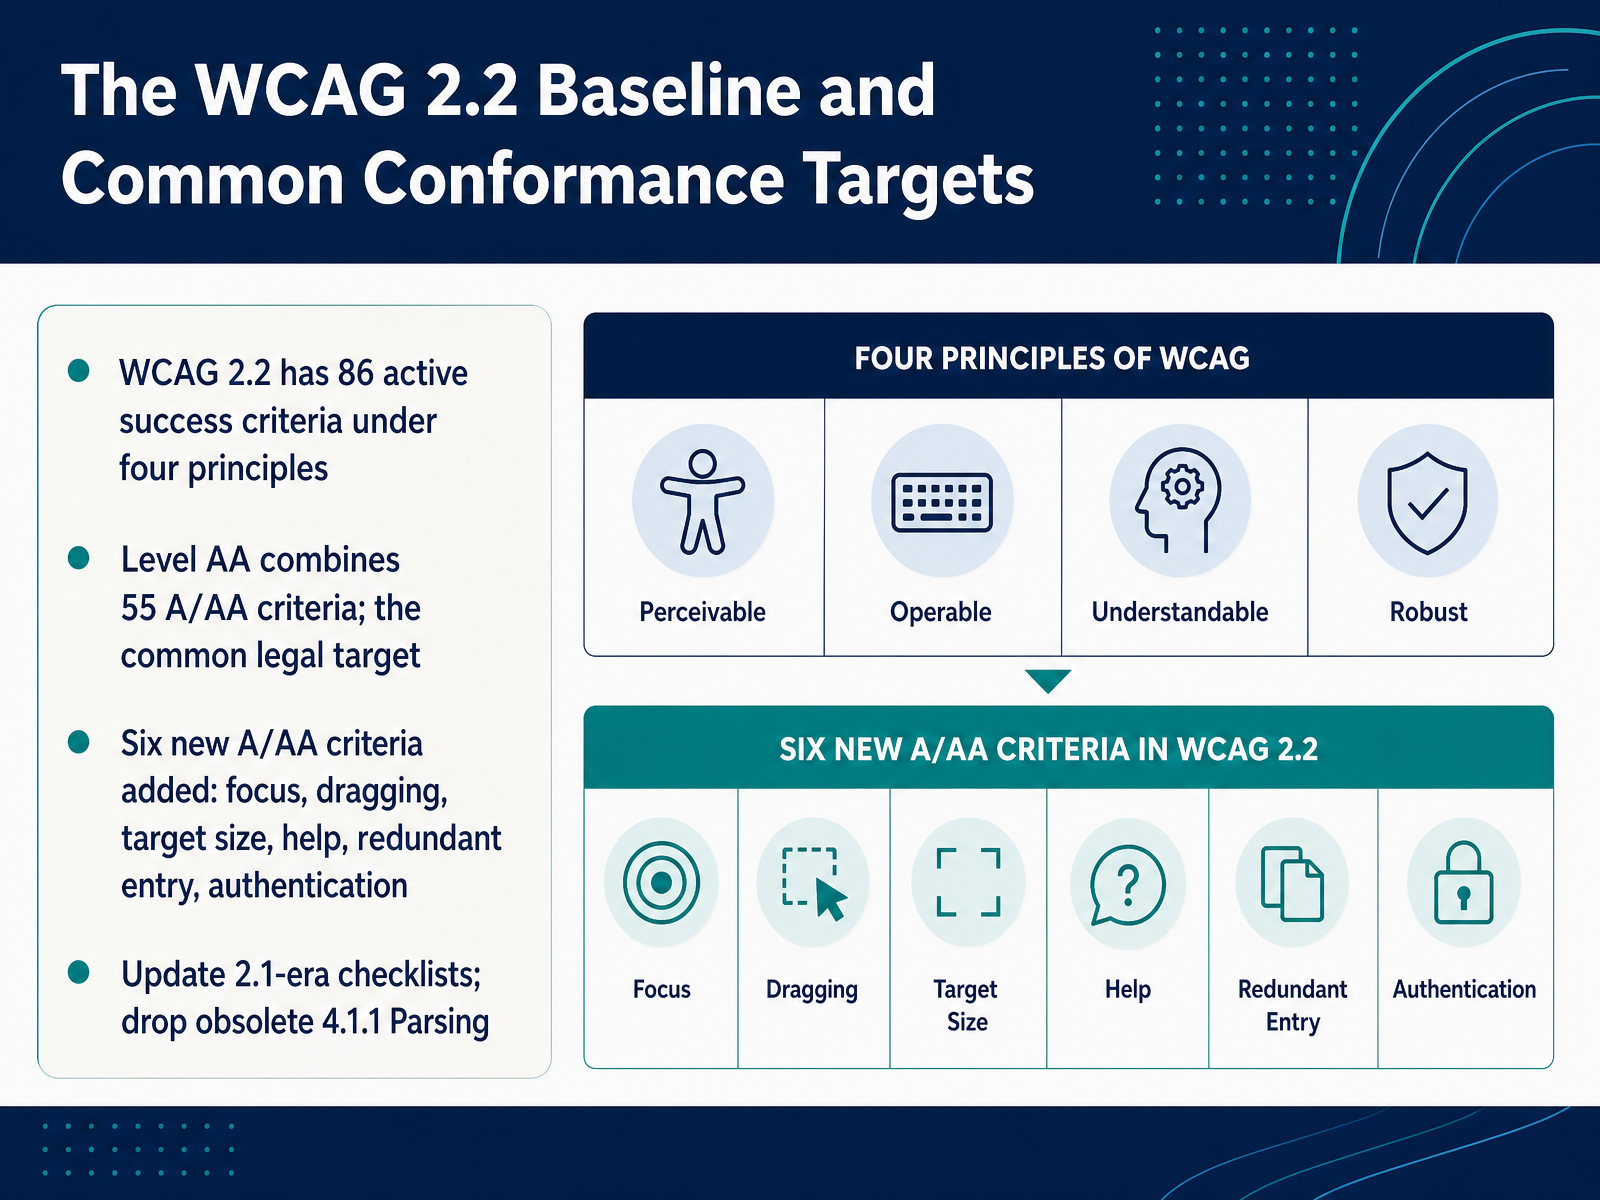
 - 03The WCAG 2.2 Baseline and Common Conformance TargetsLet's anchor your audit in the right version of the guidelines. WCAG 2.2 has 86 active success criteria, organized under four principles. For most legal and procurement work, the target is Level AA, which combines 55 criteria from Levels A and AA. That is your baseline. Now, if you are updating from an older checklist, here is what changed. WCAG 2.2 adds six new A and AA criteria. These cover focus visibility, dragging movements, target size, consistent help placement, redundant entry, and accessible authentication. In short, your checklist must include these. Also, drop the old 4.1.1 Parsing criterion. It is obsolete in 2.2, so don't waste time testing it. Focusing on these 55 criteria gives you a clear, defensible audit scope. Next, let's talk about the roles and responsibilities that make this audit work.
 w3.orgexceedability.comexceedability.com+22 min
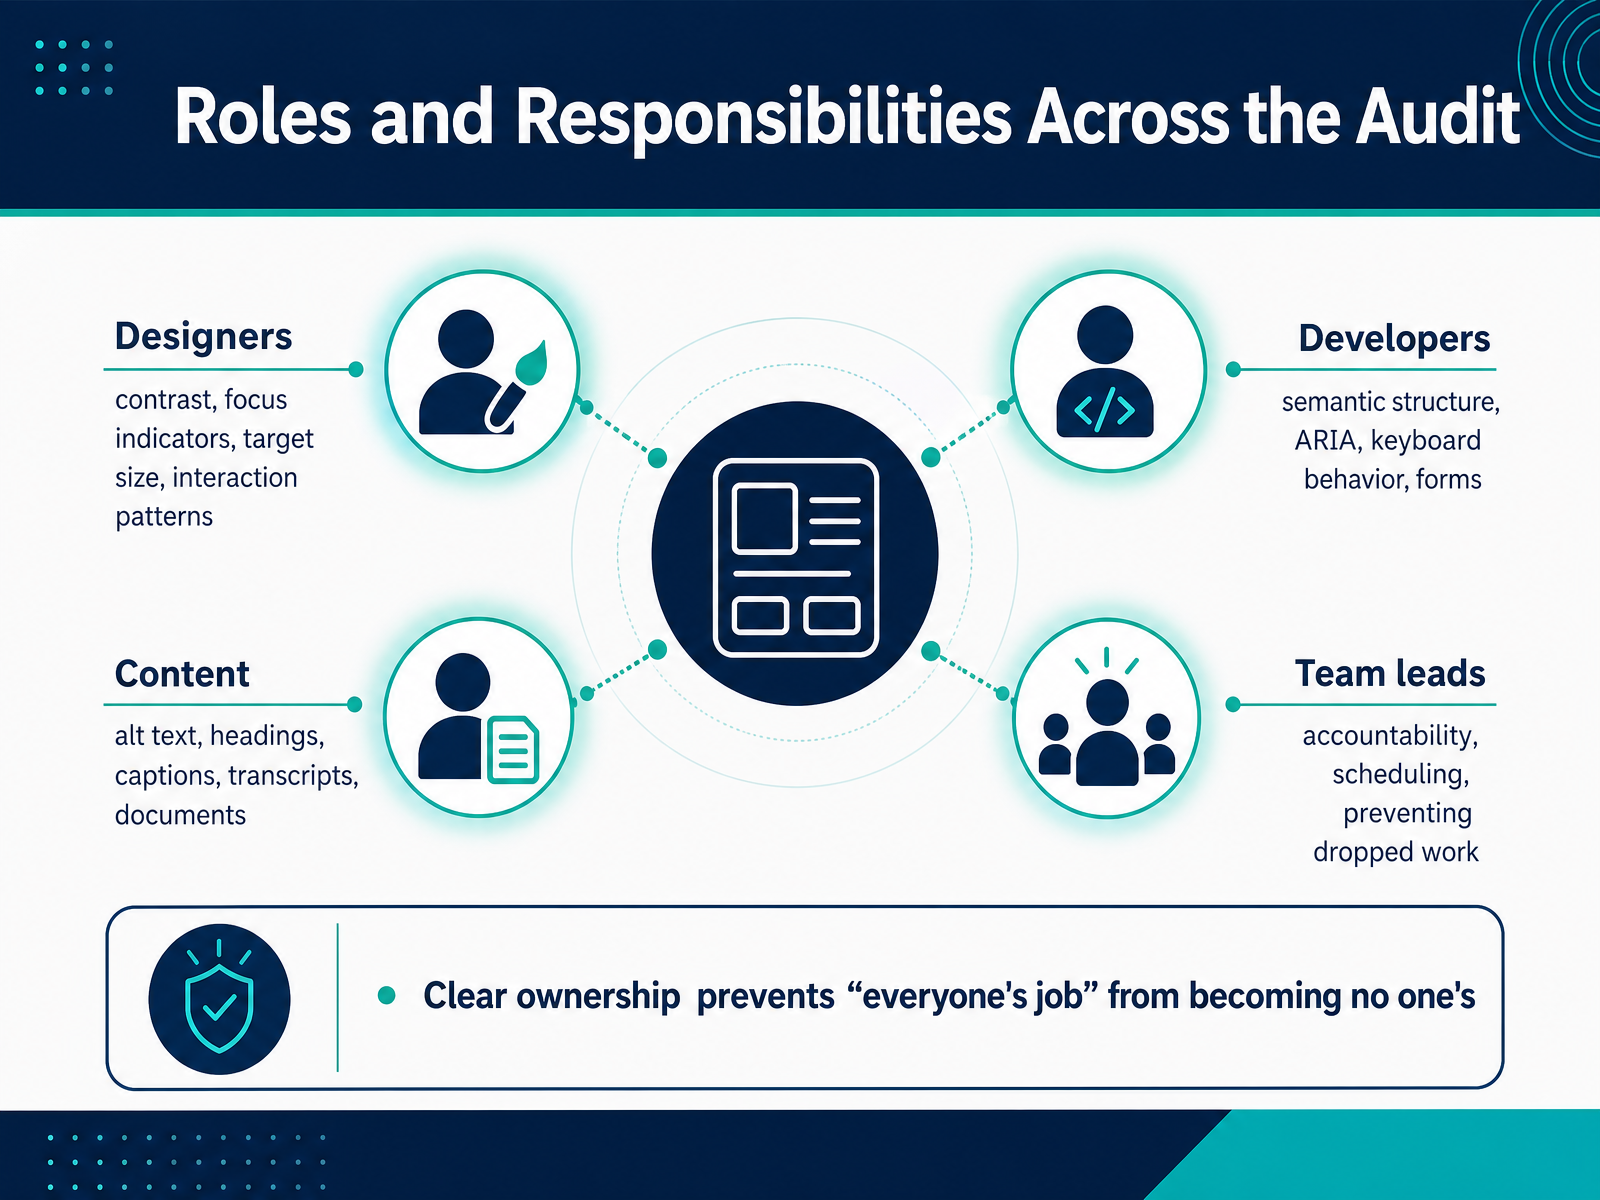
 - 04Roles and Responsibilities Across the AuditLet's talk about who does what. A structured audit only works when every role has clear ownership. Designers handle contrast, focus indicators, target size, and interaction patterns. These are decisions made in the design phase, before a single line of code is written. Developers own semantic structure, ARIA, keyboard behavior, and forms. They make sure the interface actually behaves the way it looks. Content creators are responsible for alt text, headings, captions, transcripts, and documents. If the words and media aren't accessible, the whole experience falls apart. Team leads provide accountability. They schedule the work, track progress, and make sure nothing slips through the cracks. Here's the key point: when ownership is vague, accessibility becomes everyone's job and no one's priority. Assign specific owners for each checklist item before you start. You'll save hours of confusion later. Next, we'll scope the audit and pick representative samples to test.
 accessibility.buildwebaim.orgsection508.gov+22 min
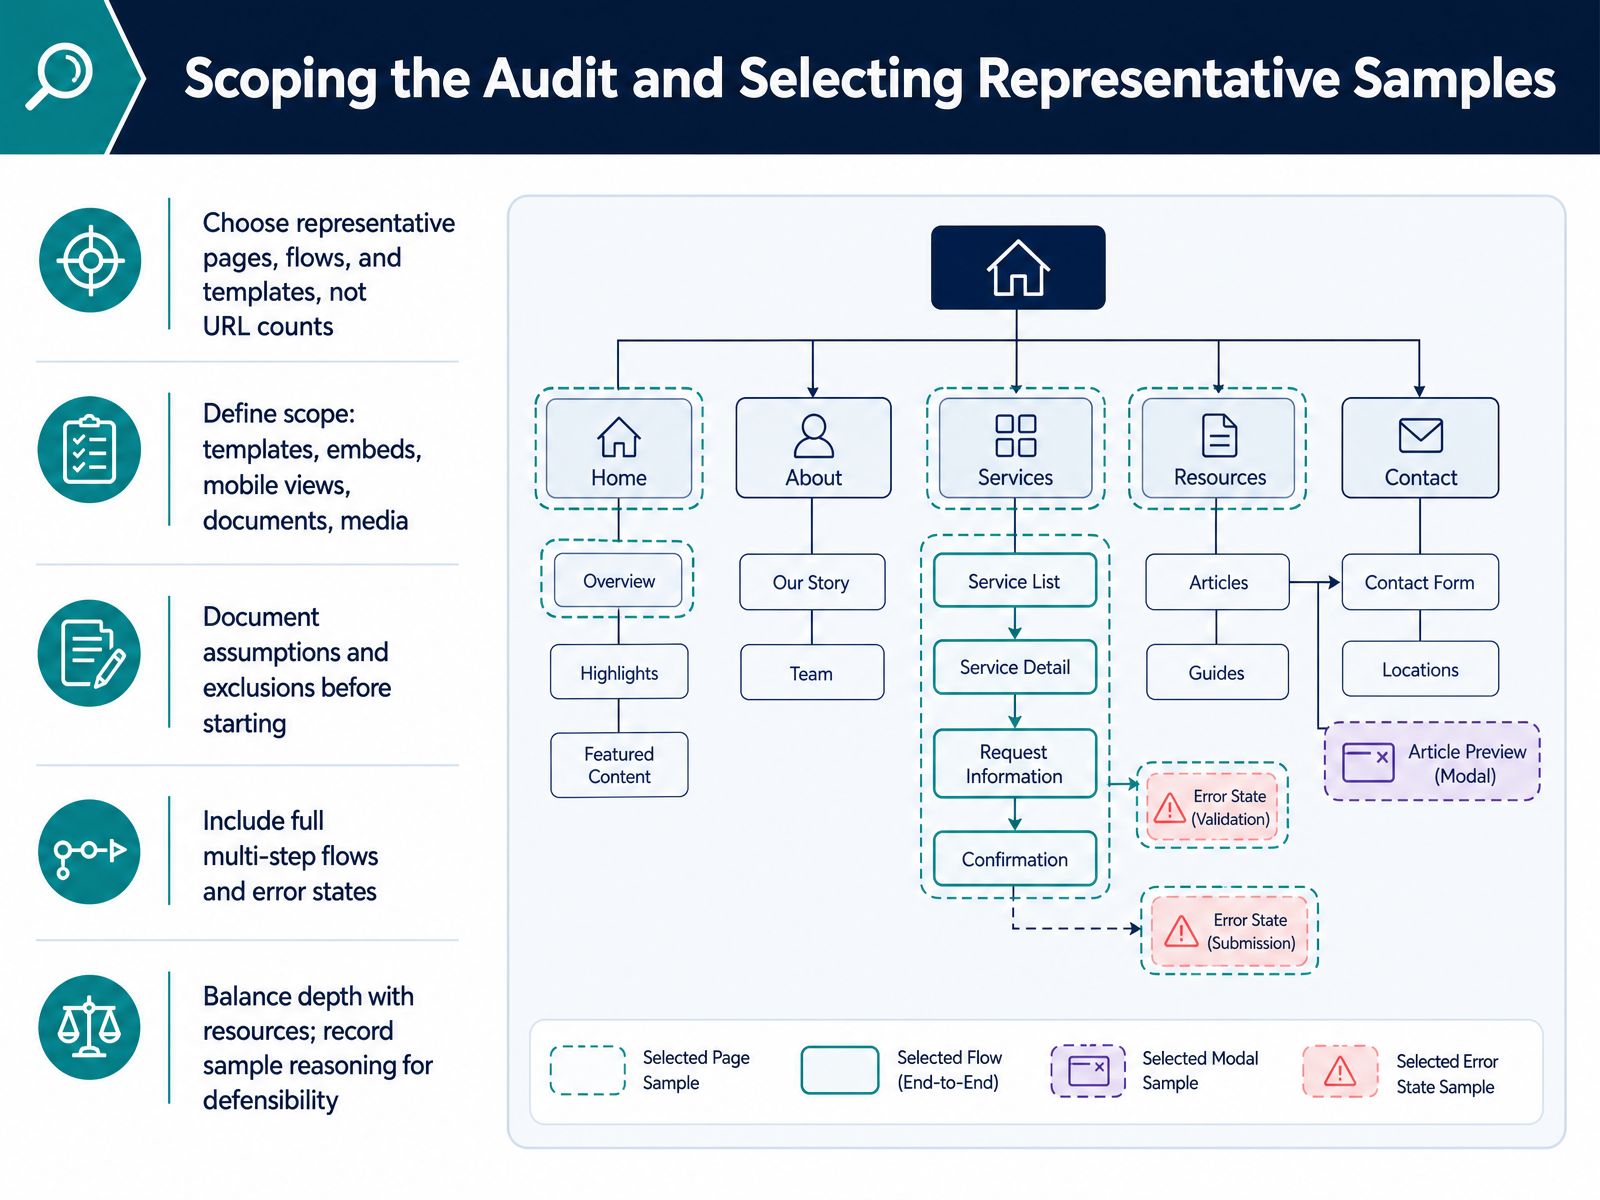
 - 05Scoping the Audit and Selecting Representative SamplesNow let’s talk about scoping the audit. The goal here is not to test every page on your site. That would be slow and wasteful. Instead, you want to select representative samples. Think in terms of templates, not URL counts. A site with five hundred pages might only have twelve unique templates. Test one instance of each template. Also include every distinct user flow. If checkout takes five steps, test all five. One inaccessible step blocks the whole purchase. Don't forget error states and edge cases. A login page with an error message behaves differently from the default view. Document what you include and what you exclude before you start. This makes your audit defensible. Write down the reasoning for each sample you pick. That record proves your coverage and helps you repeat the work later. A good sample balances depth with your available resources. Thirty well-chosen views tell you more than fifty similar blog posts. Now, let's move on to running your automated checks as the first pass.
 accessibility.buildaccessiblepixels.comaccessible.org+22 min
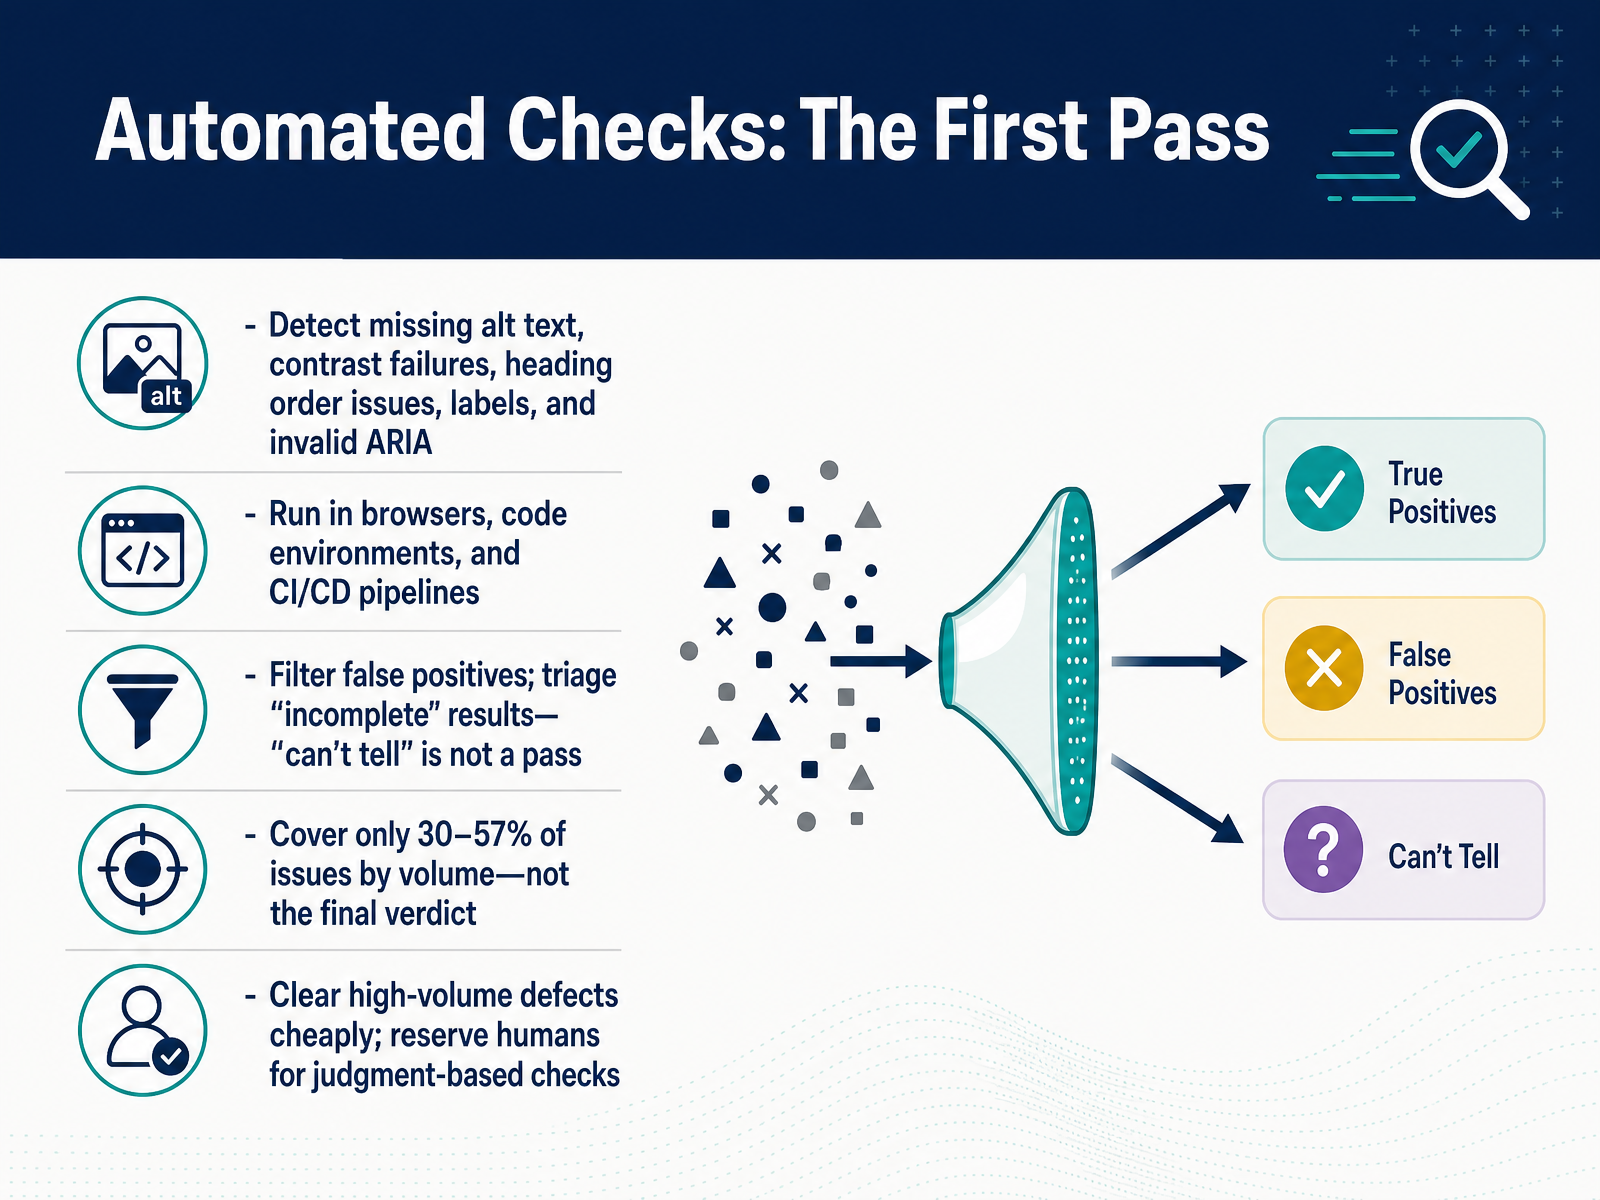
 - 06Automated Checks: The First PassLet's start with the automated pass. This is your first sweep, and its job is to clear low-hanging fruit fast. Run a tool like axe or Lighthouse in the browser, in your code editor, or right inside your CI pipeline. It will catch missing alt text, contrast failures, broken heading order, missing labels, and invalid ARIA. Now, here is the key discipline: filter the false positives. And do not treat an “incomplete” result as a pass. When a tool says it cannot tell, that is an open question for a human, not a green checkmark. Keep in mind, automation only covers thirty to fifty-seven percent of issues by volume. It is a great triage tool, but it is not the final verdict. So use it to clear the cheap, high-volume defects. That frees up your team’s time for the judgment-based checks that really matter, which we will dive into next with keyboard and focus manual checks.
 accessibility.buildwebaim.orgsection508.gov+21 min
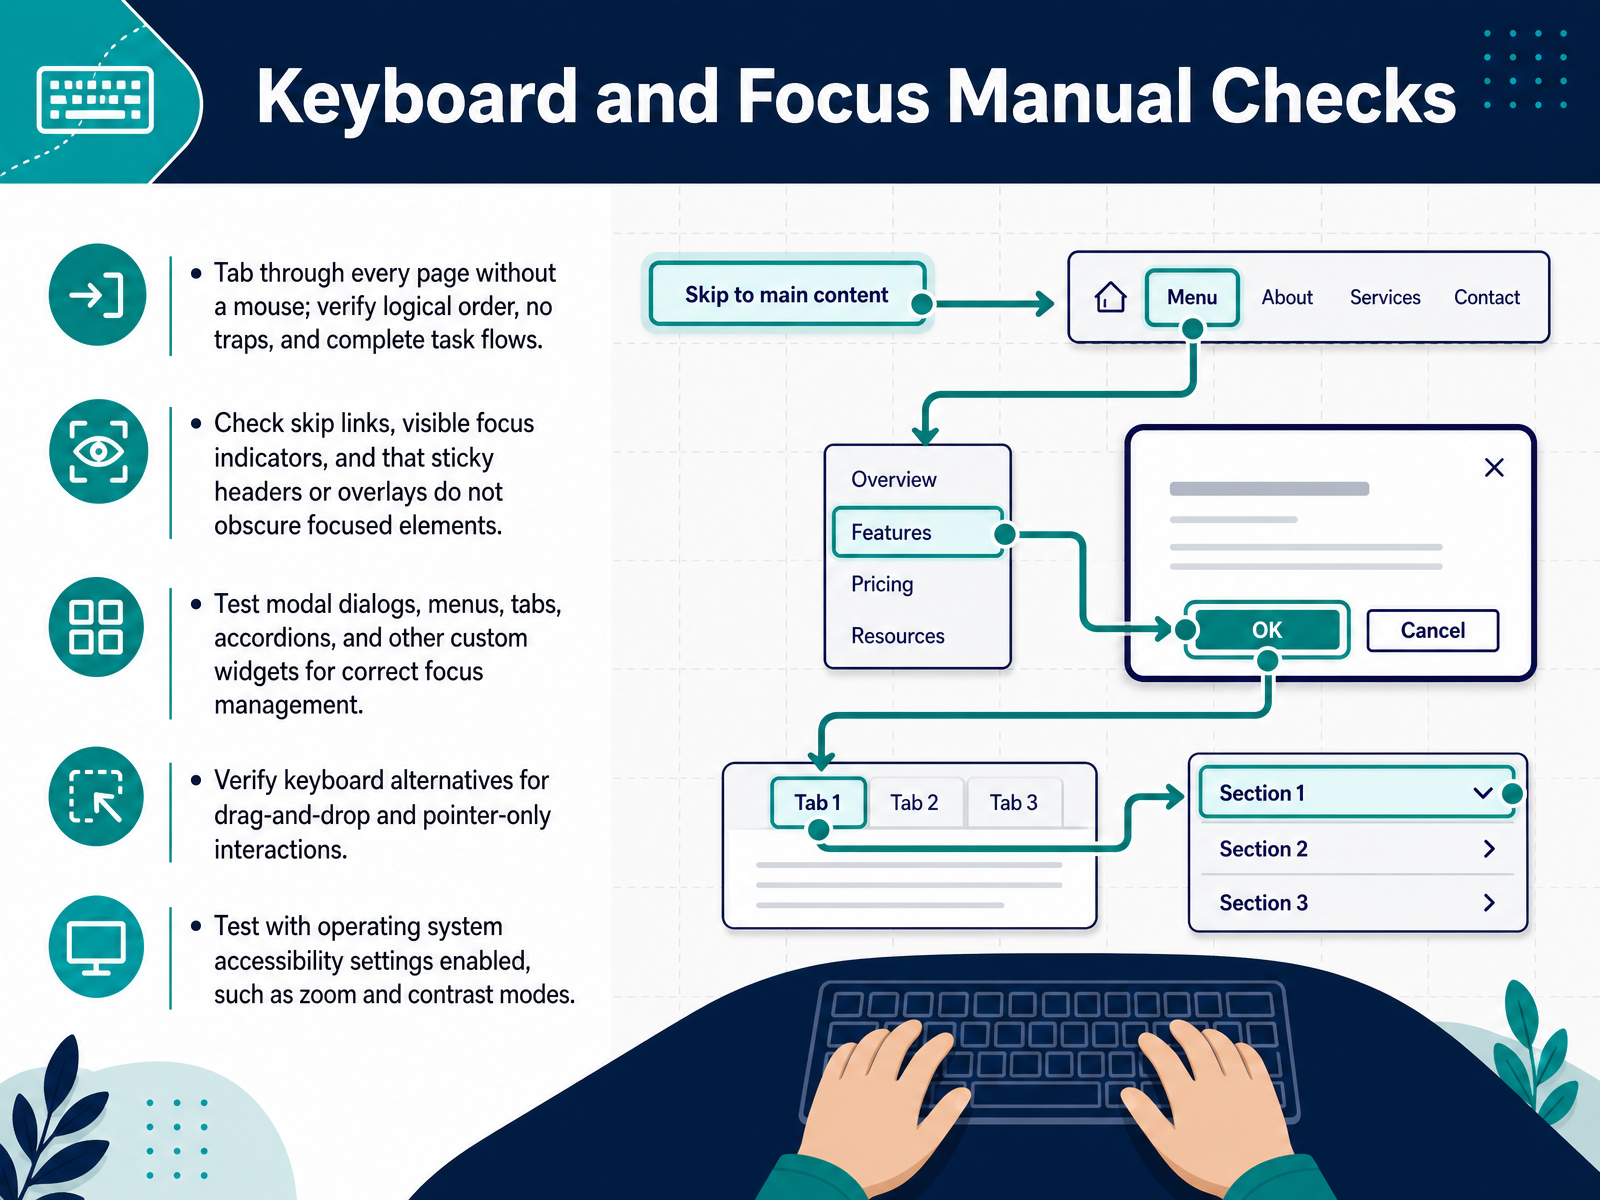
 - 07Keyboard and Focus Manual ChecksNow we move to keyboard and focus checks, the manual review that automation simply cannot do. Set your mouse aside and use only the keyboard. Tab through every page and confirm the focus order is logical and matches the visual layout. Make sure no trap holds your focus and no critical step is unreachable. Next, activate the skip link and verify it is visible when focused. Check that sticky headers and overlays do not hide the focused element. Then, open every modal, menu, tab, and accordion. Watch how focus moves in and out. Escape should close them, and focus must return to a logical place. For drag-and-drop actions, confirm a keyboard alternative exists so no user is blocked. Finally, enable common system settings, such as zoom and high contrast modes, and repeat the key checks. Focus must stay visible and reachable under these conditions. Recording what you find is just as important as fixing it. For each issue, note the page, the key sequence, and what happened. That makes remediation clear and testing repeatable. Next, we will move from keyboard operation to screen reader and content checks.
 accessibility.buildwebaim.orgsection508.gov+22 min
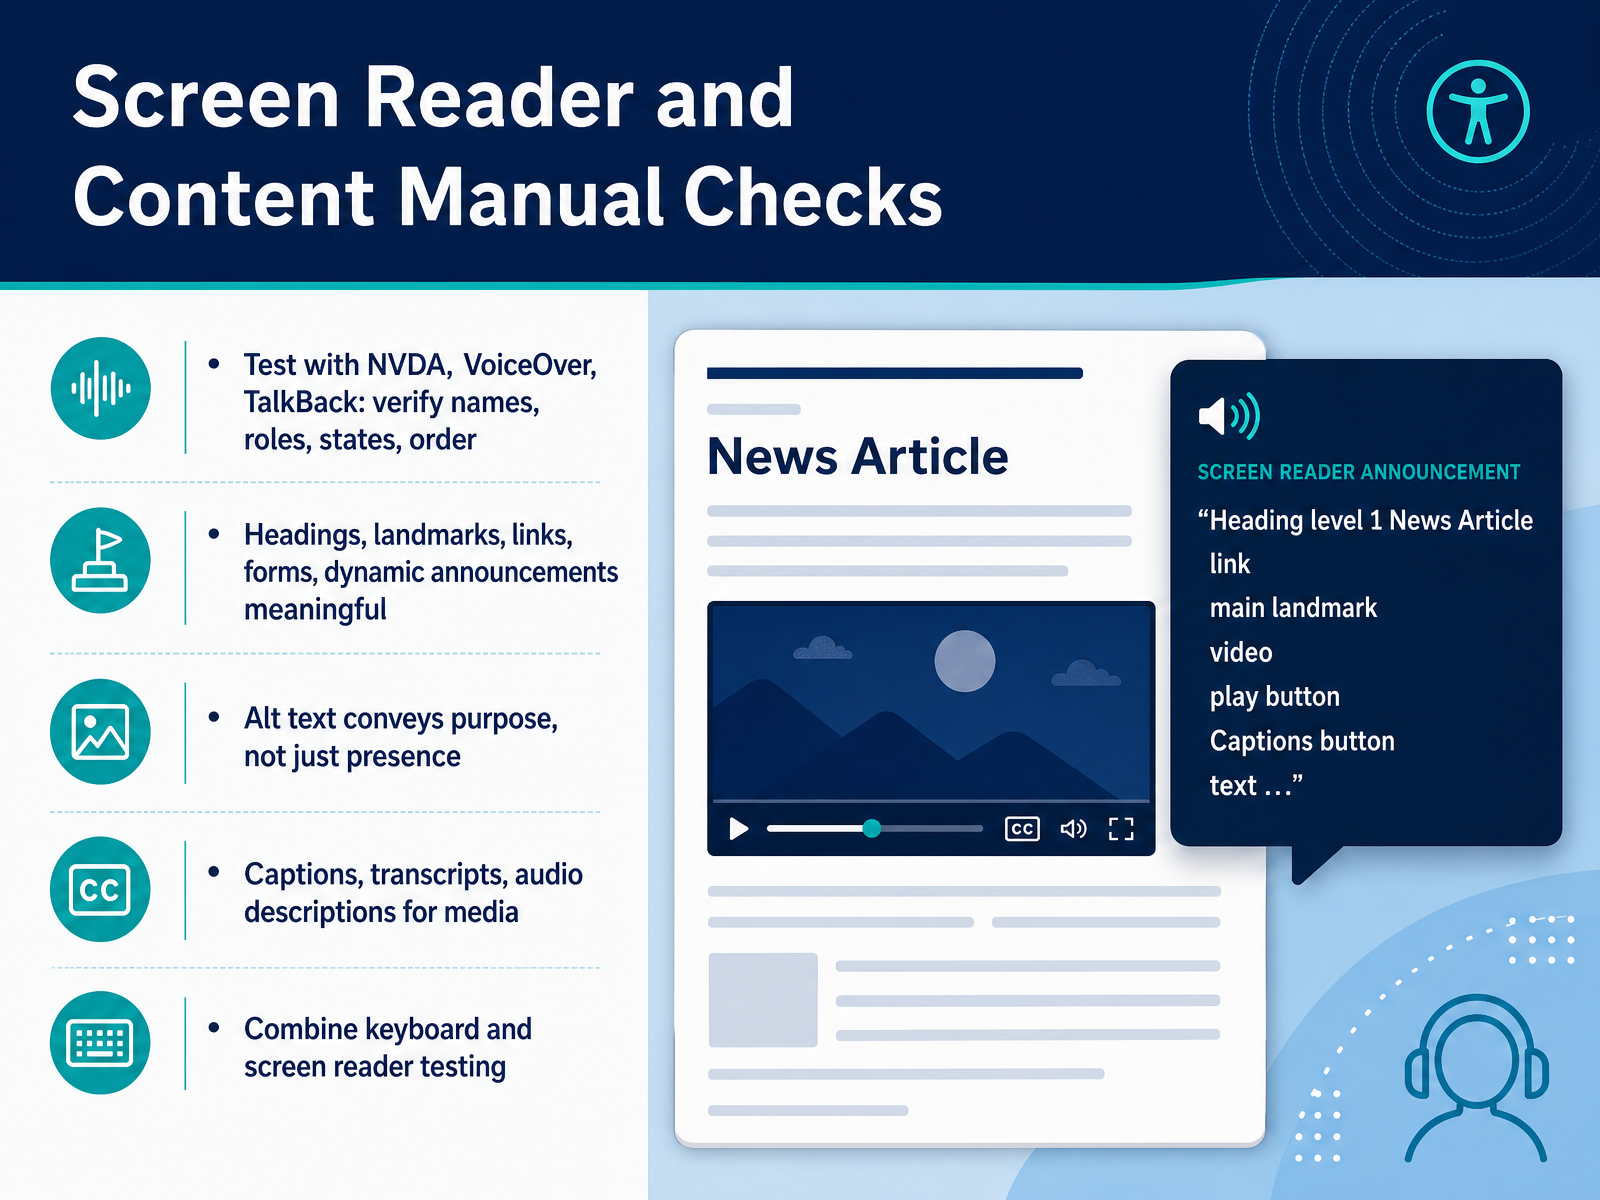
 - 08Screen Reader and Content Manual ChecksNow let’s turn to manual checks with screen readers and content. Automated tools only catch about thirty percent of issues, so this step is where real judgment comes in. Start with NVDA on Windows, VoiceOver on Mac and iOS, and TalkBack on Android. Listen carefully for names, roles, states, and the order in which content is announced. Does the page make sense when read aloud? Next, verify that headings form a logical outline, landmarks like main and nav are announced, and links and form fields have clear, descriptive labels. Alt text should convey the purpose of an image, not just its presence. For media, confirm captions and transcripts are accurate and synchronized, and that audio description is available when needed. Finally, combine keyboard and screen reader testing. Tab through the page while listening. You’ll quickly notice if focus jumps unexpectedly, if a control is announced incorrectly, or if dynamic content updates go silent. These checks take time, but they reveal how real users experience your product. Next, we’ll move on to visual, cognitive, and responsive checks.
 accessibility.buildwebaim.orgsection508.gov+22 min
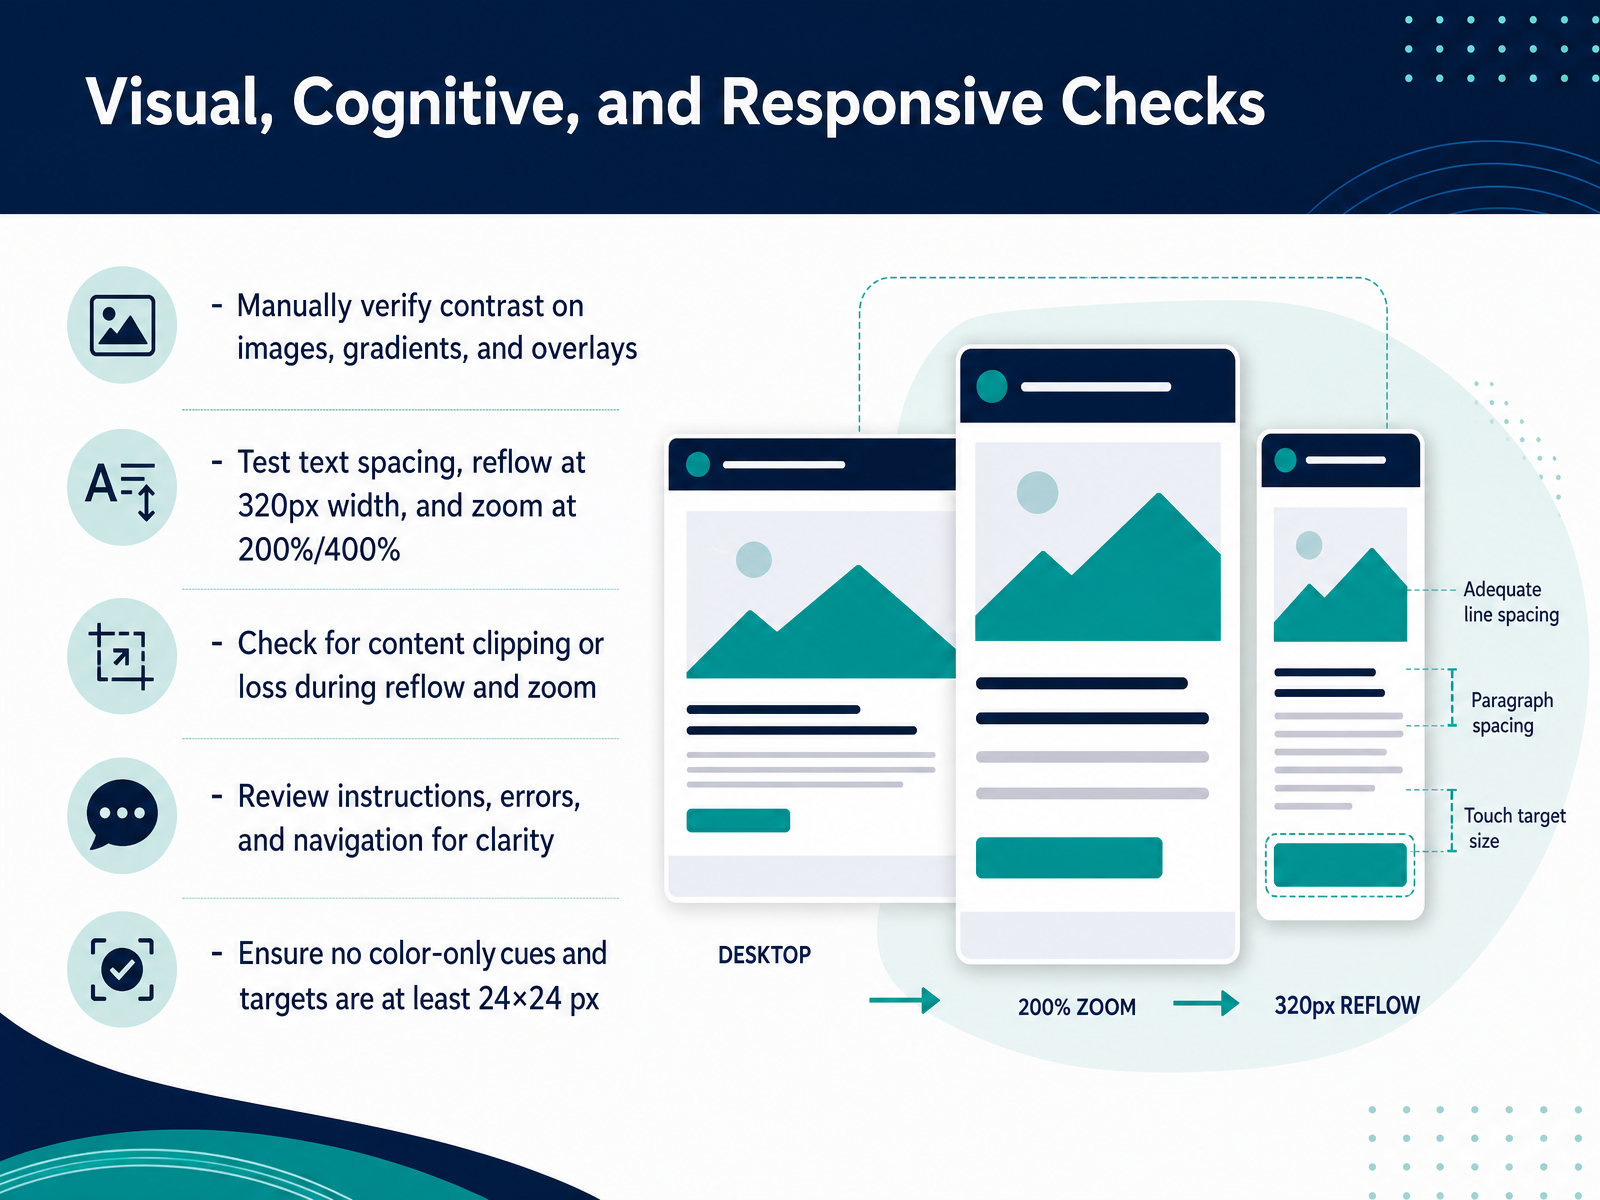
 - 09Visual, Cognitive, and Responsive ChecksNow let's look at visual, cognitive, and responsive checks. Start by verifying contrast manually, especially on images, gradients, or overlays, since automated tools can miss those tricky spots. Next, test text spacing and reflow. Zoom to 200 percent, then try 400 percent, and check content at a 320 pixel viewport width. Watch closely for clipped or hidden content during those tests. Then move to clarity. Review instructions, error messages, and navigation to make sure they are straightforward and not confusing. Finally, confirm you are not using color as the only cue, and that all clickable targets are at least 24 by 24 pixels. These checks catch what the code-based scans often let through. Once you complete this pass, we will cover recording your findings and assigning severity levels.
 accessibility.buildwebaim.orgsection508.gov+22 min
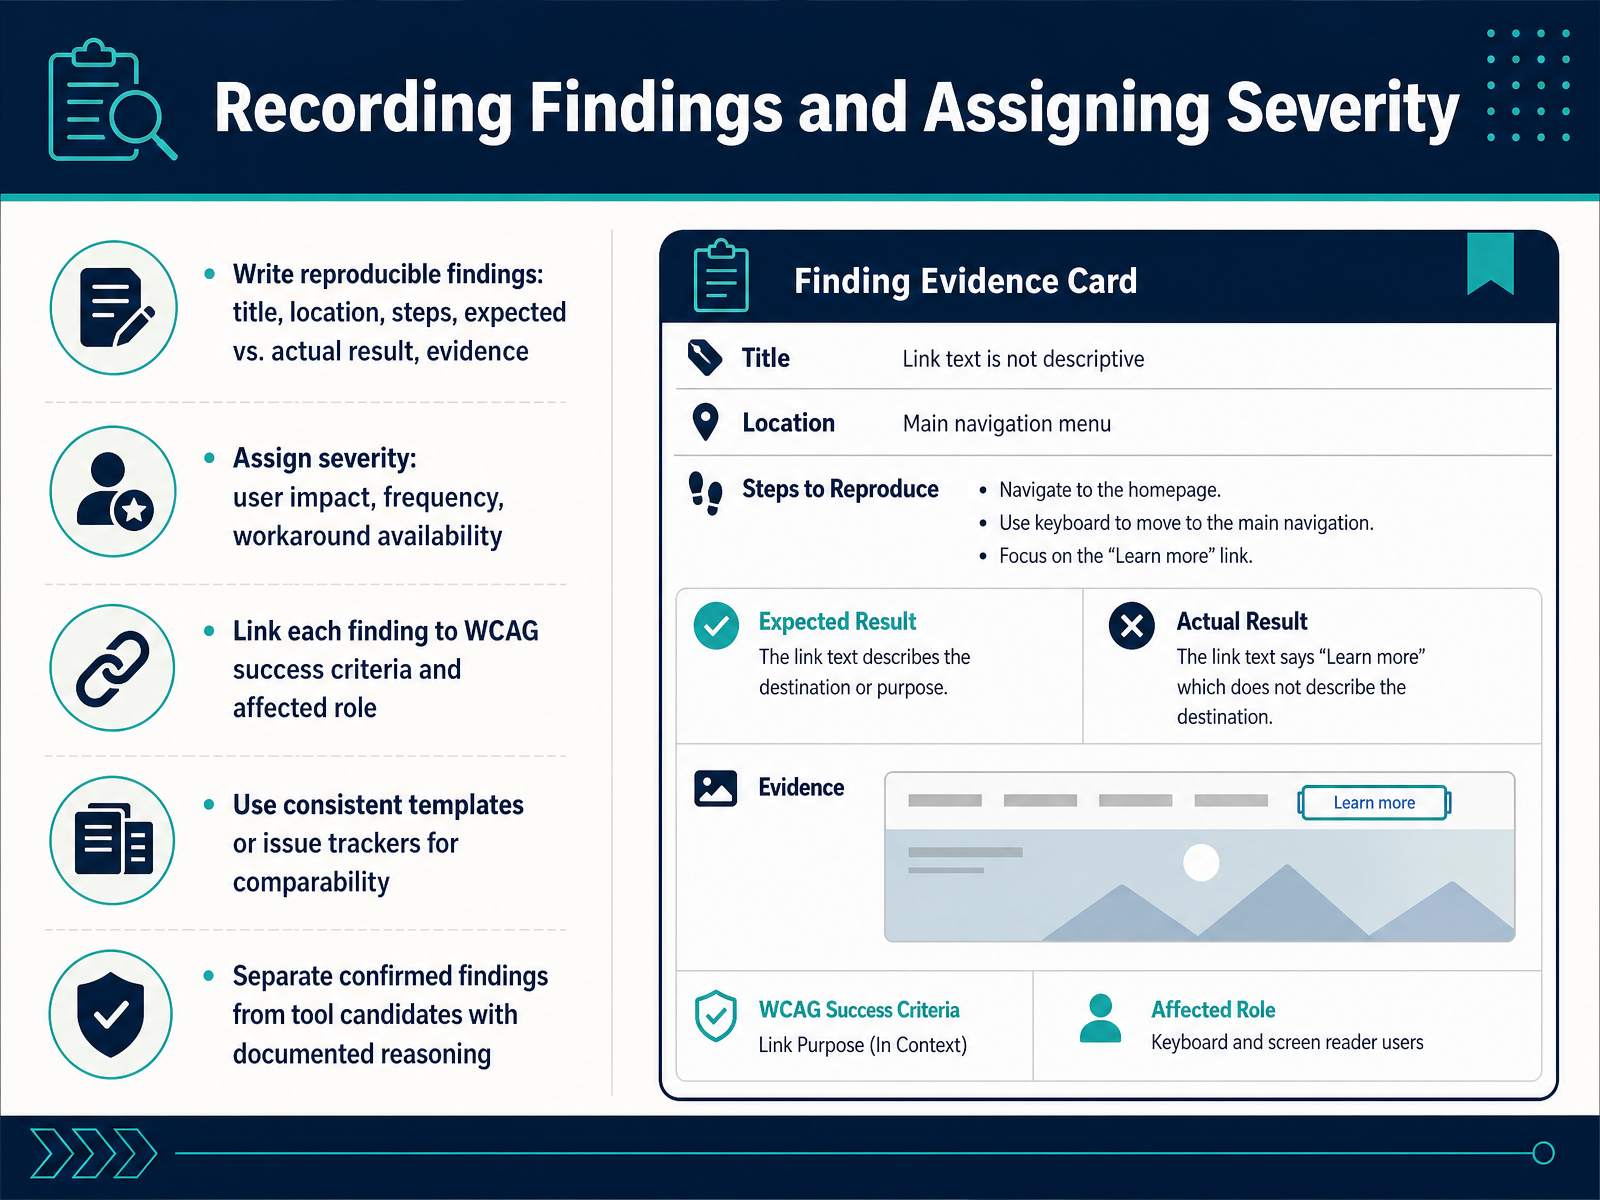
 - 10Recording Findings and Assigning SeverityNow that you've tested, the real work begins: recording what you found so someone else can actually act on it. A finding that can't be reproduced isn't actionable — it's just an opinion. Write every issue with a clear title, the exact location, steps to reproduce, and what you expected versus what actually happened. Add evidence: a screenshot, a code snippet, or a screen reader log. That's what makes it concrete. Then assign severity. Don't guess. Use three factors: how badly it blocks users, how often they hit it, and whether a workaround exists. A keyboard trap on the checkout flow is critical. A slightly off heading hierarchy is minor. Link each finding to the specific WCAG success criteria and the role that owns the fix. Use a consistent template or issue tracker so findings are comparable over time. And be honest about the source. If an automated tool flagged something, but you haven't confirmed it manually, label it as a candidate — not a confirmed finding. Document your reasoning. Your report is only as defensible as your process. Keep it structured, and the path to fixing will be clear. Up next, we'll turn that structured list into a real remediation plan.
 accessibility.buildwebaim.orgsection508.gov+21 min
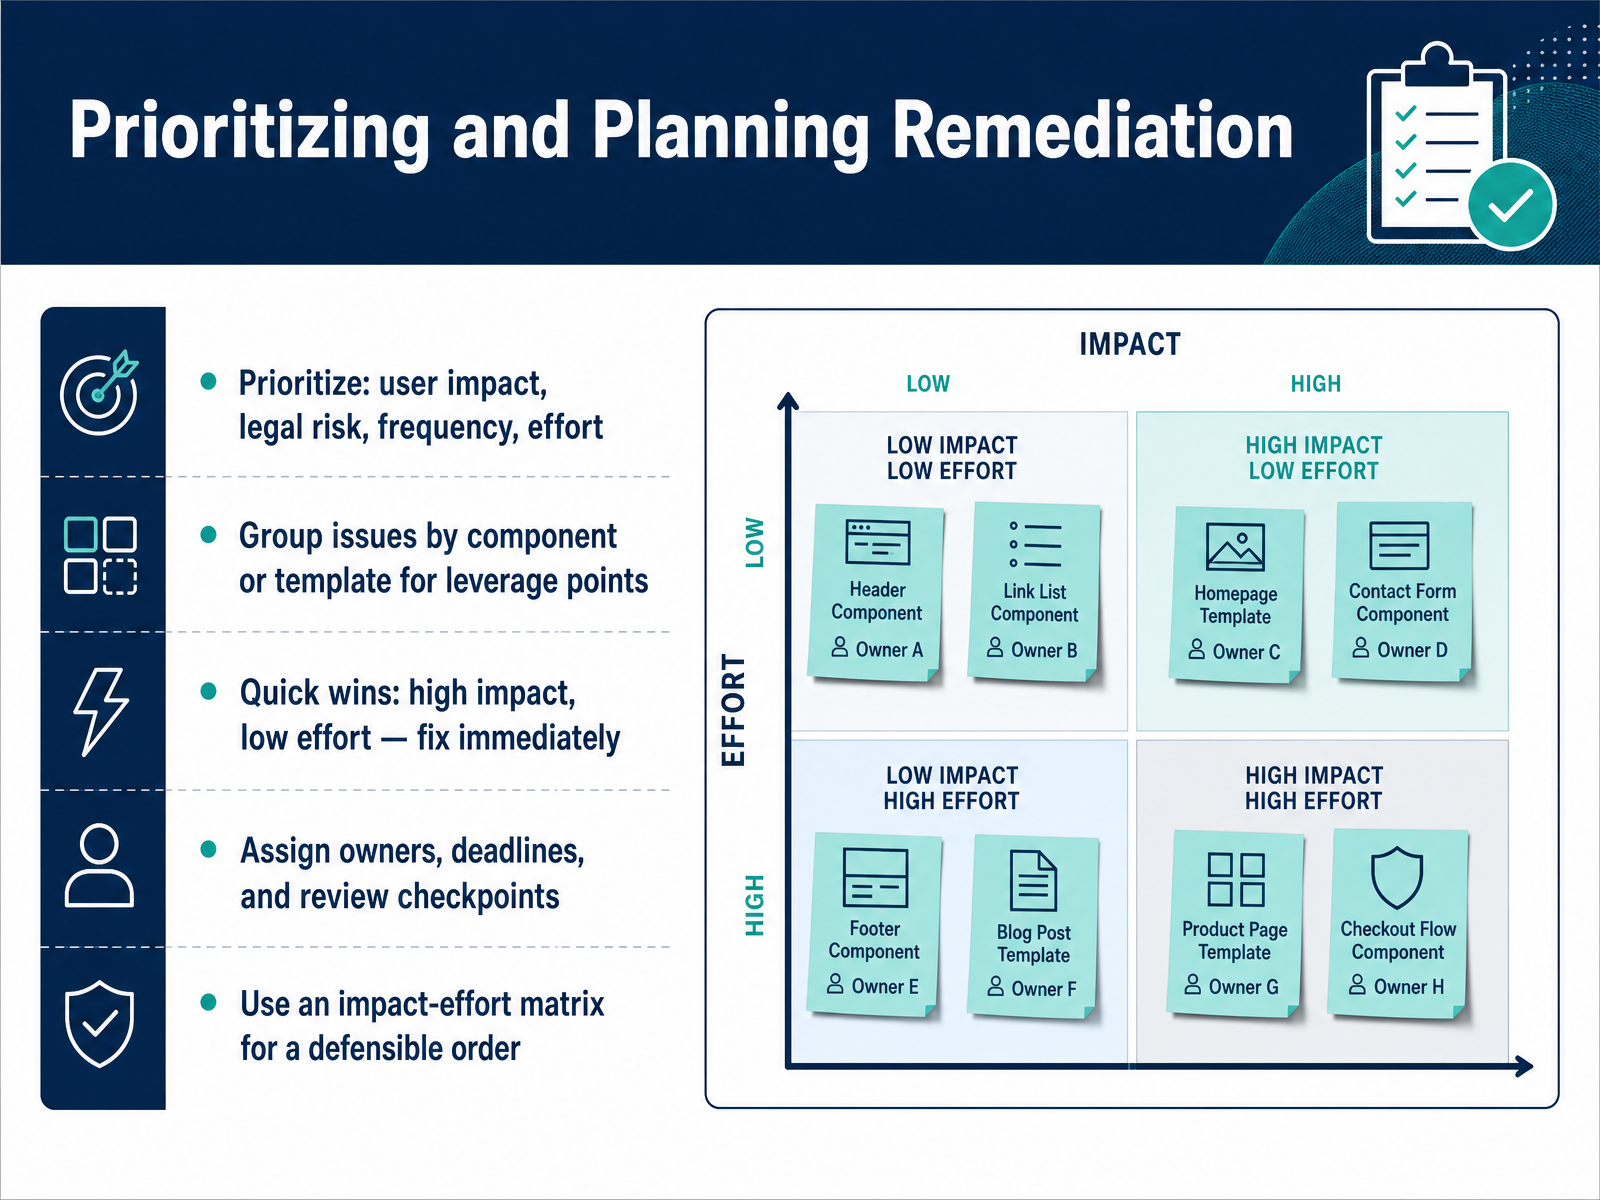
 - 11Prioritizing and Planning RemediationNow let's turn the audit findings into a clear action plan. Prioritizing remediation is where you move from a long list of issues to a focused schedule that your team can actually execute. Start by scoring each issue across four factors: user impact, legal risk, frequency, and effort. User impact looks at whether the issue blocks someone from completing a core task. Legal risk covers issues that are commonly cited in complaints. Frequency checks how many pages or components are affected. Effort is the honest engineering estimate. For a defensible order, plot these on an impact-effort matrix. High-impact, low-effort items are your quick wins, and you should fix those immediately. Then group remaining issues by component or template. Fixing a header once clears the same defect on every page. Assign owners, deadlines, and checkpoints so each fix is validated and doesn't slip. This structured approach turns an overwhelming backlog into a sequence your team can trust. Next, we'll cover how to verify those fixes and prevent regressions.
 accessibility.buildwebaim.orgsection508.gov+21 min
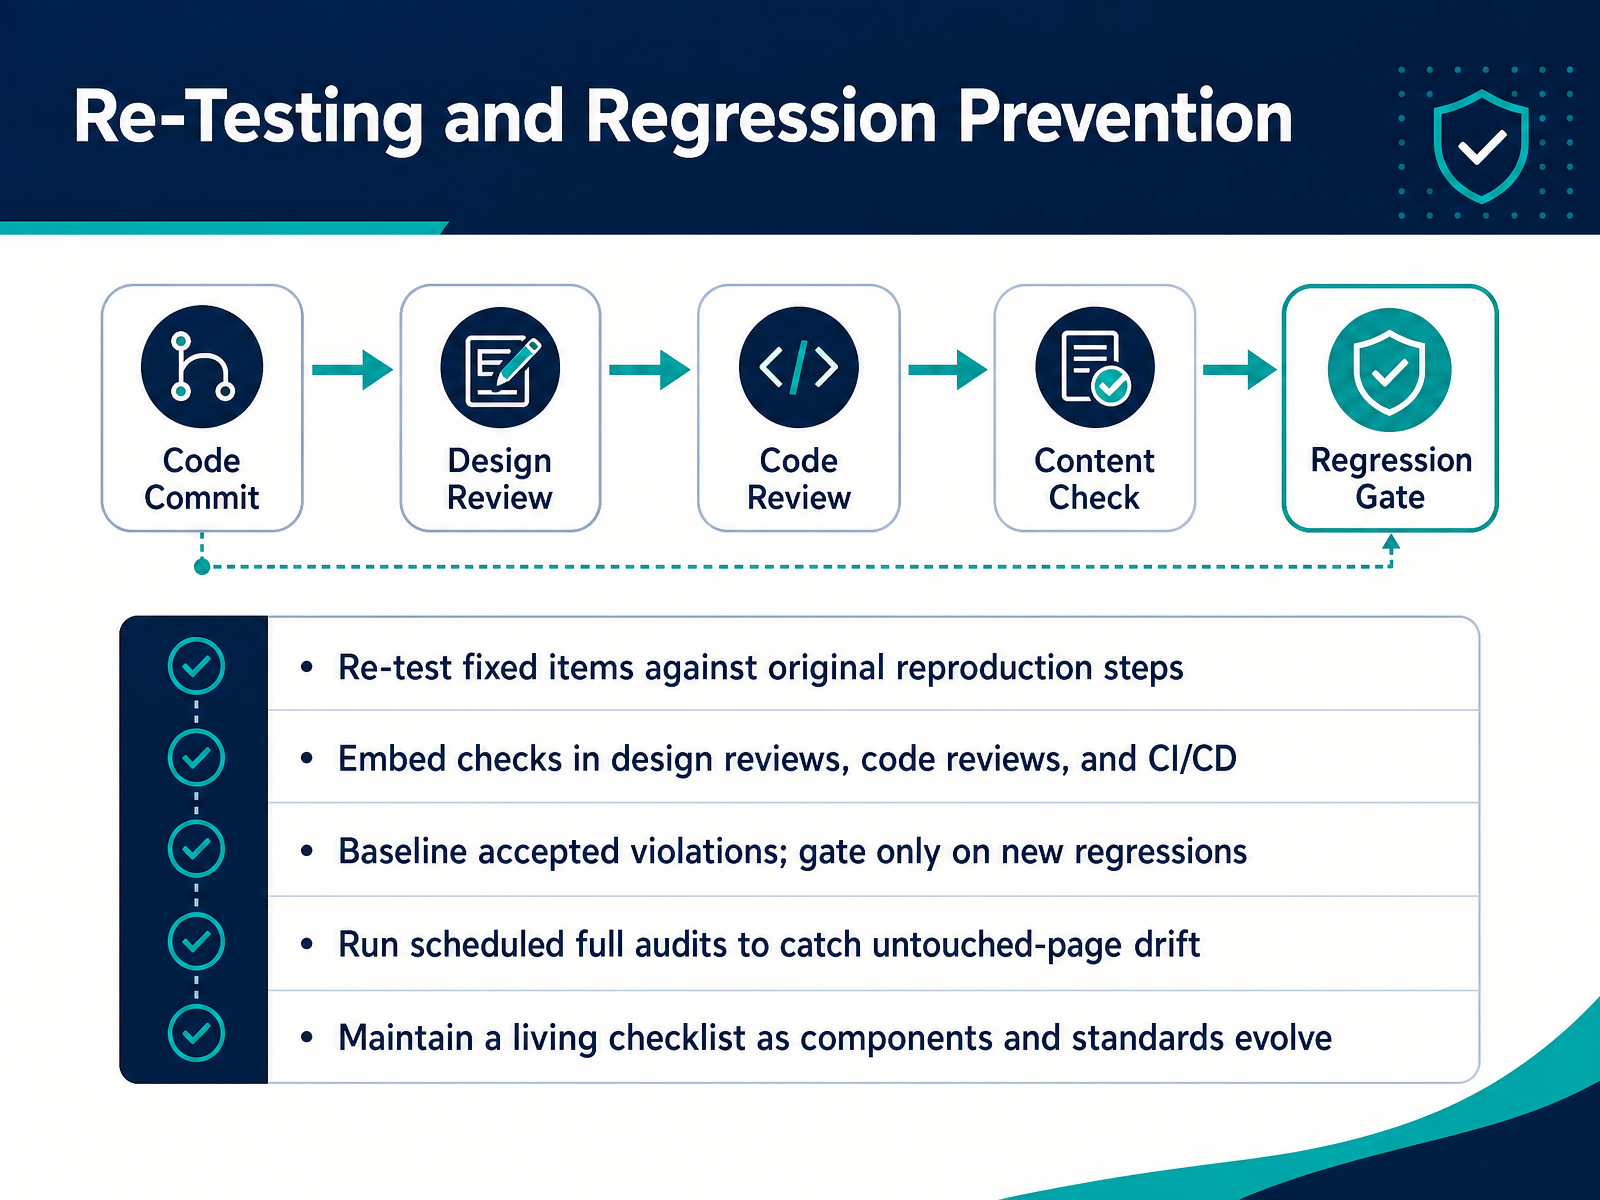
 - 12Re-Testing and Regression PreventionNow we move to the part that makes your audit durable: re-testing and preventing regressions. A fix is only real once you confirm it against the original reproduction steps. Do not trust the code change alone. Run the exact scenario that failed before and watch it pass now. Next, embed these checks into your daily workflow. Add them to design reviews, code reviews, and your CI pipeline. This is how accessibility stops being a one-time project and becomes part of how you build. You will have existing violations. That is normal. Create a baseline of the ones you accept for now, and set your gate to block only new regressions. This keeps the team moving without letting new problems silently appear. Then run scheduled full audits, at least monthly or nightly if you can. Your pull request checks only see changed pages. Untouched pages can drift through content updates or dependency bumps. A scheduled sweep catches that drift. Keep a living checklist that evolves with your components and standards. As you fix things and as guidelines change, update the checklist. This is a system, not a document. The takeaway is simple: verify each fix, automate what you can, baseline the rest, and schedule full reviews. Do that, and your audit results will hold over time. Next, let's talk about adoption, metrics, and keeping this sustainable.
 accessibility.buildwebaim.orgsection508.gov+22 min
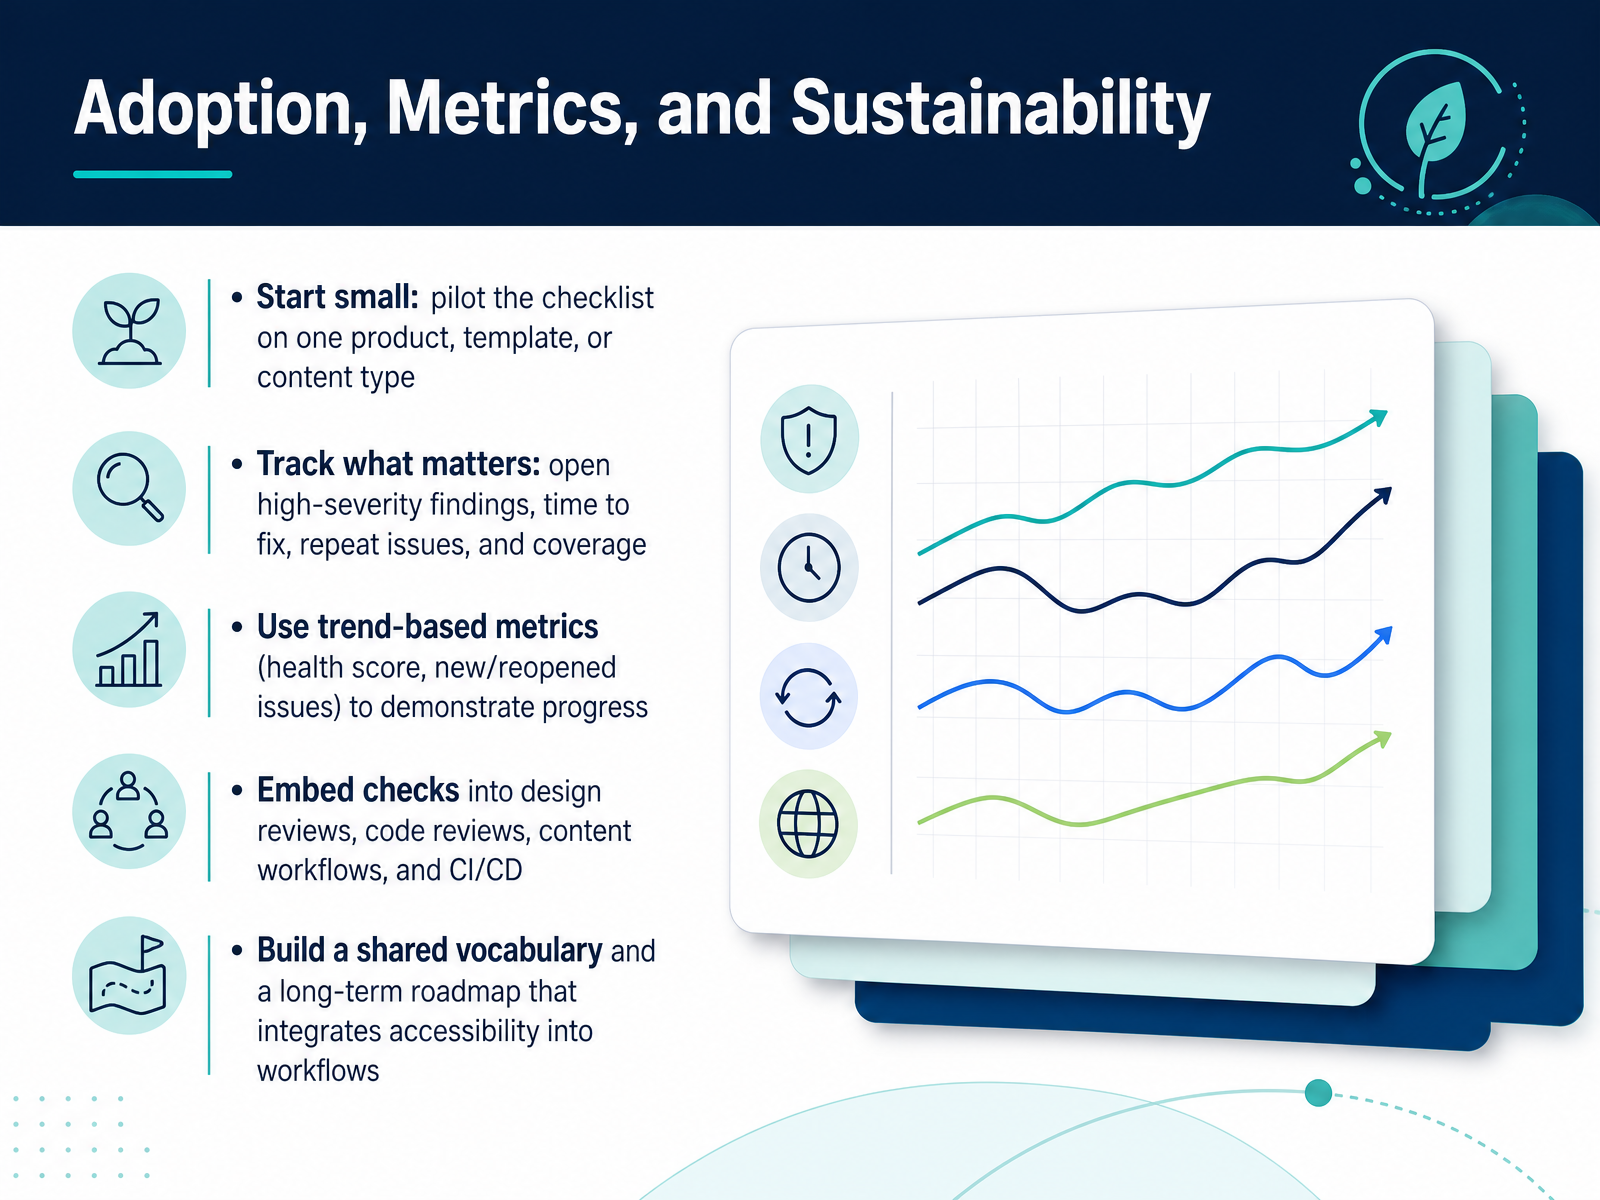
 - 13Adoption, Metrics, and SustainabilityNow let's talk about making the audit stick. Start small. Pilot the checklist on one product, one template, or one content type. This keeps the first pass manageable. Then, track what matters. These are the metrics that count: open high-severity findings, time to fix, repeat issues, and coverage. Coverage means what percentage of your properties have actually been tested. The trend is what tells the story. Track a health score over time, and keep an eye on new versus reopened issues. Reopened issues are costly rework, so watch those closely. Next, embed the checks where the work happens. Put them in design reviews, code reviews, content workflows, and your CI/CD pipeline. This is how you catch issues early, before they ship. Finally, build a shared vocabulary and a long-term roadmap. When designers, developers, and content creators use the same language, accessibility becomes part of the product. Let's look at the resources and next steps to pull this together.
 accessibility.buildwebaim.orgsection508.gov+22 min
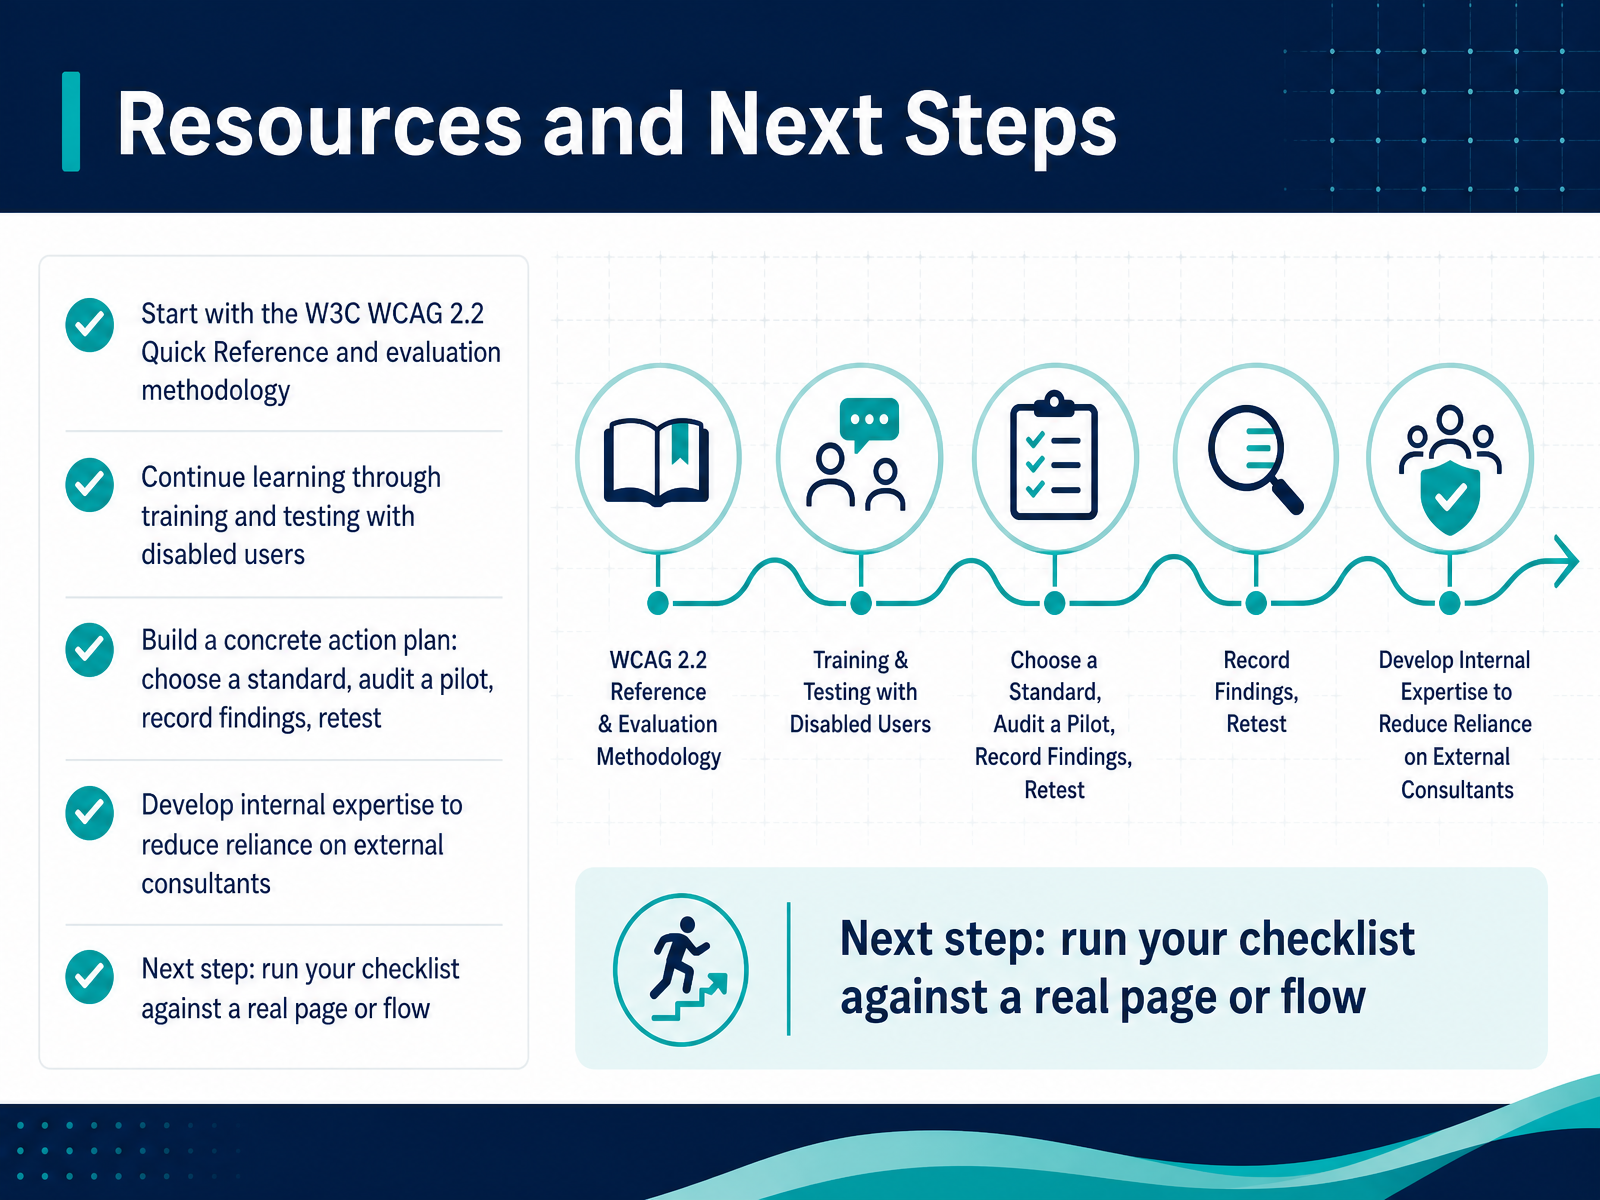
 - 14Resources and Next StepsWe've covered the full audit cycle, so now let's lock in the path forward. Start with the W3C WCAG 2.2 Quick Reference. It's the authoritative filter for success criteria, and it's free. Use it alongside the W3C evaluation methodology to keep your reviews consistent and defensible. Then, keep learning. Pair your checklist with training and, most importantly, testing with disabled users. They will surface issues that no automated tool can catch. Build a concrete action plan. Choose your standard, audit a pilot page, record findings, and then retest after fixes. That loop is your quality engine. Develop internal expertise along the way. This reduces your reliance on external consultants and makes accessibility a core skill, not a vendor dependency. Your next step is simple. Run this checklist against a real page or flow today. Don't wait for the perfect moment. Start small, document what you find, and improve from there. Thank you for your commitment to building a more inclusive web. You have the tools. Now go put them to work.
 w3.orgexceedability.comexceedability.com+22 min
Take the deck with you
Download this course as a file — free, no sign-up needed.
- PDF handoutEvery slide page, ready to print or share.15 pages · 3.5 MBDownload
- Narrated PowerPointThe deck that presents itself — every slide carries the digital human's narration video.15 pages · 25.2 MBDownload
- PowerPoint slidesThe full deck as a .pptx — open it in PowerPoint, Keynote, or Google Slides.15 pages · 3.4 MBDownload
Free to use in your own training — please keep the PersonWise credit page at the end.
Have your own deck? Turn it into a course
Sources consulted
Web sources consulted while building this course.
- How to Meet WCAG (Quick Reference) - W3C — w3.org
- https://exceedability.com/wcag-quick-reference.html — exceedability.com
- https://exceedability.com/wcag-criteria-search.html — exceedability.com
- How to Meet WCAG (Quickref Reference) — w3.org
- WCAG 2.2 Checklist & Quick Reference | Inclusense — inclusense.eu
- Automated vs Manual Accessibility Testing: A Full Comparison | ADA Compliance Pros — adacompliancepros.com
- Manual vs Automated Accessibility Testing | IAAP Audit — iaapaudit.com
- Automated vs Manual Accessibility Testing: The Data | A11yFlow — a11yflow.dev
- Comparing Manual and Free Automated WCAG Reviews — Adrian Roselli — adrianroselli.com
- How accessibility programs benefit from both manual and ... — deque.com
- How to Audit a Website for Accessibility (2026): Step-by-Step WCAG Guide | Accessibility.build — accessibility.build
- WebAIM: WebAIM's WCAG 2 Checklist — webaim.org
- Guide to Accessible Web Design & Development - Section508.gov — section508.gov
- How to Conduct a Thorough Digital Accessibility Audit — bemyeyes.com
- WCAG 2.2 Accessibility Audit Checklist 2026 for Web Teams — digitalapplied.com
- How Big Should an Accessibility Audit Sample Be? | Accessibility.build — accessibility.build
- Website Accessibility Conformance Evaluation Report — accessiblepixels.com
- How Many Pages Should Be in Your Accessibility Audit Scope — accessible.org
- How to Conduct an Accessibility Audit | Accessible.org — accessible.org
- What to Include in an Accessibility Audit Scope — accessible.org