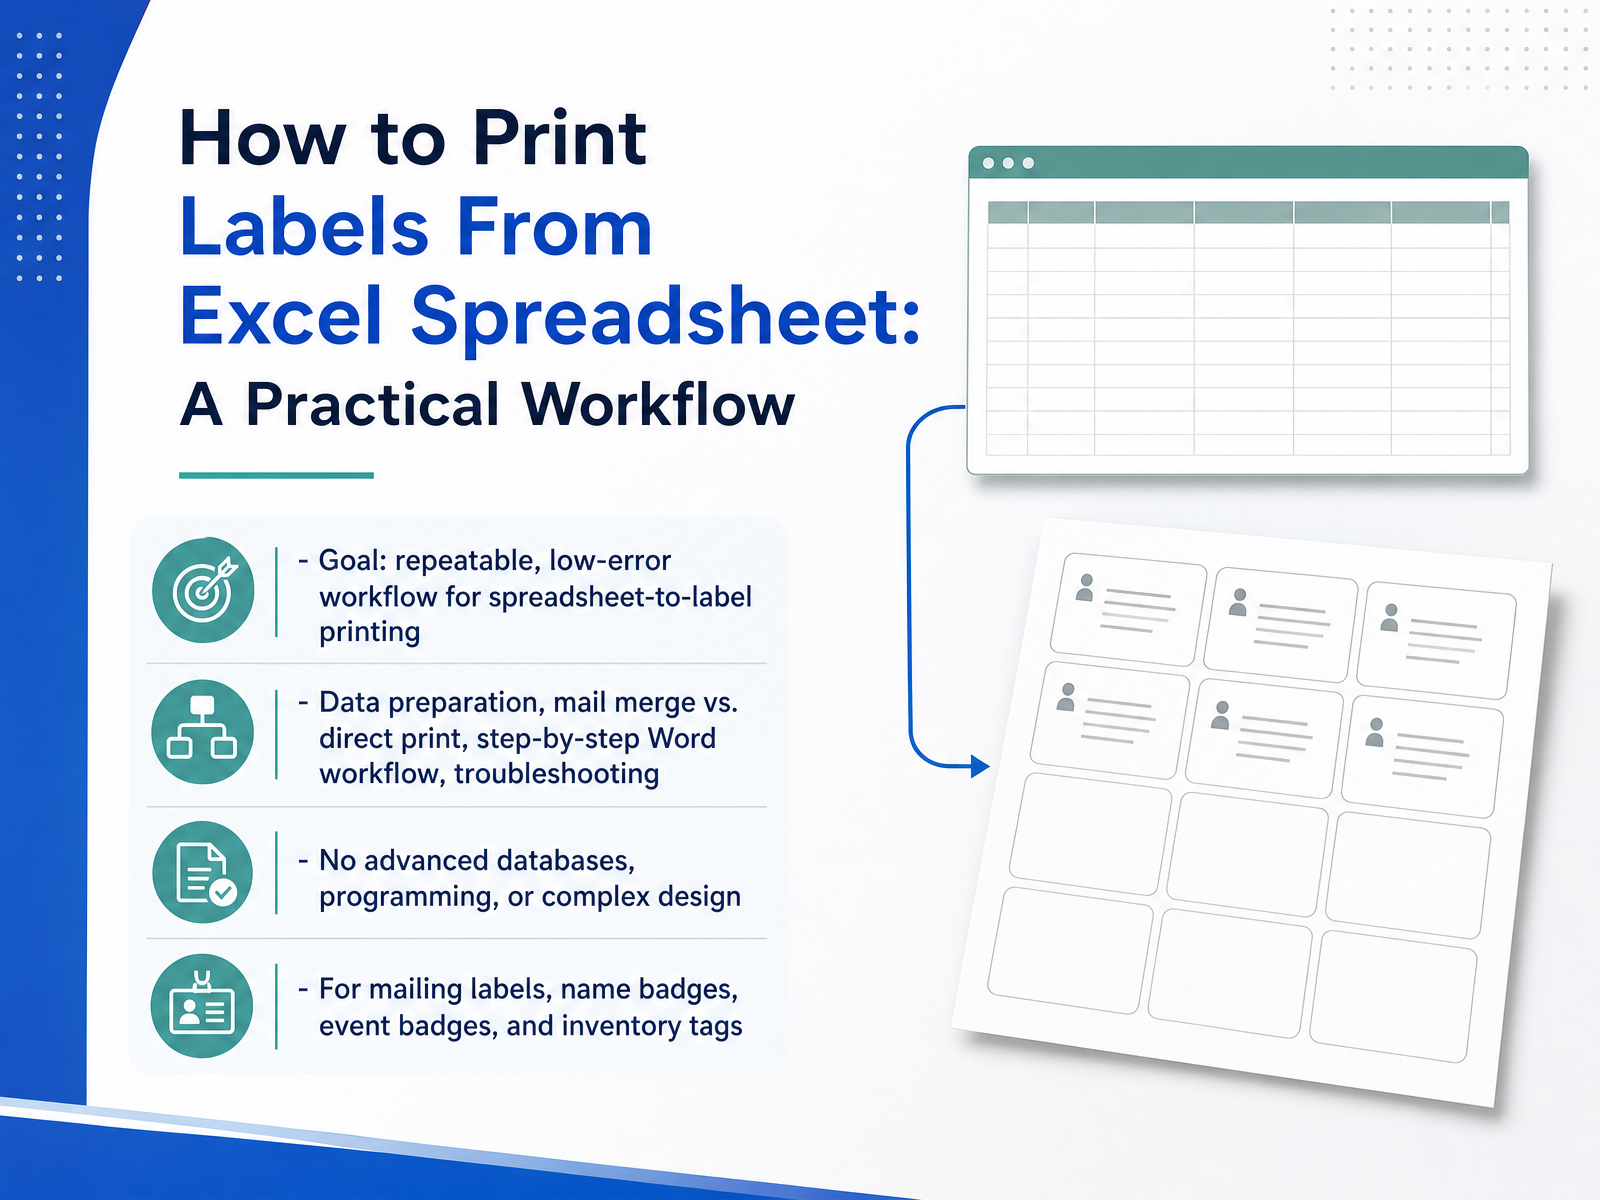
Print Labels from Excel: Practical Workflow
Begin
14 pages · ~28 min
Print Labels from Excel: Practical Workflow
Learn a practical workflow for printing labels directly from an Excel spreadsheet, perfect for professionals preparing mailings or product labels efficiently.
What you’ll learn
- 01How to Print Labels From Excel Spreadsheet: A Practical WorkflowWelcome. If you've ever needed to print labels from a spreadsheet, you know it can feel fiddly. Maybe you've wasted a sheet of expensive label stock on a misaligned test print. This course fixes that. Our goal is a repeatable, low-error workflow. Whether you're printing mailing labels, name badges, or inventory tags, the process is the same. We'll walk through the practical steps to prep your data correctly the first time. Then we'll compare the two main paths: Word's mail merge versus printing directly from Excel. I'll show you which one to use and why. You won't need any advanced database skills or programming knowledge. Just clean data and a steady workflow. Stick with me, and your next batch of labels will look sharp and line up perfectly, every single time. Now, let's look at the two main paths: mail merge versus direct Excel printing.support.microsoft.compracticetestgeeks.comwisechecker.com+21 min
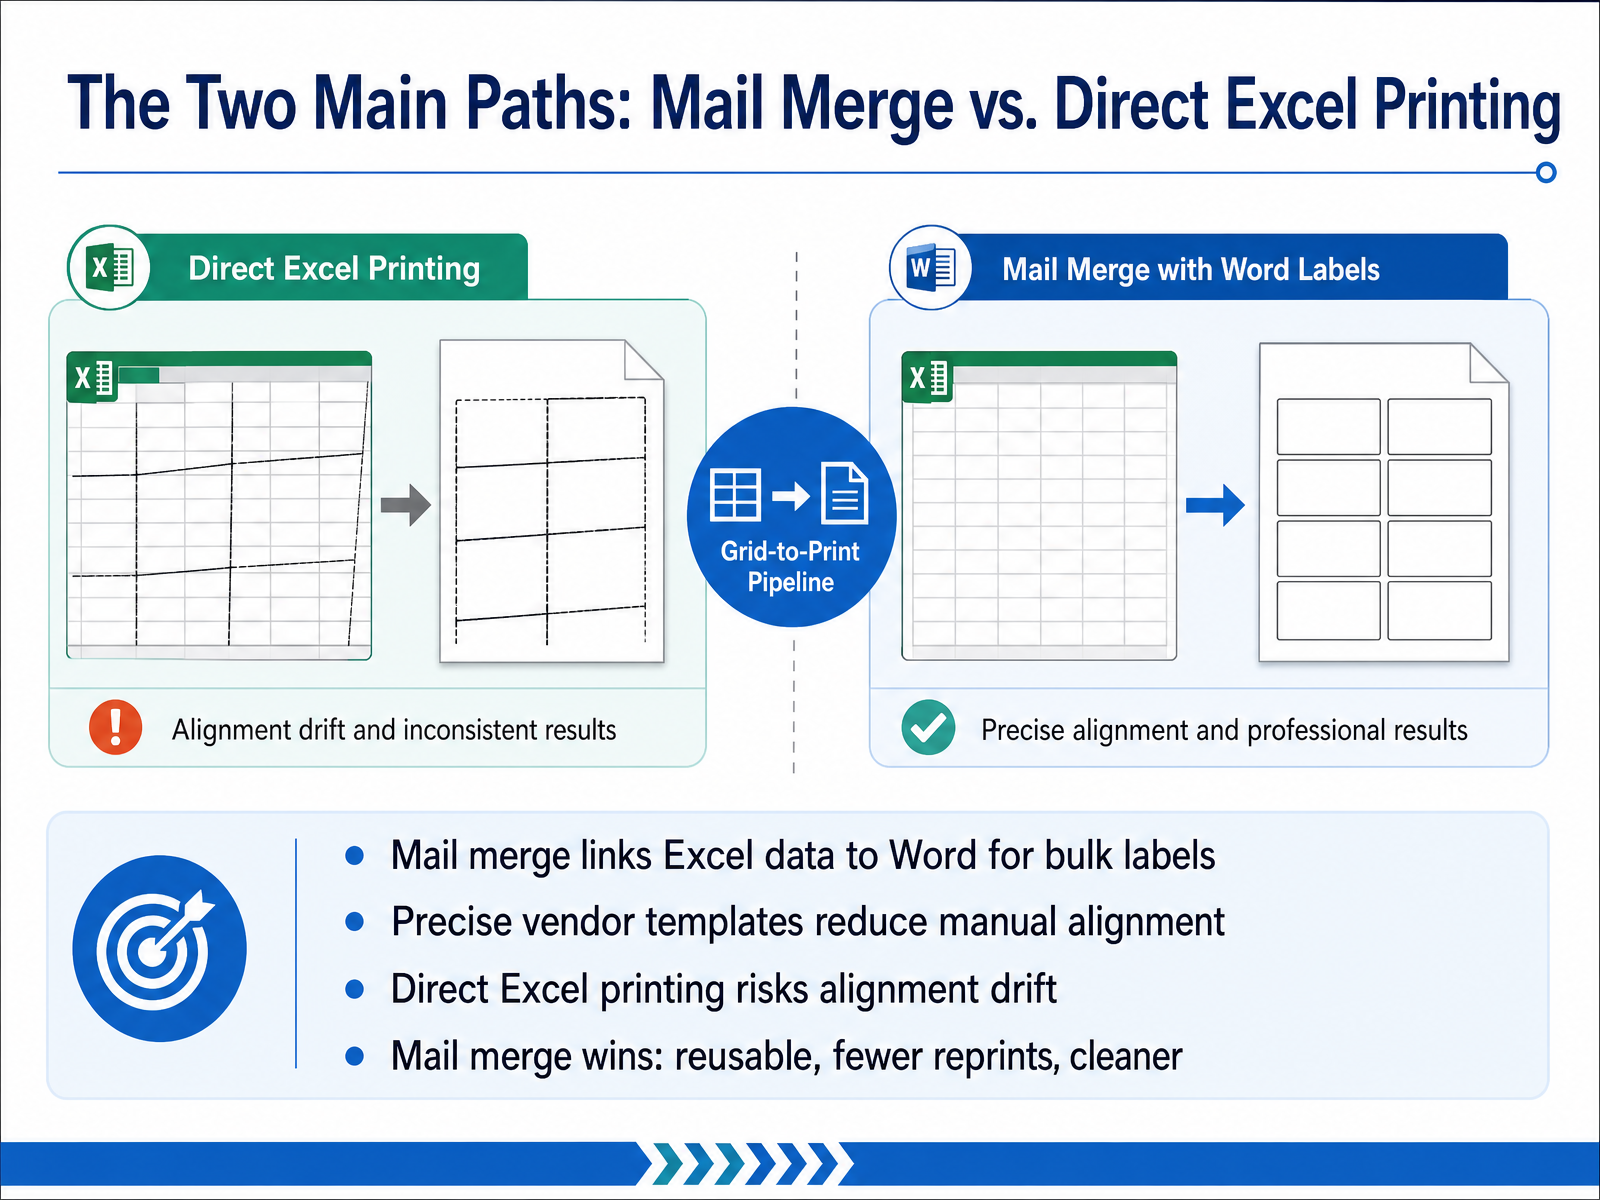
- 02The Two Main Paths: Mail Merge vs. Direct Excel PrintingSo when it comes to printing labels from Excel, you have two main paths. One is direct printing from Excel, where you format rows and columns to match your label sheet. The other is mail merge, which links your Excel data to Word, using precise vendor templates like Avery. Direct printing sounds simpler, but it often causes alignment drift. That means your labels can shift between printers or even between print jobs, and you end up wasting label sheets. Mail merge wins here because it’s built for this. It keeps your data in Excel, where you can manage it easily, and lets Word handle the layout. Once it’s set up, it’s reusable, so next month you just refresh the data and print. Fewer reprints, cleaner results, and far less frustration. For most admin, fulfilment, or event tasks, that’s the route you want. Next, we’ll look at how to prepare your Excel data the right way.
 practicetestgeeks.comrollo.compracticetestgeeks.com+22 min
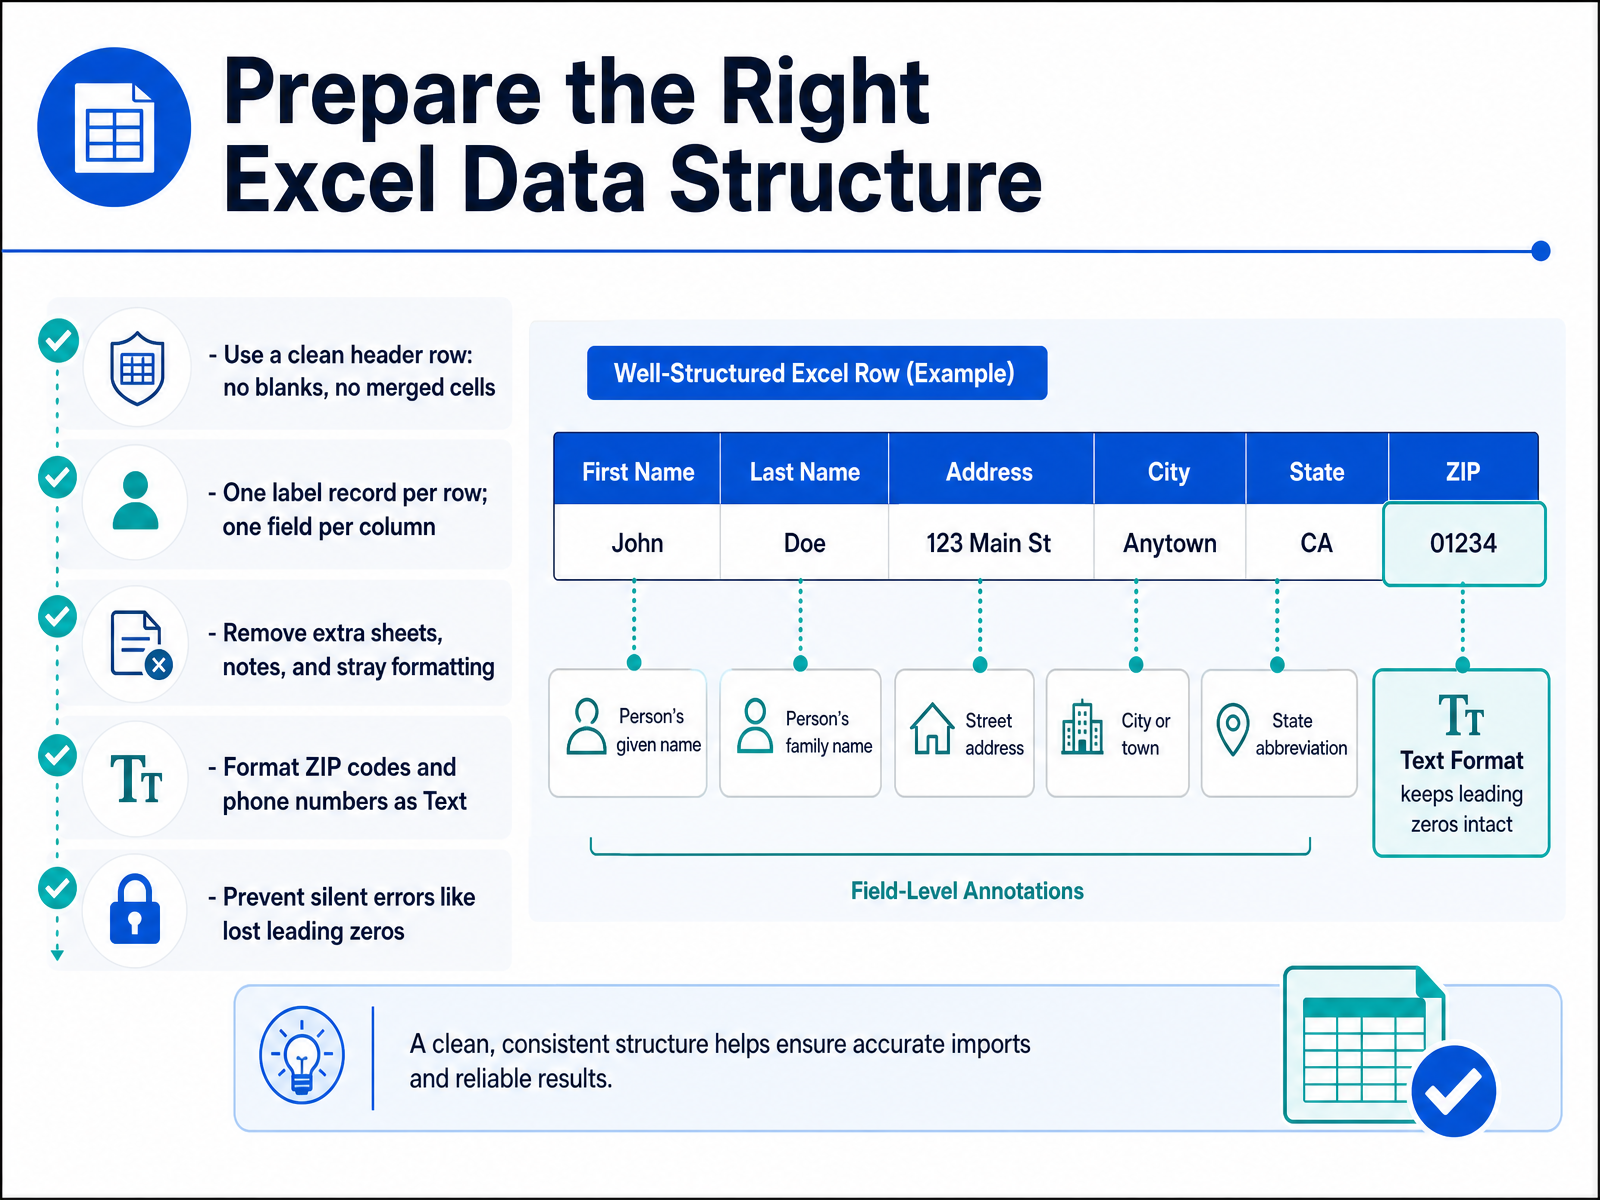
 - 03Prepare the Right Excel Data StructureHere’s the part that saves you the most headache: setting up your Excel data. Word pulls everything from this file, so if your data is messy, your labels will be a mess too. Get this right up front, and you will avoid reprinting entire batches later. Start with one clean sheet. Row one must hold your headers only. Use simple names like First Name, Last Name, Street, City, State, and ZIP. No merged cells and no blank rows. Each remaining row is exactly one label. Each column is exactly one field. That means no stray notes, no extra sheets, and no colorful formatting that might confuse Word. Then, the classic silent error. If you type a ZIP code like zero-one-two-three-four, Excel will quietly drop the leading zero and turn it into a number. Before you type anything, select the ZIP column and format it as Text. Do the same for phone numbers. It takes five seconds and it prevents nasty surprises on the printed page. So, clean headers, no blanks, no merged cells, and format those codes as text. Now, with tidy source data, let's start the label merge in Word.
 support.microsoft.compracticetestgeeks.comwisechecker.com+21 min
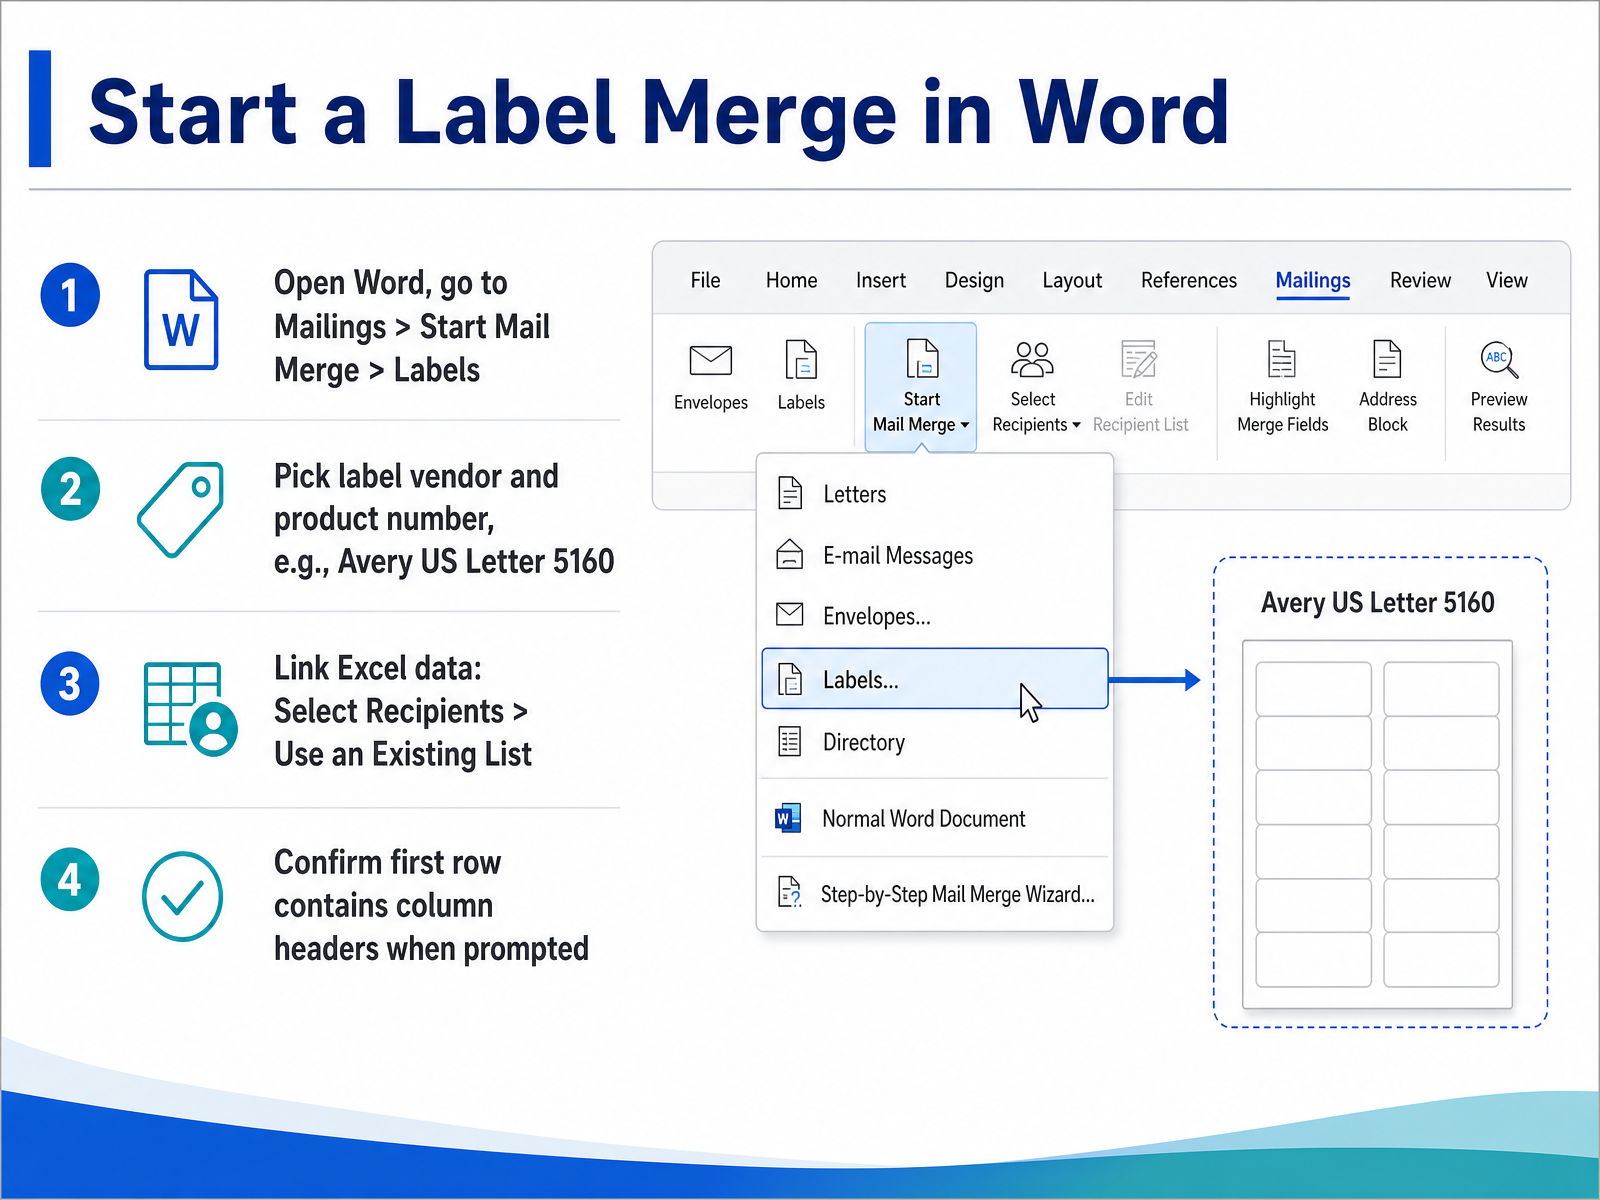
 - 04Start a Label Merge in WordNow we move to Word to start the merge. Open a blank Word document, then go to the Mailings tab on the ribbon. Click Start Mail Merge, and choose Labels. A dialog box will appear asking for your label size. This is where you match Word to the actual paper in your printer. Pick your label vendor from the list, and then scroll to find the product number. For standard address labels, that is usually Avery US Letter, product 5160. If you are not sure, check the packaging. It always lists the vendor and product number. Click OK, and Word will draw a table that matches your label sheet. Now it is time to link your data. Click Select Recipients, then choose Use an Existing List. Browse to the Excel file you prepared on your local machine. When the dialog opens, select the worksheet that holds your mailing list. Make sure the box that says First Row of Data Contains Column Headers is checked. This is important because those headers become the field names you will insert next. Click OK, and Word is now connected to your spreadsheet. Next, we will build the label layout and insert those fields.
 support.microsoft.comsupport.microsoft.comsupport.microsoft.com+22 min
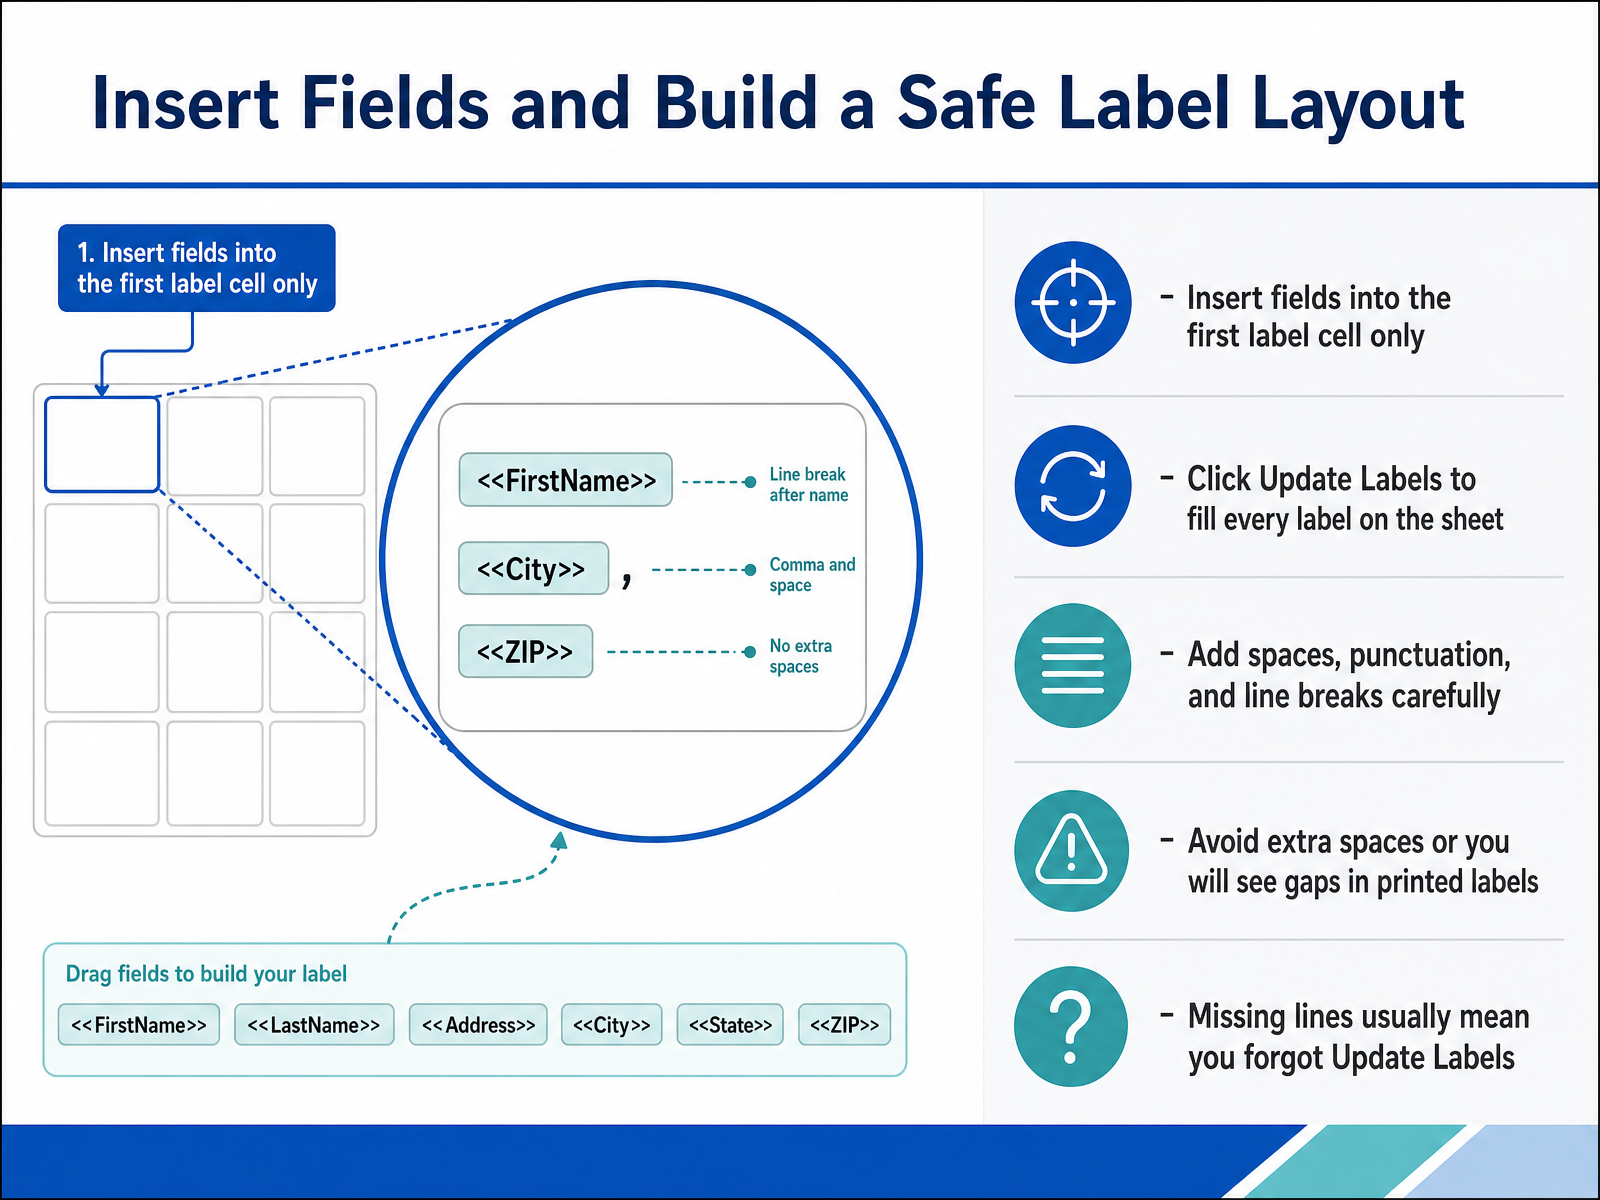
 - 05Insert Fields and Build a Safe Label LayoutNow let's build the label layout. Insert your fields into the first label cell only. Don't build each label by hand. Word will copy the layout for you. Click Update Labels on the Mailings tab. That one click fills every label on the sheet instantly. When you arrange fields like street address, city, and state, add the spaces and commas exactly where they need to be. Do not add extra spaces. Extra spaces create visible gaps on the printed labels. Also, keep line breaks intentional. One blank line here might be fine in an email, but it will ruin a batch of labels. If you see blank or missing lines on your sheet, check your first label cell first. Nine times out of ten, it means you forgot to click Update Labels. It is the most common mistake in this workflow. So remember: build once, update once, and let Word handle the repetition. Next, we will preview the results and spot-check a few records before anything touches the printer.
 support.microsoft.compracticetestgeeks.comwisechecker.com+21 min
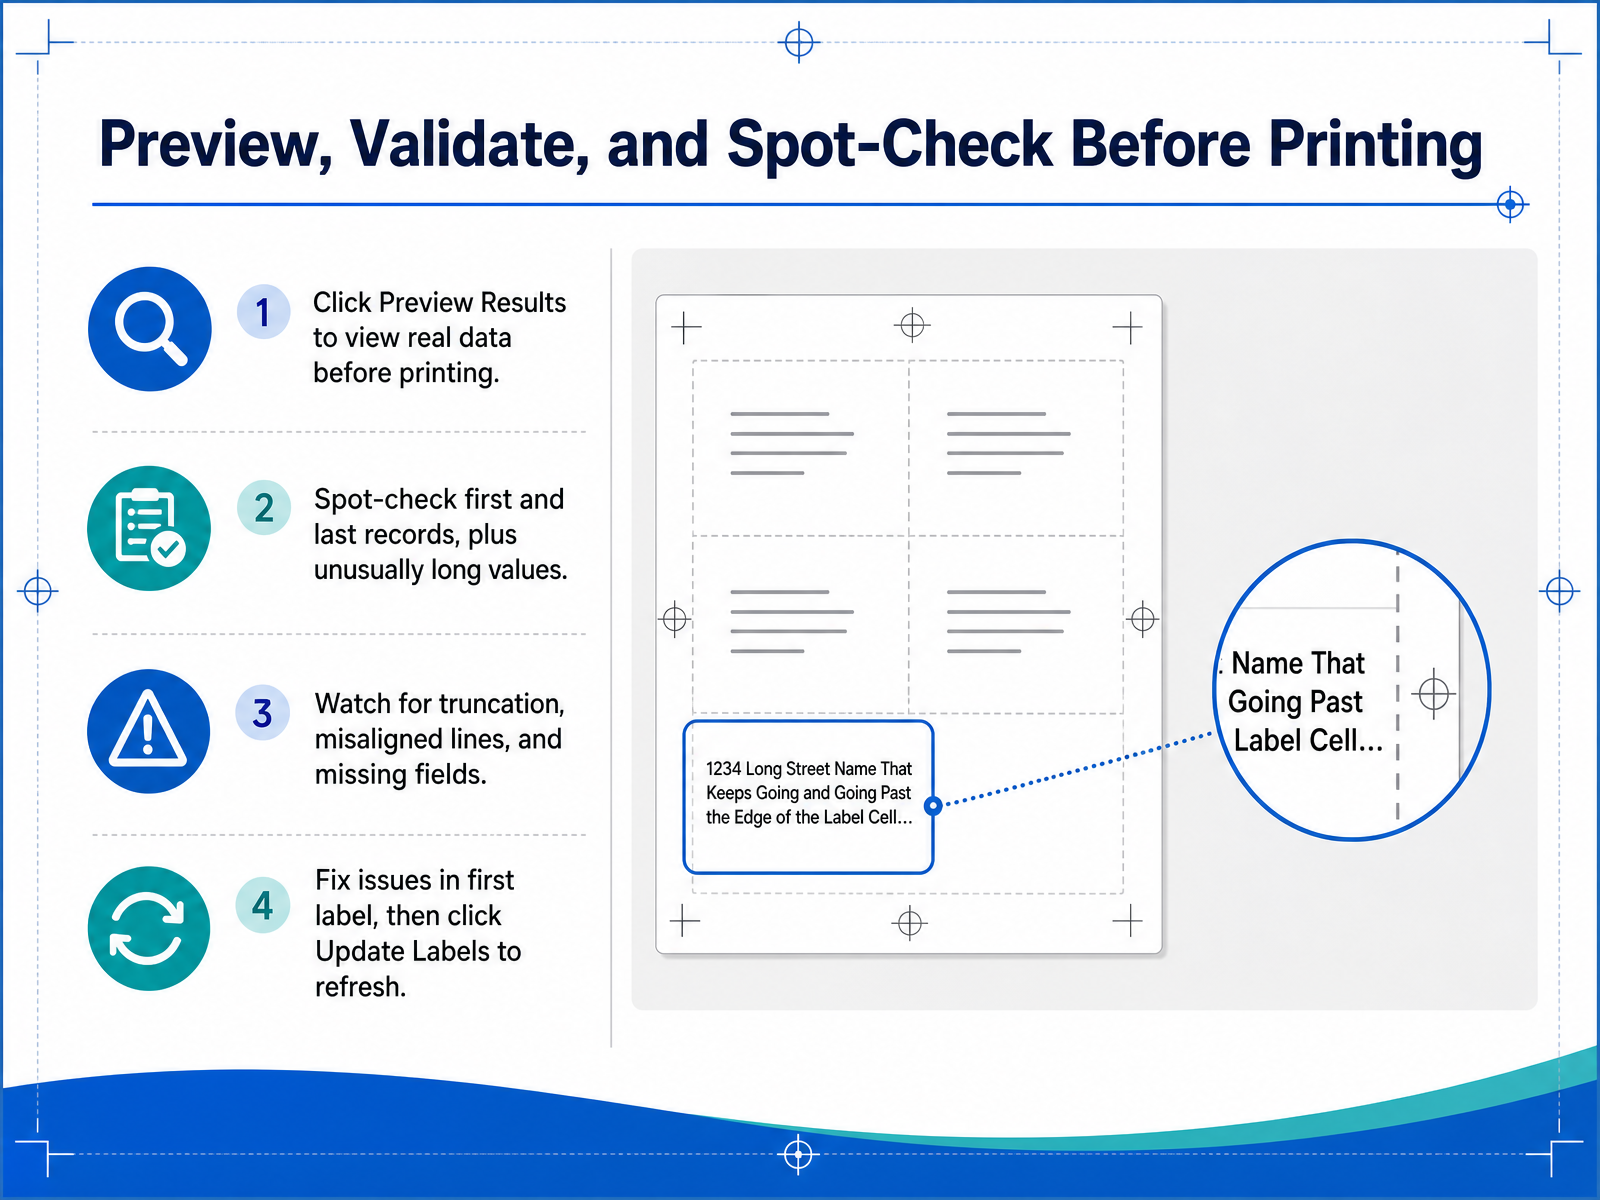
 - 06Preview, Validate, and Spot-Check Before PrintingNow let's preview and validate before you commit to printing. Click Preview Results to see your real data on the labels. Don't just look at the first one. Spot-check the first record, the last record, and any entries with unusually long values. You are looking for truncation, misaligned lines, and missing fields. If you catch an issue, fix it in that first label cell only. Then click Update Labels. That refreshes the whole batch. This is your safety check. It costs one minute of review to save you from an entire sheet of wasted label stock. Next, we'll cover printing a test page and adjusting your printer settings.
 support.microsoft.compracticetestgeeks.comwisechecker.com+21 min
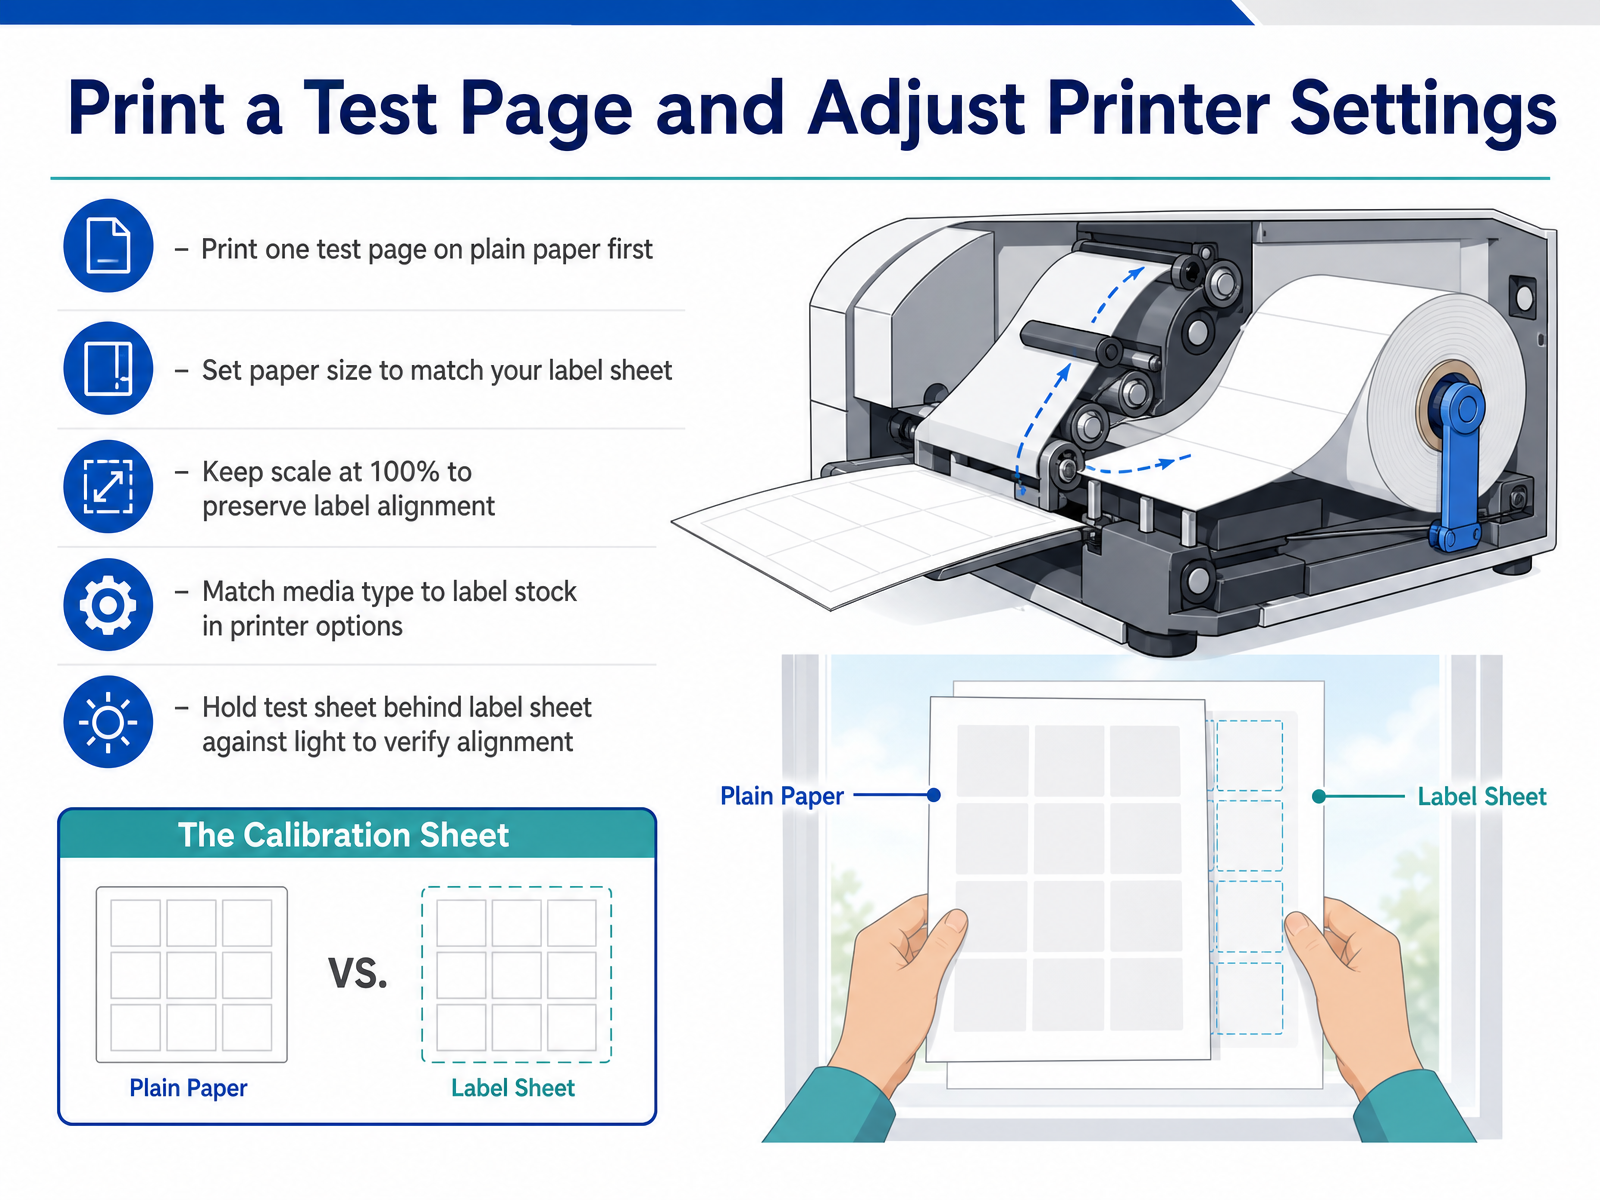
 - 07Print a Test Page and Adjust Printer SettingsBefore you load that expensive label stock, print one test page on plain paper. This is your safety check. Open your print dialog and set the paper size to match your label sheet exactly. This is one of the most common sources of misalignment. Next, keep the scale at one hundred percent. If you let your printer shrink or stretch the page, even by a few percent, your alignment will drift with every row. Look for anything that says fit to page, and turn it off. You also want to match the media type in your printer options. If plain paper is selected, your printer may handle the sheet incorrectly or cause smudging. After the test page prints, hold it behind a blank label sheet and lift it to a bright light. This lets you see if the text lines up with the actual sticker borders. Check the top, middle, and bottom rows. If everything lines up, you are ready to load the label stock. If not, fix the settings now, not after wasting a whole batch. Once this test looks good, you will want to save these exact settings so you can reuse them for future label jobs.
 avery.comsheetstolabels.comhp.com+22 min
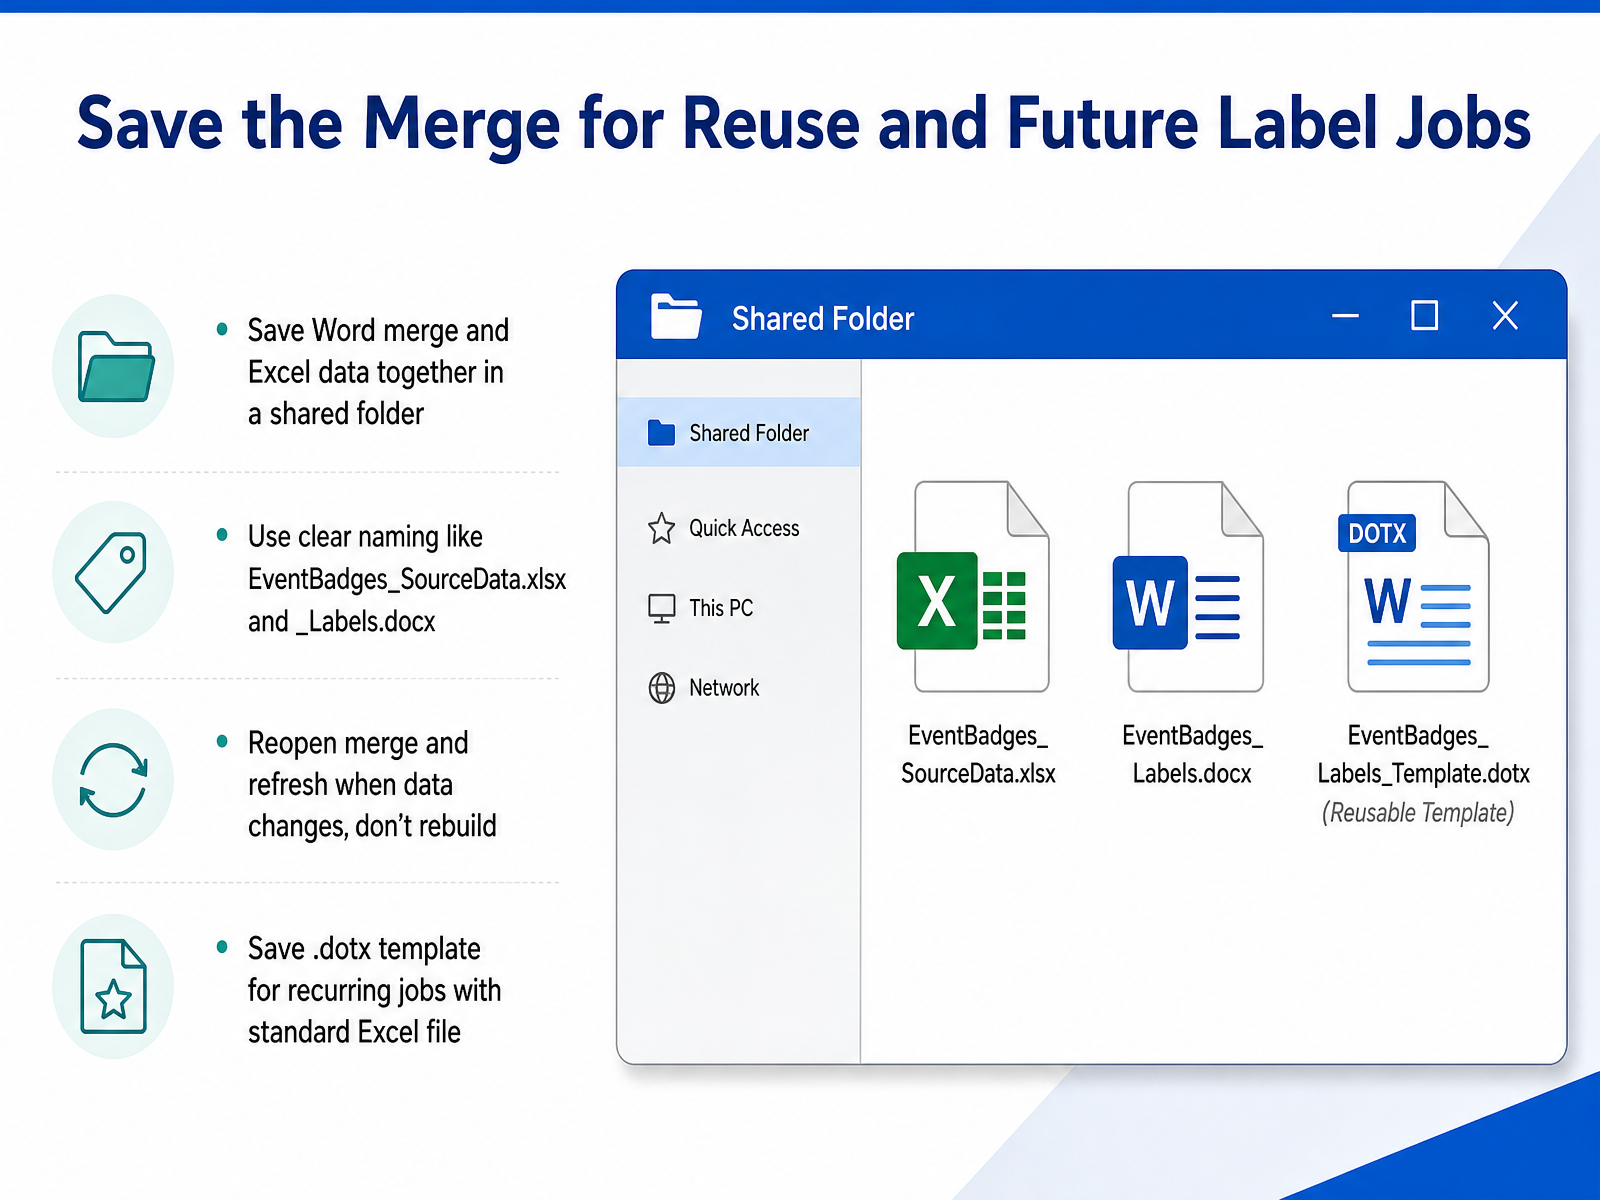
 - 08Save the Merge for Reuse and Future Label JobsLet’s talk about saving your work so you never have to rebuild this from scratch. Keep the Word merge and the Excel data file together in one shared folder. Name them clearly, something like EventBadges_SourceData.xlsx and EventBadges_Labels.docx. That way, anyone on the team knows exactly which data file feeds which label job. When your list changes, don’t rebuild the merge. Just open the Word document, say yes to keeping the connection, and refresh the data. If you run the same label job regularly, save your Word setup as a dotx template. Pair it with a standard Excel file your team uses every time. Next time, you only open the template, connect the new list, and print. That turns a fifteen-minute setup into a two-minute task. A little planning now saves you a full reprint later. Next, let’s look at troubleshooting common label printing problems.
 support.microsoft.comsupport.microsoft.comsupport.microsoft.com+21 min
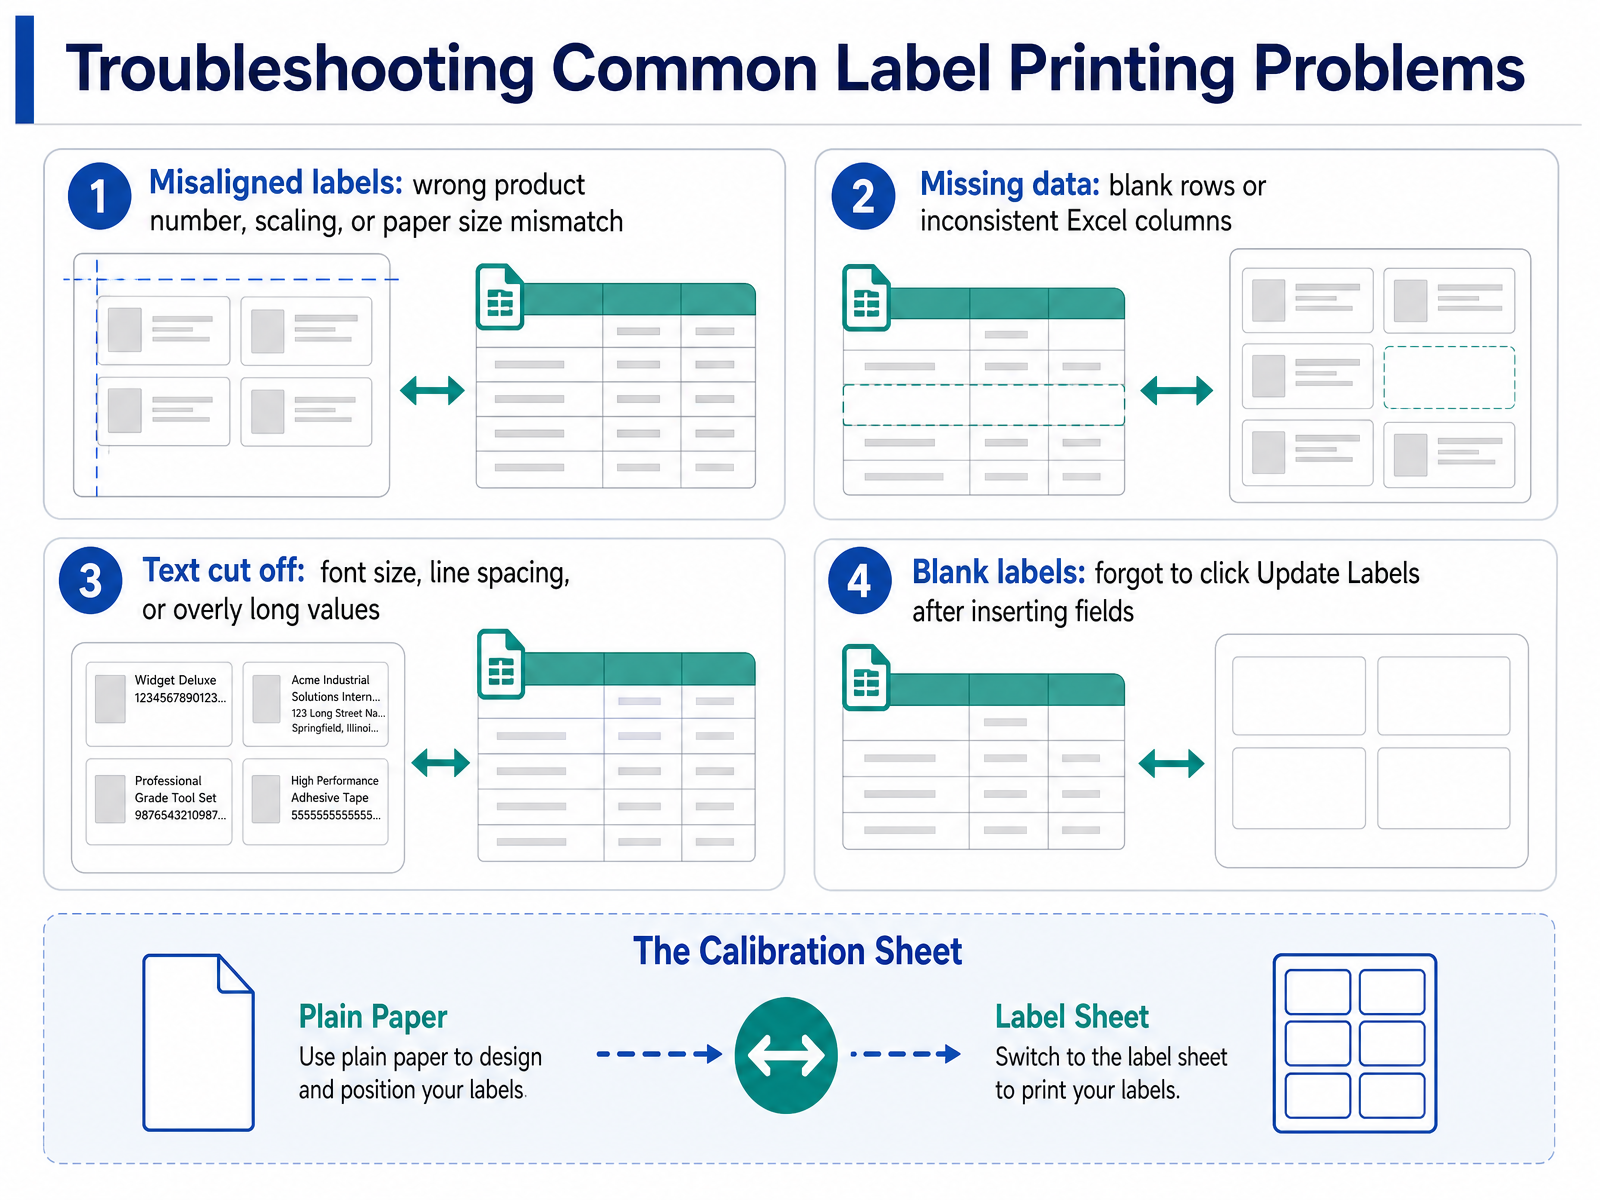
 - 09Troubleshooting Common Label Printing ProblemsLet’s walk through the usual suspects when labels don’t come out right. Most issues trace back to one of four things. First, misalignment. This usually means the label product number in Word doesn’t match the physical sheet you loaded. Check the product code on the packaging, compare it to the template, and disable any scale-to-fit or fit-to-page setting in the printer properties. A quick test print on plain paper will confirm the fix before you waste label stock. Second, missing data. Blank rows in the Excel file create blank labels, and inconsistent column headers confuse the merge. Remove empty rows, keep headers simple, and watch for filters hiding records. Third, text getting cut off. This happens when values are too long or the font and spacing are set too large. Shorten the data, reduce the font size, or adjust line spacing within the first label cell. And fourth, blank labels across the entire sheet. That usually means you inserted the fields but forgot to click Update Labels. After you build the first label, always click Update Labels so the layout repeats across the whole sheet. A final tip: always preview results and scan a few records before printing. It takes seconds and prevents a full reprint. Next, we’ll wrap everything into a repeatable workflow summary and checklist you can reuse for every batch.
 support.microsoft.compracticetestgeeks.comwisechecker.com+22 min
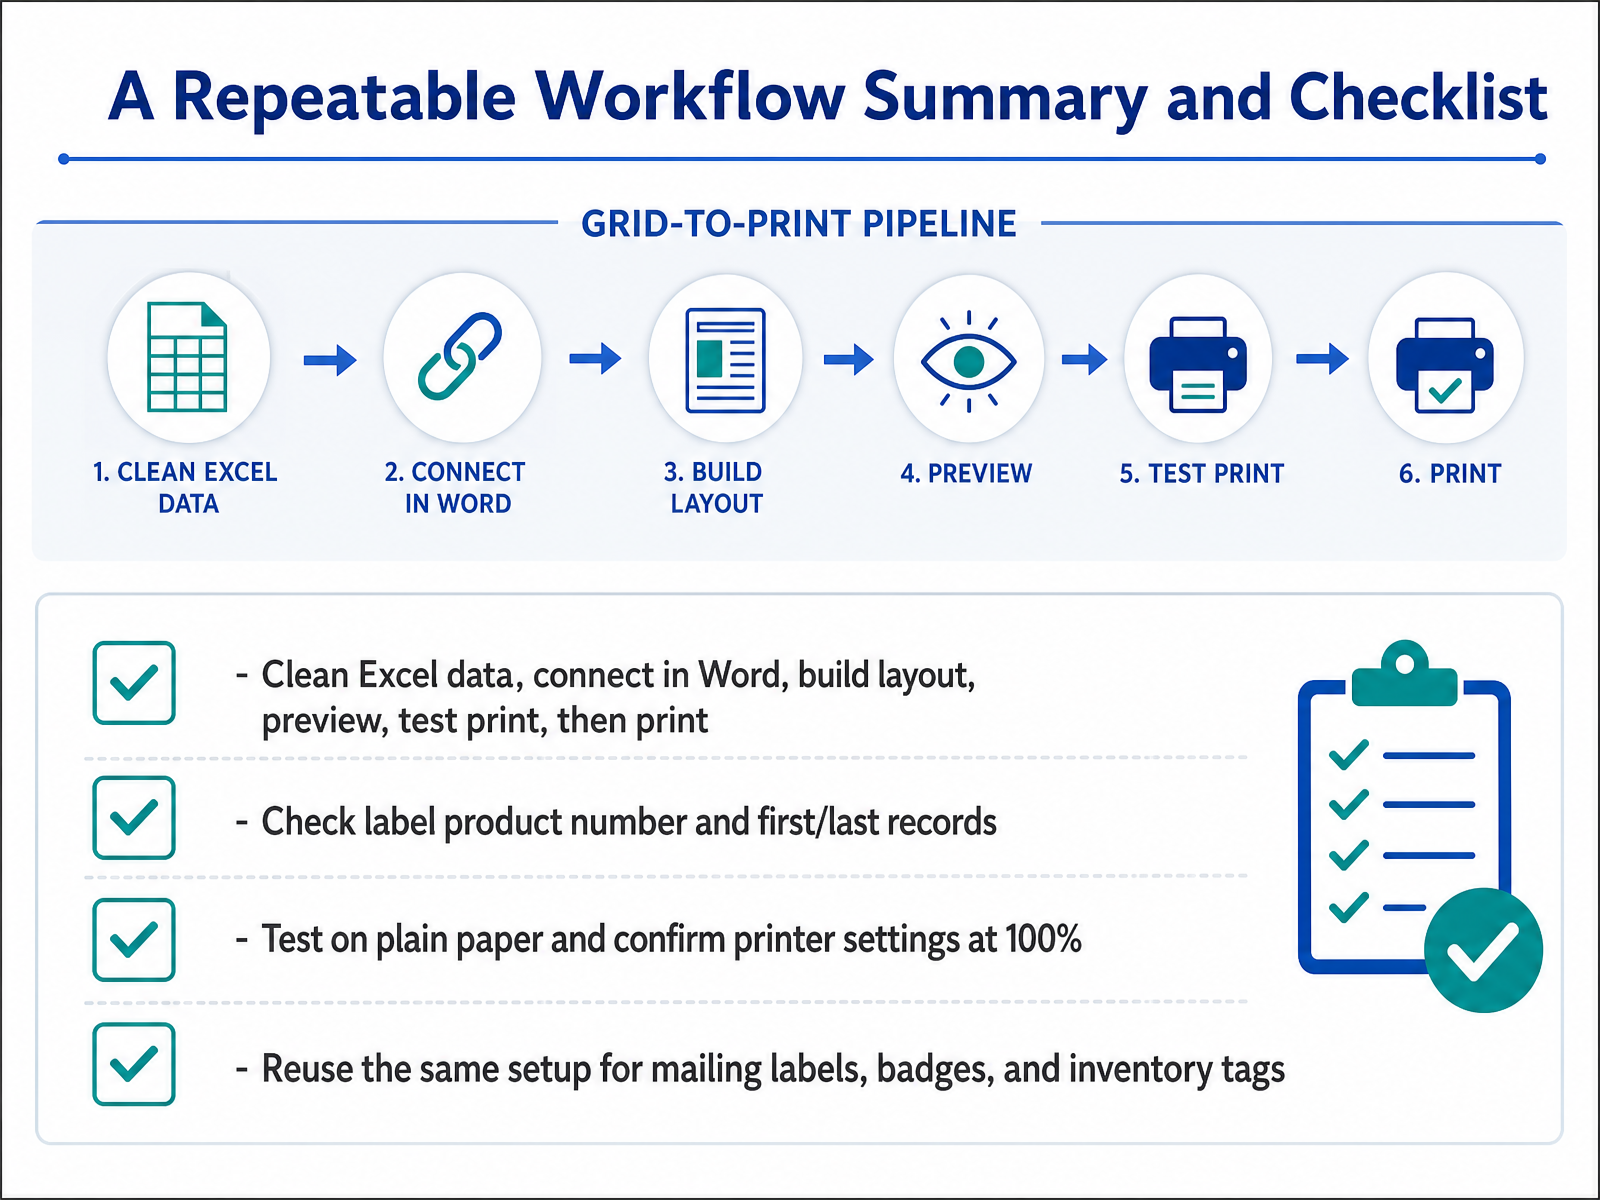
 - 10A Repeatable Workflow Summary and ChecklistLet’s pull the whole workflow together. It’s a six-step loop. Clean the Excel data. Connect it in Word. Build the label layout. Preview the results. Do a test print. Then print the final batch. If you follow that order, you’ll catch problems early, so you don’t reprint the whole batch later.
Before you start, check two things. First, confirm the label product number on the package matches the template you selected in Word. Second, check the first and last records in your data. If those look right, the middle probably does too.
Next, always test on plain paper. Place that test sheet over your label stock and hold it up to the light. Make sure your printer settings are set to one hundred percent scale. No fit-to-page, no shrink to fit. That setting causes most misalignment issues.
Once it works, save your setup. This same template works for mailing labels, event name badges, and inventory tags. So next time, you just connect the new Excel file and print.
 support.microsoft.comsupport.microsoft.comsupport.microsoft.com+21 min
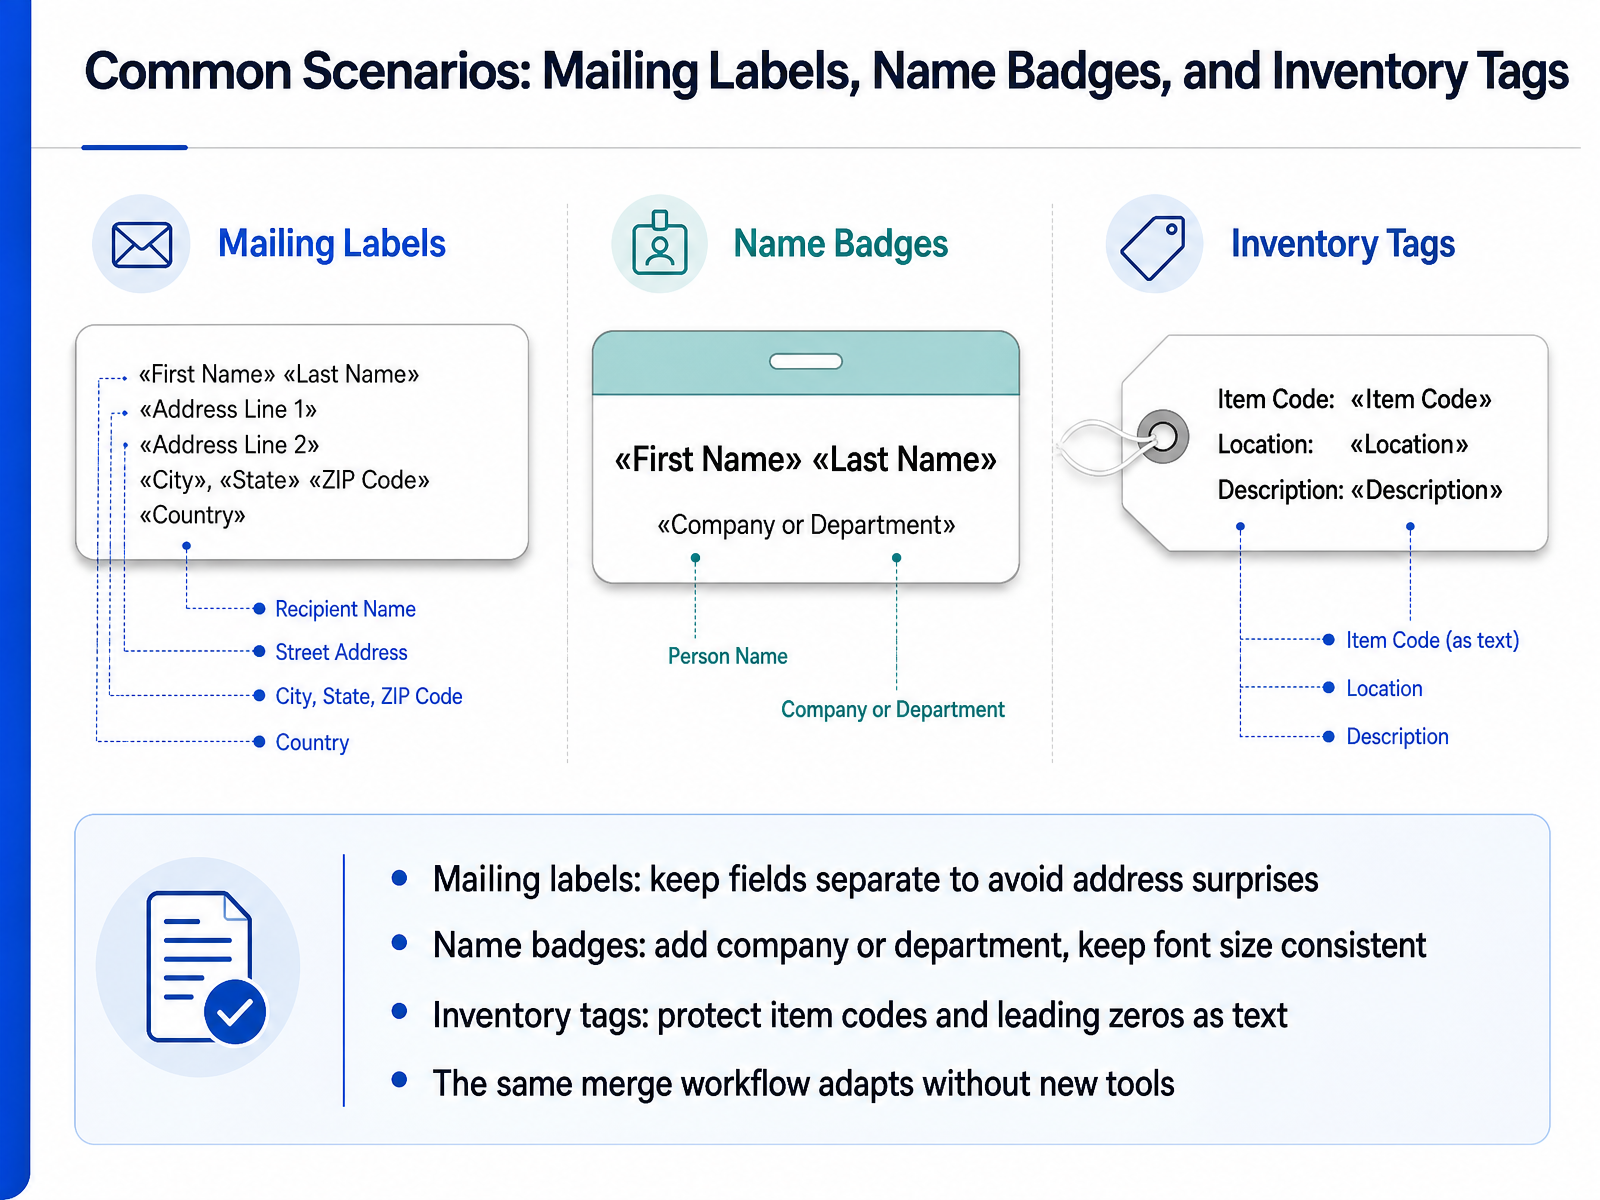
 - 11Common Scenarios: Mailing Labels, Name Badges, and Inventory TagsLet’s look at three common scenarios where this same workflow saves you time. First, mailing labels. Keep every part of the address in its own column. That way, you avoid surprises when a line is missing or out of order. Next, name badges. Add the company or department, but keep the font size consistent. A badge that is too small is hard to read. One that is too large looks cramped. Finally, inventory tags. Protect item codes and any leading zeros by formatting those columns as text. Otherwise, you could end up with the wrong number on the tag. The key point is that you don’t need new tools for any of these. The same merge workflow adapts. You change the template layout and the fields you insert, but the steps stay the same. That keeps things simple and repeatable for your team. Next, let’s talk about handling messy data and edge cases before you print.
 support.microsoft.compracticetestgeeks.comwisechecker.com+21 min
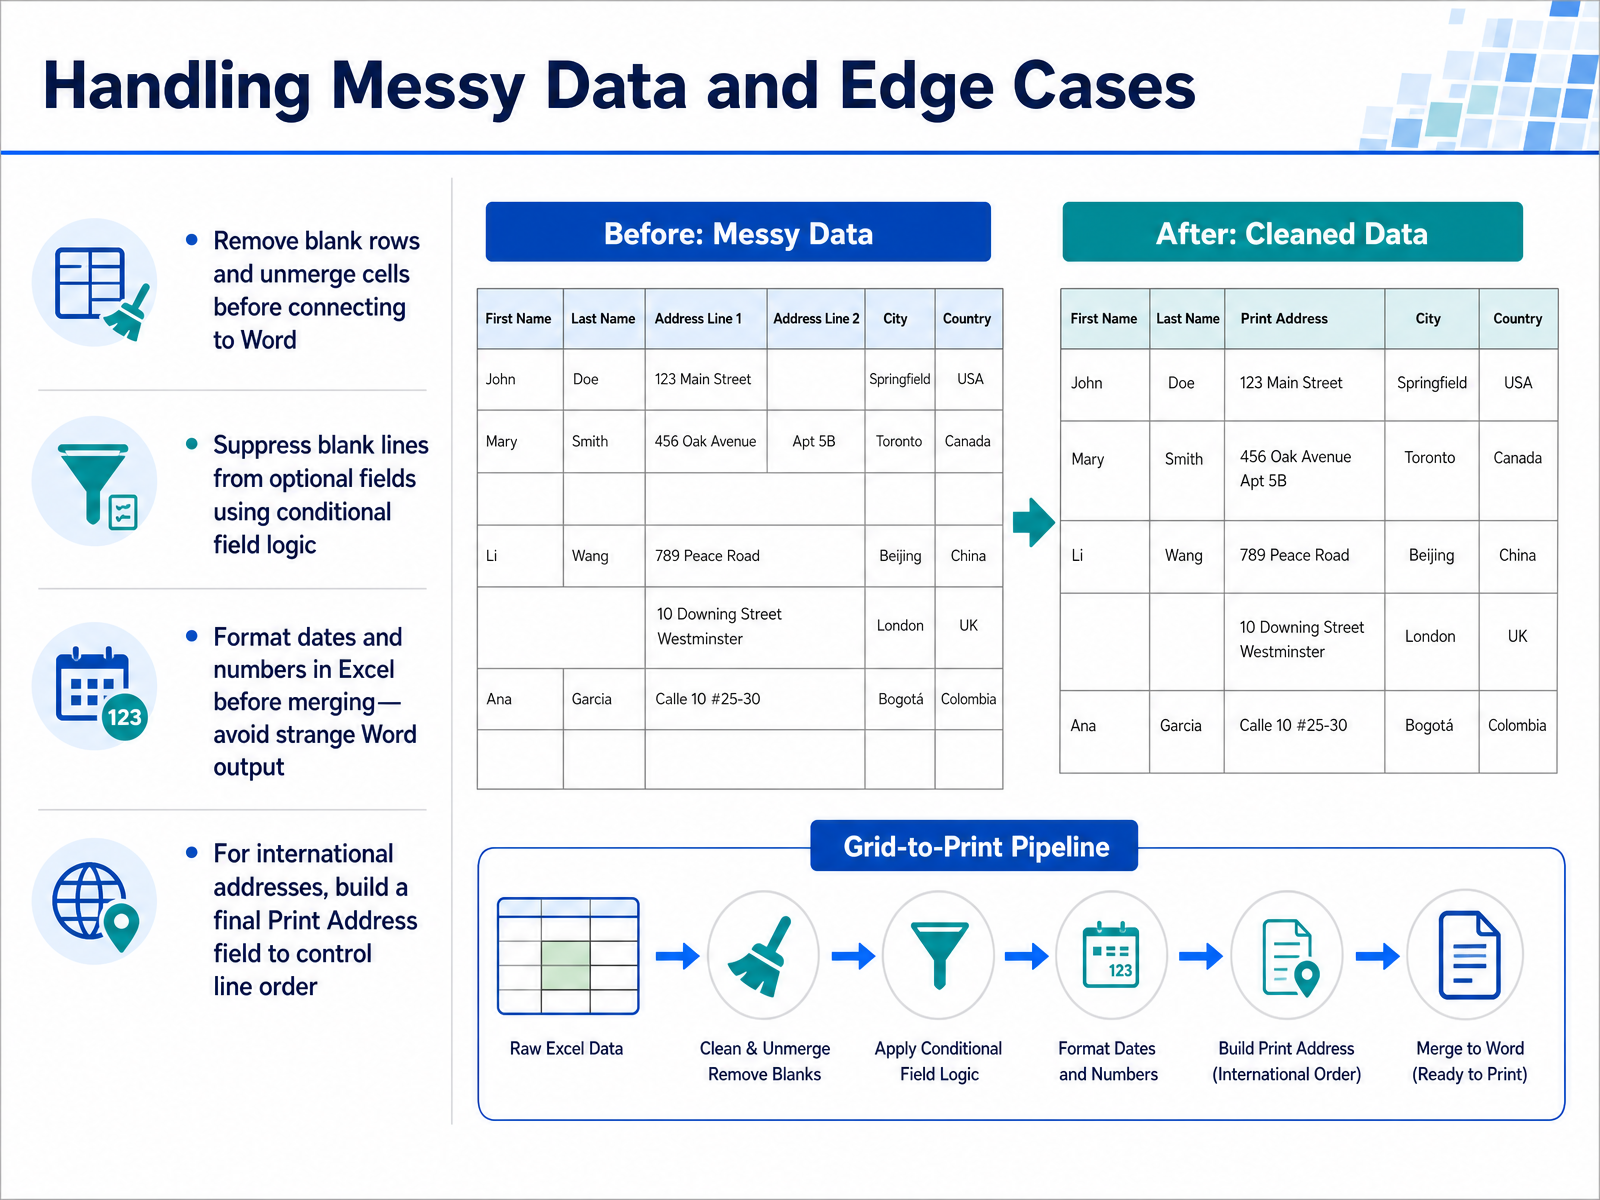
 - 12Handling Messy Data and Edge CasesNow, let’s talk about messy data and edge cases. A few minutes of cleanup here can save you a whole reprint batch. First, remove any blank rows in Excel and unmerge merged cells before you connect to Word. Blank rows can print as empty labels, and merged cells confuse the merge field alignment. Next, handle optional fields like apartment numbers or company names. If a field is blank, you don’t want it leaving an ugly gap. Use conditional field logic in Word, like the If-Then-Else rule, to suppress those blank lines. Also, format your dates and numbers in Excel first. Word pulls the raw value, so a date may appear as a serial number, and currency may lose its symbols. Fix the format in the source file before merging. For international addresses, build a final Print Address field in Excel. Combine the parts in the order you want them to appear, with the country line included only when needed. That way, Word just inserts one clean, ready-to-print block every time. Next, let’s look at the pre-print checklist to catch these issues before they cost you labels.
 support.microsoft.compracticetestgeeks.comwisechecker.com+21 min
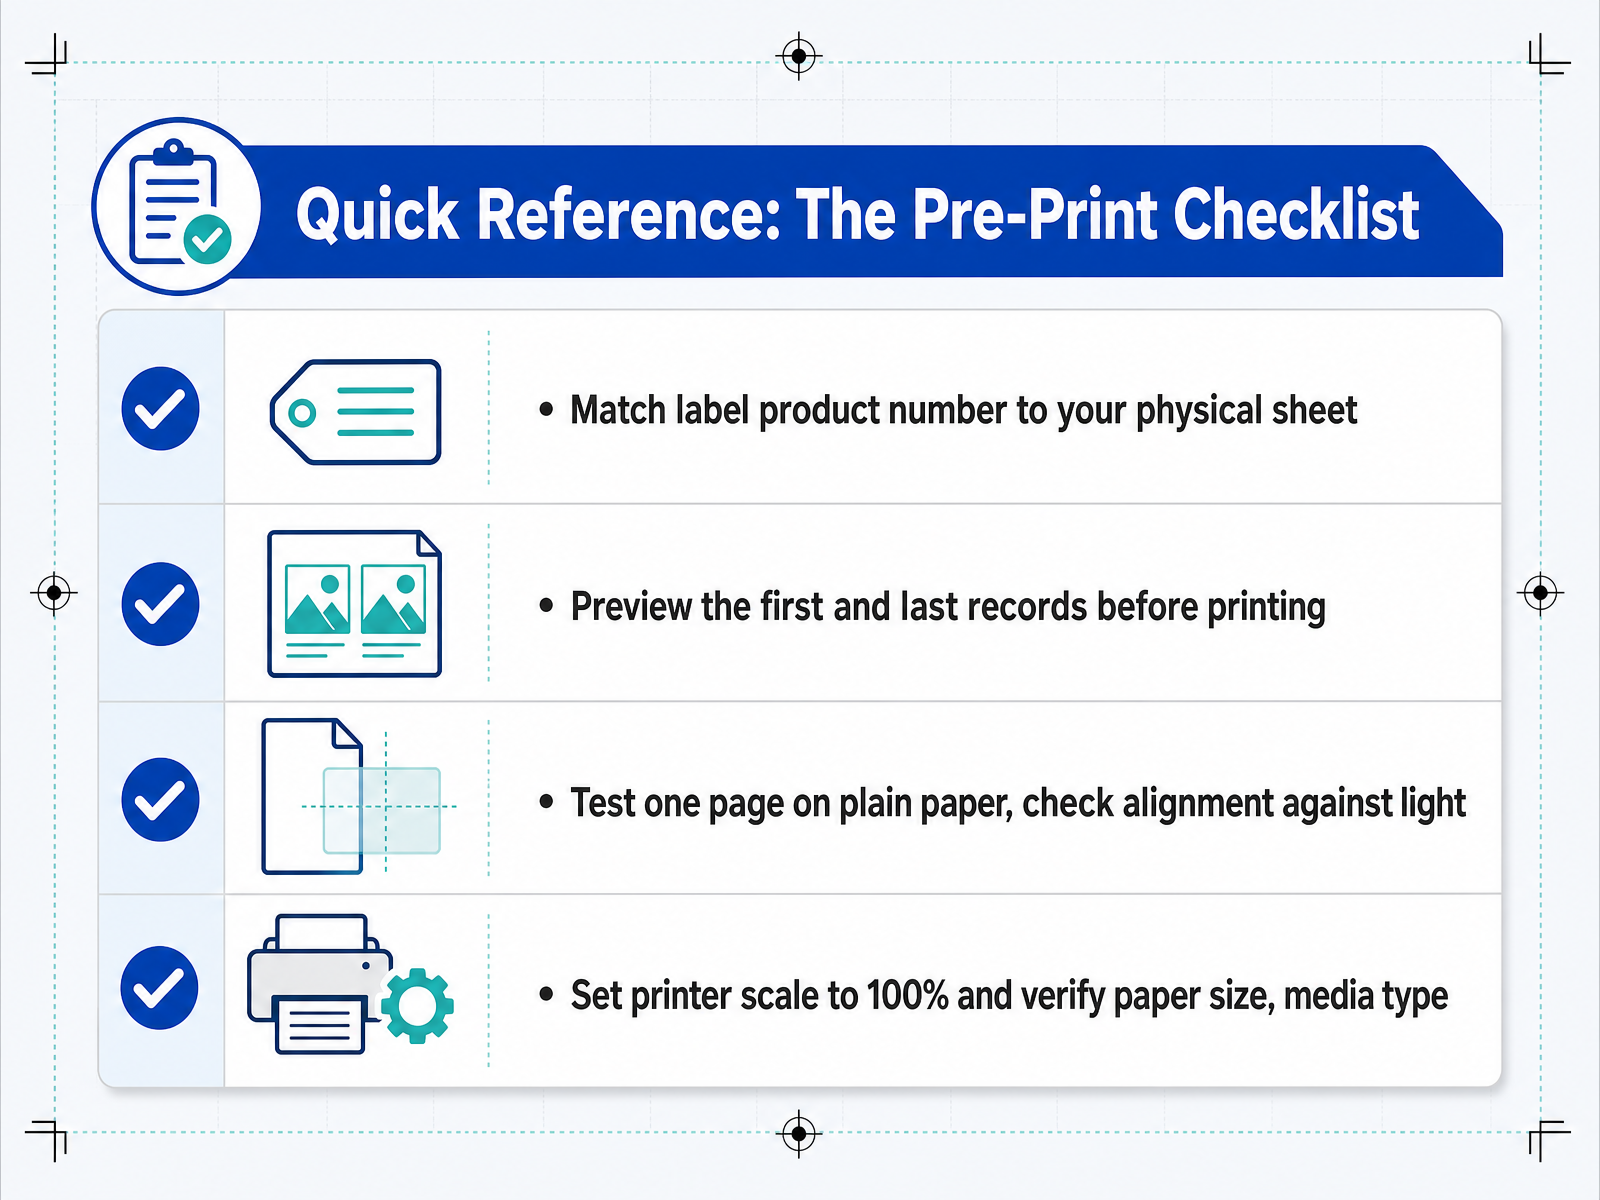
 - 13Quick Reference: The Pre-Print ChecklistBefore you commit to printing the whole batch, run through this quick checklist. First, match the label product number on your template to the physical sheet in your hand. They need to be exactly the same. Next, preview the first and last records. This catches layout issues early, so you do not reprint everything. Then, test one page on plain paper. After it prints, hold that page against a label sheet and check the alignment against a bright light. This shows you if the text lines up with the sticker borders. Finally, make sure your printer scale is set to one hundred percent, and verify the paper size and media type. Any shrink-to-fit setting will throw off the alignment. These checks take two minutes and save you from wasting a whole sheet of labels. Next, we will look at building habits that keep your label runs smooth and error-free.
 avery.comsheetstolabels.comhp.com+21 min
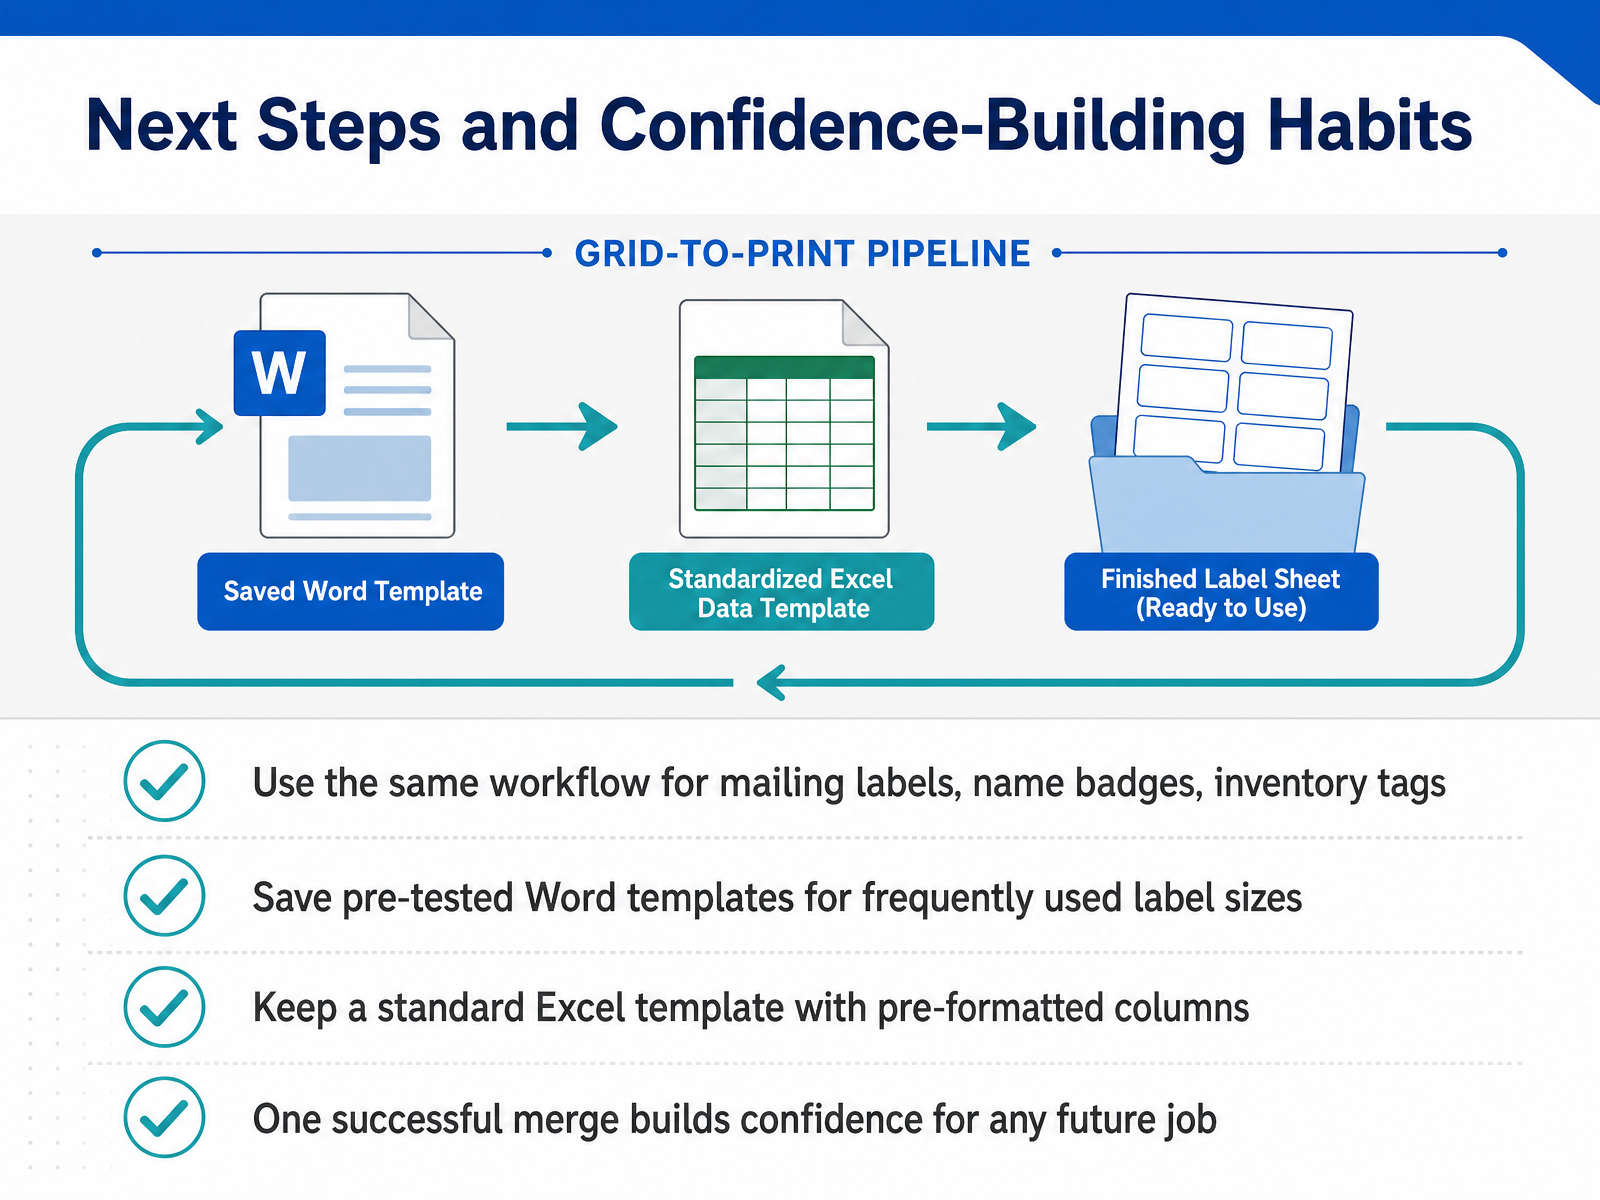
 - 14Next Steps and Confidence-Building HabitsHere’s your takeaway. You now have one solid workflow that handles mailing labels, name badges, inventory tags, and more. The same steps apply every time. To make this even faster, save your pre-tested Word template for the label size you use most. That way, you skip the setup next time. Also, keep a standard Excel template with the column headers already formatted. Just paste in your names and addresses, and you’re ready. Remember, one successful merge is all it takes to build confidence. The next job will feel routine. You’ve done the hard part once. Now you can repeat it with ease. Thanks for working through this with me. You’re all set to print your next batch of labels with confidence.
 support.microsoft.comsupport.microsoft.comsupport.microsoft.com+21 min
Take the deck with you
Download this course as a file — free, no sign-up needed.
- PDF handoutEvery slide page, ready to print or share.15 pages · 3.4 MBDownload
- Narrated PowerPointThe deck that presents itself — every slide carries the digital human's narration video.15 pages · 14.3 MBDownload
- PowerPoint slidesThe full deck as a .pptx — open it in PowerPoint, Keynote, or Google Slides.15 pages · 3.1 MBDownload
Free to use in your own training — please keep the PersonWise credit page at the end.
Have your own deck? Turn it into a course
Sources consulted
Web sources consulted while building this course.
- Common mail merge issues | Microsoft Support — support.microsoft.com
- 📗 How to Mail Merge Labels From Excel: Complete Guide 2026 August — practicetestgeeks.com
- Word Labels Print Misaligned From Mail Merge: Fix – WiseChecker — wisechecker.com
- MS Word Mail Merge - Printouts are not aligned - Microsoft Q&A — learn.microsoft.com
- Creating Mailing Labels from Excel Data in MS Word — helion360.com
- ❓ How to Make Labels in Excel: Mail Merge & Print 2026 June — practicetestgeeks.com
- How to Print Mailing Labels from Excel the Smart Way - Rollo — rollo.com
- Excel: Print Labels from Excel Guide 📚 2026 July — practicetestgeeks.com
- Print labels for your mailing list — support.microsoft.com
- Address Label Maker vs Word Mail Merge | Blog — sheetstolabels.com
- Create and print mailing labels for an address list in Excel | Microsoft Support — support.microsoft.com
- Mail merge using an Excel spreadsheet | Microsoft Support — support.microsoft.com
- How to mail merge and print labels from Excel to Word — ablebits.com
- Practice Test Sheet — avery.com
- Why Are My Labels Printing Out of Alignment? | Fix Avery & Custom Sheets | Blog — sheetstolabels.com
- How to Print Labels | HP® Singapore — hp.com
- Printing a test page — help.corel.com
- Printer Labels Not Printing Correctly — Easy Fixes & Next Steps — whizz-print.com