Begin
14 pages · ~28 min
Moon Observation
This training teaches learners to observe the Moon, covering key features, phases, and techniques for effective lunar viewing.
A digital instructor presents all 14 pages. Hold “Ask” at any point and ask out loud — the answer comes from this course. No sign-up needed.
What you’ll learn
- 01Observing the Moon: A Practical Guide for Educators and CommunicatorsWelcome, friends of the night sky. I am so glad you are here. Today, we begin a journey together, a journey to our closest celestial neighbor, the Moon. This guide is built for you, whether you are a science educator, a curious student, or a content creator looking to share the wonder of the cosmos. We will start with the naked eye, learning to read the Moon's changing face. Then, we will reach for binoculars and telescopes, exploring craters and mountain ranges in stunning detail. And for those ready to go further, we will touch on imaging and how to plan entire observing sessions. The Moon is the perfect first target, a gateway to the universe, and it is waiting for you. So, let us begin. But first, let us ask a simple question: why does the Moon hold such a special place in our teaching and outreach? Let's find out.2 min
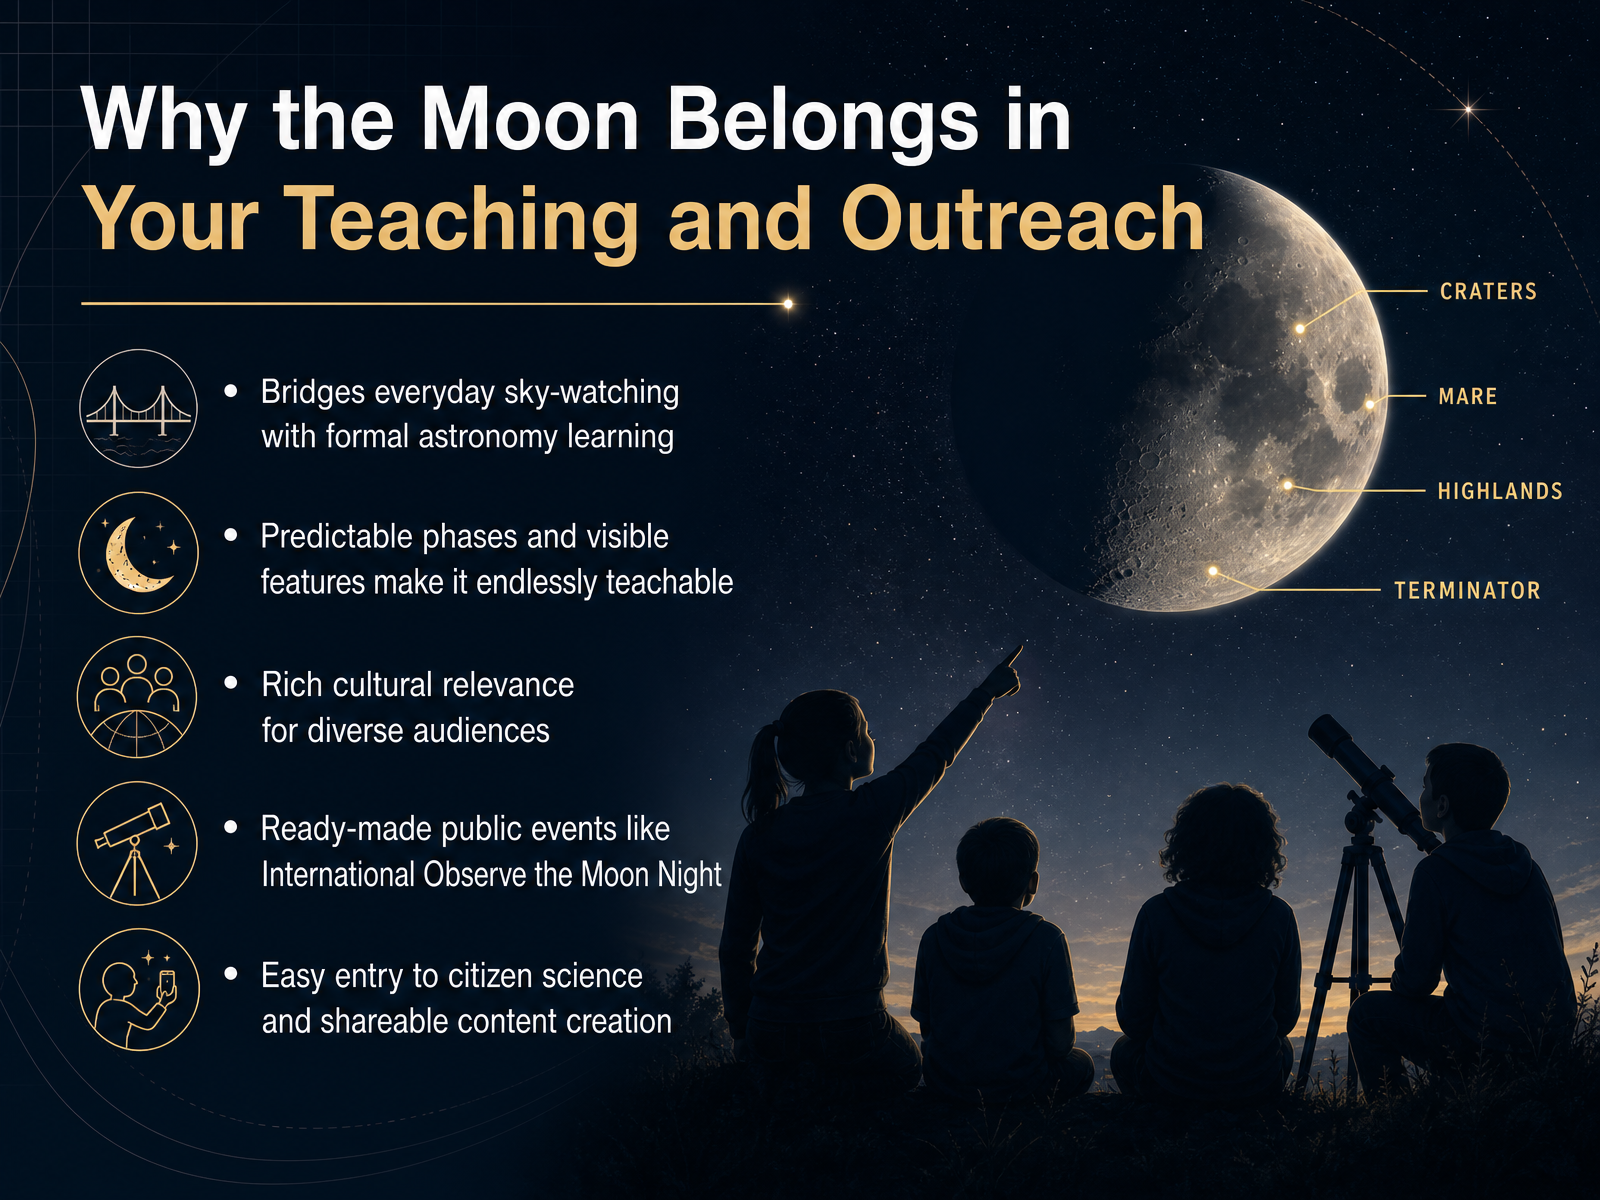
- 02Why the Moon Belongs in Your Teaching and OutreachSo why make the Moon a centerpiece of your teaching or outreach? First, it's the perfect bridge between the sky we see every day and the formal science of astronomy. When learners recognize a crescent in the evening, they're already doing real observation. The Moon's predictable phases and visible craters make it endlessly teachable. You can revisit it month after month, and there's always something new to notice. It also carries rich cultural meaning across the world, so it naturally connects with diverse audiences. And here's a wonderful opportunity: NASA hosts International Observe the Moon Night every year, with the next one on September nineteenth, 2026. That's a ready-made public event. You can host a gathering or simply join from home. The supporting materials are extensive, including printable Moon maps, observation journals, and even activities for cloudy nights. It's also a gentle entry point into citizen science. Your learners, or your followers, can contribute real observations and create shareable content. Up next, we'll explore how the Moon actually moves, its phases, its orbit, and what you can truly see from your own backyard.
 science.nasa.govscience.nasa.govscience.nasa.gov+21 min
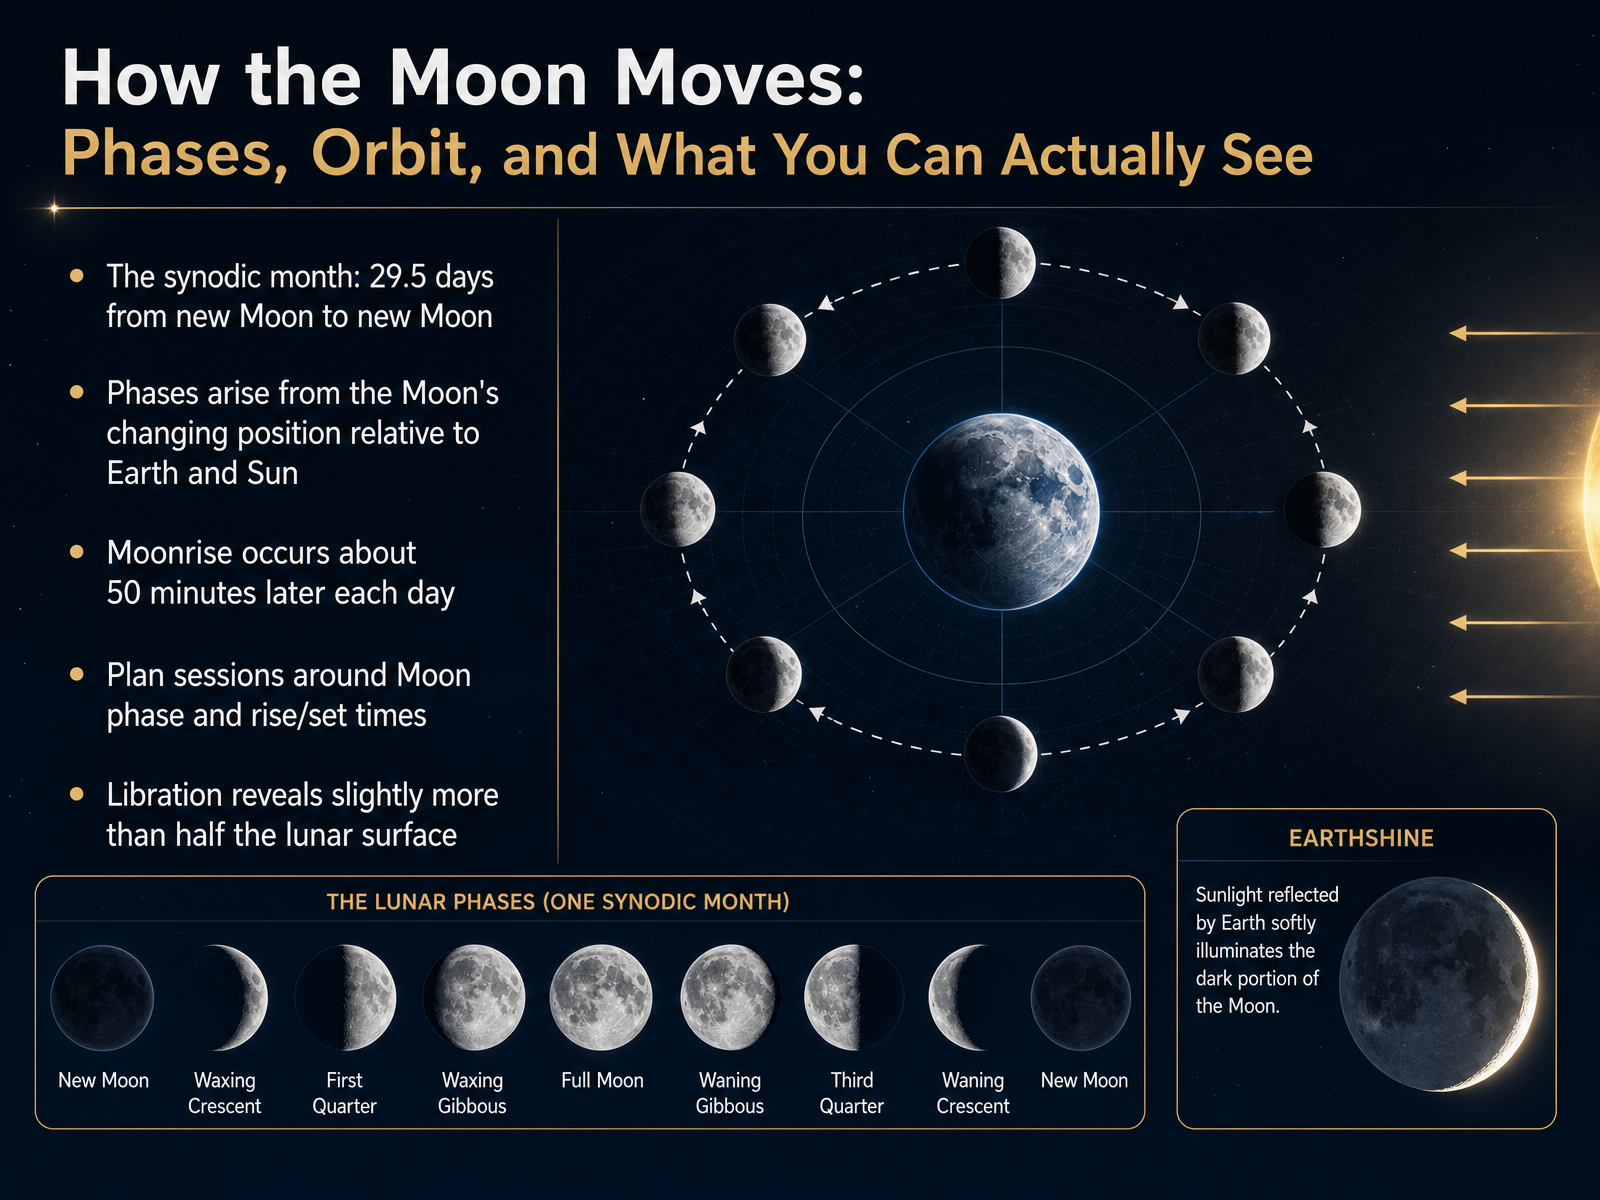
 - 03How the Moon Moves: Phases, Orbit, and What You Can Actually SeeLet's think about how the Moon actually moves, because that's what creates the beautiful changing faces we see from night to night. The Moon takes about twenty-nine and a half days to go from one new Moon to the next. That's called a synodic month, and it's the reason our calendar months are roughly that length. As the Moon orbits Earth, its position relative to the Sun and our planet shifts, and that's what produces the phases. You'll also notice the Moon rises about fifty minutes later each day. That small daily delay matters when you're planning a night of observation. If you want to catch the Moon at a comfortable hour, check its phase and rise time first. And here's a lovely surprise: because the Moon wobbles slightly in its orbit, a phenomenon called libration, we actually get to see a bit more than half of its surface over time. So keep this in mind as you look up. Next, let's start simple and talk about what you can see with just your eyes and a pair of binoculars.
 1 min
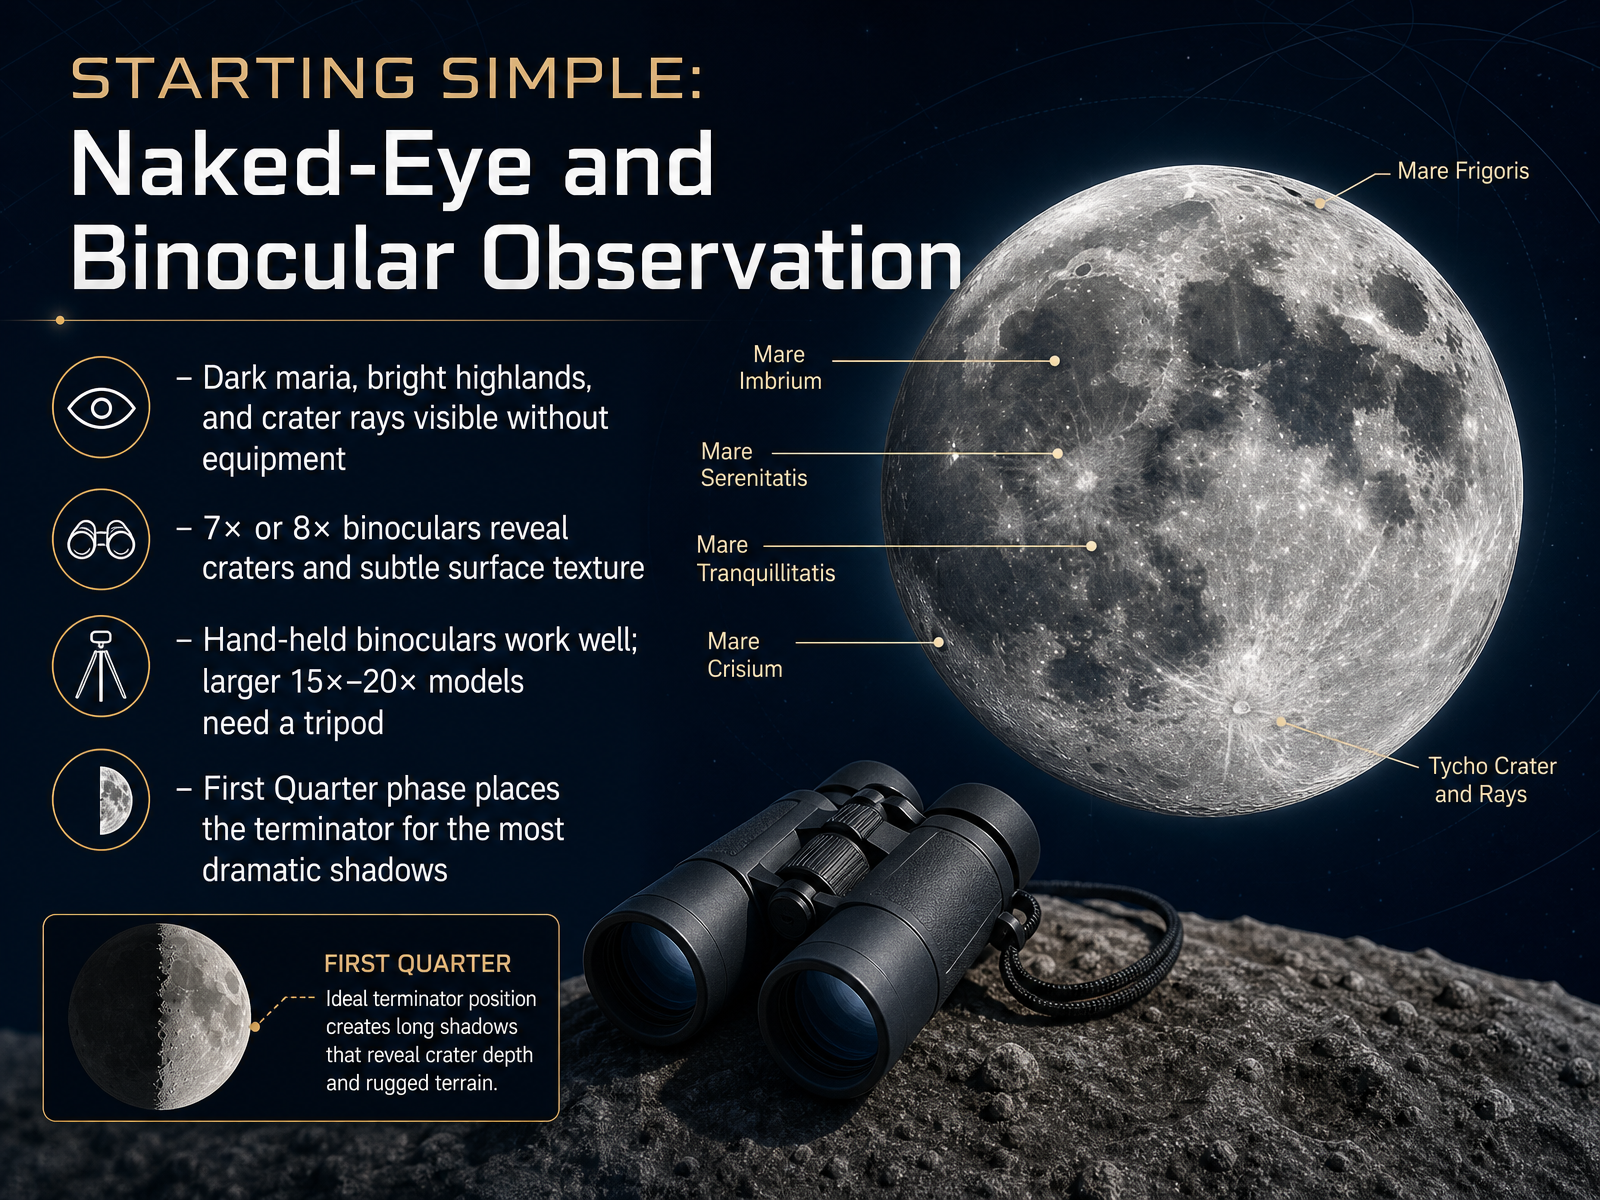
1 min - 04Starting Simple: Naked-Eye and Binocular ObservationNow, let's talk about how to start observing the Moon without any fancy equipment. Believe it or not, your eyes are already a great tool. Look up on a clear night and you'll see the dark patches of the maria, the bright ancient highlands, and even the delicate rays spreading from young craters like Tycho. But grab a pair of binoculars—even a modest 7 by 50 pair—and suddenly the Moon reveals a whole new level of detail. Craters with their raised rims, subtle ridges, and the texture of the lunar surface all come into focus. If you're using standard handheld binoculars, you'll find them easy to hold steady. But if you have a larger pair, say 15 by 70 or 20 by 80, they can get heavy and shaky, so a tripod is a must. Now here's a tip that will transform your view: try observing at first quarter phase. That's when the terminator—the line between day and night on the Moon—runs right through the middle. The low-angle sunlight casts long, dramatic shadows that make craters and mountains pop in three dimensions. It's like seeing the Moon's face in high relief, and it's absolutely breathtaking. So, the next clear evening, step outside with your binoculars and watch the shadows dance along the terminator. In our next segment, we'll talk about choosing and using a telescope for even more glorious lunar views.
 telescopeadvisor.comtelescopeadvisor.comtelescopeguides.com+22 min
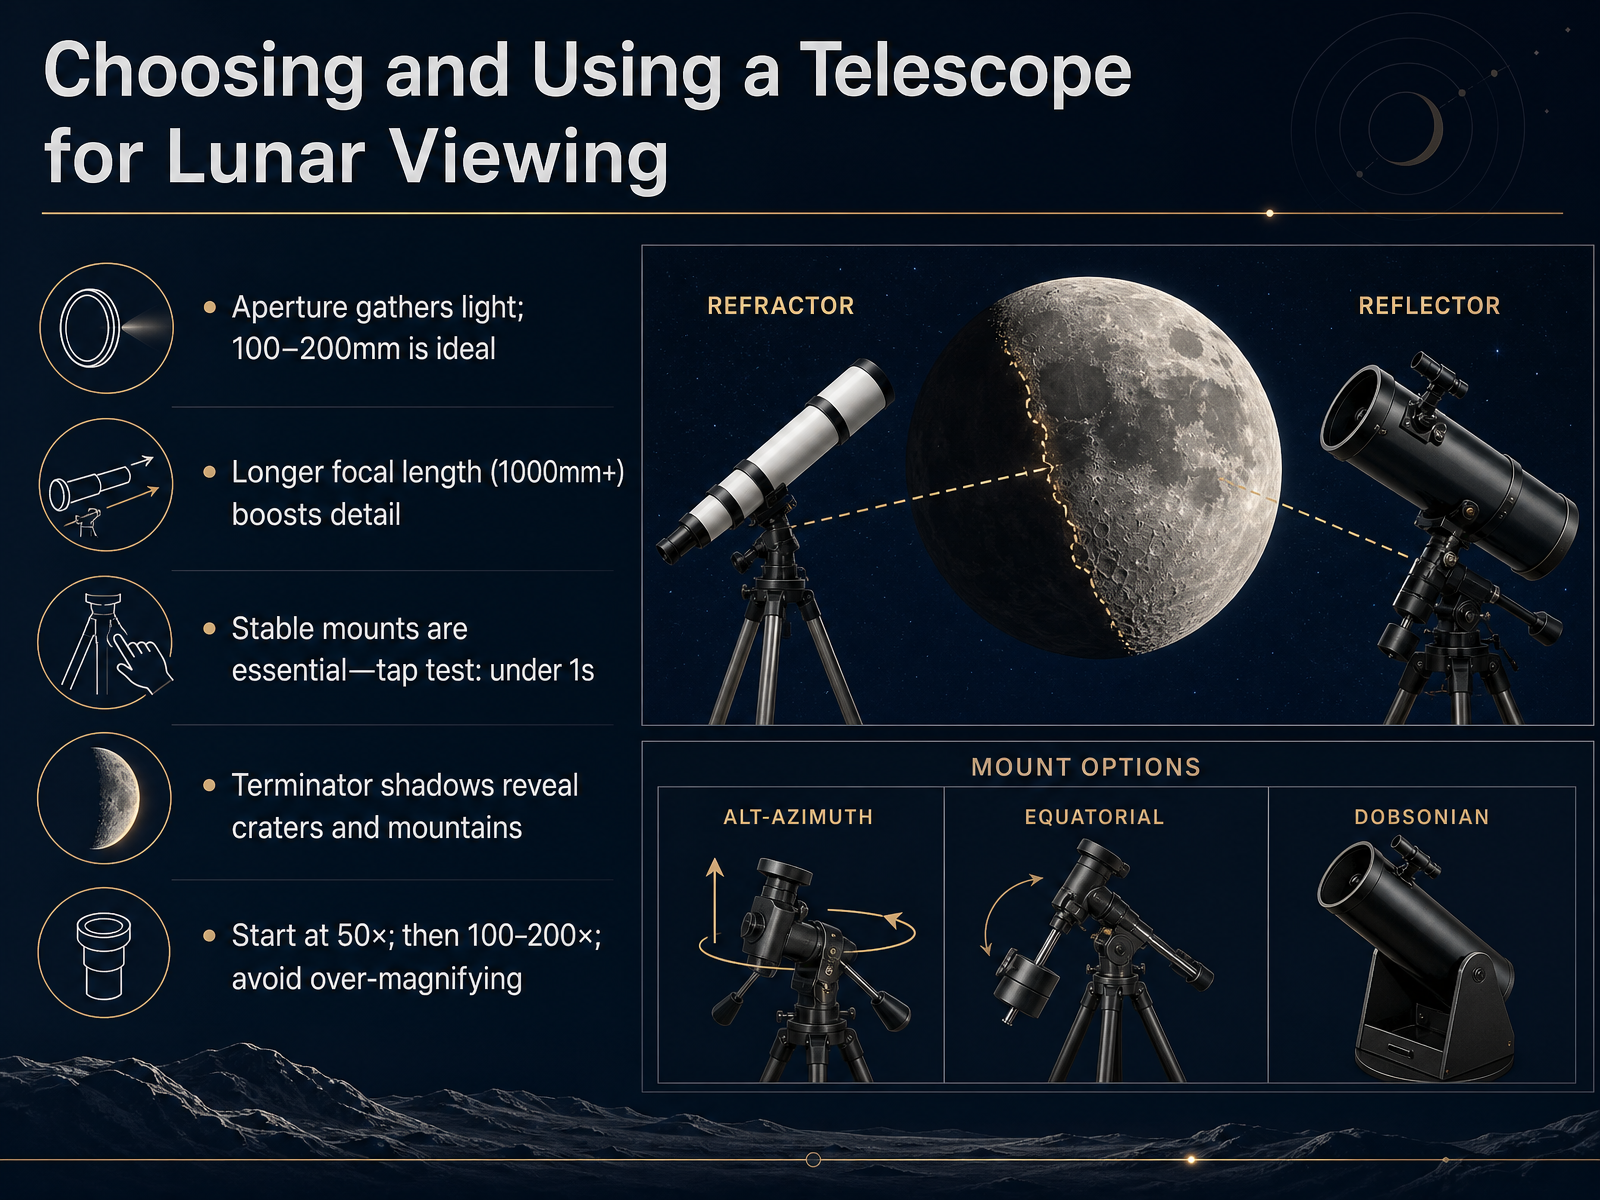
 - 05Choosing and Using a Telescope for Lunar ViewingNow let's talk about choosing and using a telescope for lunar viewing. You might be surprised to learn that the Moon is actually the most forgiving target in all of astronomy. Even a modest telescope can give you breathtaking views. The key is understanding a few essentials. First, aperture matters. This is the size of the main lens or mirror, and it gathers light. For the Moon, something in the 100 to 200 millimeter range is ideal. It gives you enough resolution to see fine detail without breaking the bank. Next, consider focal length. A longer focal length, say over 1000 millimeters, gives you higher magnification with comfortable eyepieces, which means cleaner views of crater walls and mountain peaks. Now, here's something often overlooked: mount stability. When you touch the focuser, the image should settle in under one second. If it shakes for three seconds, you'll miss all the fine detail. And remember the terminator, that line between day and night on the Moon. It's where shadows are longest and craters and mountains pop out in dramatic three-dimensional relief. Finally, magnification. Start low at around 50 power to get your bearings, then work up to 100 or 200. If you over-magnify, the image just gets blurry. So, keep these tips in mind. A stable, mid-sized scope with moderate power, pointed at the terminator, will reward you with unforgettable views. Next, let's talk about managing brightness, stability, and seeing conditions.
 telescopeadvisor.comtelescopeadvisor.comtelescopeguides.com+22 min
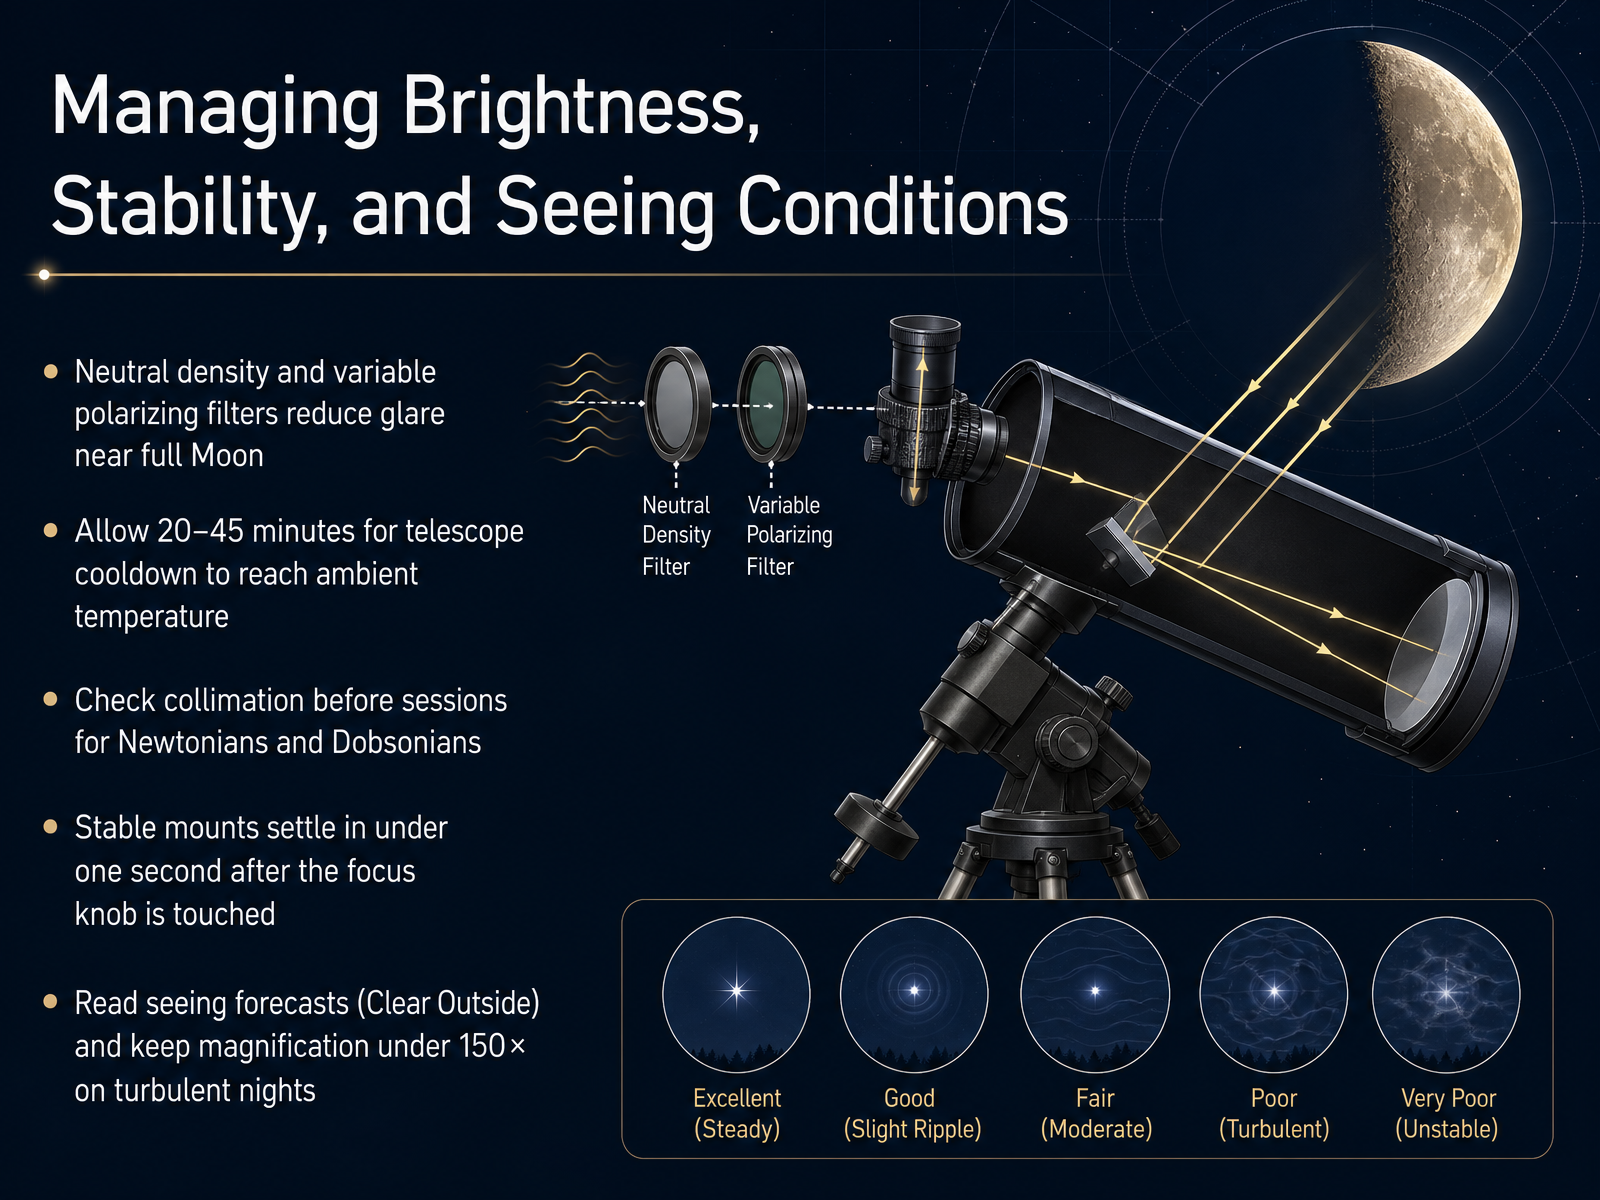
 - 06Managing Brightness, Stability, and Seeing ConditionsLet's talk about the practical side of getting a sharp, comfortable view. First, brightness. Near a full Moon, the glare can actually overwhelm your eye and wash out contrast. A neutral density filter, or even better, a variable polarizing filter, lets you dial the brightness down to a comfortable level, especially useful with larger apertures. Next, give your telescope time to acclimate. A scope brought straight from a warm house into cool night air will have internal currents that blur the image. Allow twenty to forty-five minutes for it to reach ambient temperature. And if you're using a Newtonian or Dobsonian, check the collimation before you start. Even a slight misalignment will soften the view. A stable mount is also key. It should settle in under a second after you touch the focus knob. Finally, patience with the sky. Check a seeing forecast and on turbulent nights, keep magnification under one hundred fifty times. The detail will be far more rewarding than pushing for power that the atmosphere just can't support. Next, let's see how to capture what you're seeing with your phone. We'll move from a white blob to real detail in smartphone Moon photography.
 telescopeadvisor.comtelescopeadvisor.comtelescopeguides.com+21 min
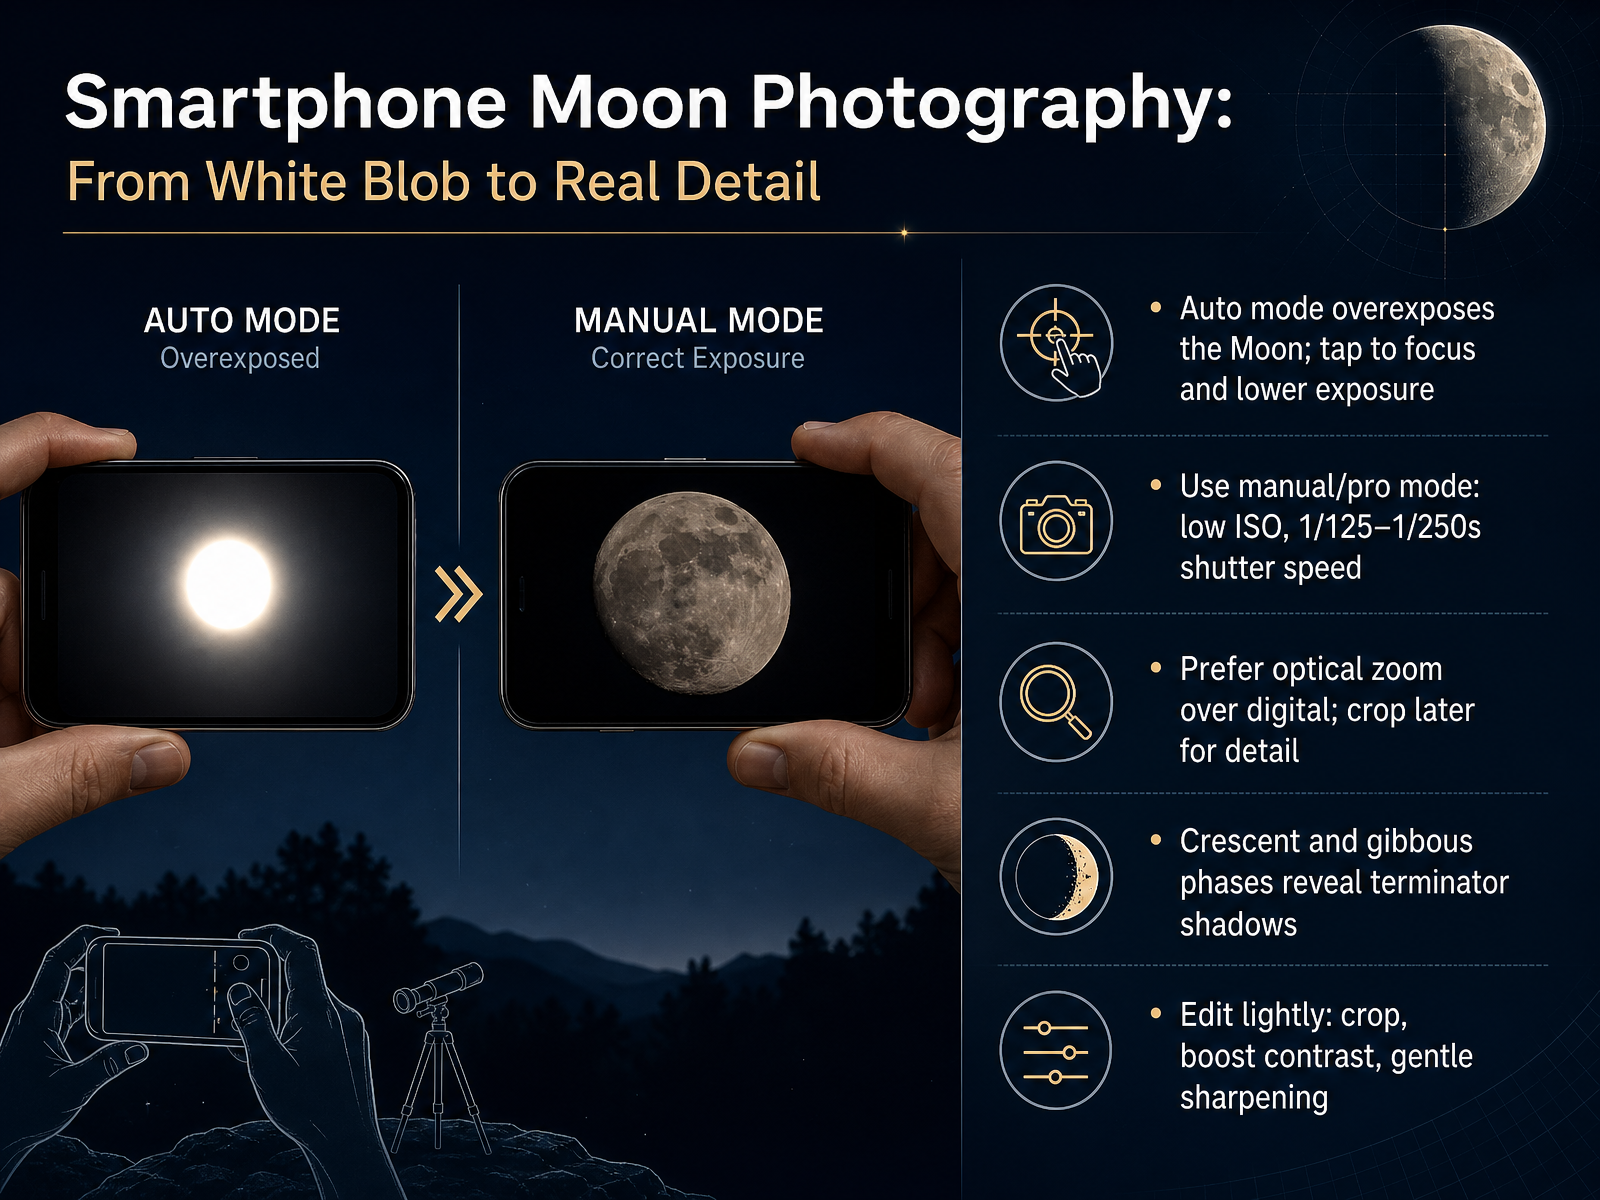
 - 07Smartphone Moon Photography: From White Blob to Real DetailLet's talk about getting a photo of the Moon that actually looks like the Moon. If you've ever pointed your phone at it and gotten a white blob, you're not alone. The fix starts with exposure. Tap the Moon on your screen to focus, then drag that brightness slider down until you start to see craters. If your phone has a manual or pro mode, even better. Set a low ISO around one hundred, and a shutter speed between one one-hundred-twenty-fifth and one two-hundred-fiftieth of a second. That's fast enough to freeze the Moon's bright surface. Also, skip the digital zoom. It just stretches pixels. Use your optical zoom and crop the photo later. For the most dramatic shots, try a crescent or gibbous phase. The terminator, that line where light meets dark, throws long shadows that make the craters pop. After you snap it, do some light editing. Crop in, boost contrast a little, and add gentle sharpening. That's it. From white blob to real lunar detail. Coming up next, we'll step up to telescope imaging with DSLRs, afocal methods, and simple processing.
 csiro.autechtimes.compasthorizon.com+21 min
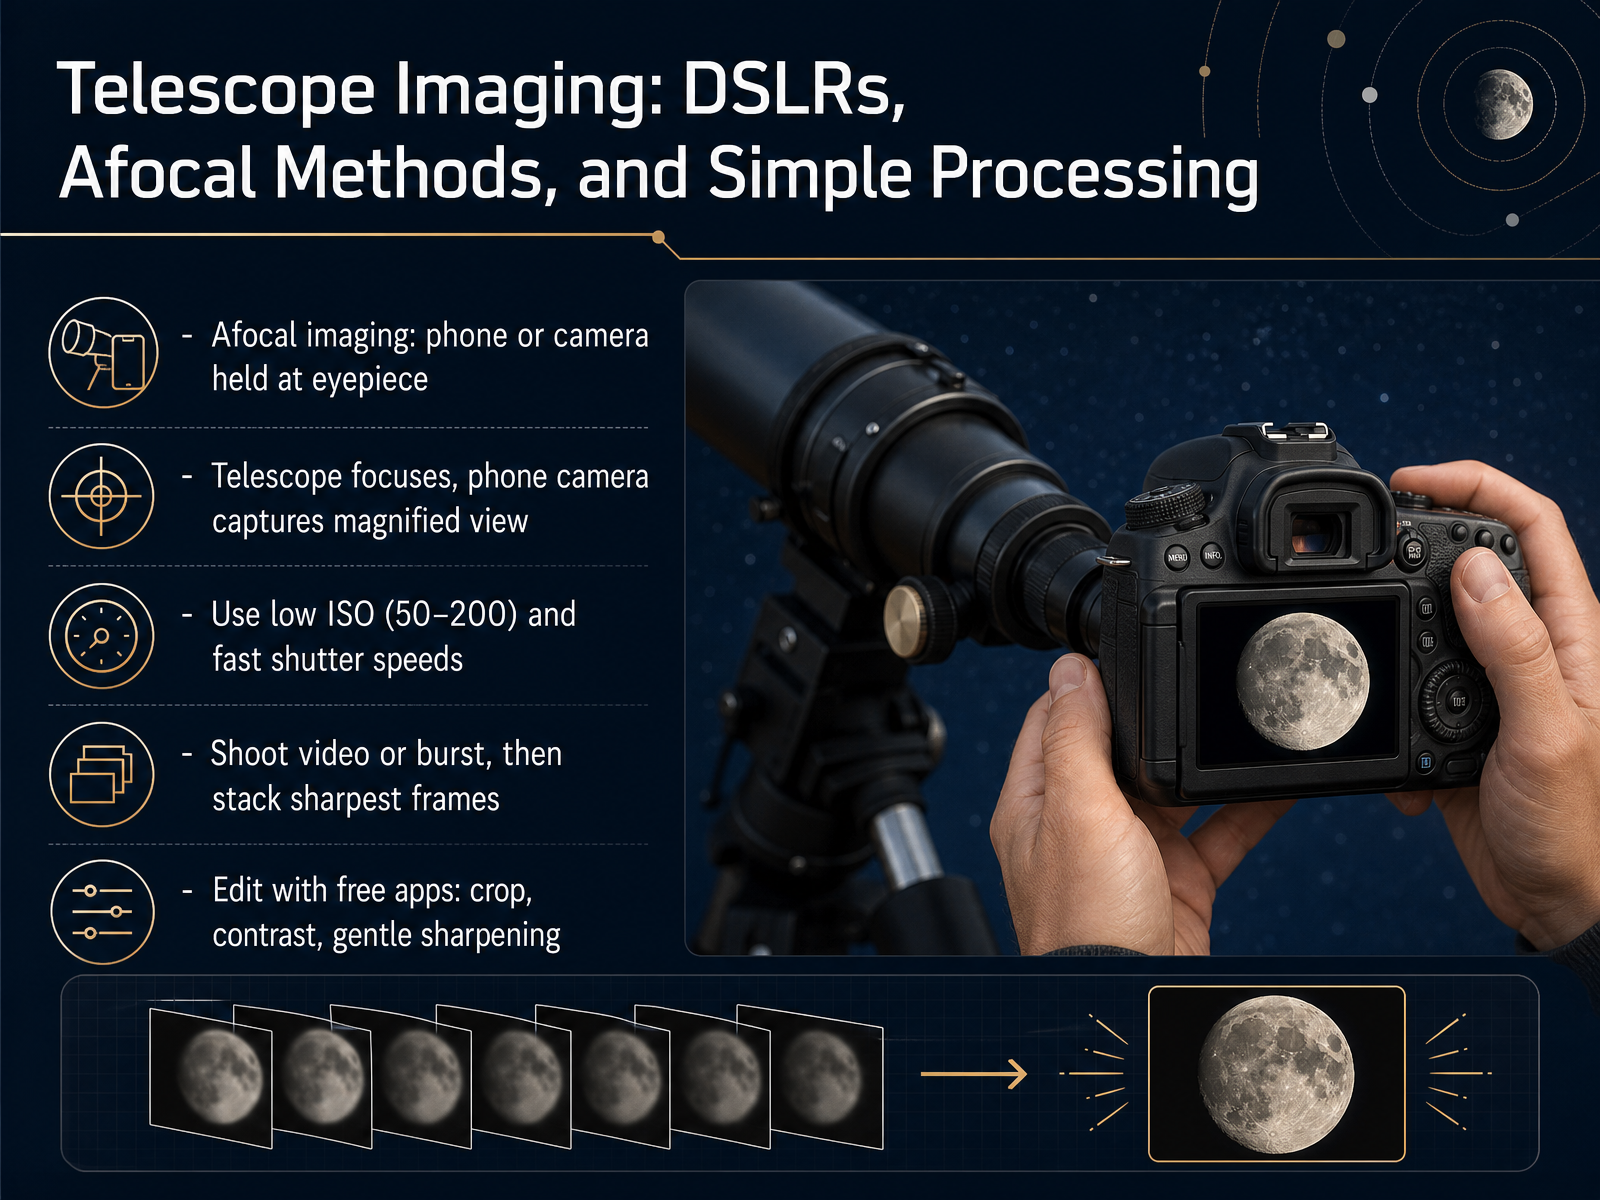
 - 08Telescope Imaging: DSLRs, Afocal Methods, and Simple ProcessingNow let’s talk about capturing the Moon’s beauty with a camera. You don’t need expensive gear. The simplest method is called afocal imaging. You simply hold your phone’s camera up to the telescope’s eyepiece. The telescope does the magnifying, and your phone captures the view. To get crisp details, keep your ISO low, from about fifty to two hundred, and use a fast shutter speed. This prevents the bright lunar surface from washing out. Instead of single photos, try shooting a short video or a burst of images. The atmosphere causes the image to shimmer, so some frames will be sharper than others. Later, you can pick the sharpest frame or stack a few together. For editing, free apps like Snapseed work wonderfully. Just crop the image to center the Moon, add a little contrast to make the craters pop, and apply only gentle sharpening. Avoid over-processing, or the craters will develop ugly halos. With a bit of practice, you can turn a simple phone snapshot into a stunning reminder of what you saw. Next, we’ll explore how to plan a Moon observation session that actually works.
 csiro.autechtimes.compasthorizon.com+22 min
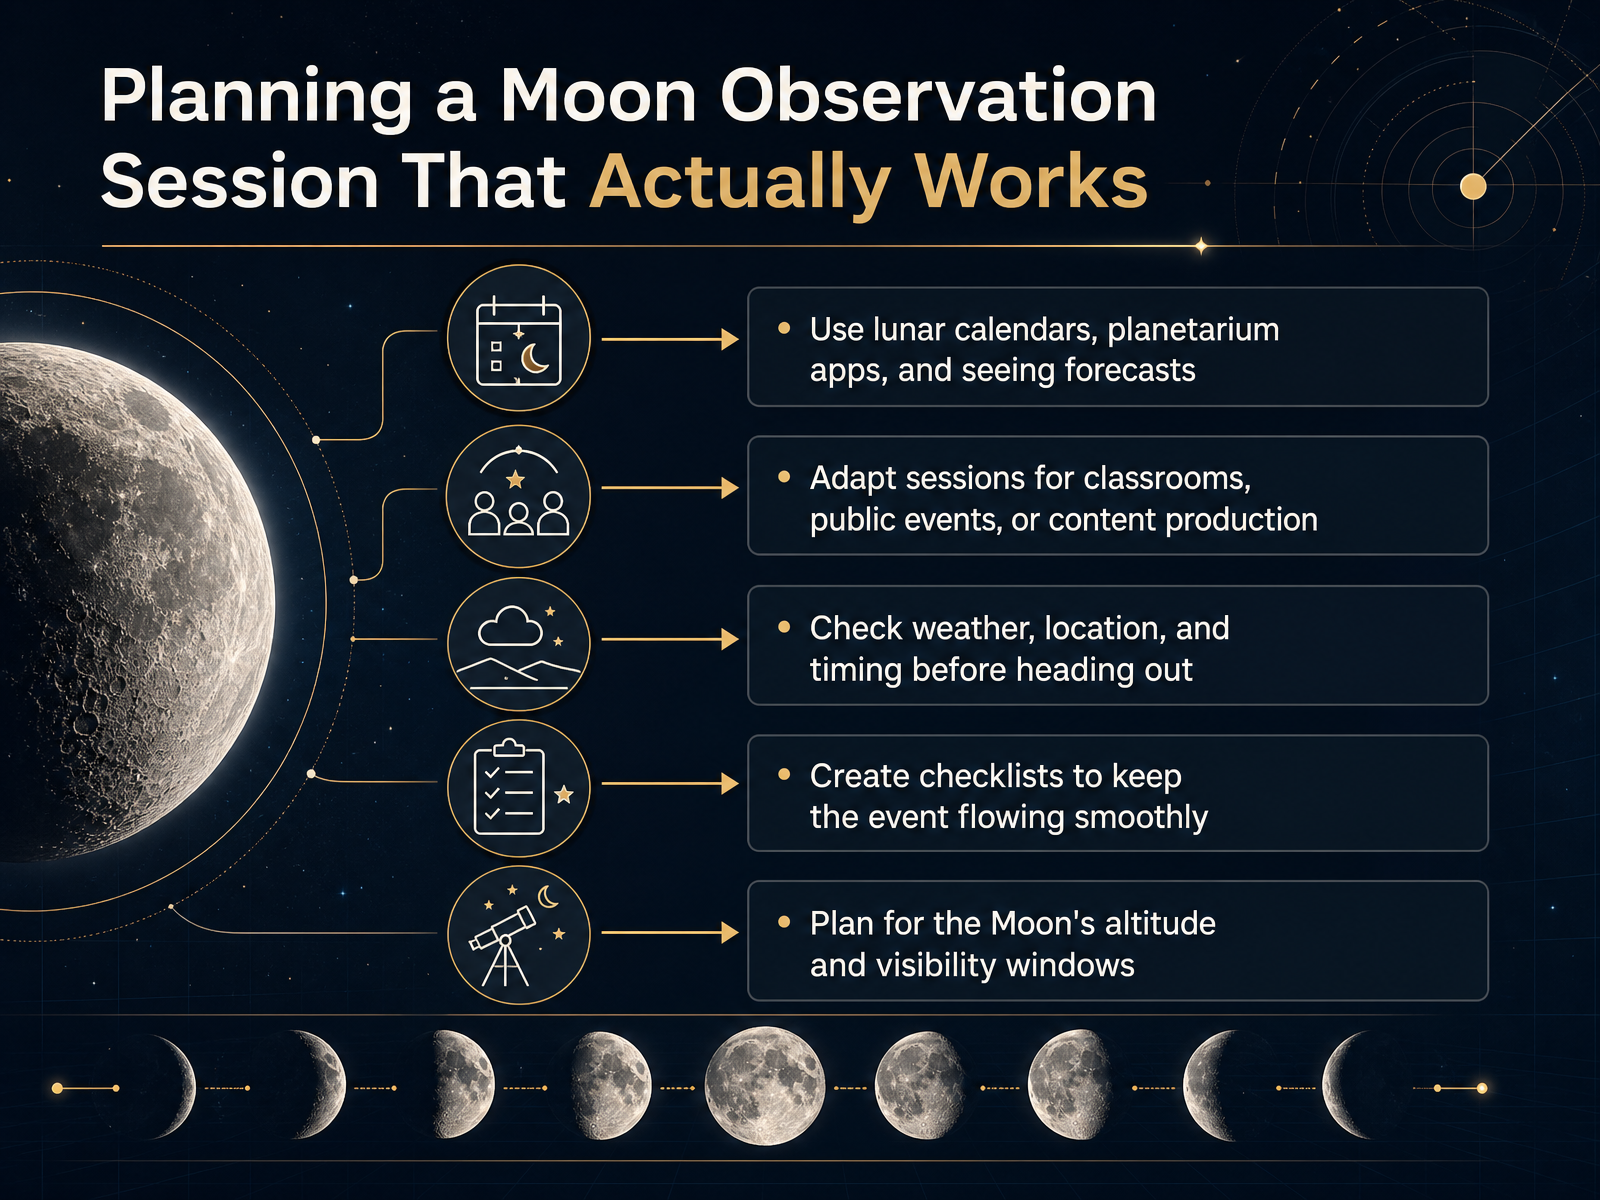
 - 09Planning a Moon Observation Session That Actually WorksNow let’s talk about planning a moon observation session that actually works. A little preparation can turn a cloudy, chaotic evening into a smooth, magical experience. Start by checking lunar calendars, planetarium apps, and seeing forecasts. These tools show you when the moon rises, how high it will climb, and whether the atmosphere will be steady enough for crisp views. If you’re leading a classroom or a public event, adapt your plan to your audience. For kids, focus on spotting big features like the maria. For content creators, plan for lighting and framing. Before you head out, always check the weather, your location, and your timing. And create a simple checklist. It keeps the event flowing, especially when you’re juggling telescopes and curious visitors. Also, consider the moon’s altitude and visibility window. A low moon means more atmospheric distortion, so aim for when it’s higher in the sky. With a solid plan, you’ll be ready for clear skies and happy observers. Next, we’ll explore hands-on activities and simple lunar models to deepen the experience.
 astropical.spacegithub.comgithub.com+22 min
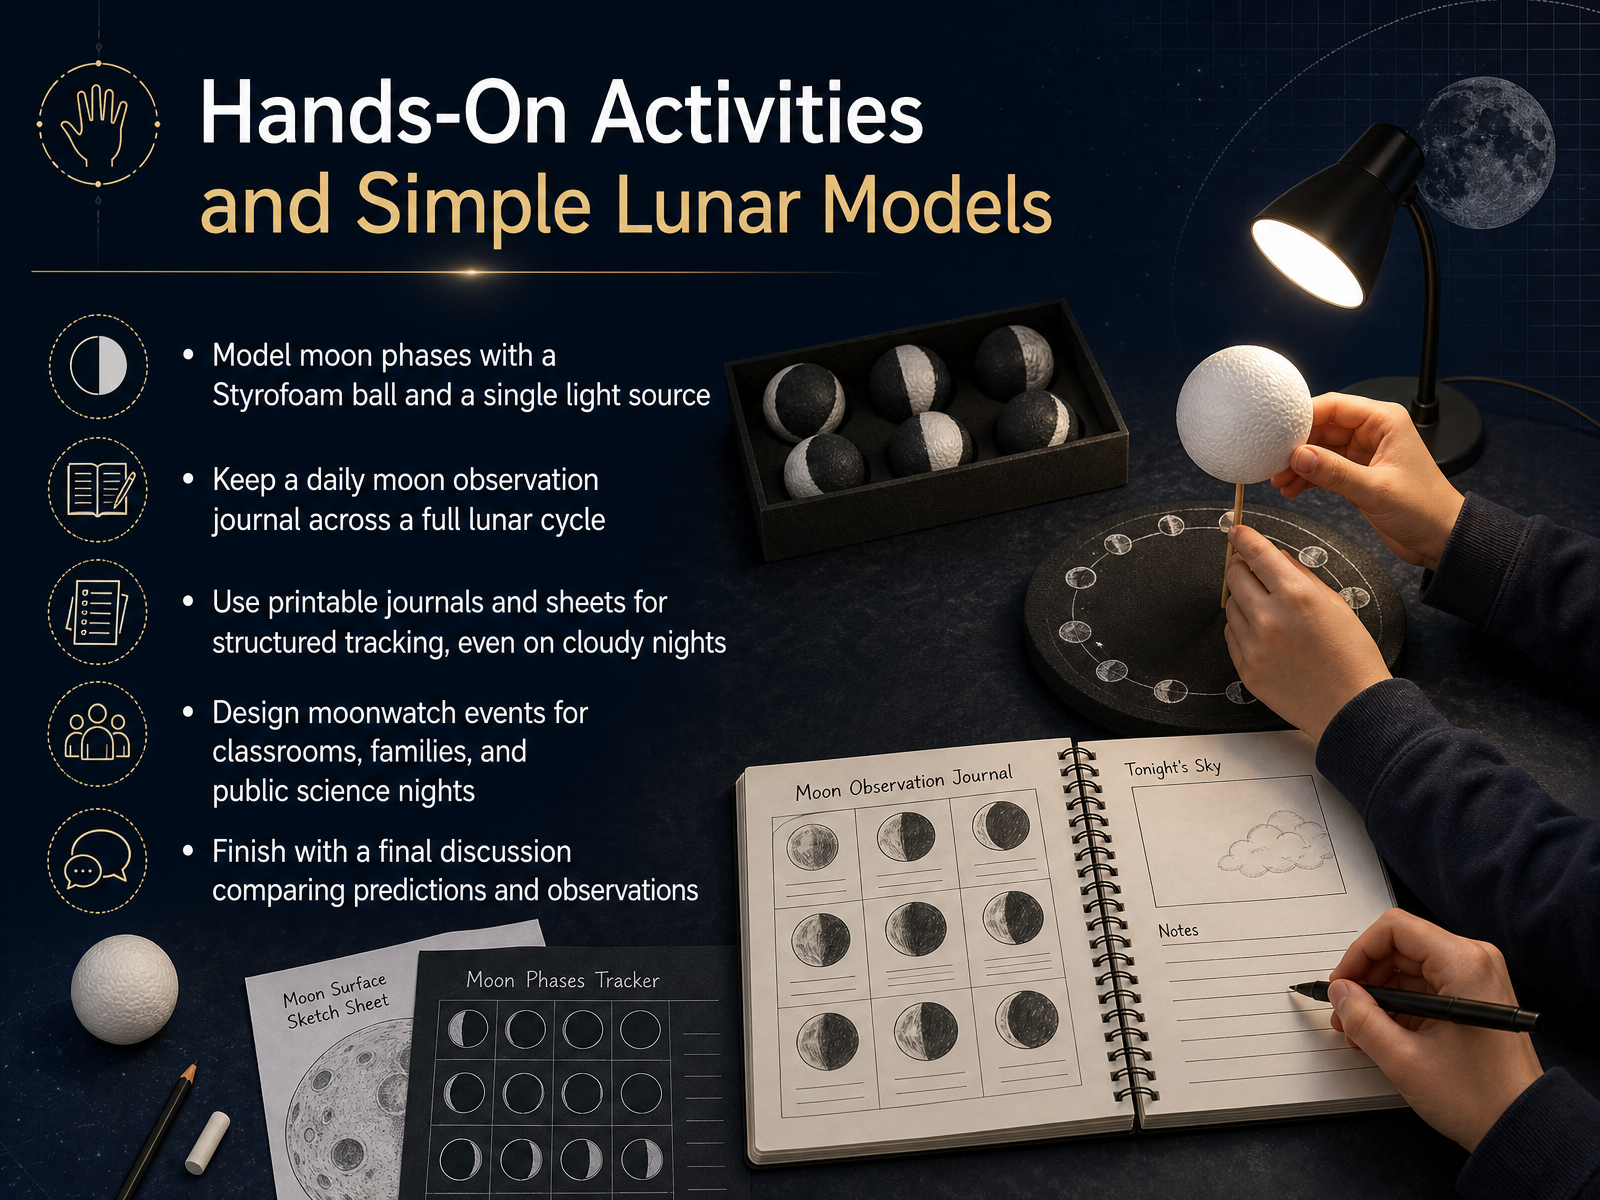
 - 10Hands-On Activities and Simple Lunar ModelsNow let's turn this knowledge into something you can hold in your hands. A simple Styrofoam ball and a single lamp can become a miniature Moon. As you move the ball around your head, watch how the shadow creeps across its surface, creating crescents and full phases right there in your classroom. It is a wonderfully vivid way to grasp why we see the Moon change. Then, take that understanding outside. Start a daily observation journal, even for just a few minutes each clear night. Printable sheets make it easy to sketch the shape and note the time, so the habit sticks even when clouds roll in. On cloudy nights, learners can simply write down the weather and use their model sheet to predict what phase they would see. For a larger community touch, consider hosting a moonwatch event. Invite families and neighbors to observe together, and wrap it up with a final discussion where everyone compares their predictions with what they actually saw. It is a rewarding way to turn individual curiosity into a shared journey of discovery. Next, let's look at some common misconceptions educators should expect when teaching about the Moon.
 science.nasa.govscience.nasa.govscience.nasa.gov+22 min
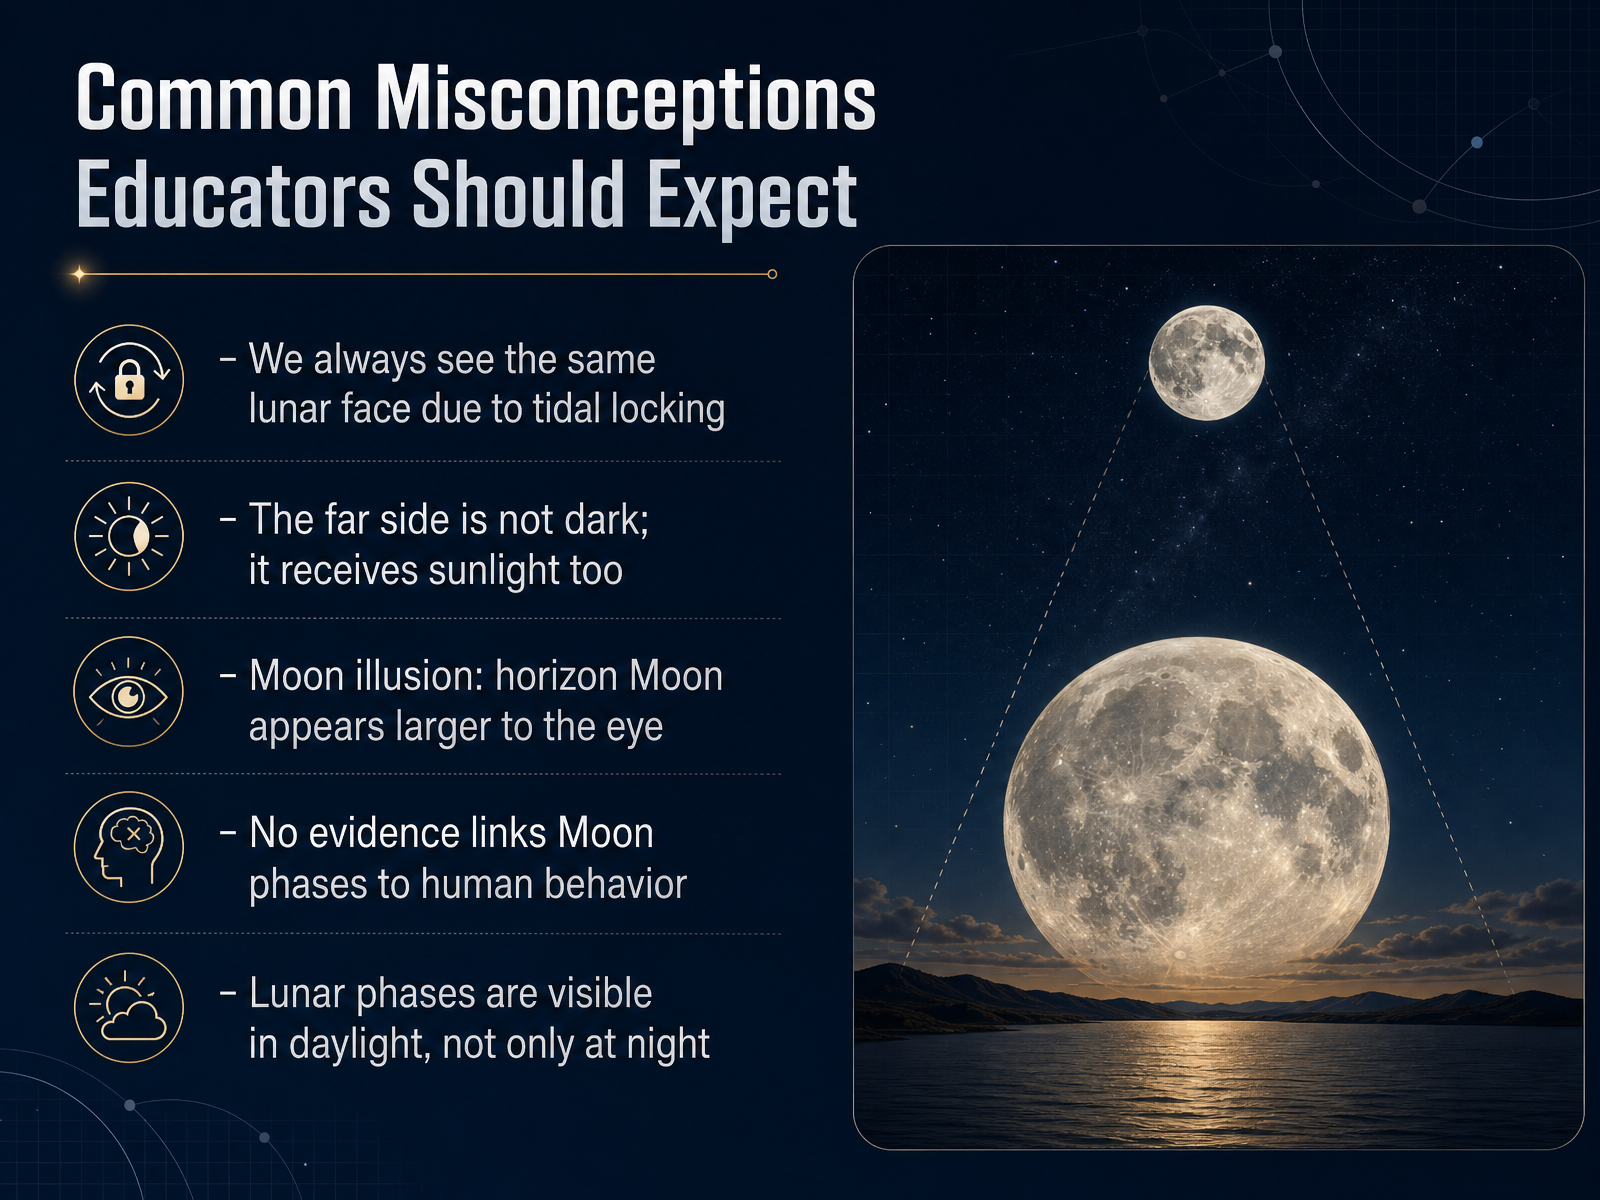
 - 11Common Misconceptions Educators Should ExpectBefore we dive into the data, let's clear up a few common myths. First, you've probably heard that we always see the same side of the Moon. That's true, thanks to tidal locking. But here's the surprise: the far side is not permanently dark. It gets just as much sunlight as the near side; we just can't see it from Earth. Next, the Moon illusion—when the Moon sits low on the horizon, it looks huge. That's your brain playing tricks, not the Moon changing size. Also, you might have heard that full moons make people behave oddly. There's no scientific evidence linking lunar phases to human behavior. And one of my favorites: you don't have to wait for night to see the Moon. It's often visible in daylight, especially near first or last quarter. So when you teach, encourage your learners to question what they've heard. Up next, we'll explore how everyday people can join real lunar research. Keep those questions coming!
 1 min
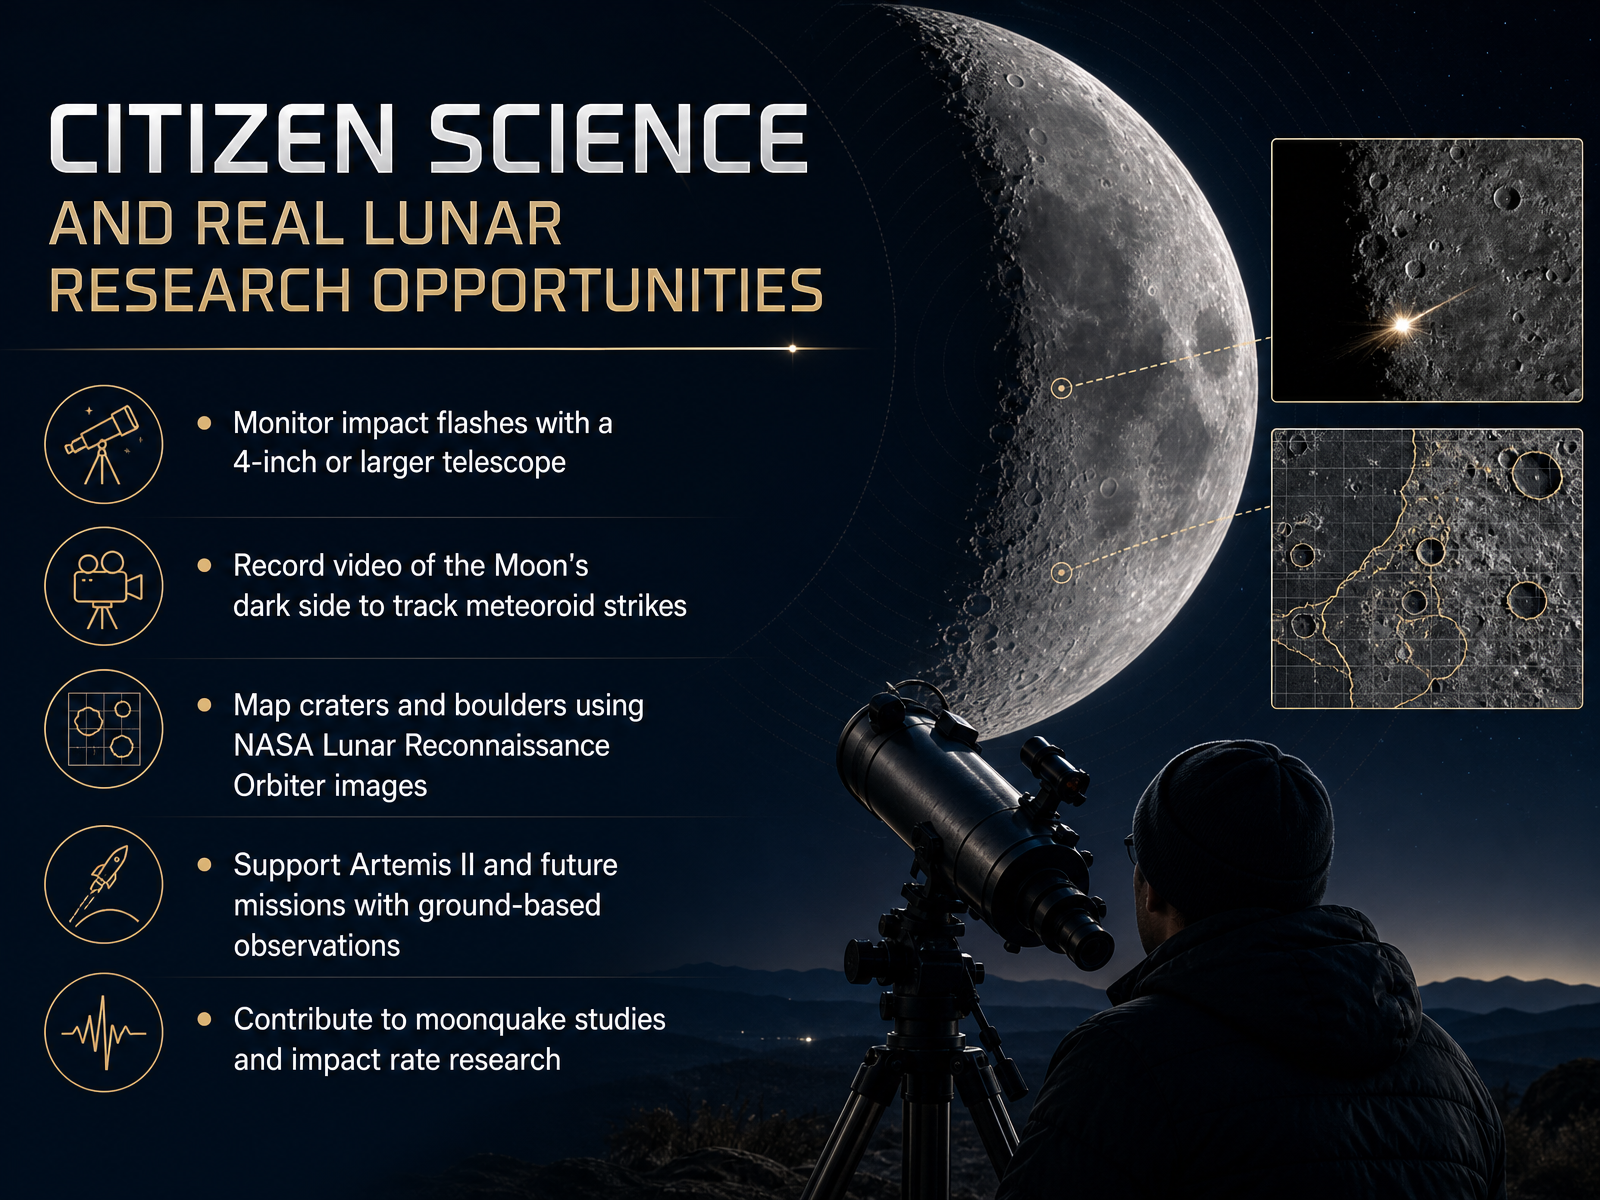
1 min - 12Citizen Science and Real Lunar Research OpportunitiesNow, let's talk about how you can contribute to real lunar research from your own backyard. Citizen science isn't just a buzzword; it's a genuine gateway to discovery. For example, you can monitor impact flashes with a telescope of four inches or larger. When a tiny meteoroid strikes the Moon's dark side, it creates a brief, split-second flash of light. By recording video of the dark side, you help scientists track these meteoroid strikes. Your footage helps them understand the frequency of impacts and the hazards they might pose to future missions. And there's more. You can also map craters and boulders using images from NASA's Lunar Reconnaissance Orbiter. This helps scientists study the Moon's geology. Your ground-based observations are especially valuable during missions like Artemis, as they can be cross-referenced with what astronauts see from space. Ultimately, your contributions help support studies on moonquakes and impact rates. You might discover a new crater or confirm a rare event. So, let's move on, because I want to show you how you can turn these observations into compelling content for any audience.
 2 min
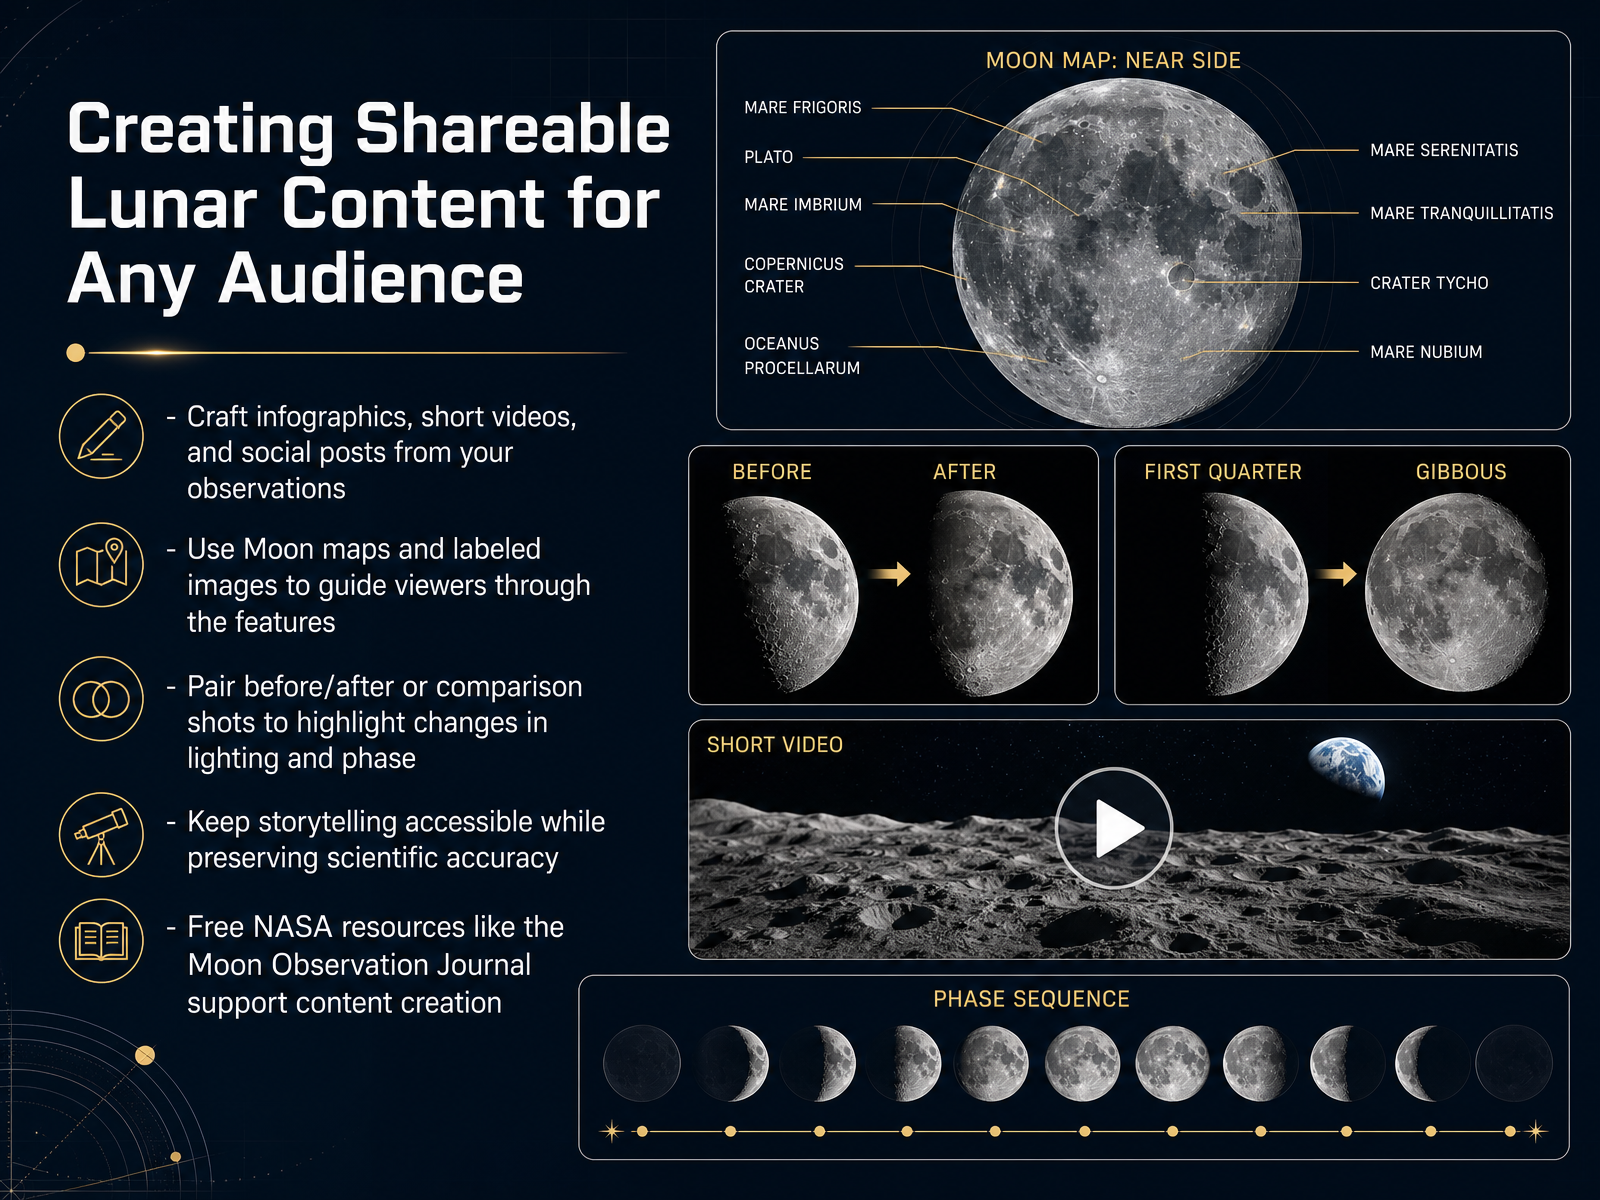
2 min - 13Creating Shareable Lunar Content for Any AudienceNow let's think about sharing what you've seen. Your lunar observations can become beautiful infographics, short videos, or simple social posts. Use labeled moon maps to guide viewers through craters and maria, so they know exactly what they're looking at. Before-and-after shots are especially effective, showing how shadows shift across the surface as the phase changes. Keep the story simple and warm, but stay scientifically accurate in every detail. And here's a wonderful resource: NASA offers free materials like the Moon Observation Journal, perfect for helping others start their own nightly practice. You don't need fancy equipment, just curiosity and a clear sky. Next, we'll explore resources, communities, and how to keep your observation habit going for the long term.
 science.nasa.govscience.nasa.govscience.nasa.gov+21 min
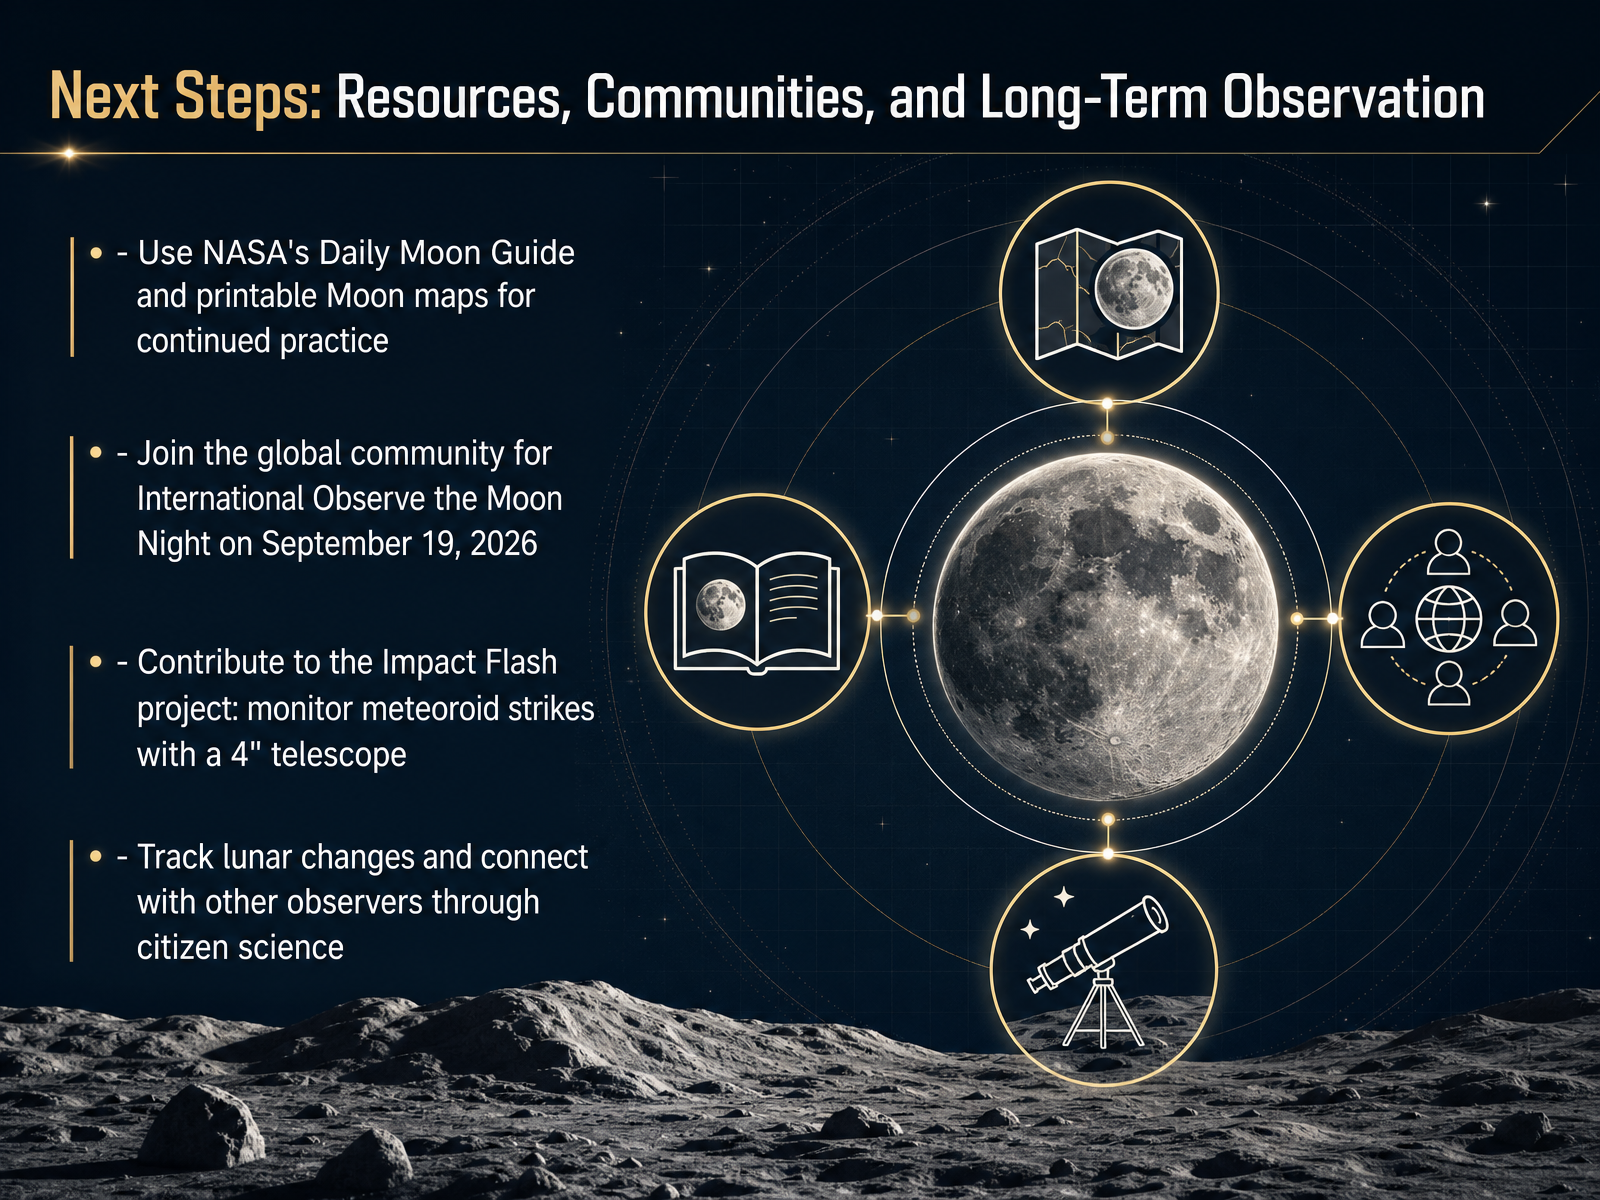
 - 14Next Steps: Resources, Communities, and Long-Term ObservationWe have reached the final chapter of our lunar journey, and what a beautiful path it has been. Now, the real adventure begins with you. To keep practicing, use NASA's Daily Moon Guide or print out a moon map to trace the craters you have learned about. Mark your calendar for September nineteenth, 2026, because that is International Observe the Moon Night, a worldwide celebration where you can join thousands of fellow sky watchers. If you want to dive even deeper into real science, consider the Impact Flash project. With a telescope of at least four inches, you can record video of the Moon's dark side and catch fleeting meteoroid strikes that help NASA study lunar hazards. Your observations truly matter. Tracking the changing Moon connects you to a global community of curious minds, so pick up your telescope or just step outside. The Moon will be waiting, and now you know exactly how to greet it. Thank you for learning with me today, and happy observing!
 science.nasa.govscience.nasa.govscience.nasa.gov+22 min
Take the deck with you
Download this course as a file — free, no sign-up needed.
- PDF handoutEvery slide page, ready to print or share.15 pages · 4.2 MBDownload
- Narrated PowerPointThe deck that presents itself — every slide carries the digital human's narration video.15 pages · 14.4 MBDownload
- PowerPoint slidesThe full deck as a .pptx — open it in PowerPoint, Keynote, or Google Slides.15 pages · 4.2 MBDownload
Free to use in your own training — please keep the PersonWise credit page at the end.
Have your own deck? Turn it into a course
Sources consulted
Web sources consulted while building this course.
- International Observe the Moon Night Event Materials — science.nasa.gov
- Rain or Shine Moon Resources - NASA Science — science.nasa.gov
- International Observe the Moon Night - Multimedia — science.nasa.gov
- International Observe the Moon Night Resources — science.nasa.gov
- Observe the Moon Night: Resources for Learning Environments - NASA Science — science.nasa.gov
- Best Telescope for Viewing the Moon (2026) — telescopeadvisor.com
- How to Observe the Moon With a Telescope: Complete Guide for 2026 — telescopeadvisor.com
- 10 Best Telescopes to See the Moon in 2026 (Craters, Mountains & More) | TelescopeGuides — telescopeguides.com
- How to observe the Moon with the naked eye or a telescope | BBC Sky at Night Magazine — skyatnightmagazine.com
- Best Telescopes for Moon Viewing in 2026: Buyer's Guide - Moon Phase Today — moonphase.today
- Looking up? Here's how to photograph the Moon with your phone — csiro.au
- How to Photograph the Moon With Your Smartphone Camera: Tips for Better Lunar Photography — techtimes.com
- Photograph the Moon with a Smartphone: Settings and Tips — pasthorizon.com
- How to Photograph the Moon: Camera & Phone Settings — watchthestars.co.uk
- How to photograph the Moon | BBC Sky at Night Magazine — skyatnightmagazine.com
- Lunar Imaging App | Home — astropical.space
- tholewis/moon-classroom — github.com
- danilop/nightseek — github.com
- The Schools’ Observatory (TSO) – — ftp-europlanet.de
- GlobeViewer Moon PRO - Education App | MWM — mwm.ai