Begin
14 pages · ~28 min
Identifying Minerals by Physical Properties
This training teaches learners to identify minerals using hardness, luster, streak, and cleavage, ideal for geology students and enthusiasts building practical identification skills.
A digital instructor presents all 14 pages. Hold “Ask” at any point and ask out loud — the answer comes from this course. No sign-up needed.
What you’ll learn
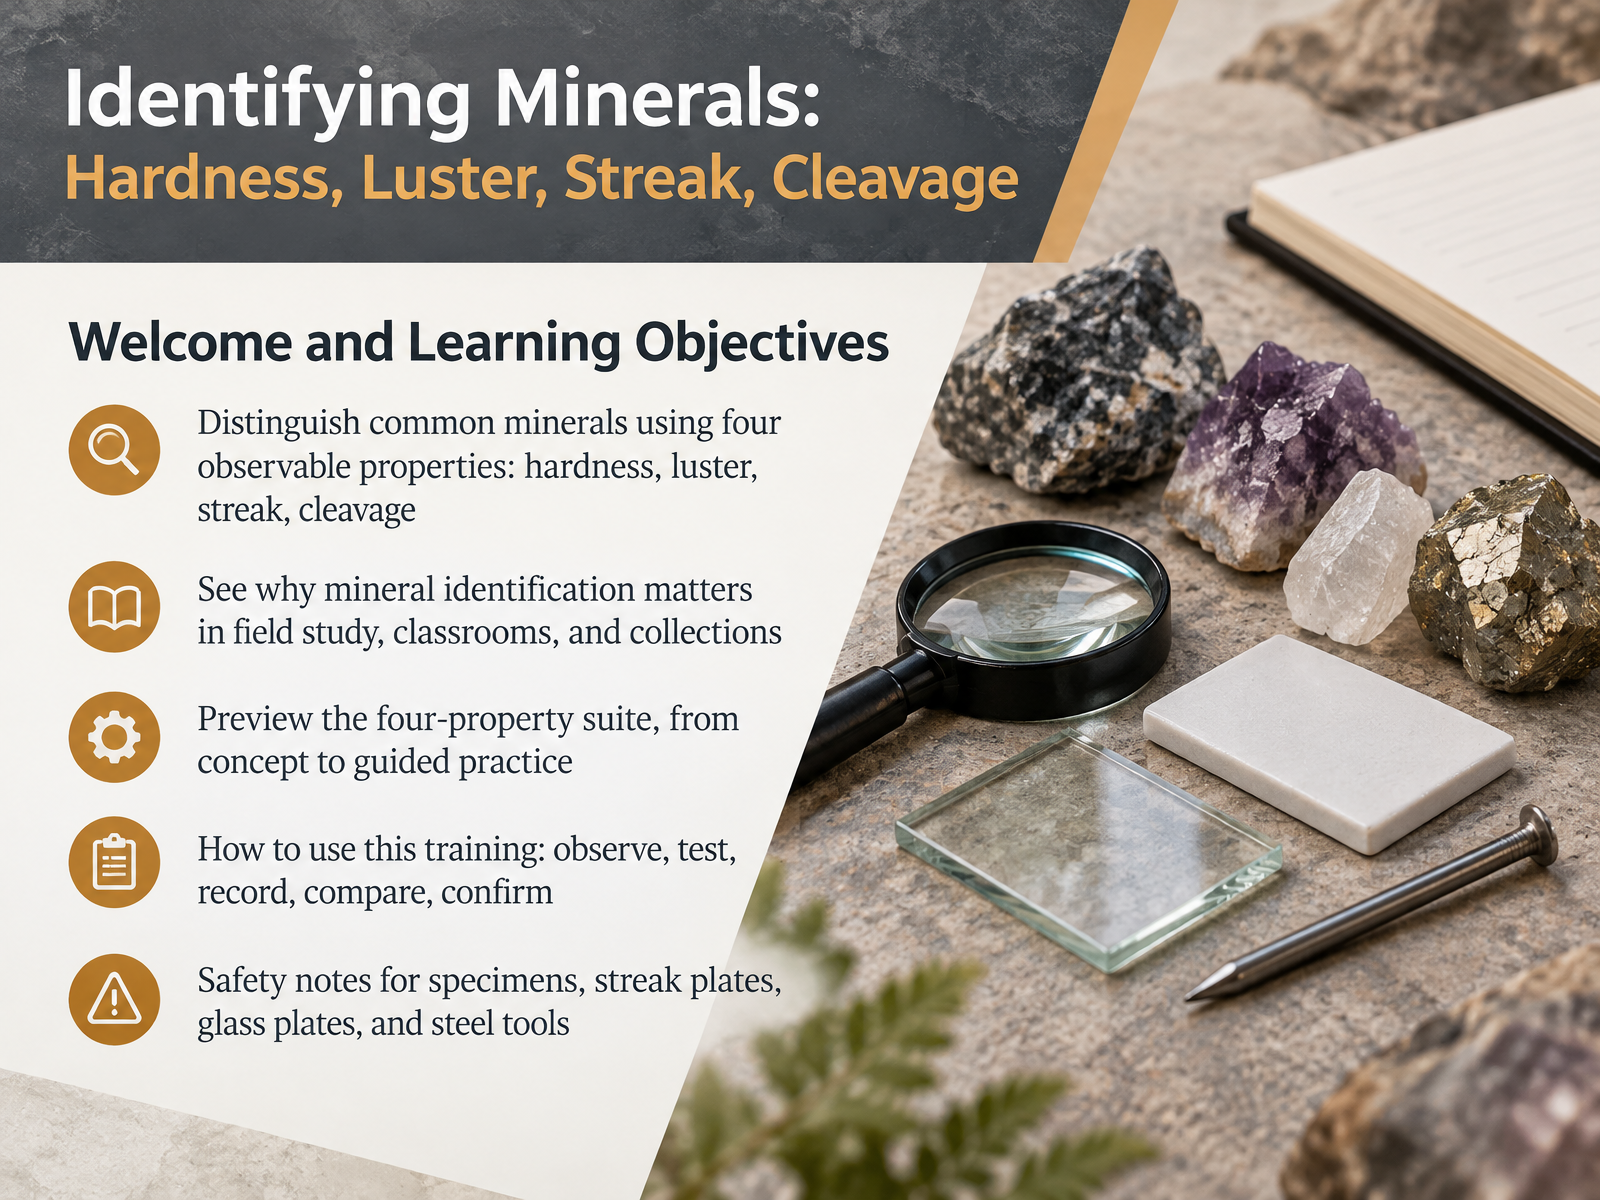
- 01Identifying Minerals: Hardness, Luster, Streak, CleavageWelcome to Identifying Minerals, a practical course built around four properties you can test anywhere: hardness, luster, streak, and cleavage. By the end, you will be able to distinguish common minerals using these observable clues, and you will see why mineral identification matters in field study, in classrooms, and in collections.
Here is our plan. First, we will build each property from the ground up. Next, you will watch a demonstration of the four tests, and then you will practice on known specimens before identifying unknowns. Throughout, keep one simple workflow in mind: observe, test, record, compare, and confirm. Ask yourself what each result tells you, and compare that to what the mineral should show.
One quick note on safety. Always lay a glass plate flat on the bench, never in your hand. Use steady, controlled pressure with streak plates and steel tools, and keep fingers clear of sharp edges.
Let us begin with the bigger picture: what minerals are and why properties matter.nps.govwww1.maine.govopenpress.usask.ca+21 min
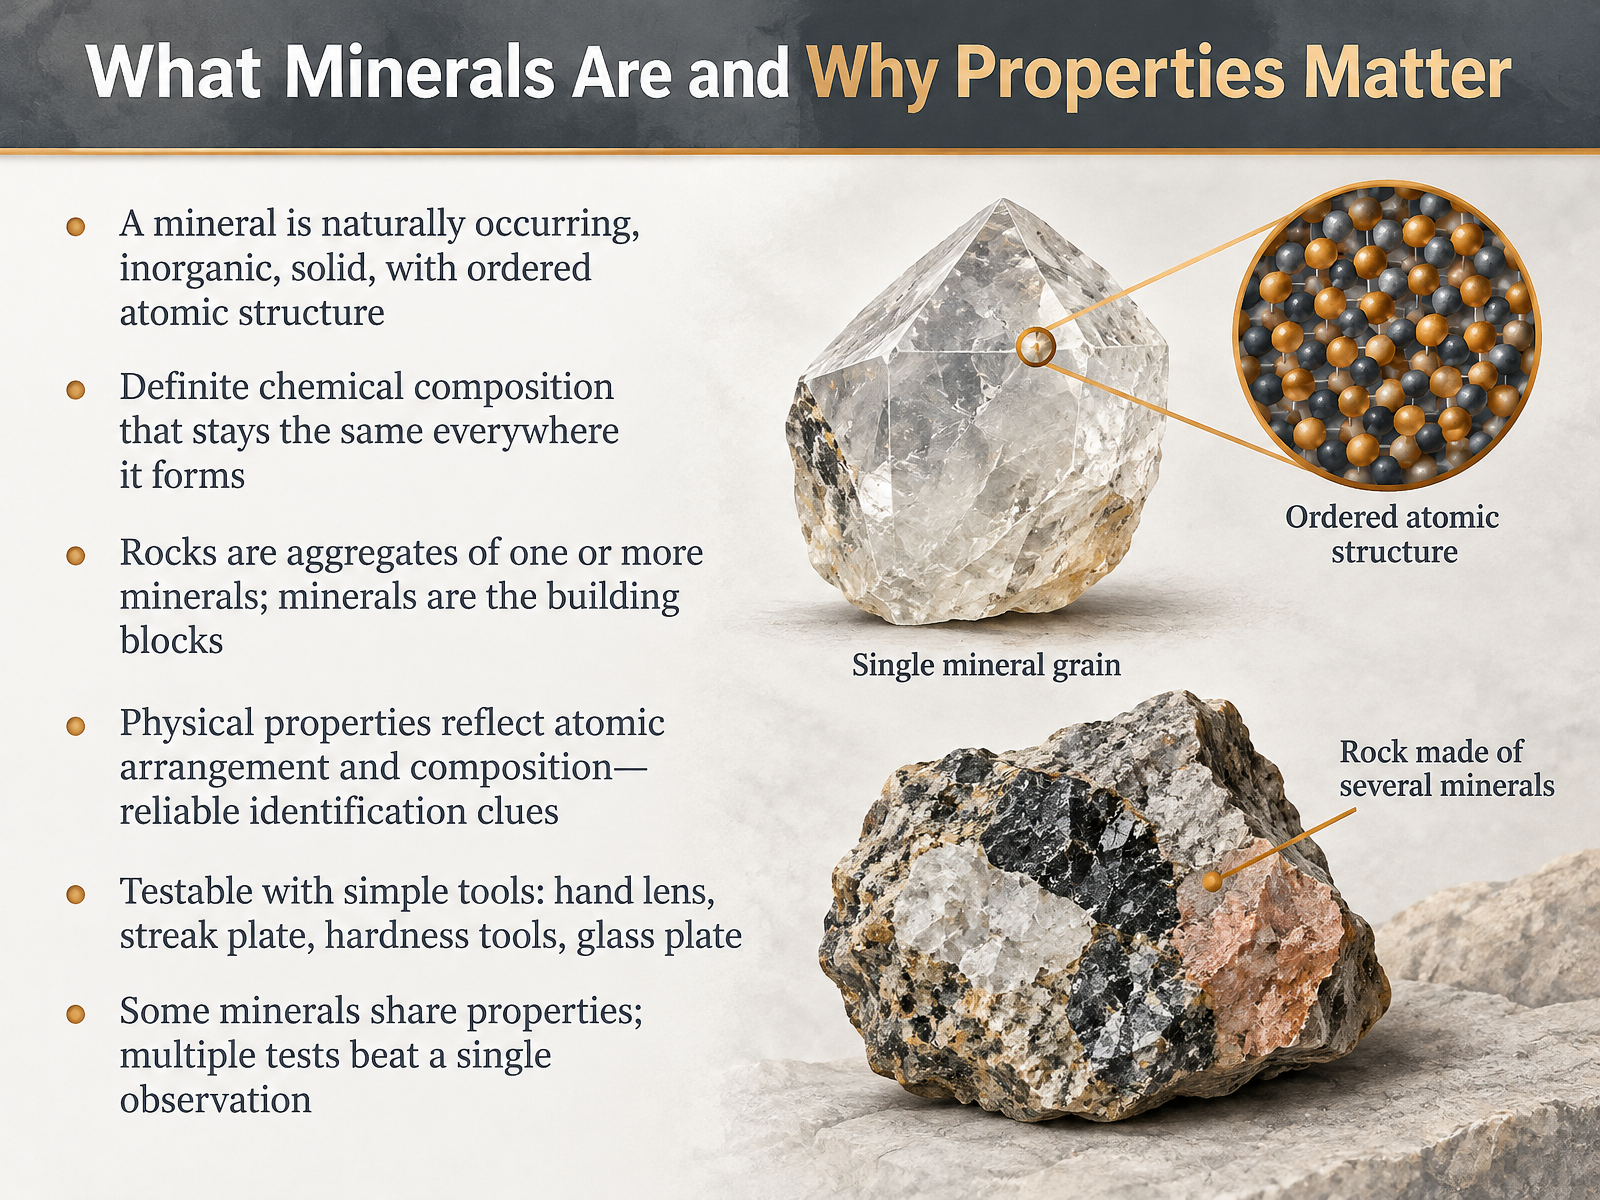
- 02What Minerals Are and Why Properties MatterNow, before we test anything, let's be clear about what a mineral actually is. A mineral is naturally occurring, inorganic, and solid, with an ordered internal atomic structure. It also has a definite chemical composition that stays the same everywhere it forms. Rocks, by contrast, are aggregates of one or more minerals. Think of minerals as the building blocks, and rocks as the structures built from them. Why does this matter for identification? Because a mineral's physical properties reflect its atomic arrangement and its composition. That makes those properties reliable clues. And here is the good news. You can test them with simple tools: a hand lens, a streak plate, hardness tools, and a glass plate. One more thing to remember. Some minerals share properties, so multiple tests beat a single observation. Let's move on to Hardness and the Mohs Scale.
 nps.govaustralian.museumdnr.sc.gov+21 min
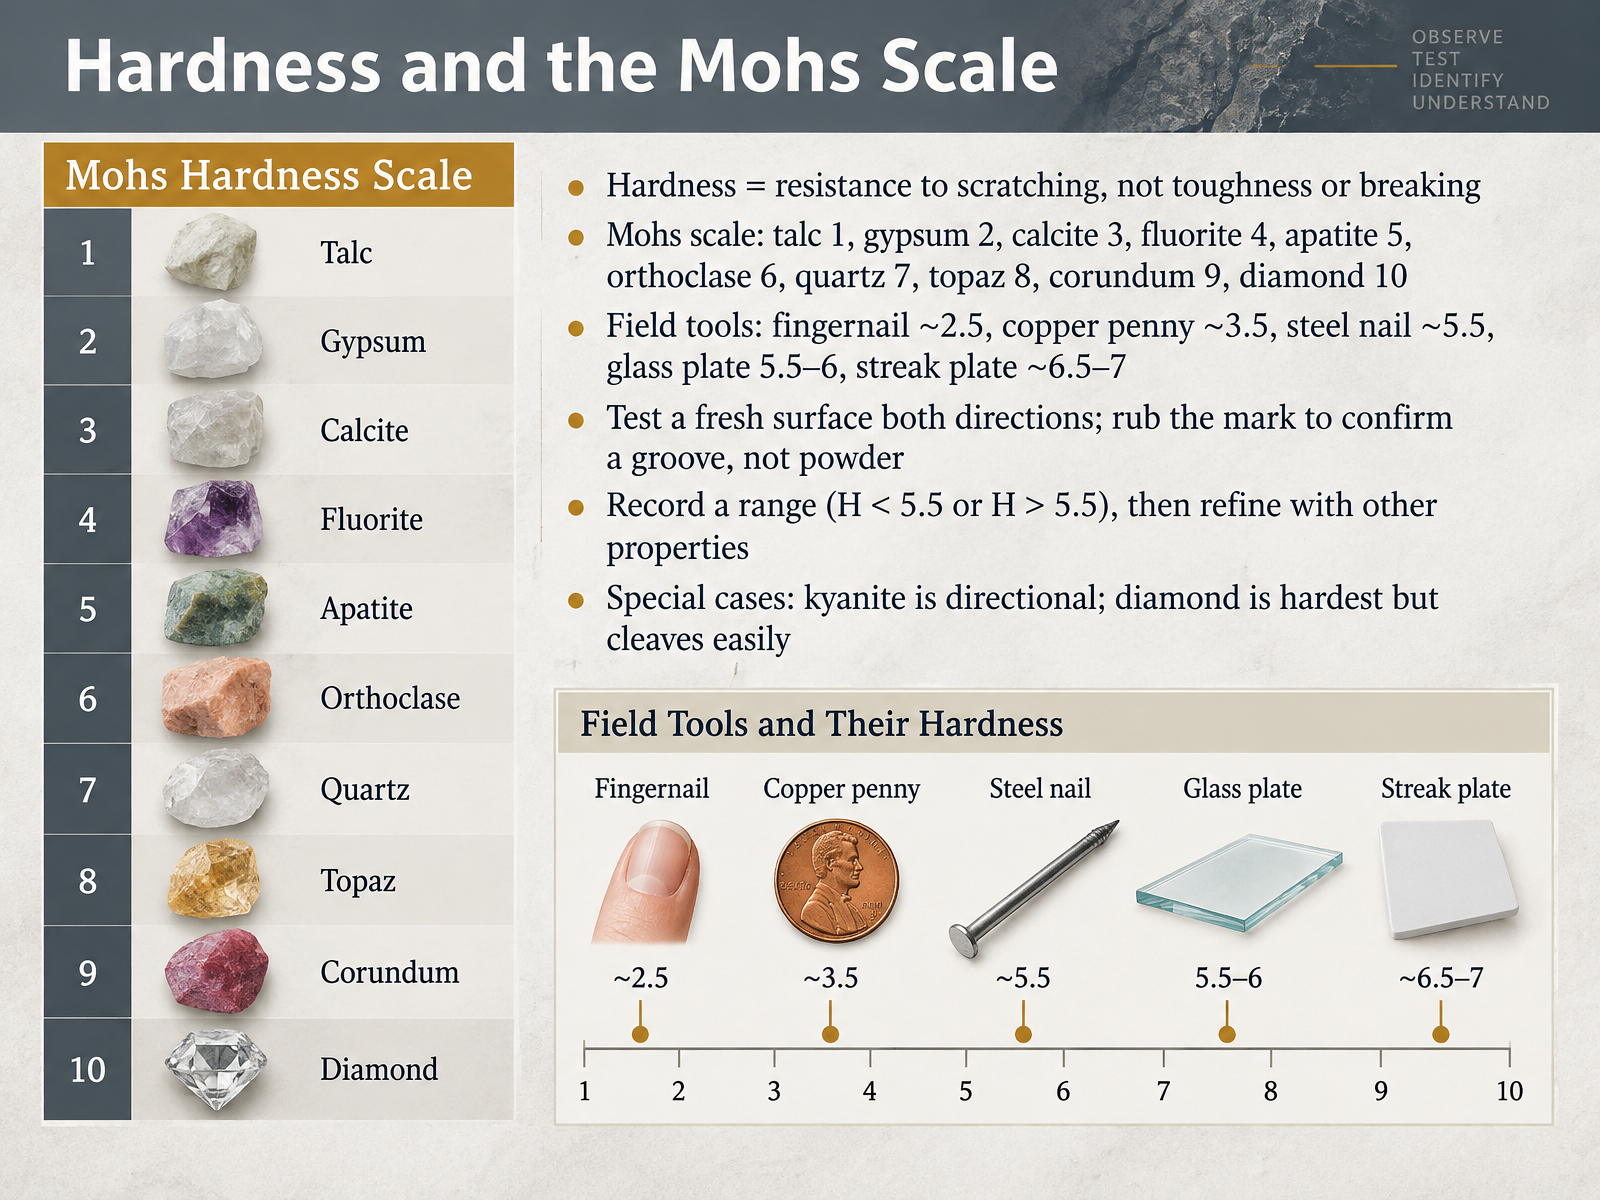
- 03Hardness and the Mohs ScaleNext, let's look at hardness and the Mohs scale. Hardness is a mineral's resistance to scratching. It is not the same as toughness. A mineral can be hard and still break easily. The Mohs scale ranks ten reference minerals from one to ten. Talc sits at one, the softest. Gypsum is two, calcite three, fluorite four, apatite five, orthoclase six, quartz seven, topaz eight, corundum nine, and diamond ten. In the field, you can estimate hardness with simple tools. A fingernail is about two and a half. A copper penny is about three and a half. A steel nail is about five and a half. A glass plate falls between five and a half and six. And a streak plate is around six and a half to seven. Now here is the key habit. Test a fresh surface in both directions. Then rub the mark with your finger. A true scratch leaves a groove. A powder streak rubs away. Record a range first, such as hardness less than five and a half or greater than five and a half. Then refine it with other properties. A few special cases are worth noting. Kyanite is directional, harder across its length than along it. And diamond is the hardest mineral, yet it cleaves easily. Next, we turn to luster: metallic, nonmetallic, and in between.
 nps.govwww1.maine.govopenpress.usask.ca+22 min
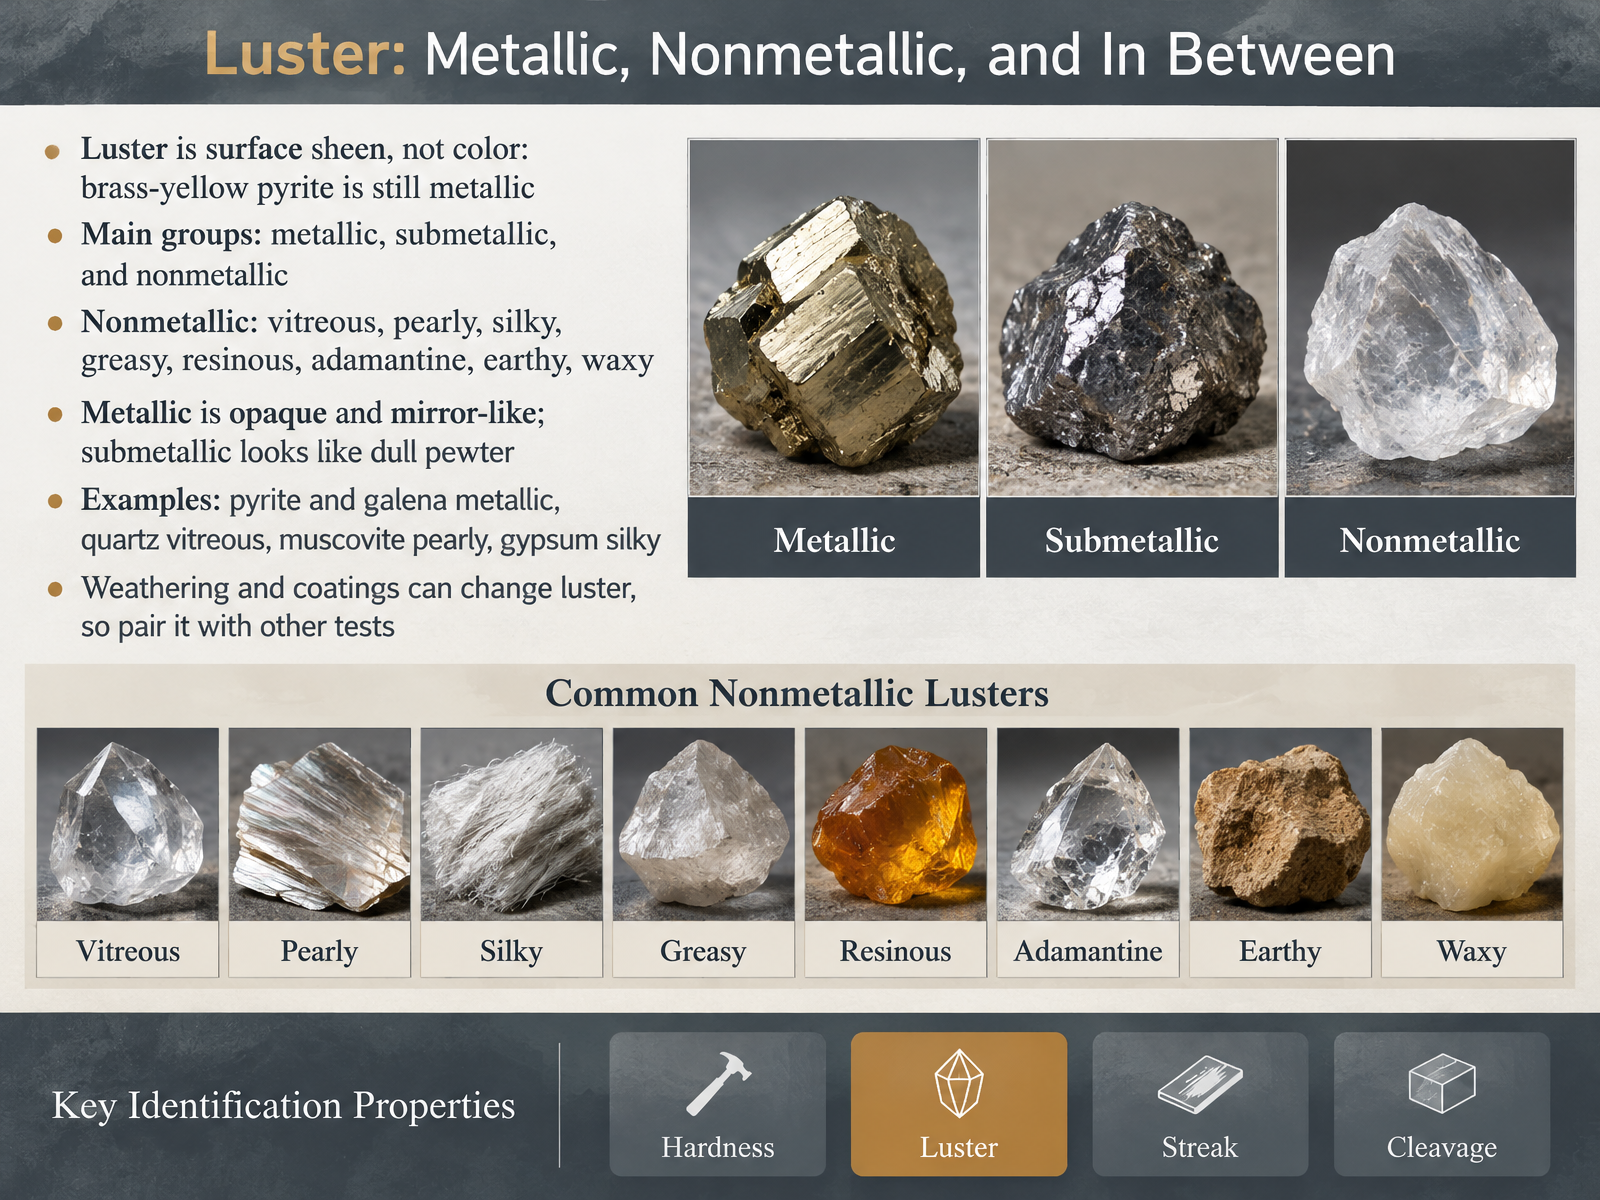
- 04Luster: Metallic, Nonmetallic, and In BetweenNow let's focus on luster, which is the sheen of a mineral's surface. Luster is not the same as color. For example, a brass-yellow pyrite crystal still has a metallic luster. The main groups are metallic, submetallic, and nonmetallic. Metallic luster is opaque and mirror-like, while submetallic looks like dull pewter. Nonmetallic luster has many subtypes, including vitreous, pearly, silky, greasy, resinous, adamantine, earthy, and waxy. Look for these examples as you observe your specimens. Pyrite and galena show metallic luster. Quartz is vitreous, muscovite is pearly, and gypsum can be silky. One caution: weathering and coatings can change luster, so pair this test with others. Next, we will examine streak, which is the color of powdered mineral.
 nps.govaustralian.museumdnr.sc.gov+21 min
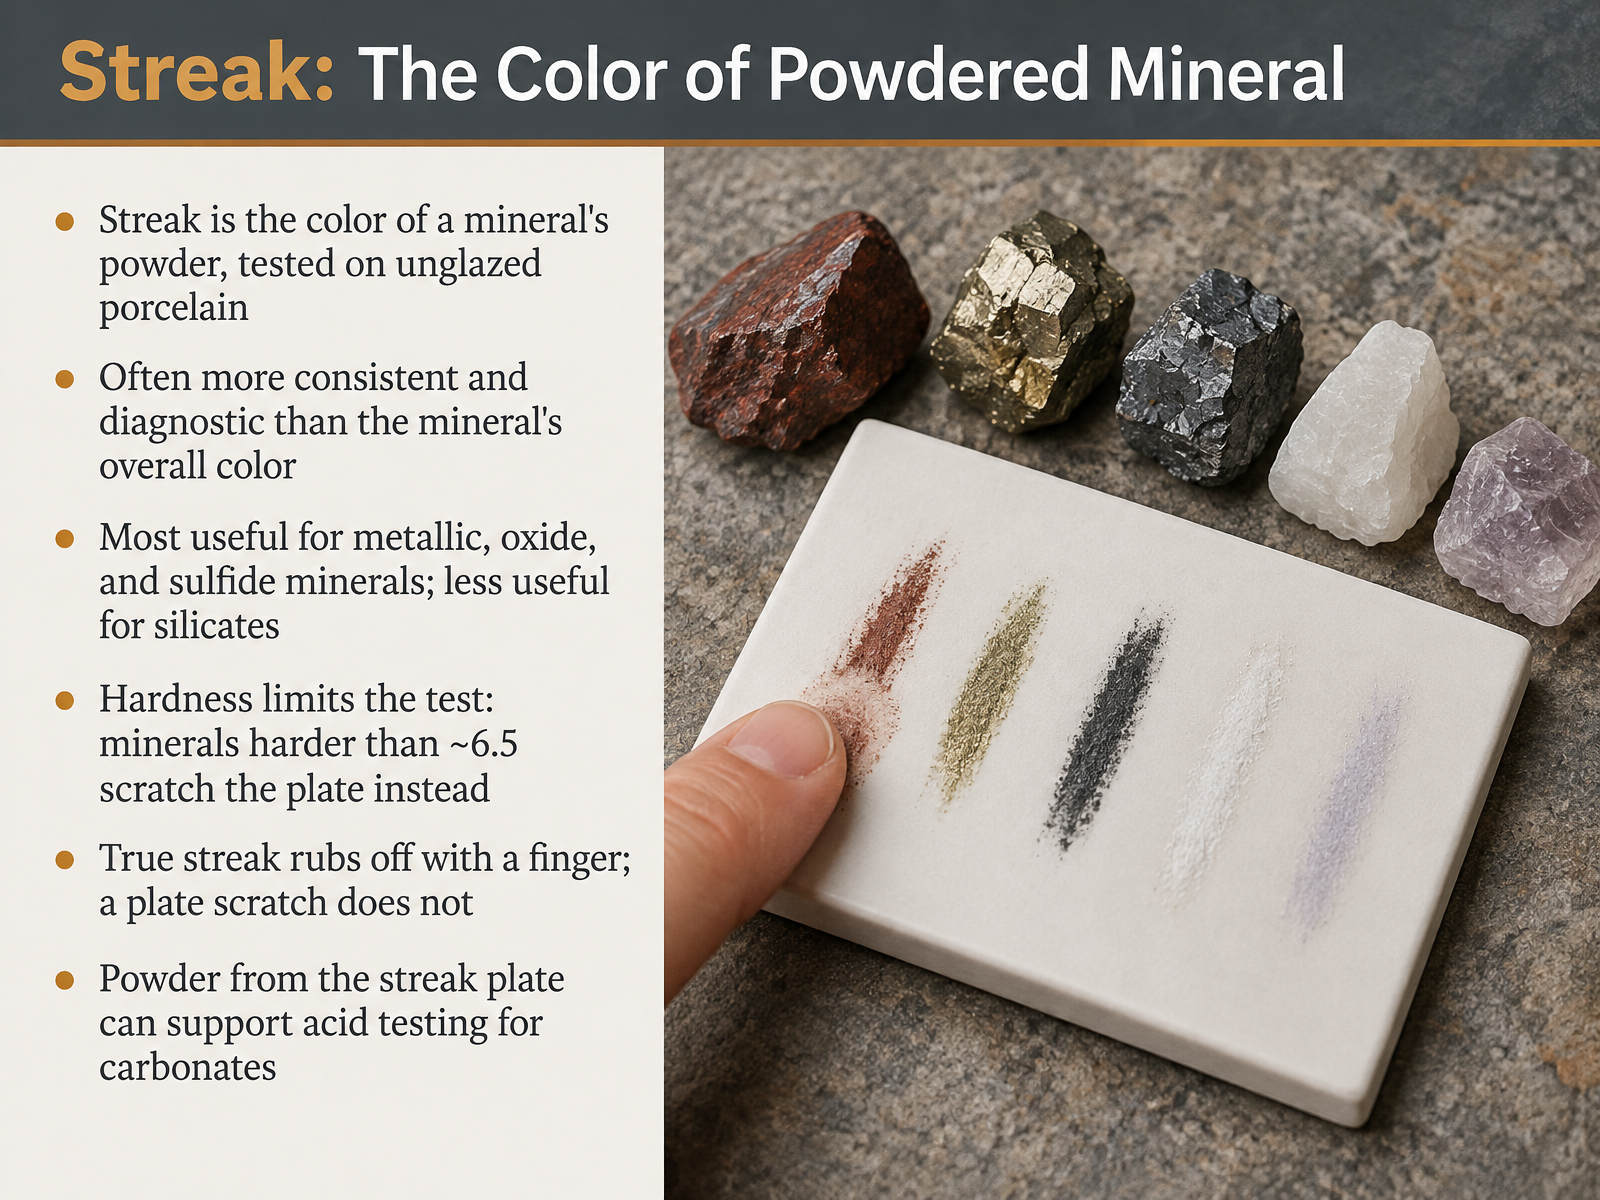
- 05Streak: The Color of Powdered MineralNext, let's talk about streak, which is the color of a mineral's powder. To test it, rub the specimen across unglazed porcelain, called a streak plate. Streak is often more consistent and more diagnostic than the mineral's overall color. It is most useful for metallic, oxide, and sulfide minerals, and less useful for silicates. Here is a classic example. Hematite can look black, red, brown, or silver, but its streak is always reddish brown. Pyrite looks brassy gold, yet it leaves a black or greenish black streak. Now, ask yourself about hardness. The streak plate is about six and a half on the Mohs scale. Minerals harder than that will scratch the plate instead of leaving powder. A simple check: rub the mark with your finger. A true streak rubs off. A plate scratch does not. Finally, that powder can support acid testing for carbonates. Next, we move on to cleavage, fracture, and crystal form.
 geo.libretexts.orggeology.comidahomuseum.org+22 min
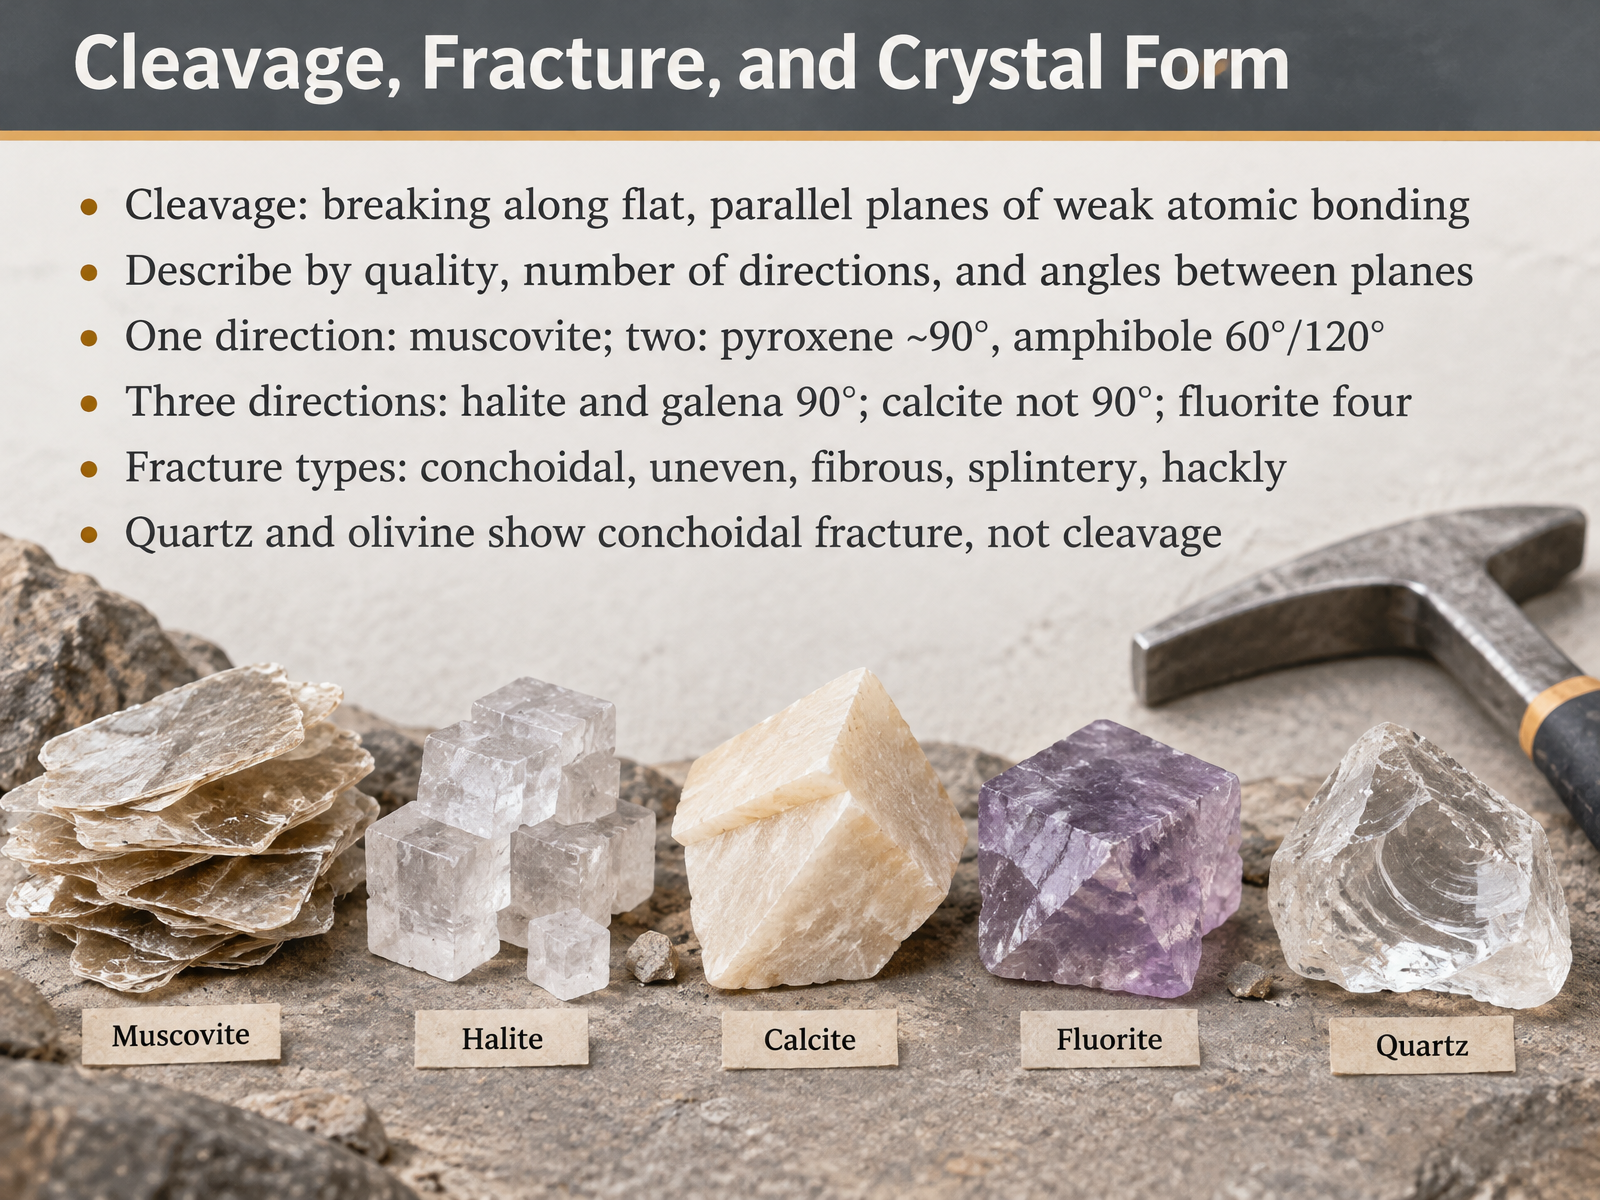
- 06Cleavage, Fracture, and Crystal FormNow let's look at how minerals break, and what that tells us. Cleavage is a break along flat, parallel planes where the atomic bonding is weak. To describe it, note three things: the quality of the planes, how many directions there are, and the angles between them. One direction gives thin sheets, as in muscovite. Two directions appear in pyroxene at about ninety degrees, and in amphibole at sixty and one hundred twenty degrees. Three directions appear in halite and galena, meeting at ninety degrees. Calcite also has three directions, but not at ninety. Fluorite shows four. When a mineral does not cleave, we call it fracture. Look for terms like conchoidal, uneven, fibrous, splintery, or hackly. Quartz and olivine are classic examples of conchoidal fracture, not cleavage. So ask yourself, does it break in flat planes, or does it break irregularly? That answer narrows your identification quickly. Next, we will bring these properties together into a step-by-step identification workflow.
 saalck.pressbooks.pubopen.maricopa.edugeo.libretexts.org+22 min
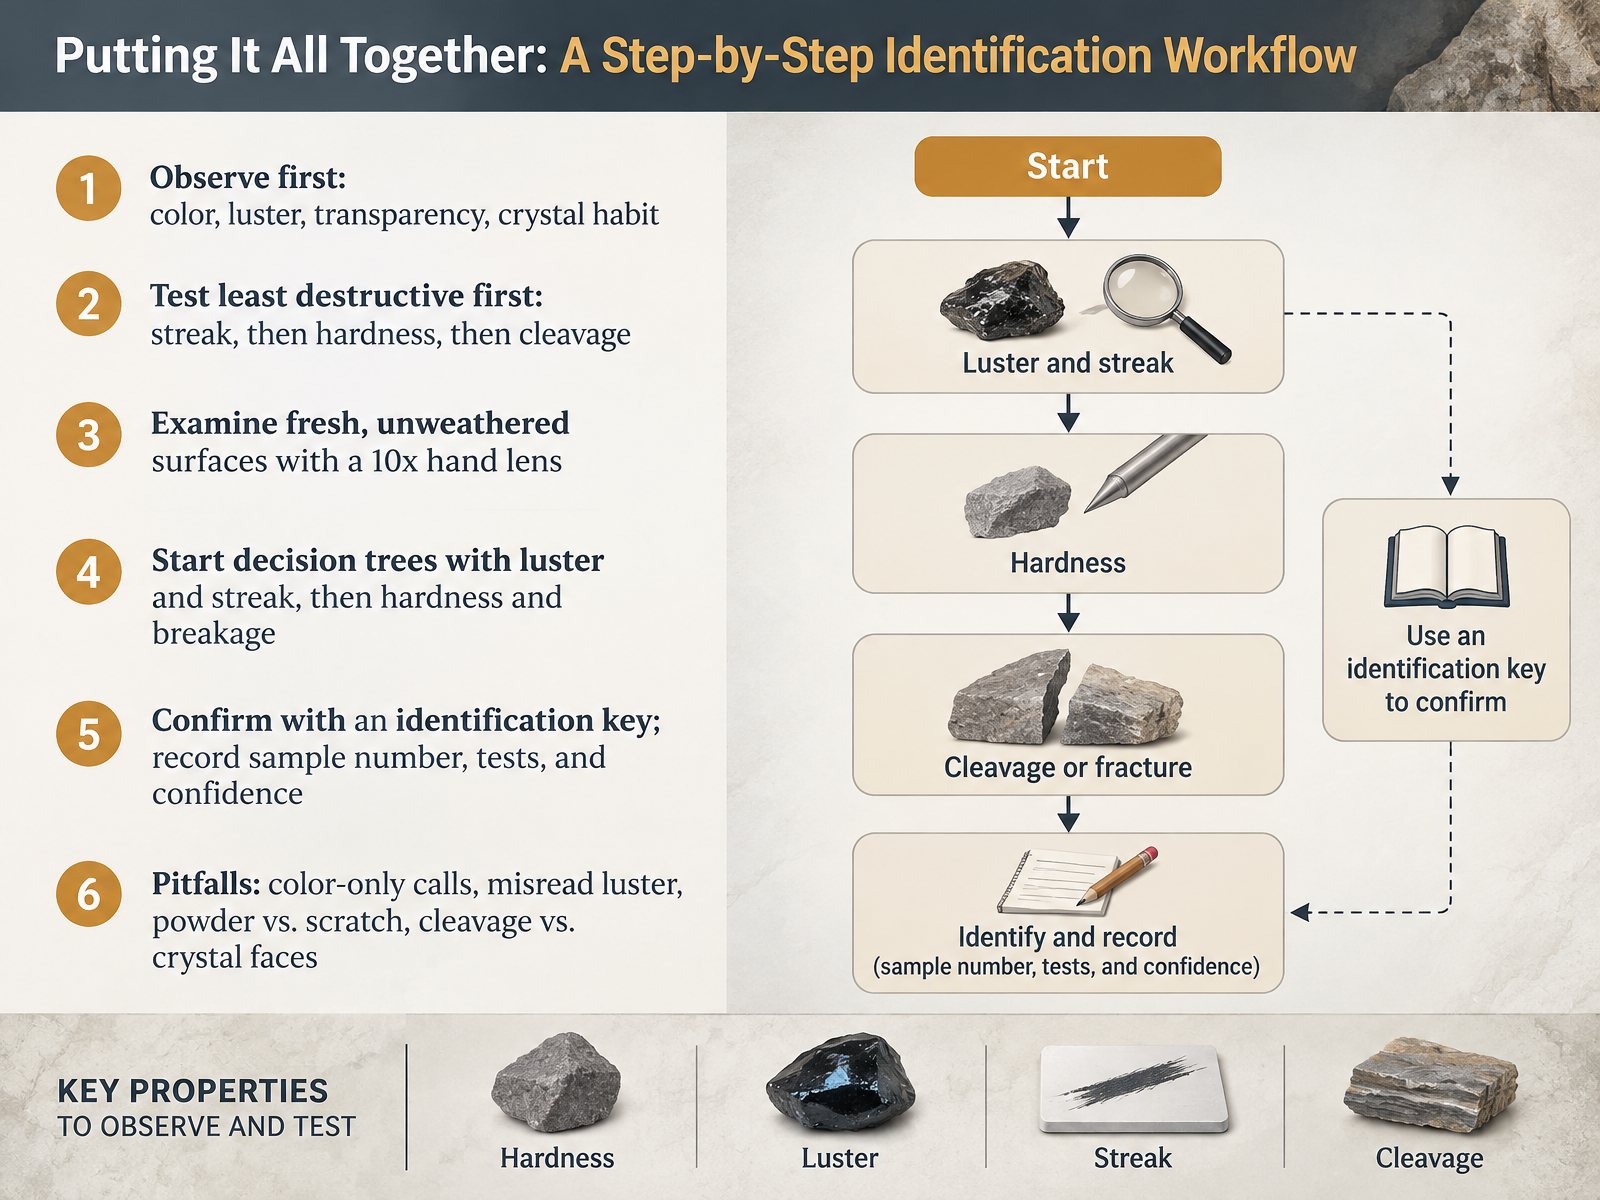
- 07Putting It All Together: A Step-by-Step Identification WorkflowNow let's pull the properties together into a step-by-step identification workflow you can use at any lab bench. First, observe before you test. Note color, luster, transparency, and crystal habit. Ask yourself, is it metallic or glassy, and can I see through it? Next, choose the least destructive test. Start with streak on an unglazed porcelain plate, then hardness, then cleavage. Always examine a fresh, unweathered surface with a ten power hand lens. Build your decision tree around luster and streak first, then hardness and breakage. Compare that to jumping straight to color, which is unreliable. Confirm your result with an identification key, and record the sample number, the tests you ran, and your confidence level. Finally, watch for common pitfalls. Don't rely on color alone. Don't misread luster. Don't confuse powder with a true scratch. And don't mistake cleavage planes for crystal faces. With that workflow in hand, you're ready to practice. Let's move on to the Guided Practice Lab: Quartz, Calcite, Halite, Muscovite, Pyrite, Hematite, Galena, and Fluorite.
 nps.govwww1.maine.govopenpress.usask.ca+22 min
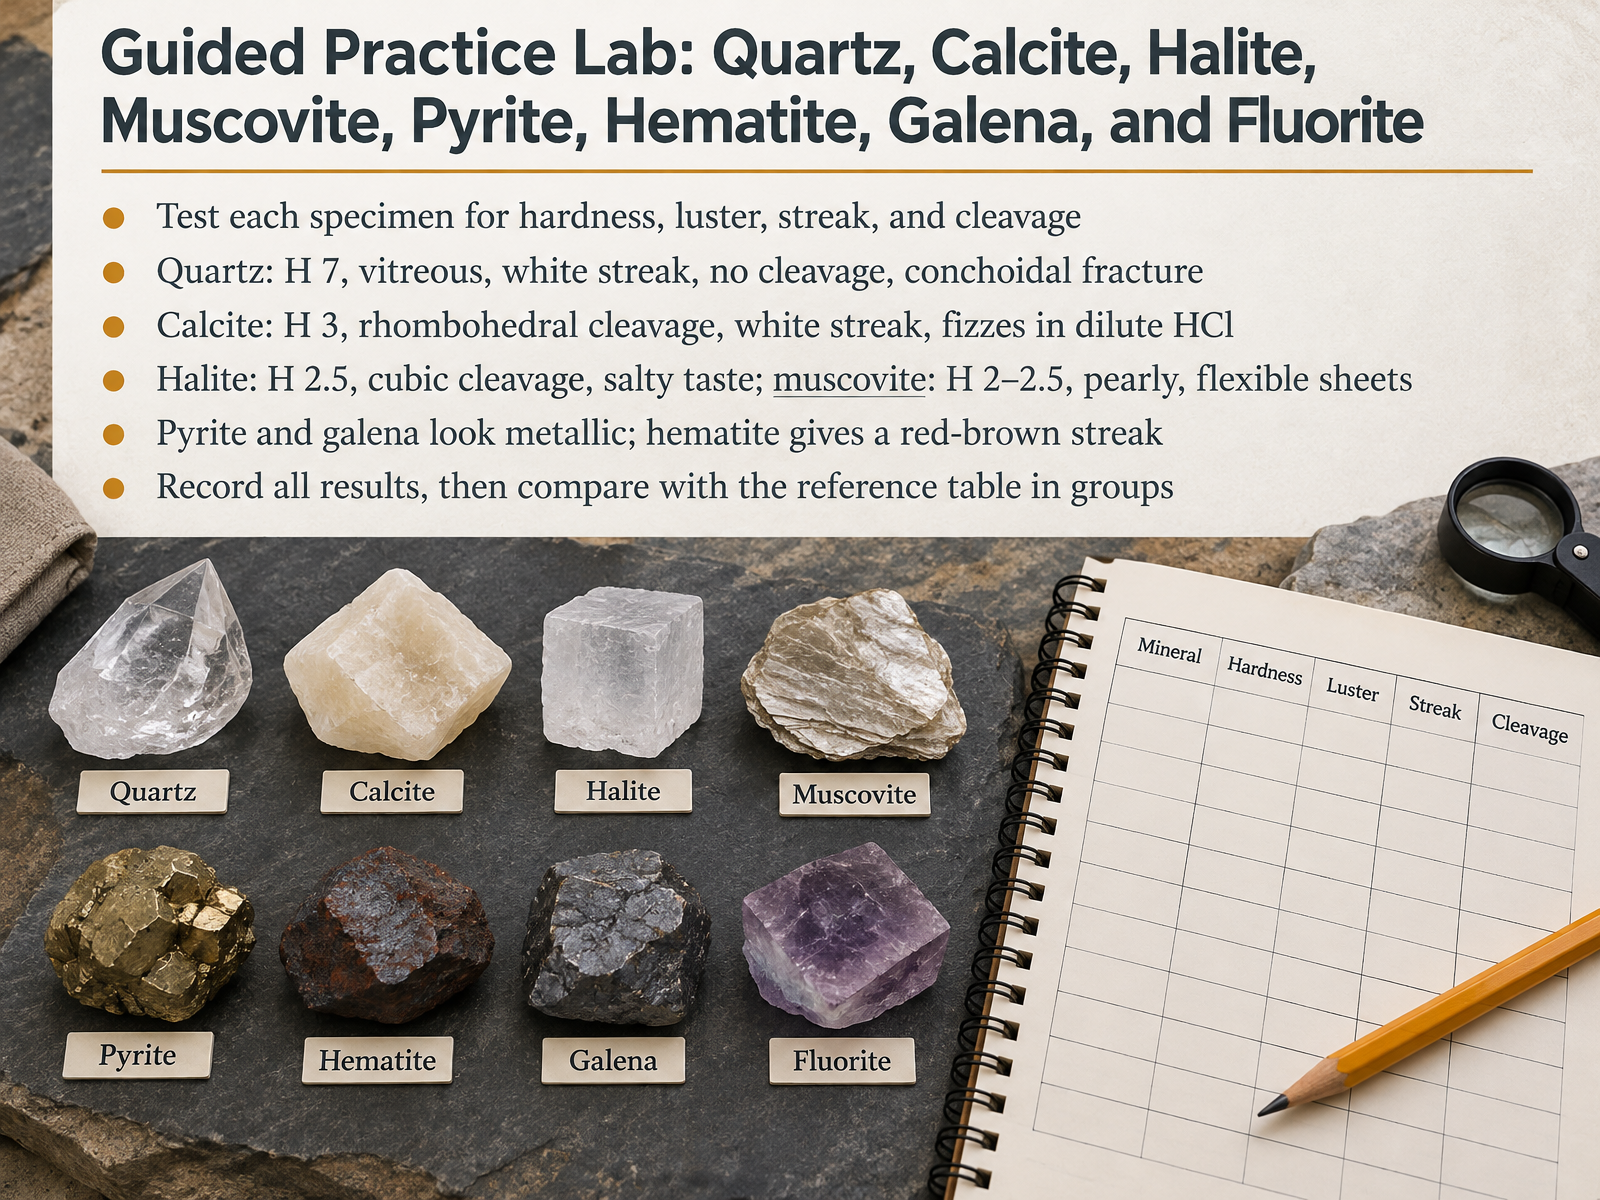
- 08Guided Practice Lab: Quartz, Calcite, Halite, Muscovite, Pyrite, Hematite, Galena, and FluoriteNow let's put those properties to work in a guided practice lab with eight specimens: quartz, calcite, halite, muscovite, pyrite, hematite, galena, and fluorite. For each one, you will test hardness, luster, streak, and cleavage, then record every result.
Start with hardness. A fingernail is about two and a half, a copper penny is around three, a steel nail sits near four, and a glass plate is five and a half. Quartz, at hardness seven, scratches glass with ease. Calcite, at three, is scratched by a penny. Halite and muscovite are both soft, around two to two and a half.
Next, look closely at how each specimen breaks. Quartz has no cleavage and instead shows conchoidal fracture, like broken glass. Calcite gives rhombohedral cleavage, halite breaks into cubes, and muscovite peels into thin, flexible, pearly sheets. Fluorite, by contrast, cleaves into octahedral shapes.
Then compare luster and streak. Pyrite and galena look metallic, while quartz is vitreous. Hematite is the standout here, because it gives a red-brown streak no matter what its surface color looks like.
Finally, record all your observations, and compare them with the reference table in your groups. Which properties matched cleanly, and which ones needed a second test? That kind of careful comparison is exactly what builds confident identification. Next, we will move into your self-check on reading these test results and avoiding misidentifications.
 nps.govwww1.maine.govopenpress.usask.ca+22 min
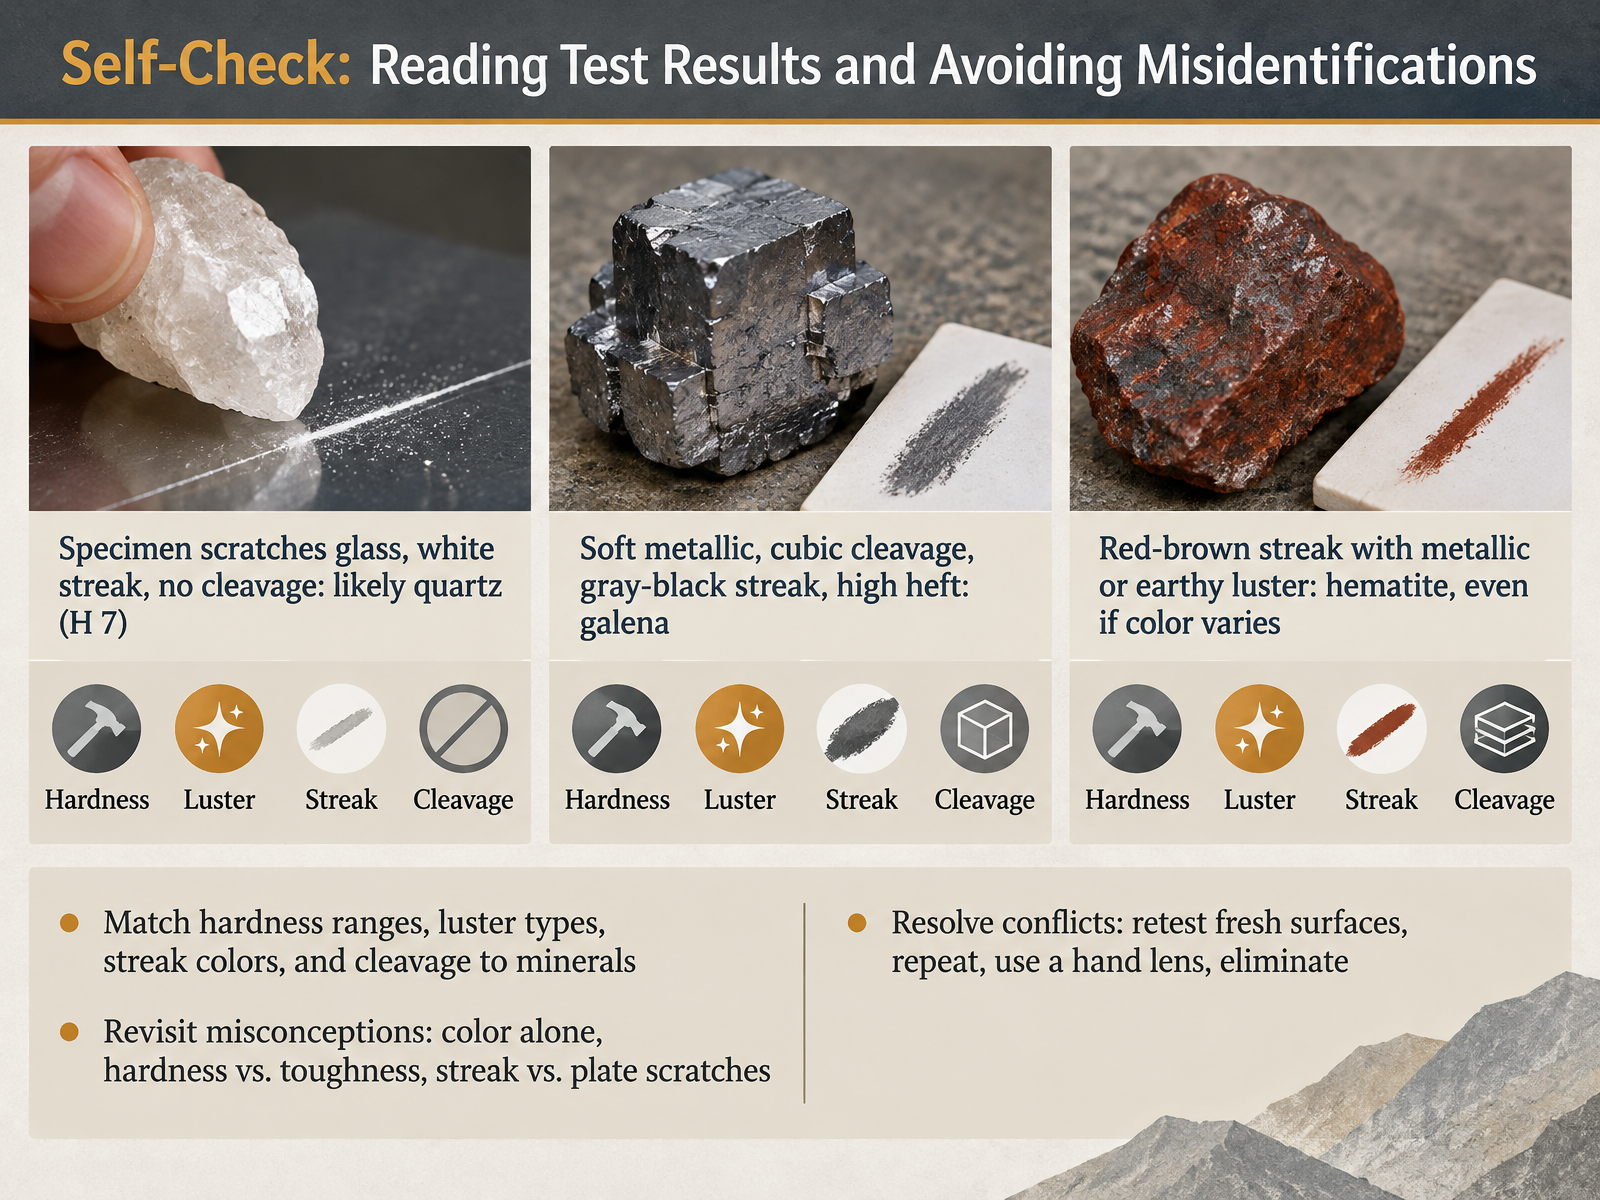
- 09Self-Check: Reading Test Results and Avoiding MisidentificationsNow let's put your skills to work and check for common misidentifications. Use a simple strategy. First, match the hardness range, luster, streak, and cleavage to the minerals you know. So, if a specimen scratches glass, leaves a white streak, and shows no cleavage, ask yourself: is this likely quartz? Yes, with a hardness of seven, that fits. Next, compare that to galena. Galena is soft, metallic, has cubic cleavage, a gray-black streak, and high heft. Notice how one property alone is not enough. Then there is hematite. Look for a red-brown streak with metallic or earthy luster. Hematite can vary in color, but that streak stays consistent. Now, revisit the misconceptions. Color alone is unreliable. Hardness is not toughness. And streak is not the same as plate scratches. If a result conflicts, resolve it. Retest on a fresh surface, repeat the test, use a hand lens, and eliminate options one by one. That careful process leads you to the right identification. Let's move on to a quick quiz to match minerals to their properties.
 nps.govwww1.maine.govopenpress.usask.ca+21 min
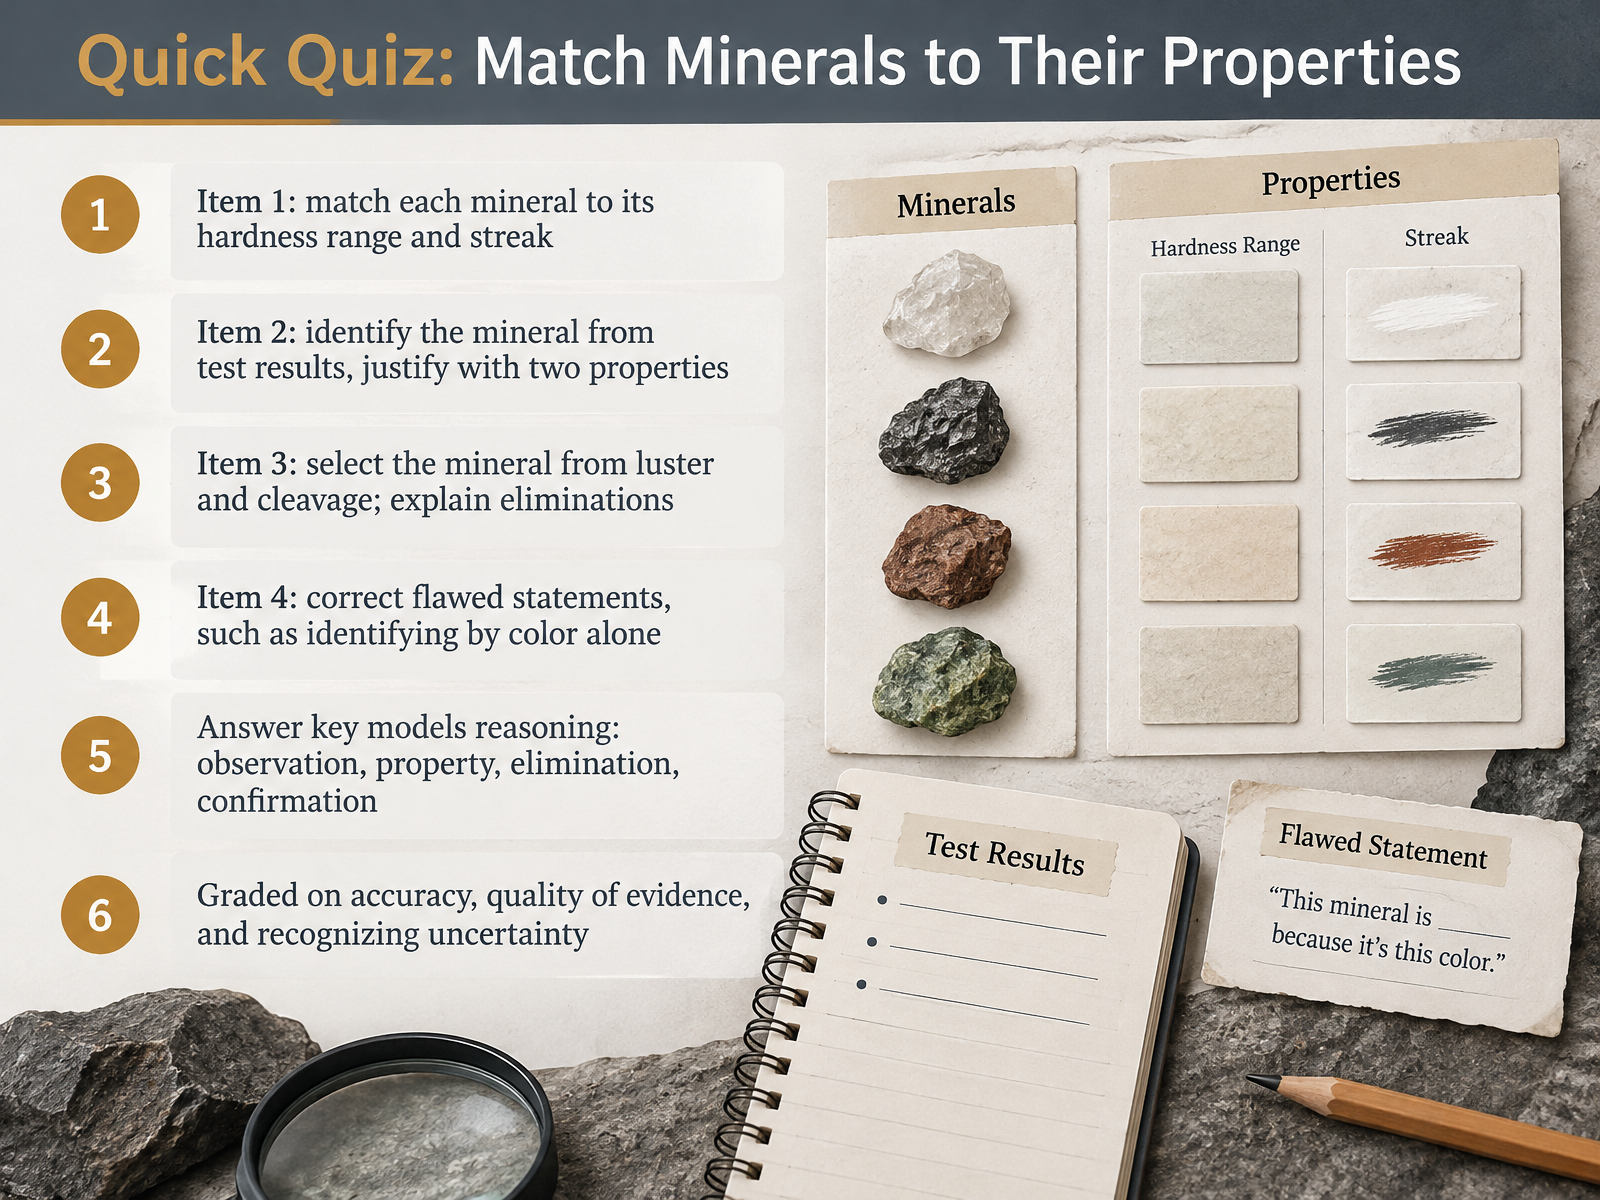
- 10Quick Quiz: Match Minerals to Their PropertiesNow let us put those skills to the test with a quick quiz. There are four items. First, match each mineral to its hardness range and streak. Next, identify a mineral from test results, and justify your answer with two properties. Then select a mineral from luster and cleavage, and explain your eliminations. Finally, correct flawed statements, such as identifying a mineral by color alone. As you work, ask yourself: what did I observe, what property does it show, and what does that eliminate? The answer key models this reasoning step by step. Observation, property, elimination, confirmation. For example, a specimen that is scratched by a fingernail is softer than two and a half, and a red-brown streak points toward hematite. You will be graded on accuracy, the quality of your evidence, and how well you recognize uncertainty. That last point matters. If two minerals remain possible, say so, and name the test that would settle it. Next, we look at real-world applications: fieldwork, teaching, and collections.
 nps.govwww1.maine.govopenpress.usask.ca+21 min
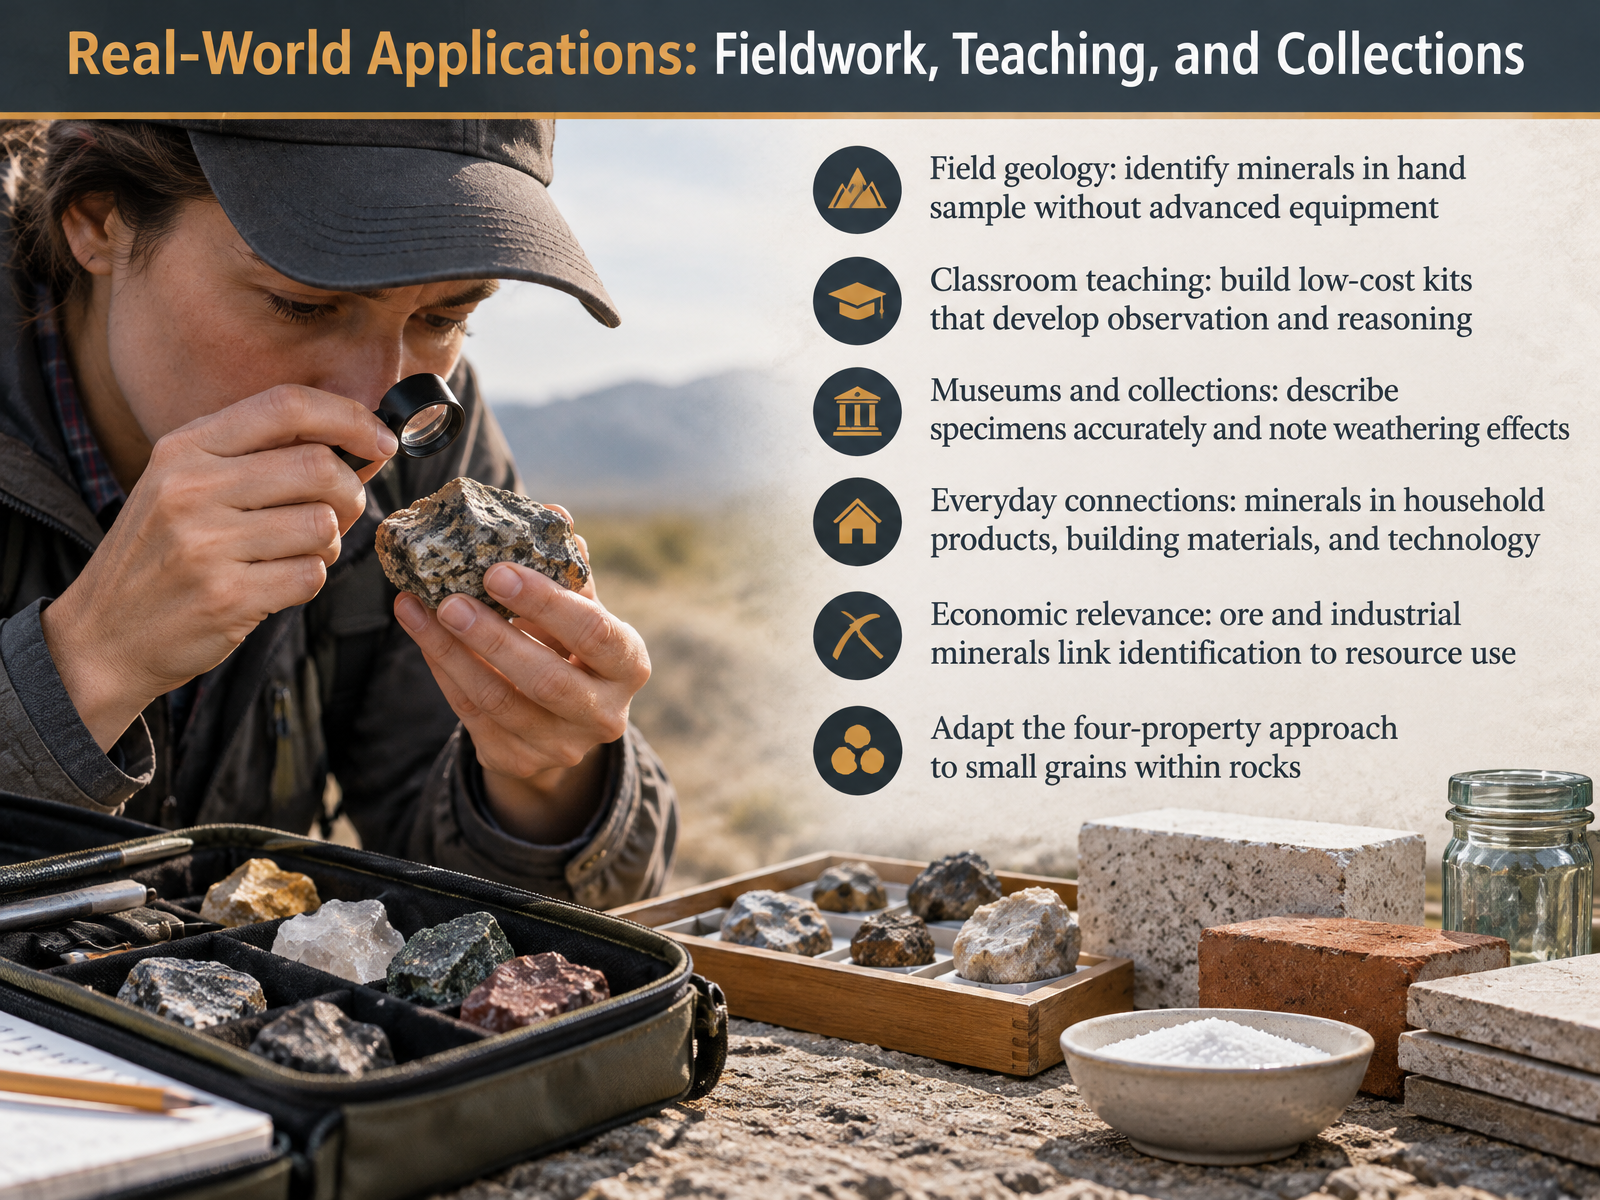
- 11Real-World Applications: Fieldwork, Teaching, and CollectionsNow let's connect these four properties to real work. In field geology, you identify minerals in hand sample without advanced equipment. Luster and hardness often narrow the list before you ever open a guide. In the classroom, build a low-cost kit with a fingernail, a penny, a nail, a glass plate, and a streak plate. Students then practice observation and reasoning, not memorization. In museums and collections, describe specimens accurately and note weathering effects, since a weathered surface can change luster and color. Ask yourself how the fresh surface compares. In everyday life, minerals appear in household products, building materials, and technology. Economically, ore and industrial minerals link identification to resource use. Finally, adapt the four-property approach to small grains within rocks. Even a tiny grain can show cleavage or streak, and that clue may identify it. Next, we will look at tools, kits, and field safety.
 nps.govaustralian.museumdnr.sc.gov+21 min
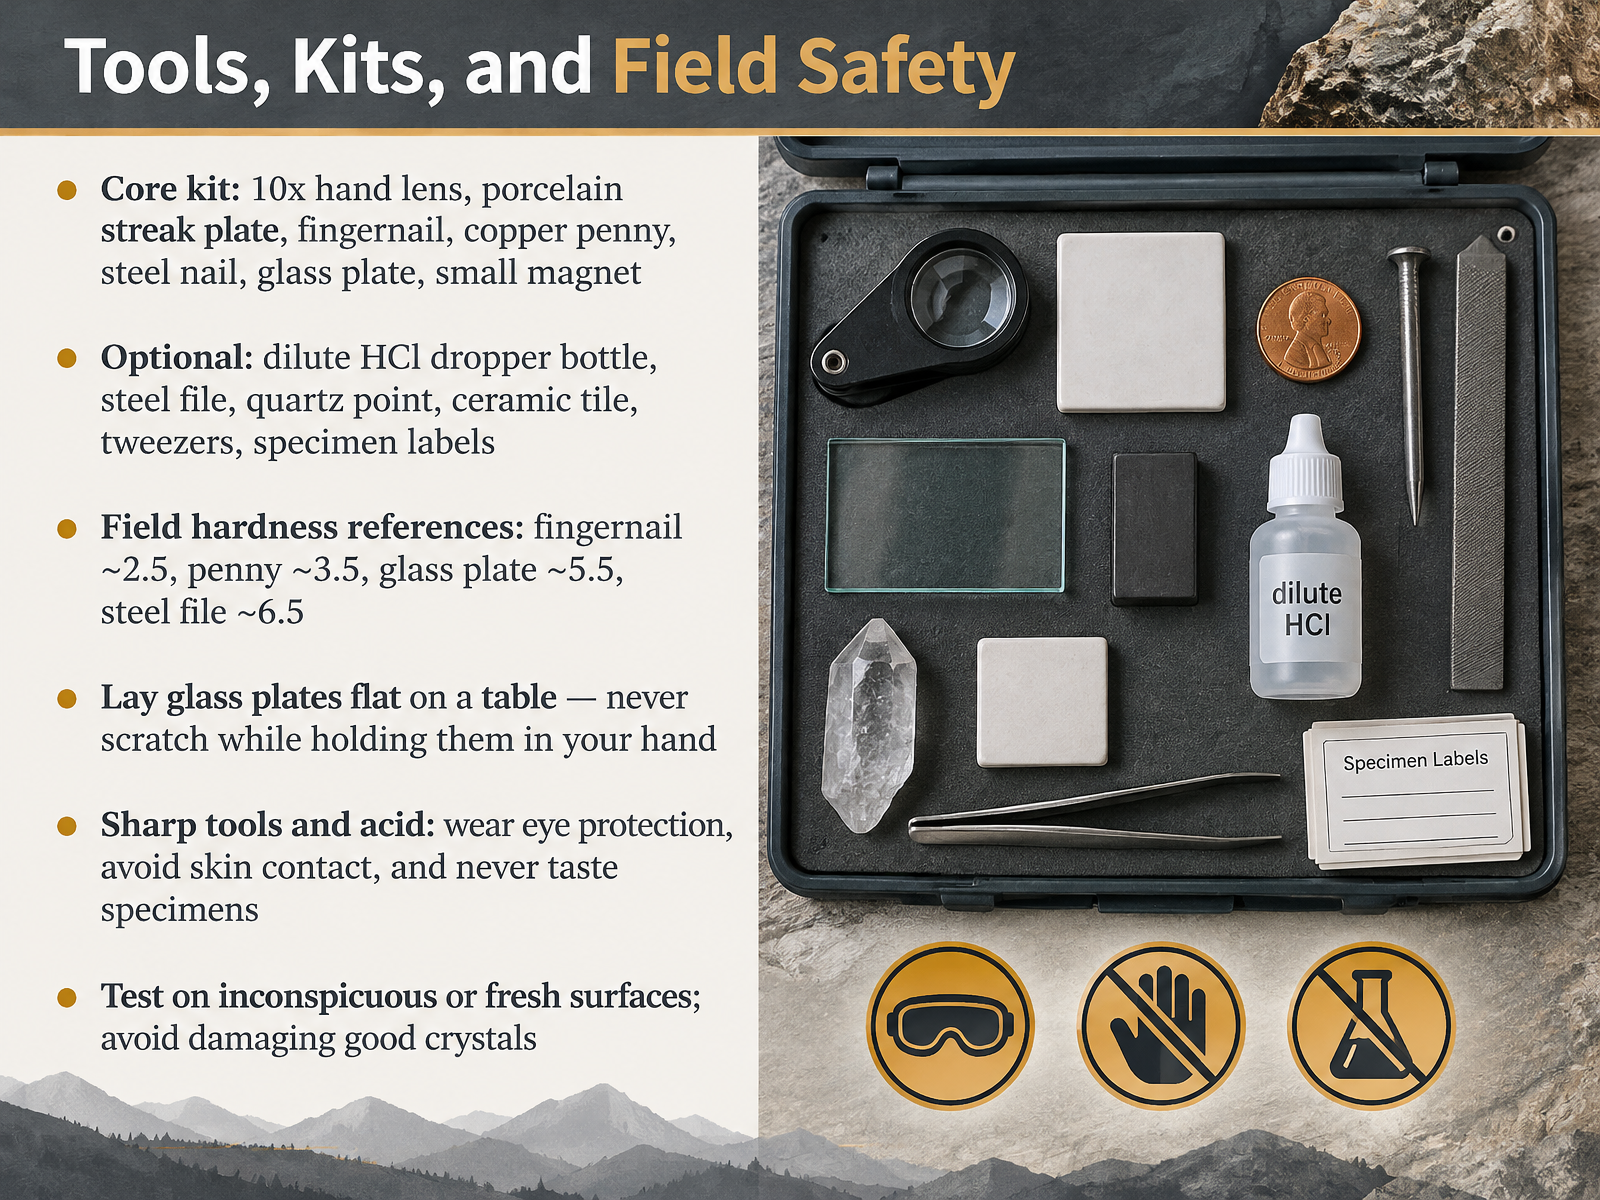
- 12Tools, Kits, and Field SafetyNow let's talk about the tools, kits, and field safety. Every good identification starts with the right equipment and a careful approach. Your core kit should include a ten power hand lens, a porcelain streak plate, your fingernail, a copper penny, a steel nail, a glass plate, and a small magnet. Optional items like a dilute hydrochloric acid dropper bottle, a steel file, a quartz point, ceramic tile, tweezers, and specimen labels can extend what you can test in the field.
Next, memorize the field hardness references you'll rely on most. Fingernail is about two point five. Copper penny is about three point five. Glass plate is five point five. And a steel file is about six point five. These simple comparisons let you place an unknown mineral on the Mohs scale without carrying a full reference set.
Safety matters just as much as technique. When using a glass plate, always lay it flat on a table. Never scratch a specimen while holding the plate in your hand, because it can break and cut you. Sharp tools and acid require eye protection, careful handling, and no skin contact. And never taste specimens, no matter how tempting the identification might be.
Finally, protect the specimens themselves. Test on inconspicuous or freshly broken surfaces, and avoid damaging good crystals or display pieces. A thoughtful approach keeps your kit safe and your results reliable.
Next, we'll look at reference tables and identification keys that tie everything together.
 nps.govwww1.maine.govopenpress.usask.ca+22 min
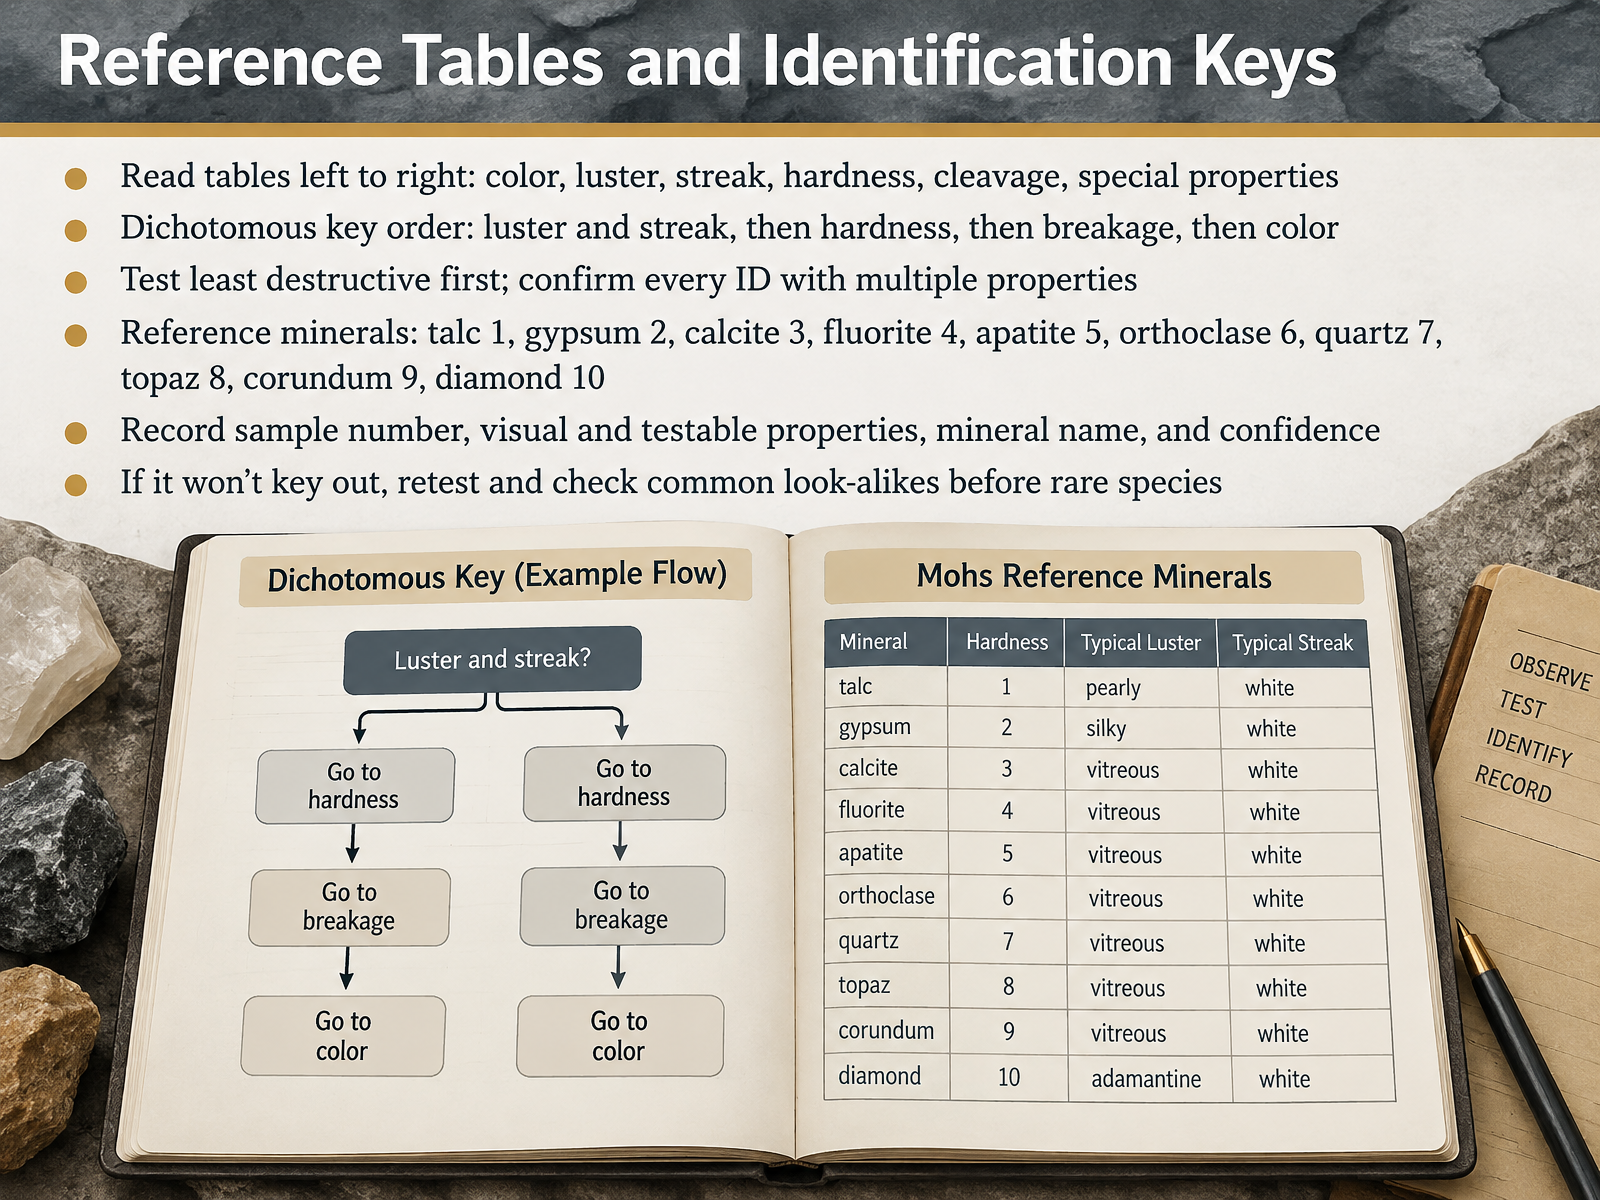
- 13Reference Tables and Identification KeysNow let's put everything together with reference tables and identification keys. First, read a reference table from left to right. Color, luster, streak, hardness, cleavage, then special properties. Next, follow a dichotomous key in order. Start with luster and streak, then hardness, then breakage, and finally color. A useful rule is to test the least destructive property first. So, streak before hardness, and hardness before you break a sample. Confirm every identification with multiple properties, never just one. Keep the reference minerals in order. Talc is one, gypsum two, calcite three, fluorite four, apatite five, orthoclase six, quartz seven, topaz eight, corundum nine, and diamond ten. As you work, record the sample number, its visual and testable properties, the mineral name, and your confidence level. Ask yourself, does this match more than one mineral? If a sample will not key out, do not jump to a rare species. Instead, retest carefully and check the common look-alikes. For example, quartz and calcite can look similar, but calcite is softer and reacts to acid. Next, we will practice these skills and build a mineral journal to keep your records organized.
 nps.govwww1.maine.govopenpress.usask.ca+22 min
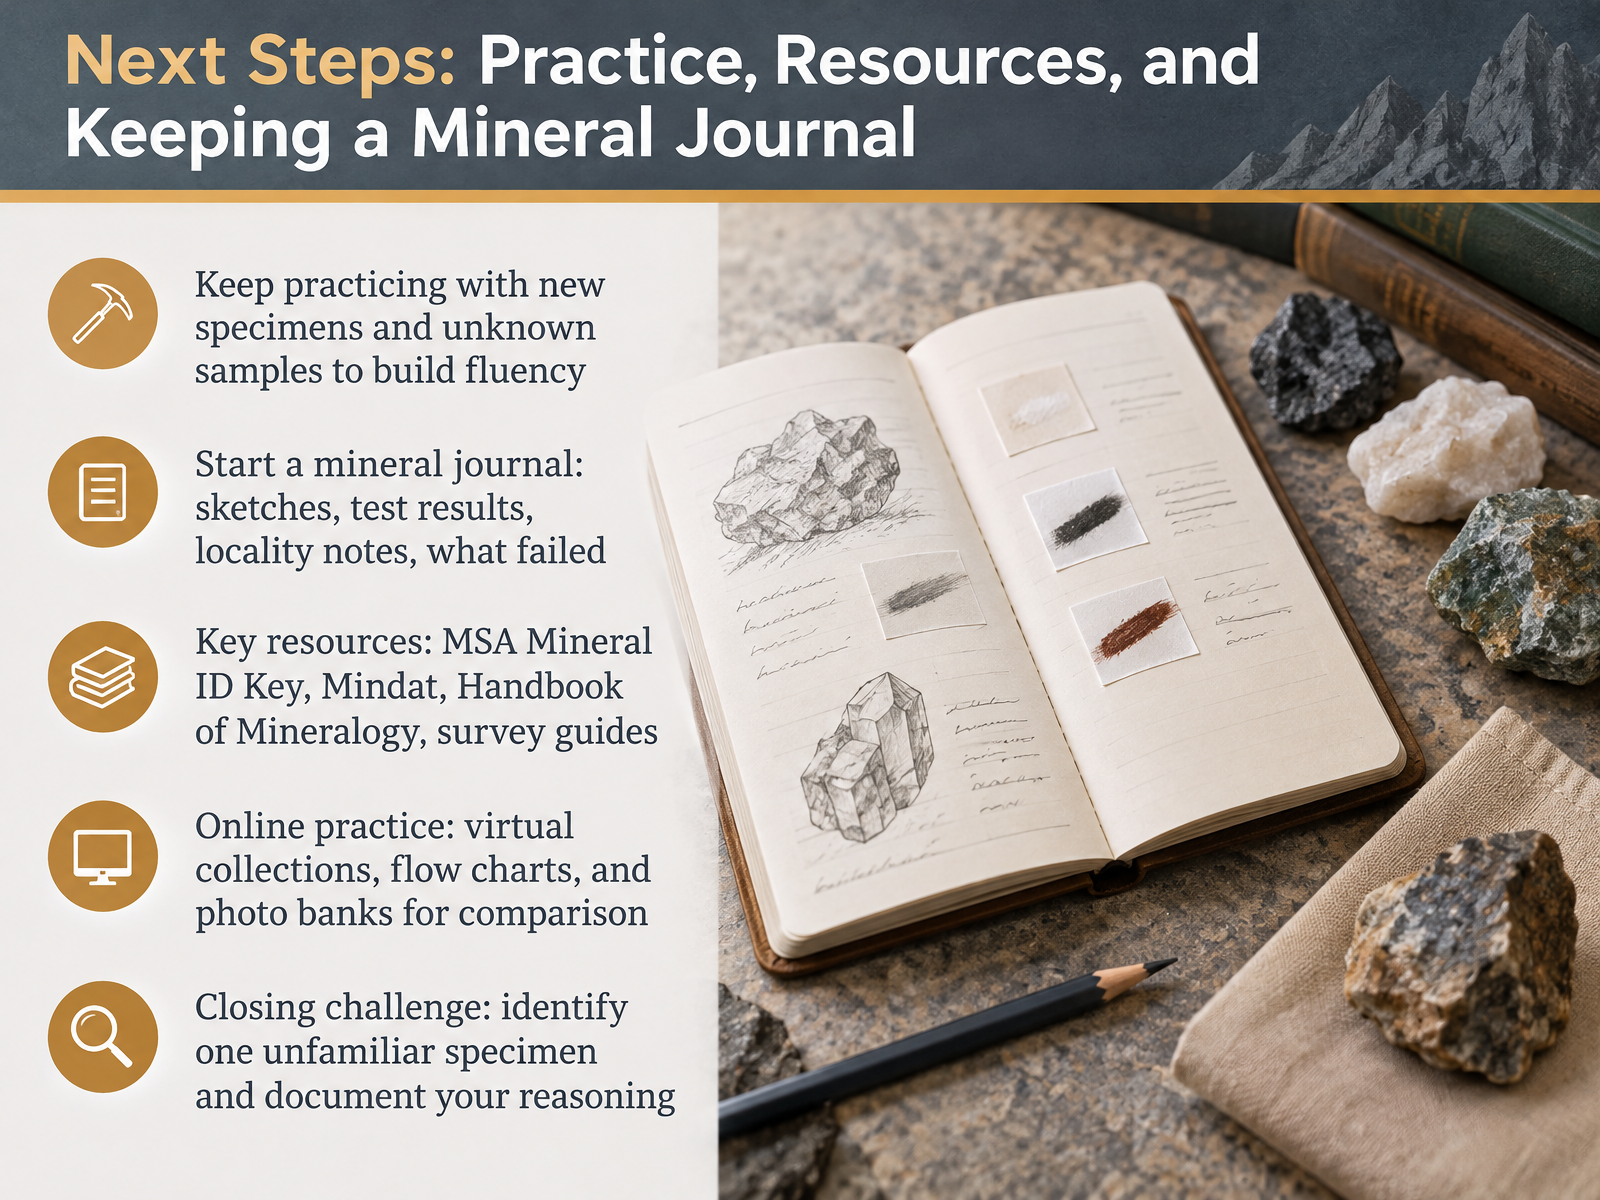
- 14Next Steps: Practice, Resources, and Keeping a Mineral JournalYou have learned the core tests: hardness, luster, streak, and cleavage. Now, keep those skills sharp. Ask yourself, how do I get better? Practice. Test new specimens and unknown samples often, because fluency comes from repetition, not memorization. Next, start a mineral journal. Sketch each specimen. Record your test results, the locality, and even what failed, because failures teach you just as much as successes. For reference, keep a few trusted resources nearby. The Mineralogical Society of America Mineral ID Key, the Mindat database, the Handbook of Mineralogy, and your local geological survey guides. You can also practice online with virtual collections, flow charts, and photo banks. Compare your observations to known samples. Here is your closing challenge. Find one unfamiliar specimen. Work through hardness, luster, streak, and cleavage. Then document your reasoning, not just your answer. Thank you for your attention and your curiosity. Keep observing carefully, and happy identifying.
 nps.govwww1.maine.govopenpress.usask.ca+22 min
Take the deck with you
Download this course as a file — free, no sign-up needed.
- PDF handoutEvery slide page, ready to print or share.15 pages · 5.2 MBDownload
- Narrated PowerPointThe deck that presents itself — every slide carries the digital human's narration video.15 pages · 28.7 MBDownload
- PowerPoint slidesThe full deck as a .pptx — open it in PowerPoint, Keynote, or Google Slides.15 pages · 5.1 MBDownload
Free to use in your own training — please keep the PersonWise credit page at the end.
Have your own deck? Turn it into a course
Sources consulted
Web sources consulted while building this course.
- Mohs Hardness Scale (U.S. National Park Service) — nps.gov
- Activity 20: Testing the Hardness of Common Minerals — www1.maine.gov
- Overview of Minerals – Introductory Physical Geology Laboratory Manual – First Canadian Edition (v.3 – Jan 2020) — openpress.usask.ca
- Mineral ID Key – MSA — msaweb.org
- Moh's Scale — csmgeo.csm.jmu.edu
- Minerals - Geology (U.S. National Park Service) — nps.gov
- Mineral properties - The Australian Museum — australian.museum
- Minerals — dnr.sc.gov
- 2.4: Mineral Identification - Geosciences LibreTexts — geo.libretexts.org
- 3.4.4: Streak - Geosciences LibreTexts — geo.libretexts.org
- Streak Test for Minerals - using a porcelain streak plate — geology.com
- Mineralogy Boot Camp Session #3 — idahomuseum.org
- KGS--Kansas Rocks and Minerals--Mineral Identification — kgs.ku.edu
- 3.6: Identifying Minerals — geo.libretexts.org
- Lab 3—Mineral identification – Laboratory Manual for Earth Science — saalck.pressbooks.pub
- 3.4 Mineral Hardness, Cleavage, and Fracture – Exploring Physical Geology Lab Online — open.maricopa.edu
- 3.5: Identifying Minerals — geo.libretexts.org
- Cleavage (crystal) — en.wikipedia.org
- Donald B Peck - Determining Fracture and Cleavage in Minerals — mindat.org