Begin
14 pages · ~28 min
Practical User Research Learning Workflow
This training teaches a practical workflow for learning user research, helping aspiring and current researchers build skills through structured, hands-on steps.
A digital instructor presents all 14 pages. Hold “Ask” at any point and ask out loud — the answer comes from this course. No sign-up needed.
What you’ll learn
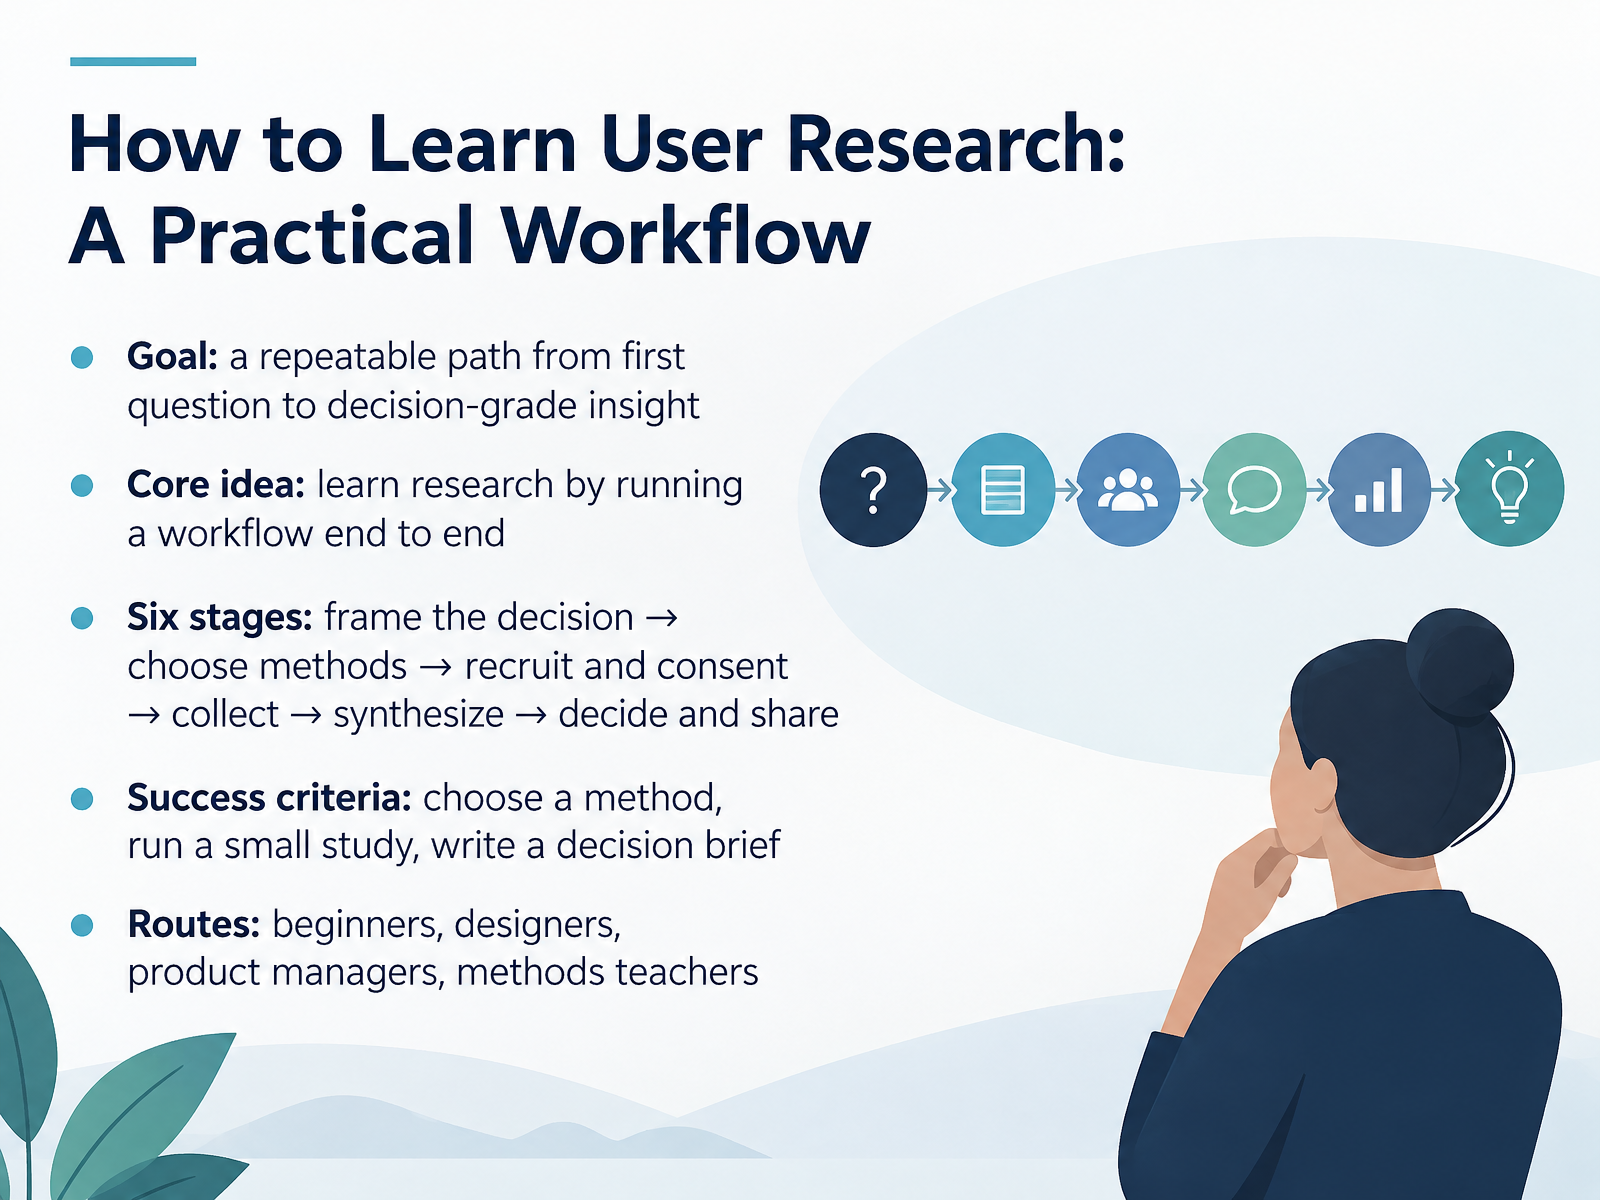
- 01How to Learn User Research: A Practical WorkflowWelcome. This course is called How to Learn User Research: A Practical Workflow. Our goal is simple: a repeatable path from your first question to insight you can actually act on. Here's the core idea. You learn research by running a workflow end to end, not by memorizing definitions. We'll walk through six stages: frame the decision, choose methods, recruit and consent, collect, synthesize, and decide and share. By the end, you'll be able to choose a method, run a small study, and write a decision brief. If you're new and unsure where to start, that's normal, and mistakes are part of the process. We'll offer separate routes for beginners, designers, product managers, and methods teachers. Let's begin with what learning research actually requires.job-profiles.fedip.orgddat-capability-framework.service.gov.ukresearchskills.net+22 min
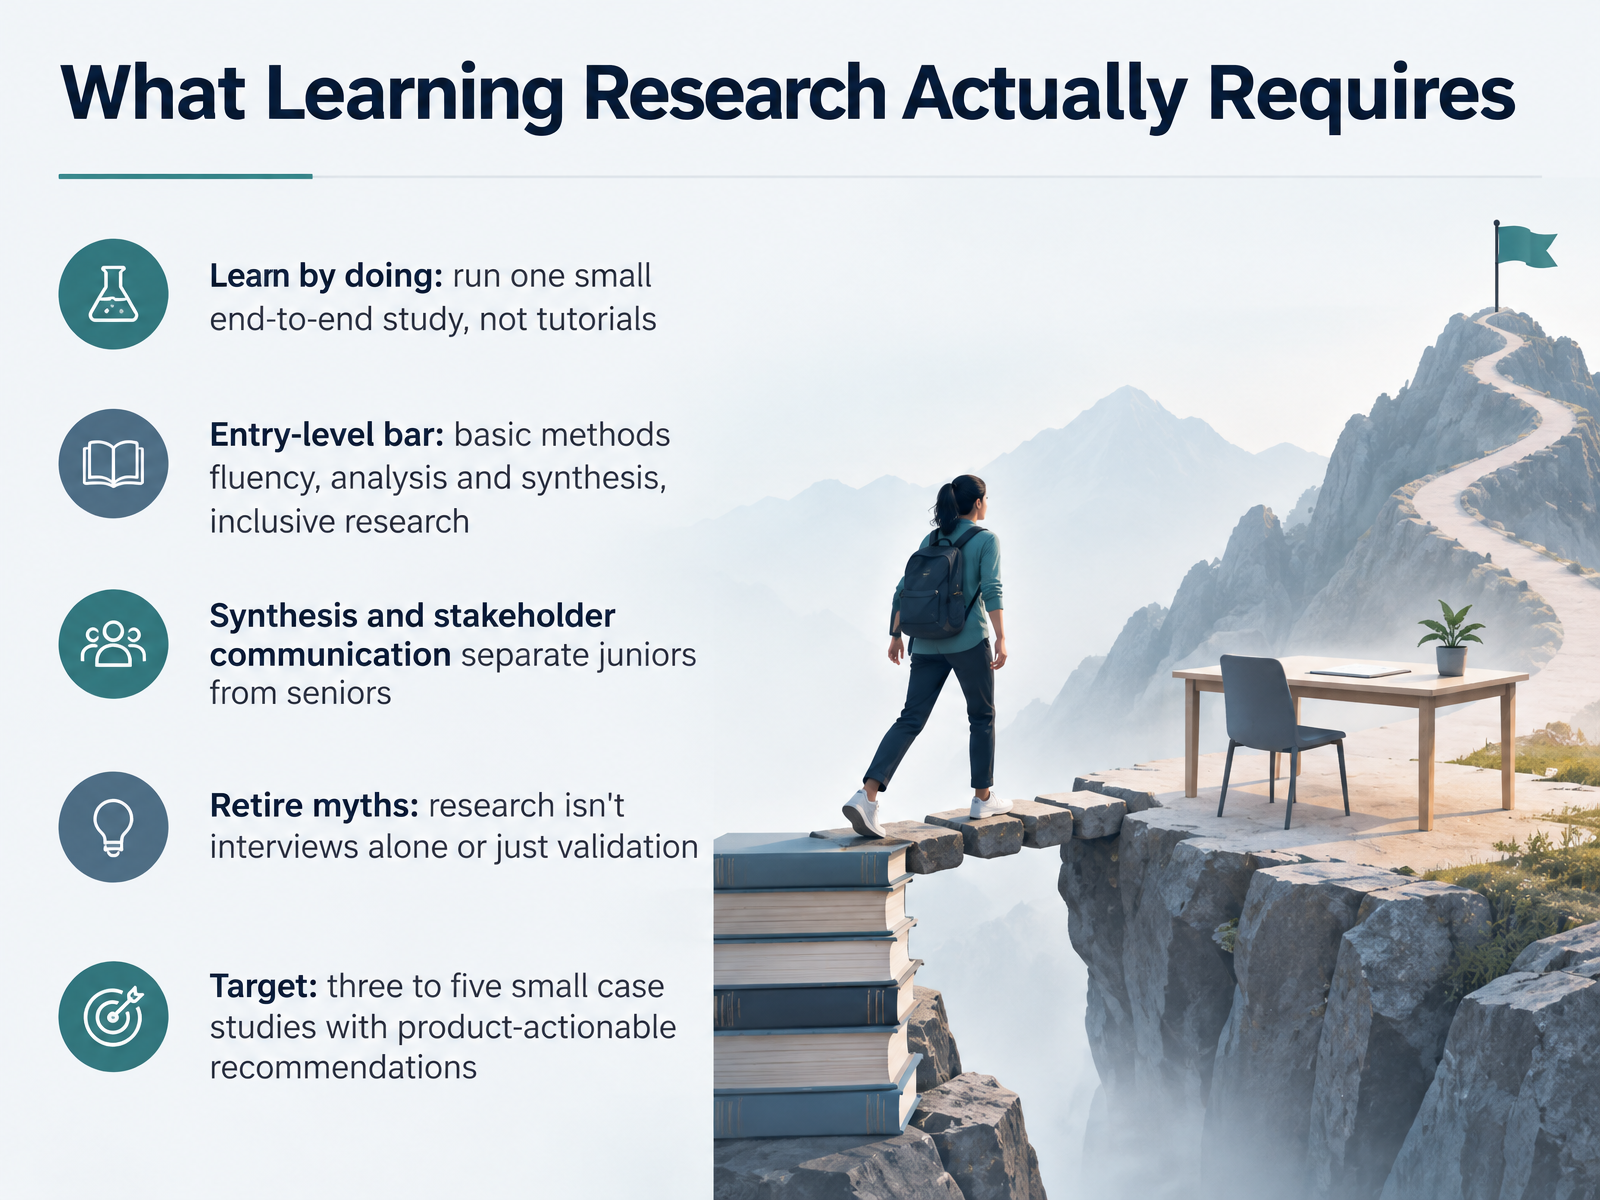
- 02What Learning Research Actually RequiresLet's look at what learning research actually requires. Here's the short version. You learn by doing. Run one small study end to end, instead of collecting tutorials. The entry-level bar is steady, not heroic. You need basic fluency with methods, solid analysis and synthesis, and inclusive research habits. Two skills really separate juniors from seniors: synthesis, and communicating with stakeholders. So retire a few myths. Research isn't interviews alone, and it isn't just validating designs that already exist. It's about turning evidence into decisions. A practical target is three to five small case studies, each with recommendations your product team can act on. That's a measurable, achievable goal, even if you're starting from scratch. Next, let's look at learning paths by role.
 job-profiles.fedip.orgddat-capability-framework.service.gov.ukresearchskills.net+22 min
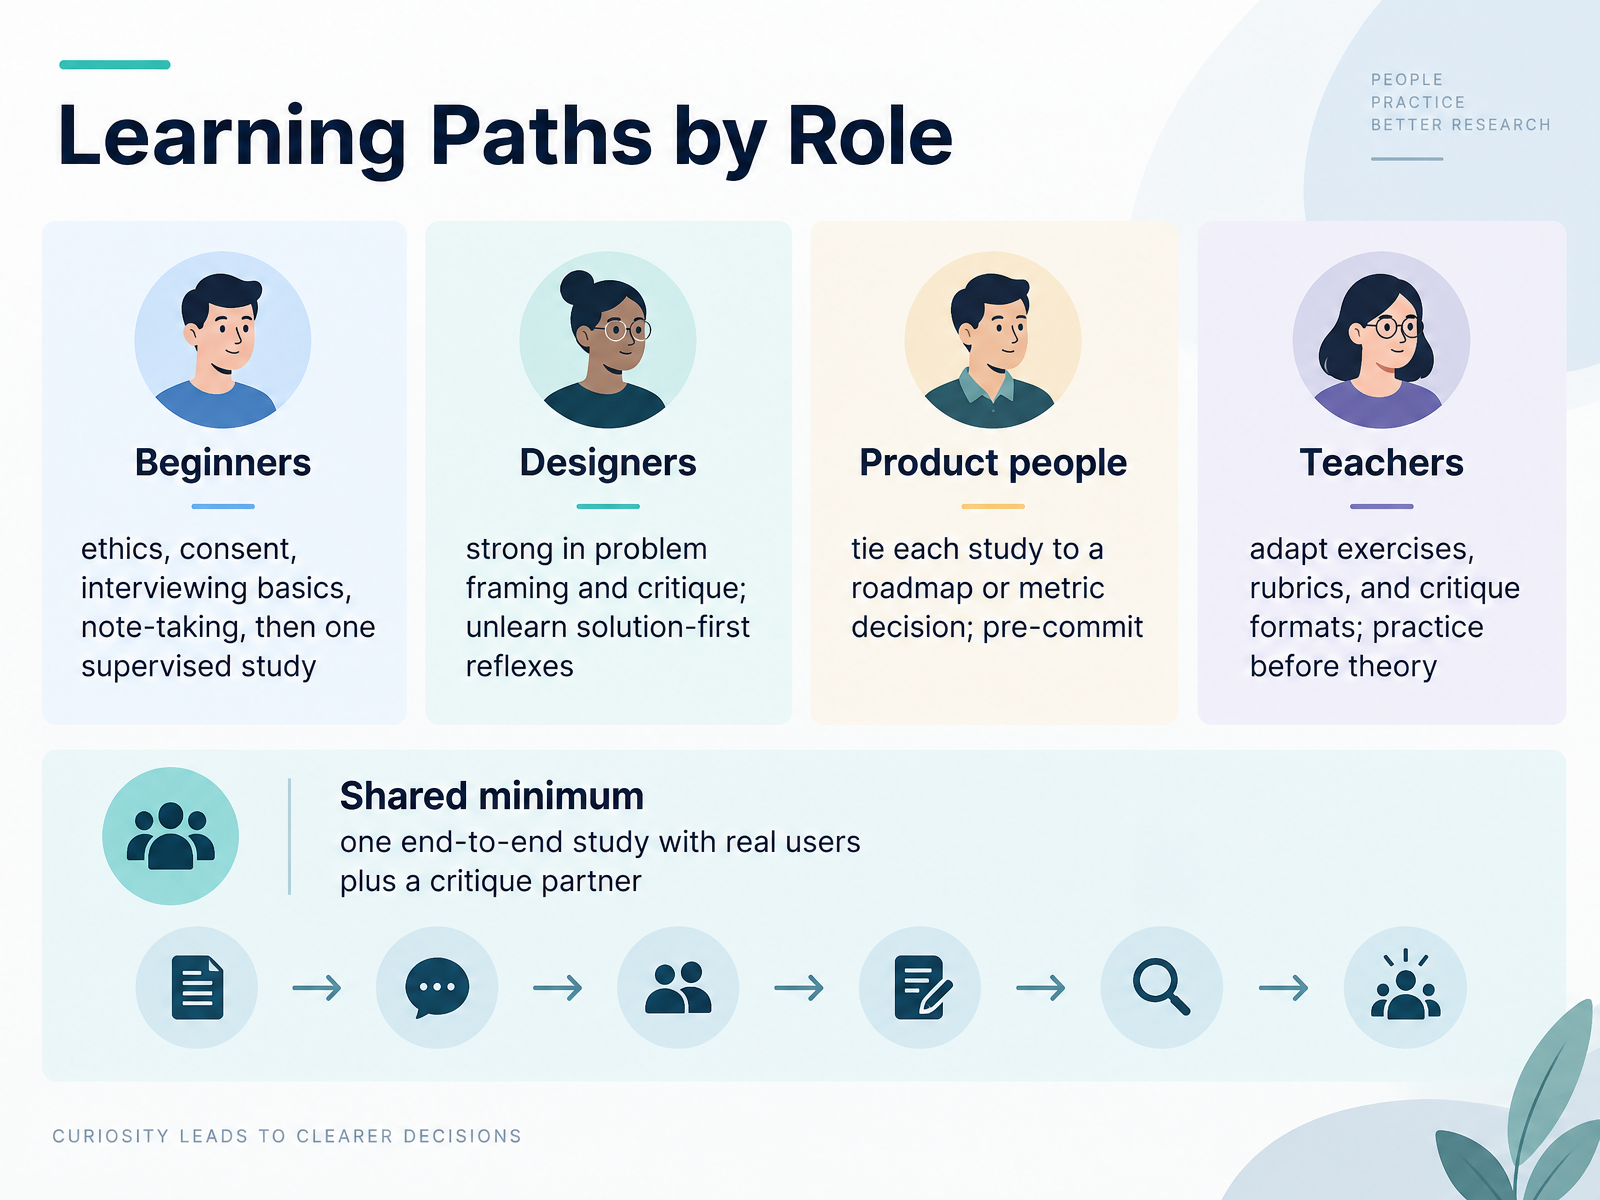
- 03Learning Paths by RoleSo let's look at learning paths by role. Wherever you're starting from, the route is a little different. If you're a beginner, start with ethics and consent, then interviewing basics and note-taking. After that, run one study with someone supervising you. Feeling unsure where to start is completely normal. Designers, your strength is problem framing and critique. Your work is to unlearn the solution-first reflex, and sit with questions before answers. If you're in product, tie every study to a roadmap or metric decision. Pre-commit to what you'll do with the findings before you collect them. Teachers, adapt the exercises, rubrics, and critique formats for your classroom, and let learners practice before you introduce theory. Over all of this, there's a shared minimum. One end-to-end study with real users, plus a critique partner who tells you the truth. That beats any amount of reading. Next, we'll look at how to frame the decision before choosing a method.
 applykiro.comdeardanielleanddave.substack.comuserinterviews.com+21 min
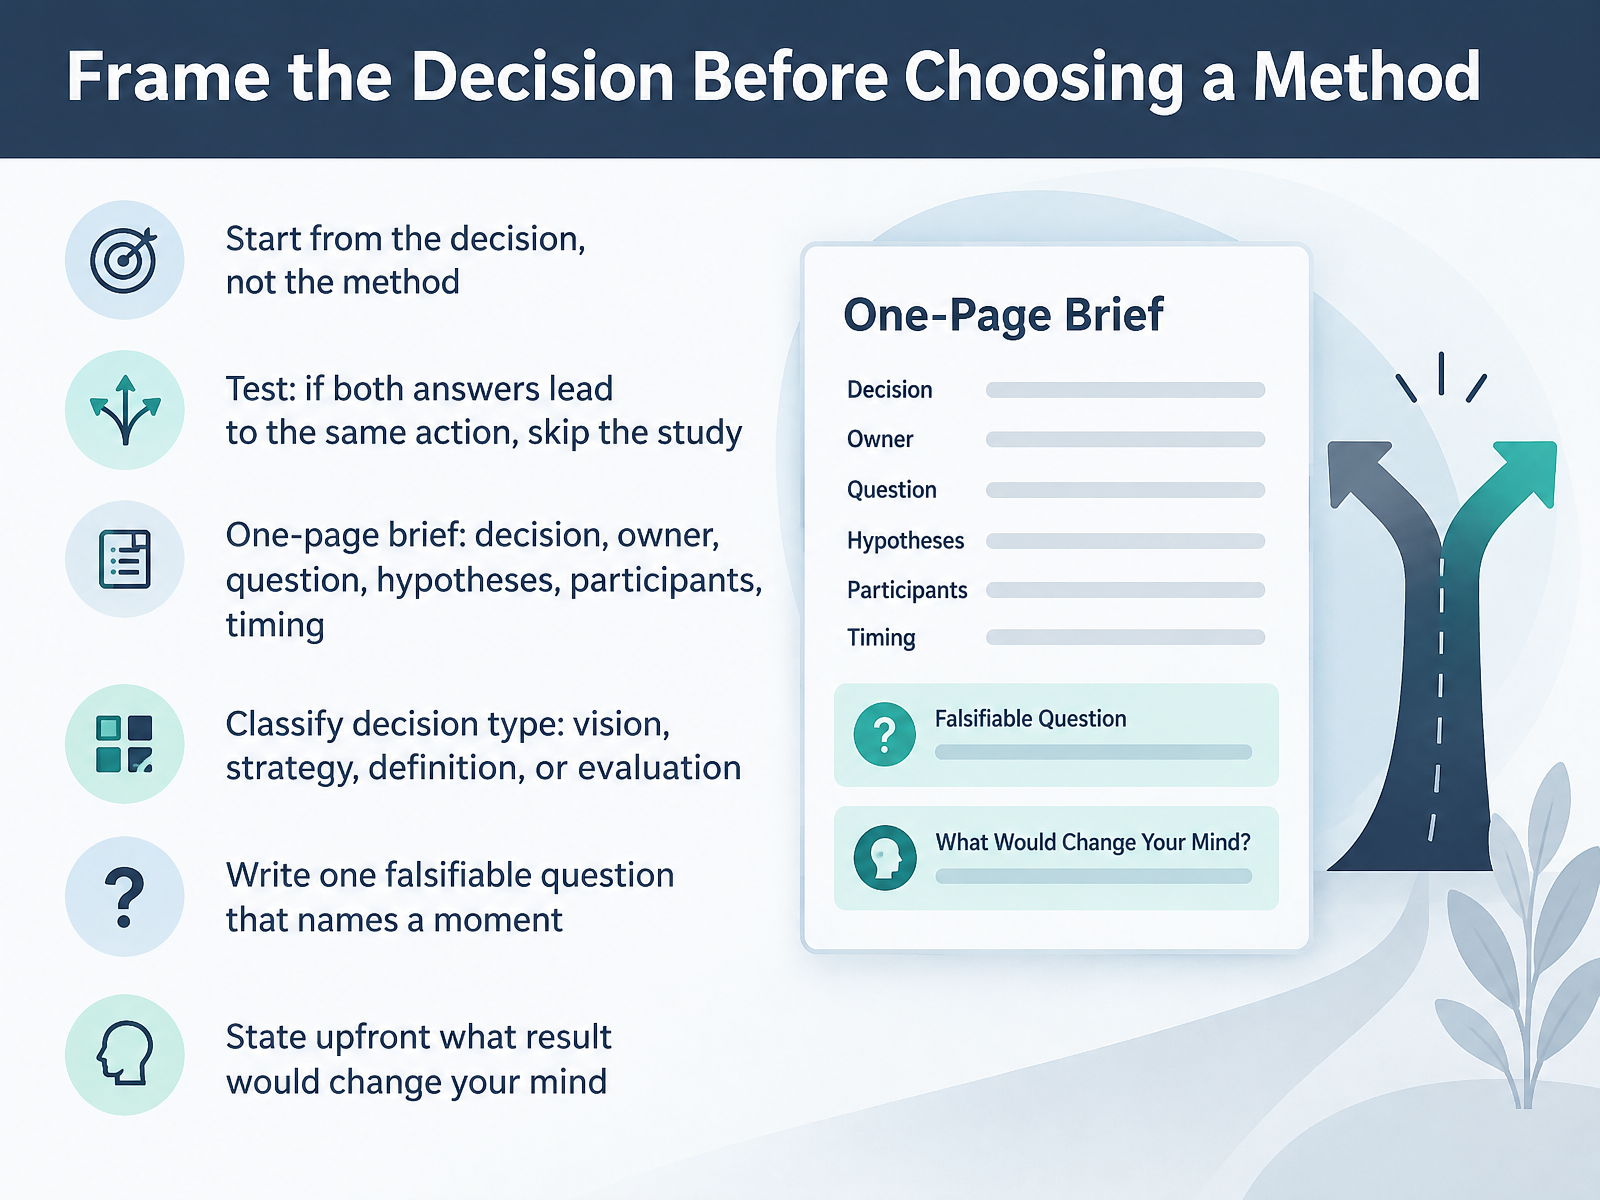
- 04Frame the Decision Before Choosing a MethodLet's talk about the most important step, and it happens before you pick any method. Start from the decision, not the method. Ask yourself, what will the team do differently depending on what we hear? Here's a quick test. If answer A and answer B both lead to the same action, skip the study. It won't change anything. So write a one-page brief. Five things: the decision, the owner, the central question, your hypotheses, and who you'll talk to plus your timing. Then classify the decision. Is it vision, strategy, definition, or evaluation? That shapes everything that follows. Next, write one falsifiable question that names a specific moment. For example, what stops a user who finishes onboarding from inviting a colleague in their first session? Finally, say upfront what result would change your mind. That one line keeps everyone honest when the data comes in. Now let's move on to choosing a method and sizing your sample.
 uxinsight.orgtalkful.iokoji.so+22 min
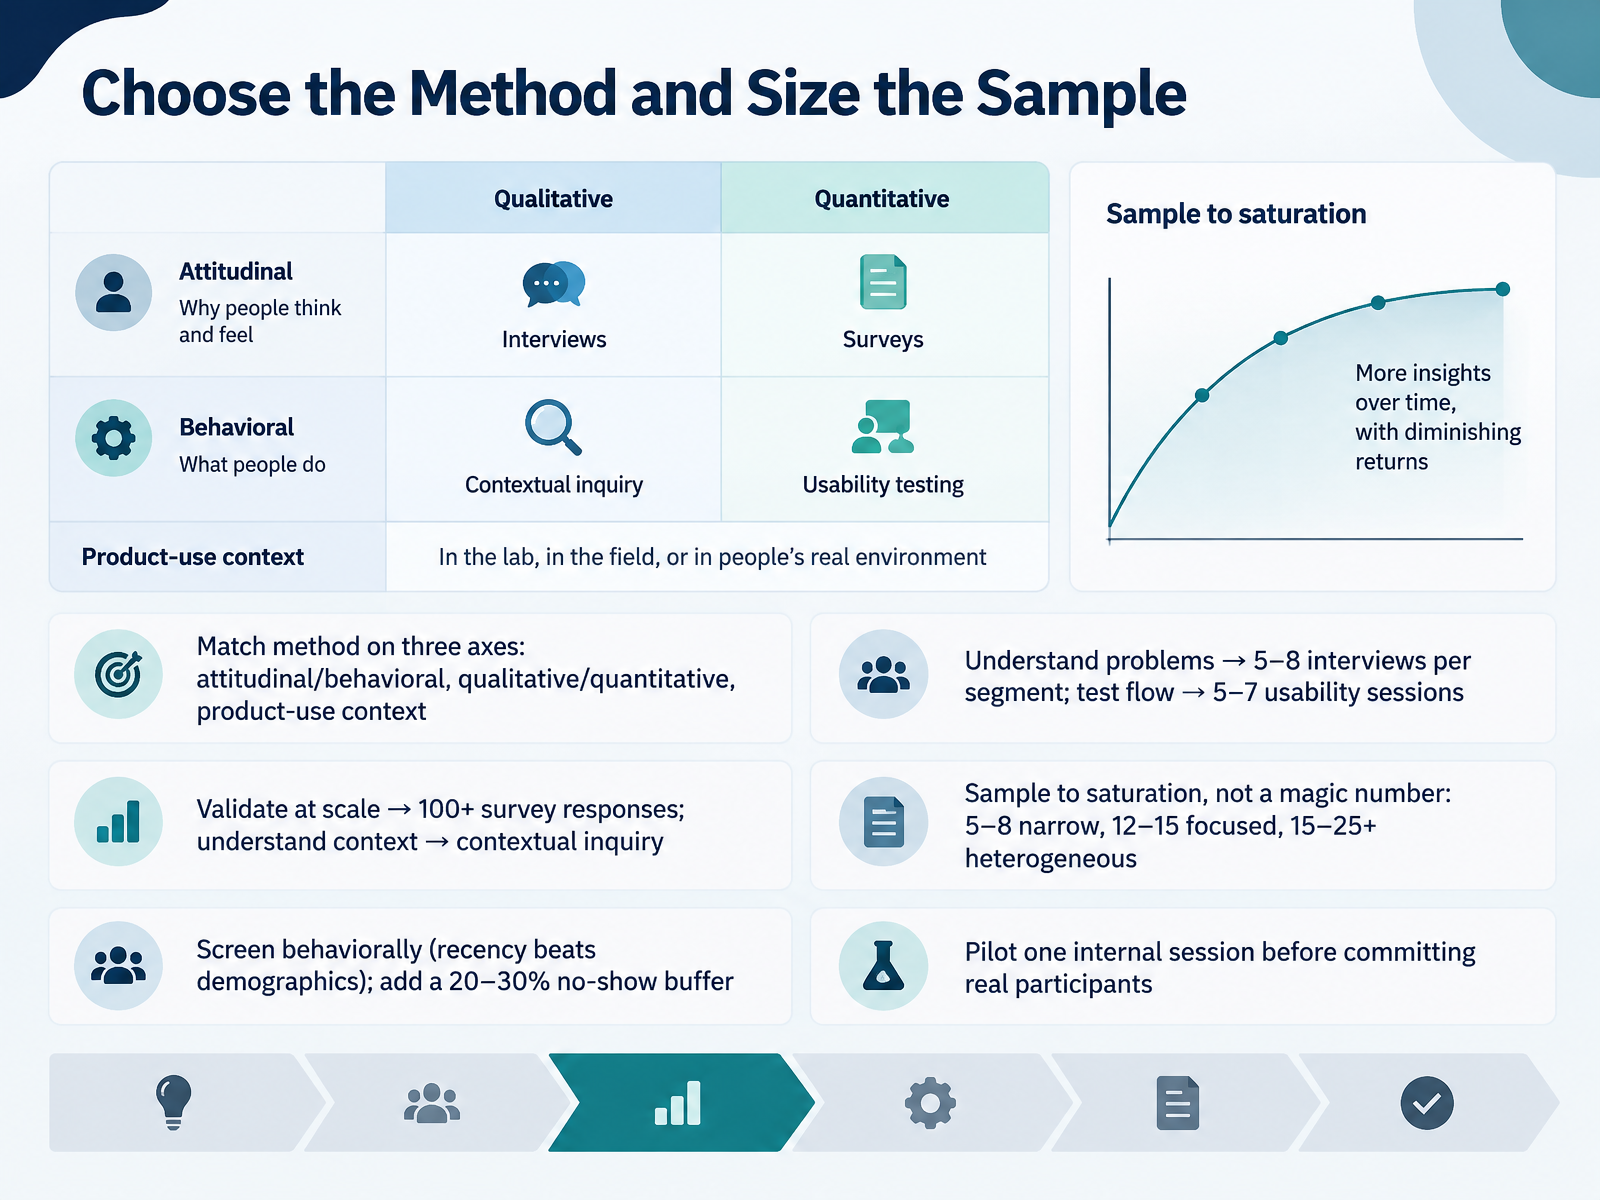
- 05Choose the Method and Size the SampleNow let's pick your method and size the sample. Match the method on three axes: what people say versus do, qualitative versus quantitative, and how much product context you need. Then map it to your goal. To understand problems, plan five to eight interviews per segment. To test a flow, run five to seven usability sessions. To validate at scale, aim for one hundred plus survey responses. To understand context, use contextual inquiry. Sample to saturation, not a magic number. Five to eight works for a narrow group, twelve to fifteen for a focused study, and fifteen to twenty five plus for a mixed group. Screen for behavior, since recency beats demographics, and add a twenty to thirty percent no show buffer. Finally, pilot one internal session before you commit real participants. That one step catches confusing questions early, without costing you a participant. Next, we'll look at how to recruit participants, get consent, and protect people.
 userinterviews.comuserinterviews.comuxcrush.com+22 min
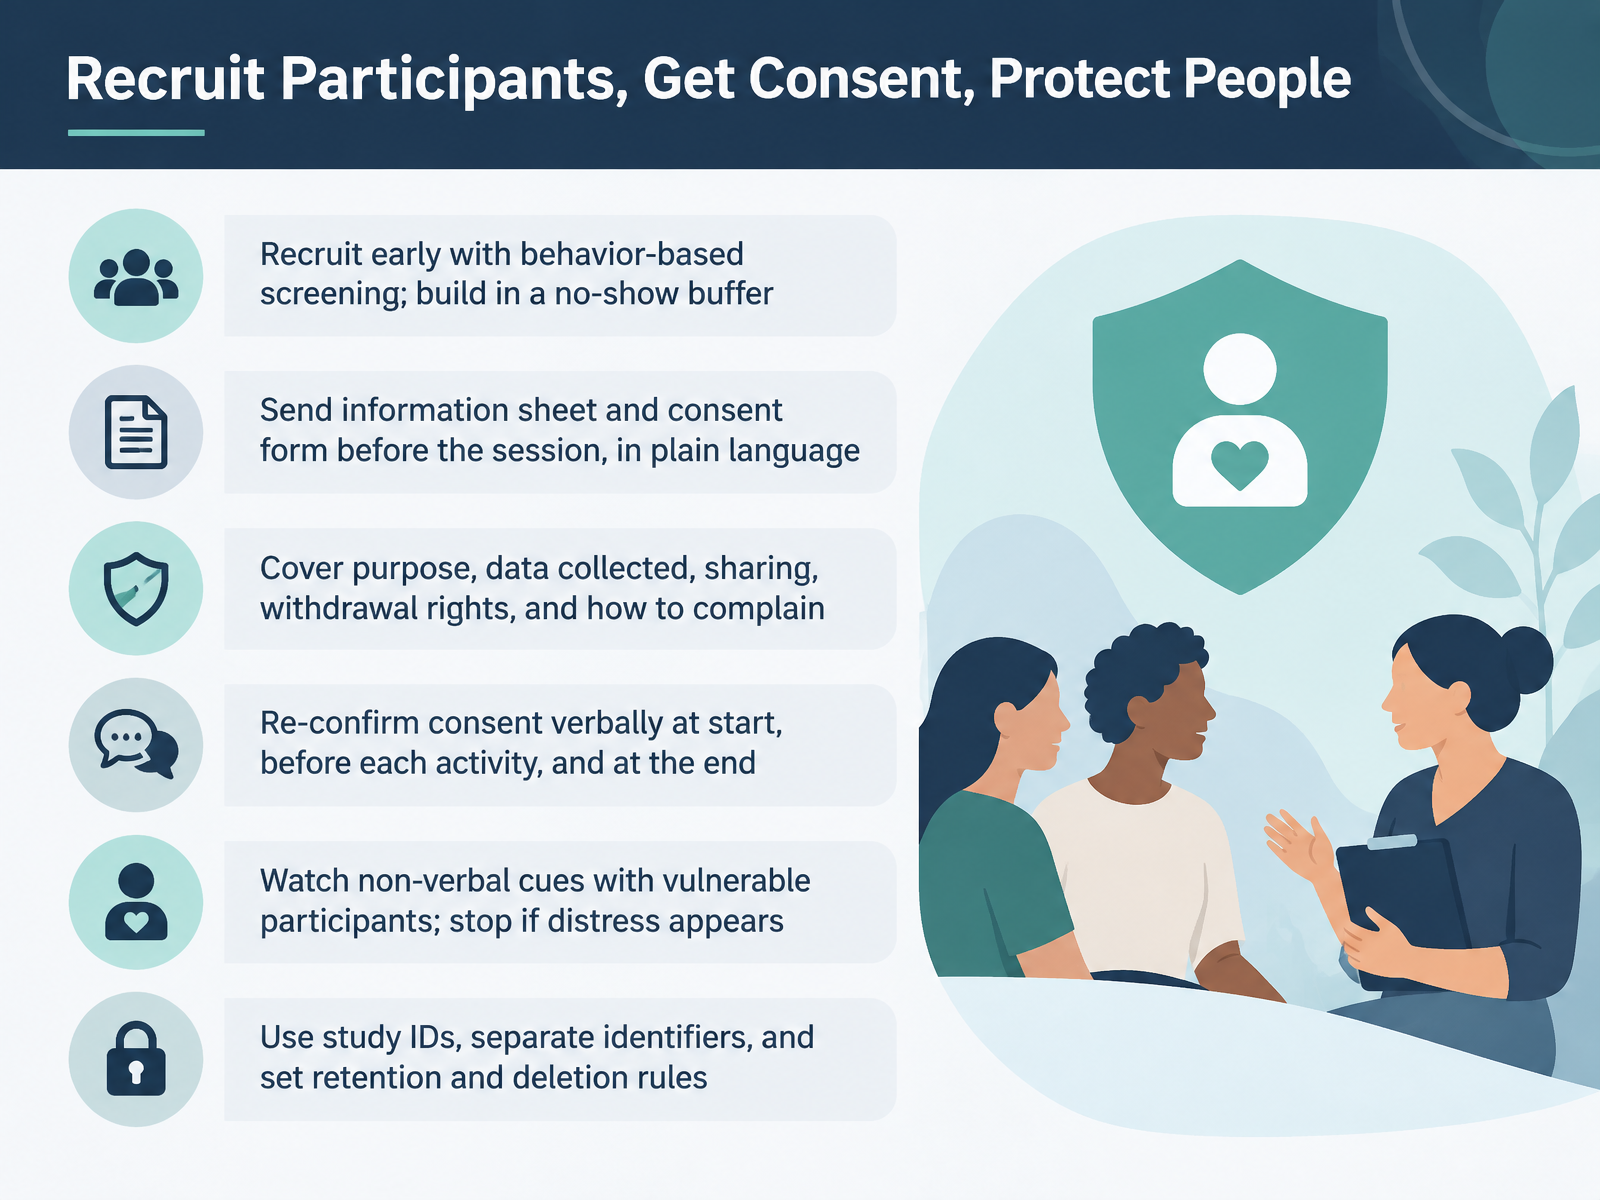
- 06Recruit Participants, Get Consent, Protect PeopleNow let's talk about recruiting participants and protecting them. Start recruiting early, and screen for behaviors, not job titles. Build in a buffer for no-shows. Send the information sheet and consent form before the session, written in plain language. Cover the purpose, what data you'll collect, who you'll share it with, their right to withdraw, and how to complain. At the start, re-confirm consent verbally. Do it again before each activity, and once more at the end. With vulnerable participants, watch non-verbal cues, and stop if distress appears. Finally, use study IDs, store identifiers separately, and set clear retention and deletion rules. Next, we'll move into collecting data through interviews and usability sessions.
 1 min
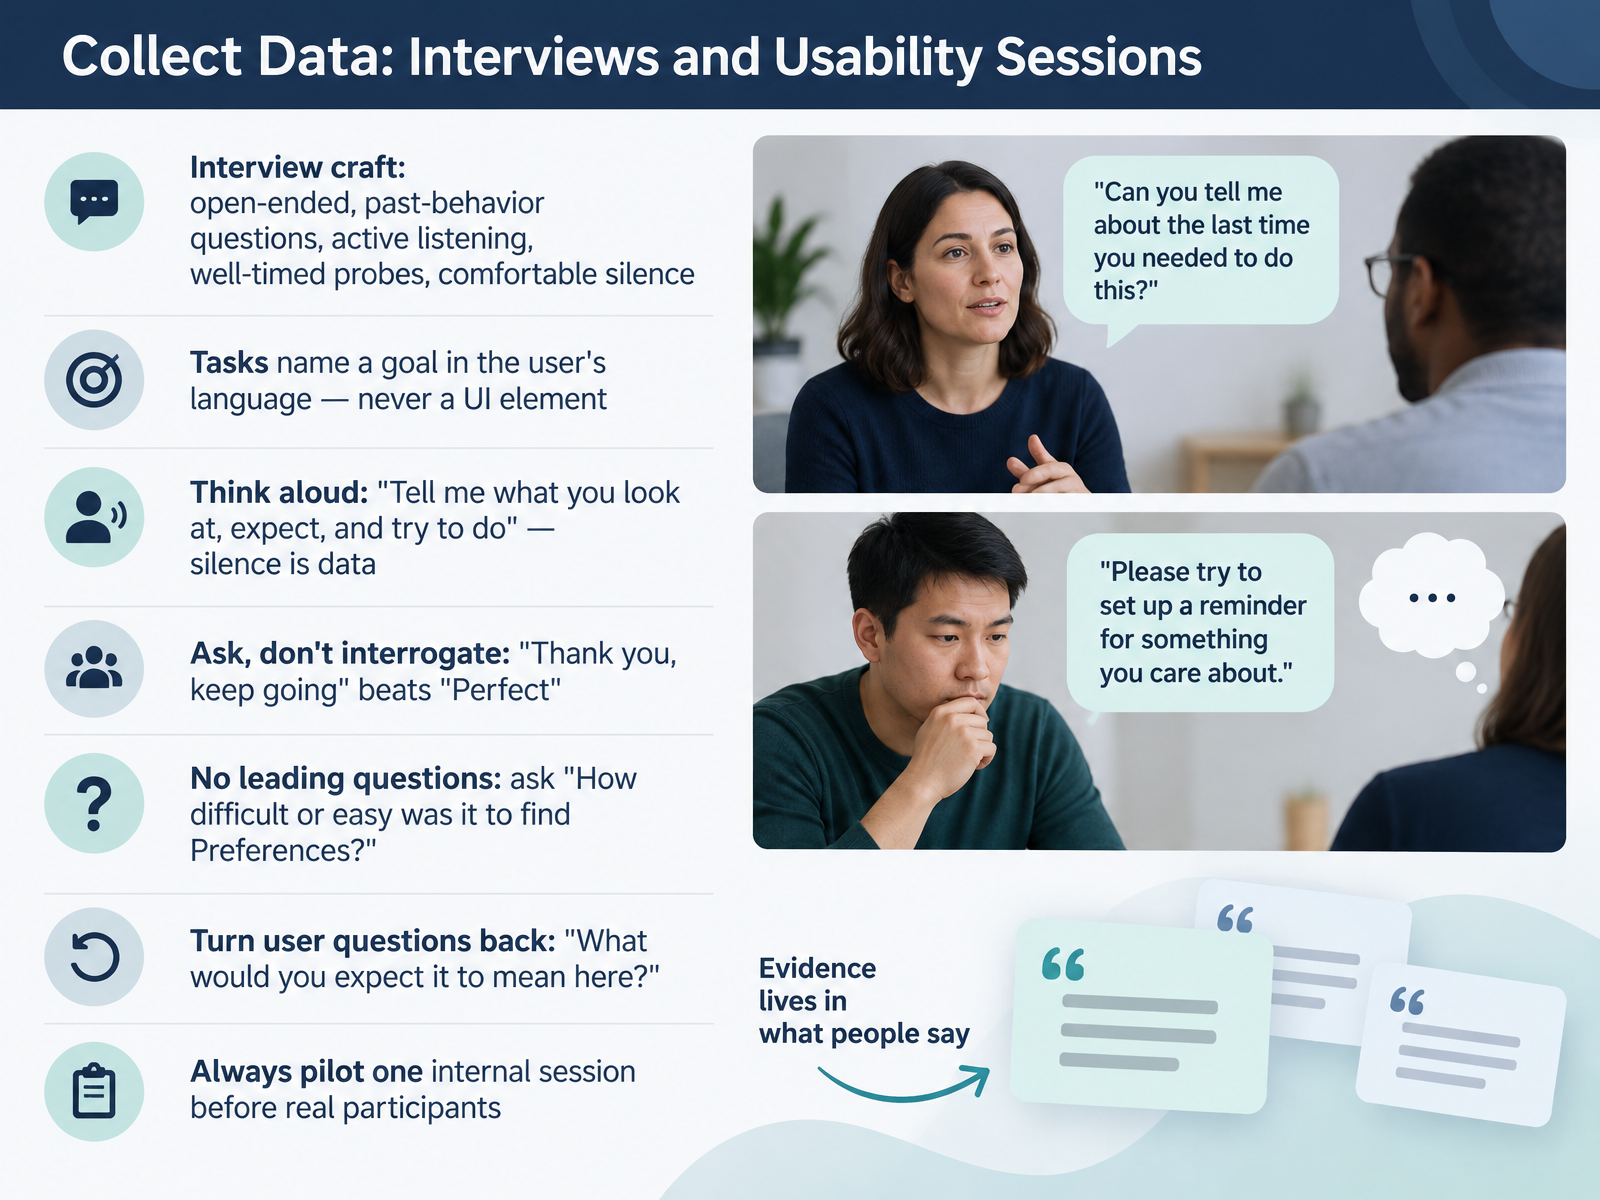
- 07Collect Data: Interviews and Usability SessionsNow let's talk about collecting data, through interviews and usability sessions. Interviews work best with open-ended questions about past behavior. Listen actively, probe at the right moment, and get comfortable with silence. For tasks, name a goal in the user's own language, and never name a button or menu item. Ask them to think aloud: tell me what you look at, what you expect, and what you try to do. Then stay quiet, because silence is data. Ask, don't interrogate. Thank you, keep going beats perfect, every time. Avoid leading questions. Instead of asking whether something was hard, ask how difficult or easy it was to find Preferences. When users ask you a question, turn it back gently: what would you expect it to mean here? And always pilot one internal session before real participants. A broken task caught early saves your whole study.
 1 min
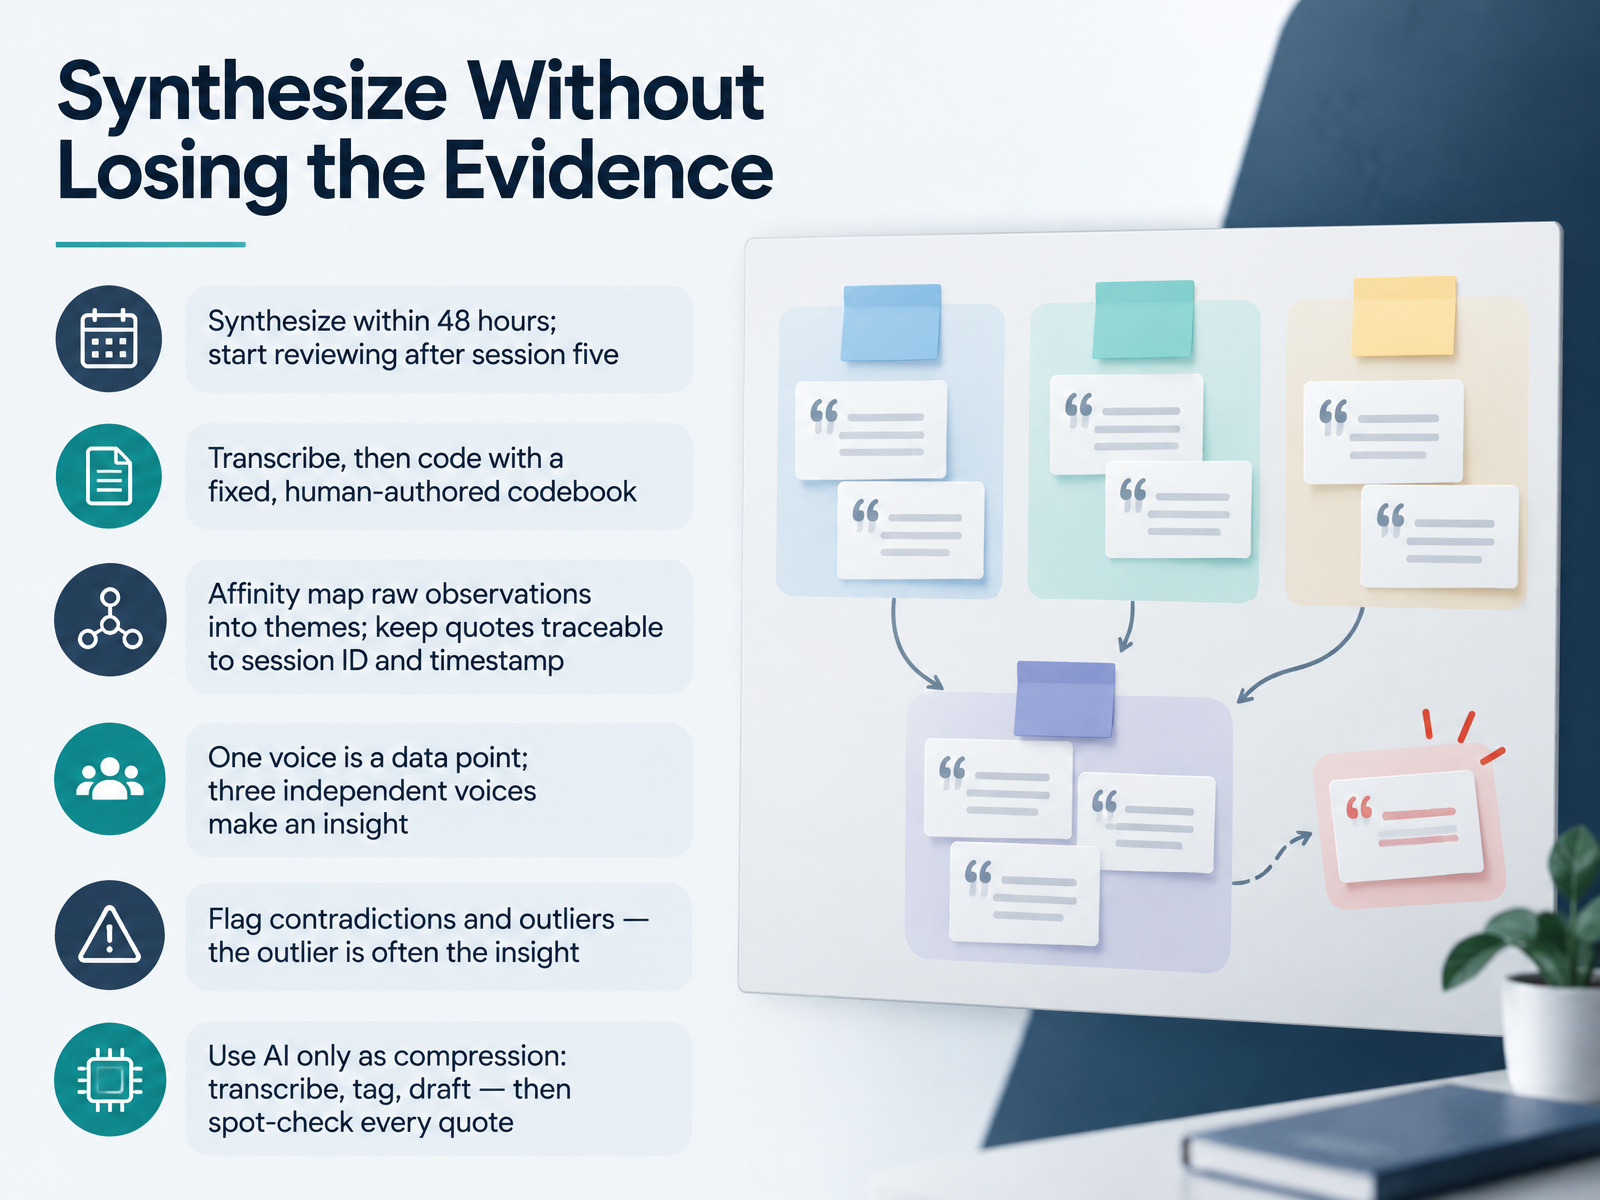
- 08Synthesize Without Losing the EvidenceNow let's talk about synthesis, the step where evidence often gets lost. Start within forty-eight hours, while your memory is fresh. Transcribe first, then code with a fixed codebook you wrote yourself. From there, build an affinity map. Group raw observations into themes, and keep every quote traceable to a session ID and timestamp. Here's a rule of thumb. One voice is a data point. Three independent voices make an insight. Also, flag contradictions and outliers, because the outlier is often the real insight. You can use AI to compress the work: transcribe, tag, and draft. But spot-check every quote against the recording, because models can invent or misquote. If it isn't in the source, it doesn't ship. Next, we'll look at how to write insights that hold up in a decision meeting.
 1 min
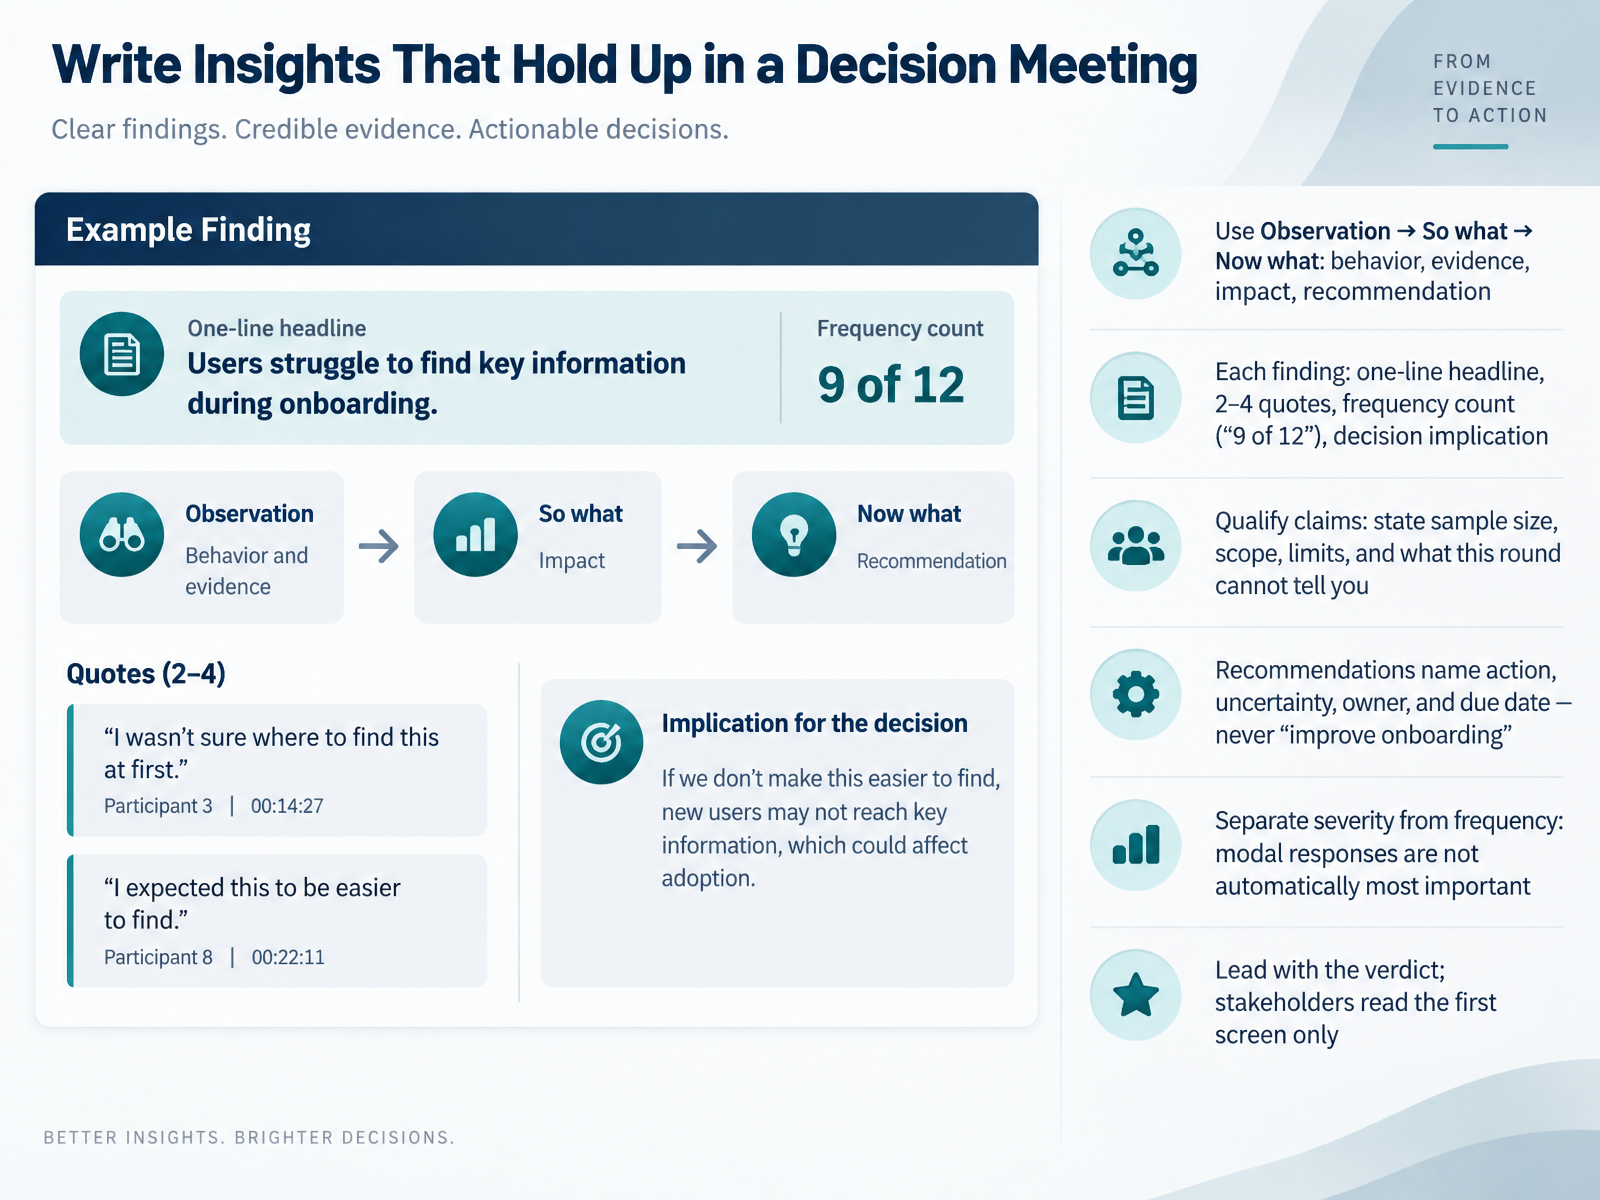
- 09Write Insights That Hold Up in a Decision MeetingNow let's talk about writing insights that hold up in a decision meeting. A useful pattern is Observation, So what, Now what. Start with what people actually did. Then say why it matters. Then name the next step. For each finding, write a one-line headline, include two to four quotes, add a frequency count like nine of twelve, and state the decision implication. Qualify your claims. Name the sample size, the scope, the limits, and what this round cannot tell you. That builds trust instead of overpromising. Recommendations should be specific. Name the action, the uncertainty, an owner, and a due date. Never write improve onboarding. Also separate severity from frequency. The most common response isn't automatically the most important. And lead with the verdict, because many stakeholders only read the first screen. Next, we'll look at how to share findings and document the decision.
 2 min
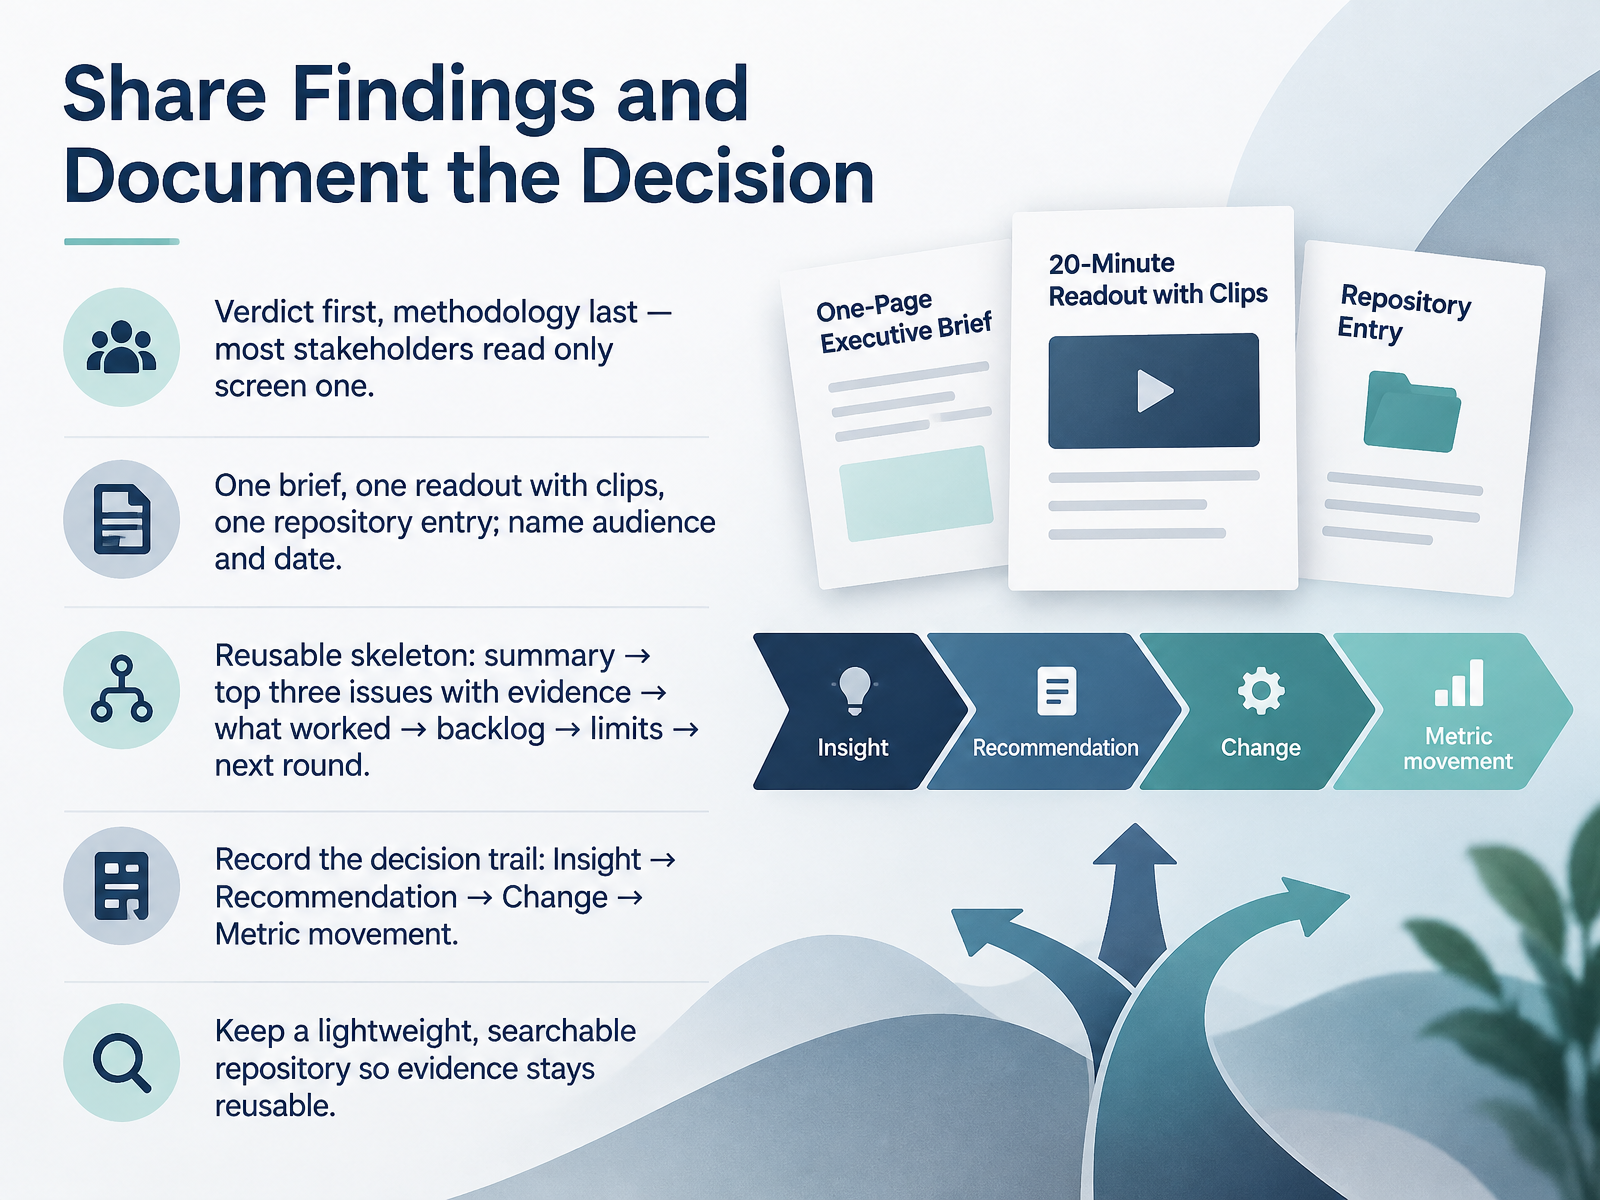
- 10Share Findings and Document the DecisionNow let's talk about sharing what you found. Your report should lead with the verdict, and put methodology last. Most stakeholders only read the first screen, so make that first screen count. Aim for one brief, one readout with short clips, and one repository entry. Name your audience and the date. A simple skeleton works well: summary, top three issues with evidence, what worked, backlog, limits, and next round. Then record the decision trail: insight, recommendation, change, and metric movement. That trail matters, because it shows what actually happened after your study. Keep a lightweight, searchable repository so evidence stays reusable in future rounds. Quick recap: lead with the verdict, use a repeatable skeleton, and log every decision. Next, we'll look at how to Measure What the Research Changed.
 1 min
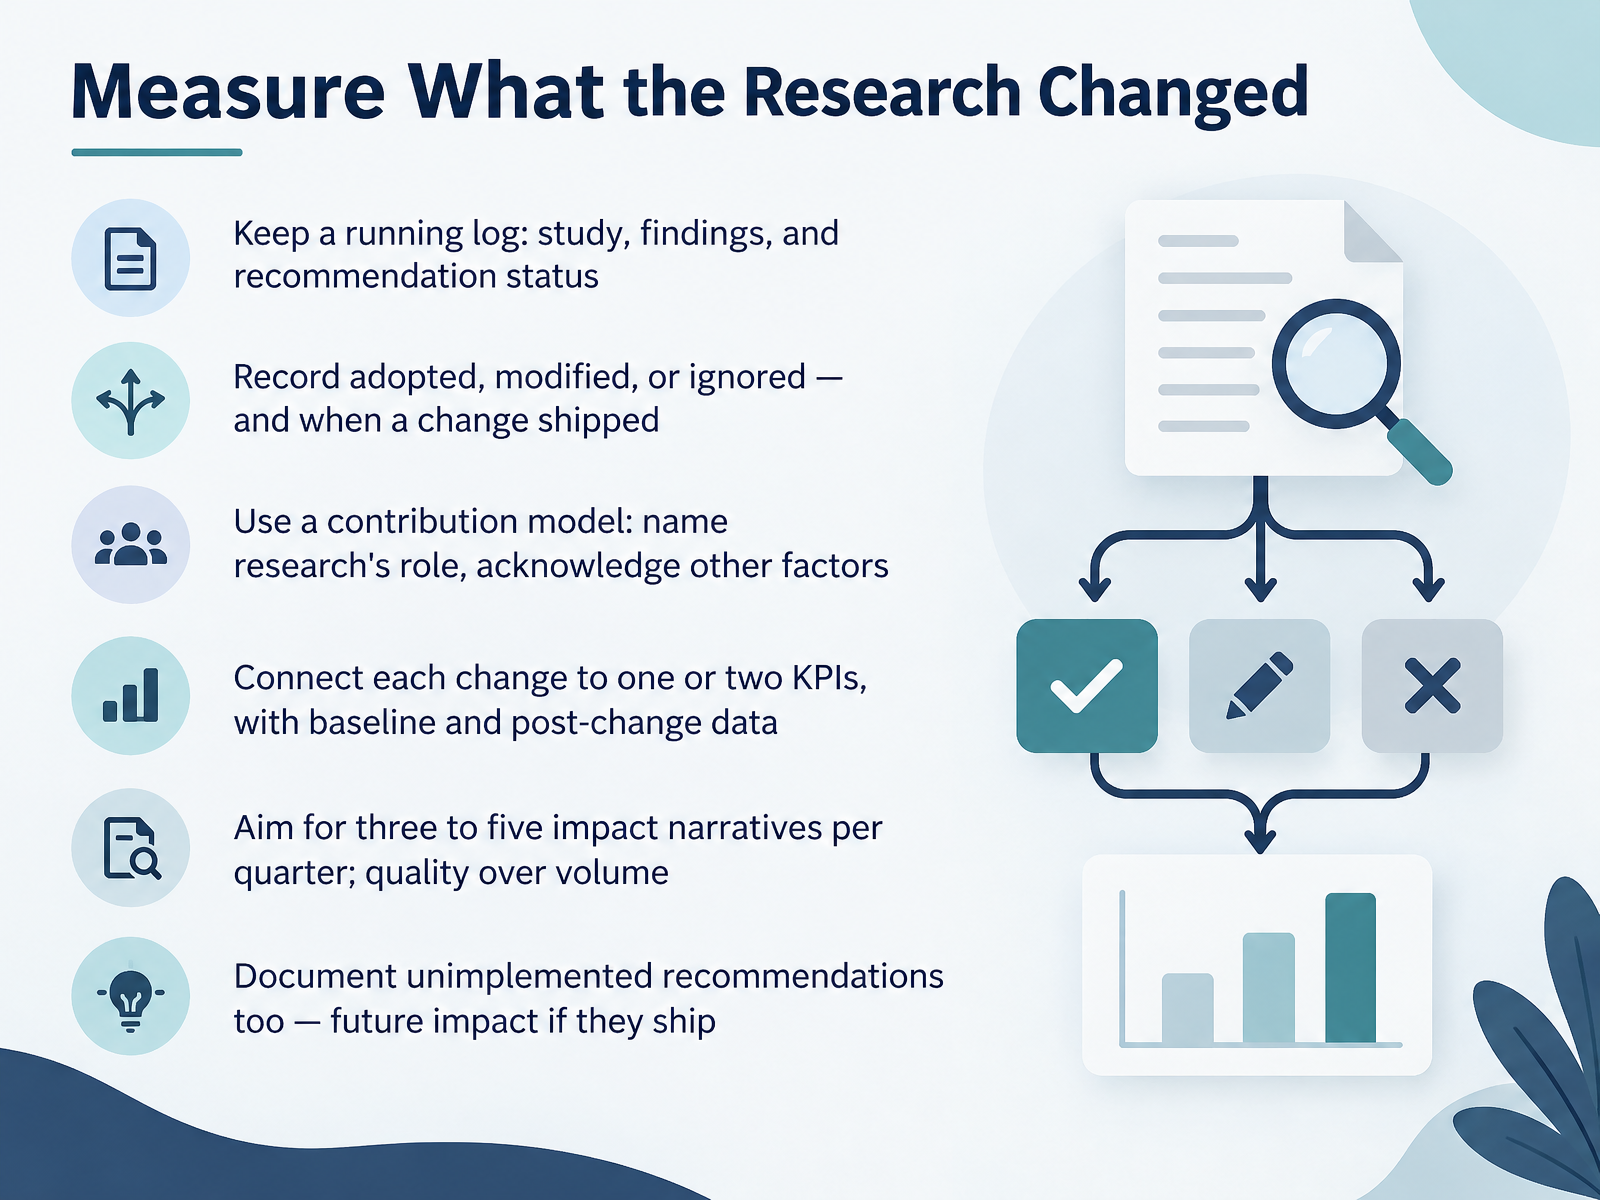
- 11Measure What the Research ChangedNow let's talk about measuring what the research actually changed. Start with a running log. For each study, note the findings, your recommendations, and what happened next. Record whether each recommendation was adopted, modified, or ignored, and when any change shipped. This log is your raw material later. When you claim impact, use a contribution model. Name the role research played, and acknowledge other factors, like engineering constraints or market timing. You can't prove research alone moved a metric, and you don't need to. Connect each change to one or two KPIs, with baseline and post-change data. If you don't have a baseline yet, say so honestly. Aim for three to five impact narratives per quarter. Quality beats volume every time. And document recommendations that haven't shipped. If they ship later, that's future impact. Ready to turn this into a habit? Let's build a six-week practice plan.
 1 min
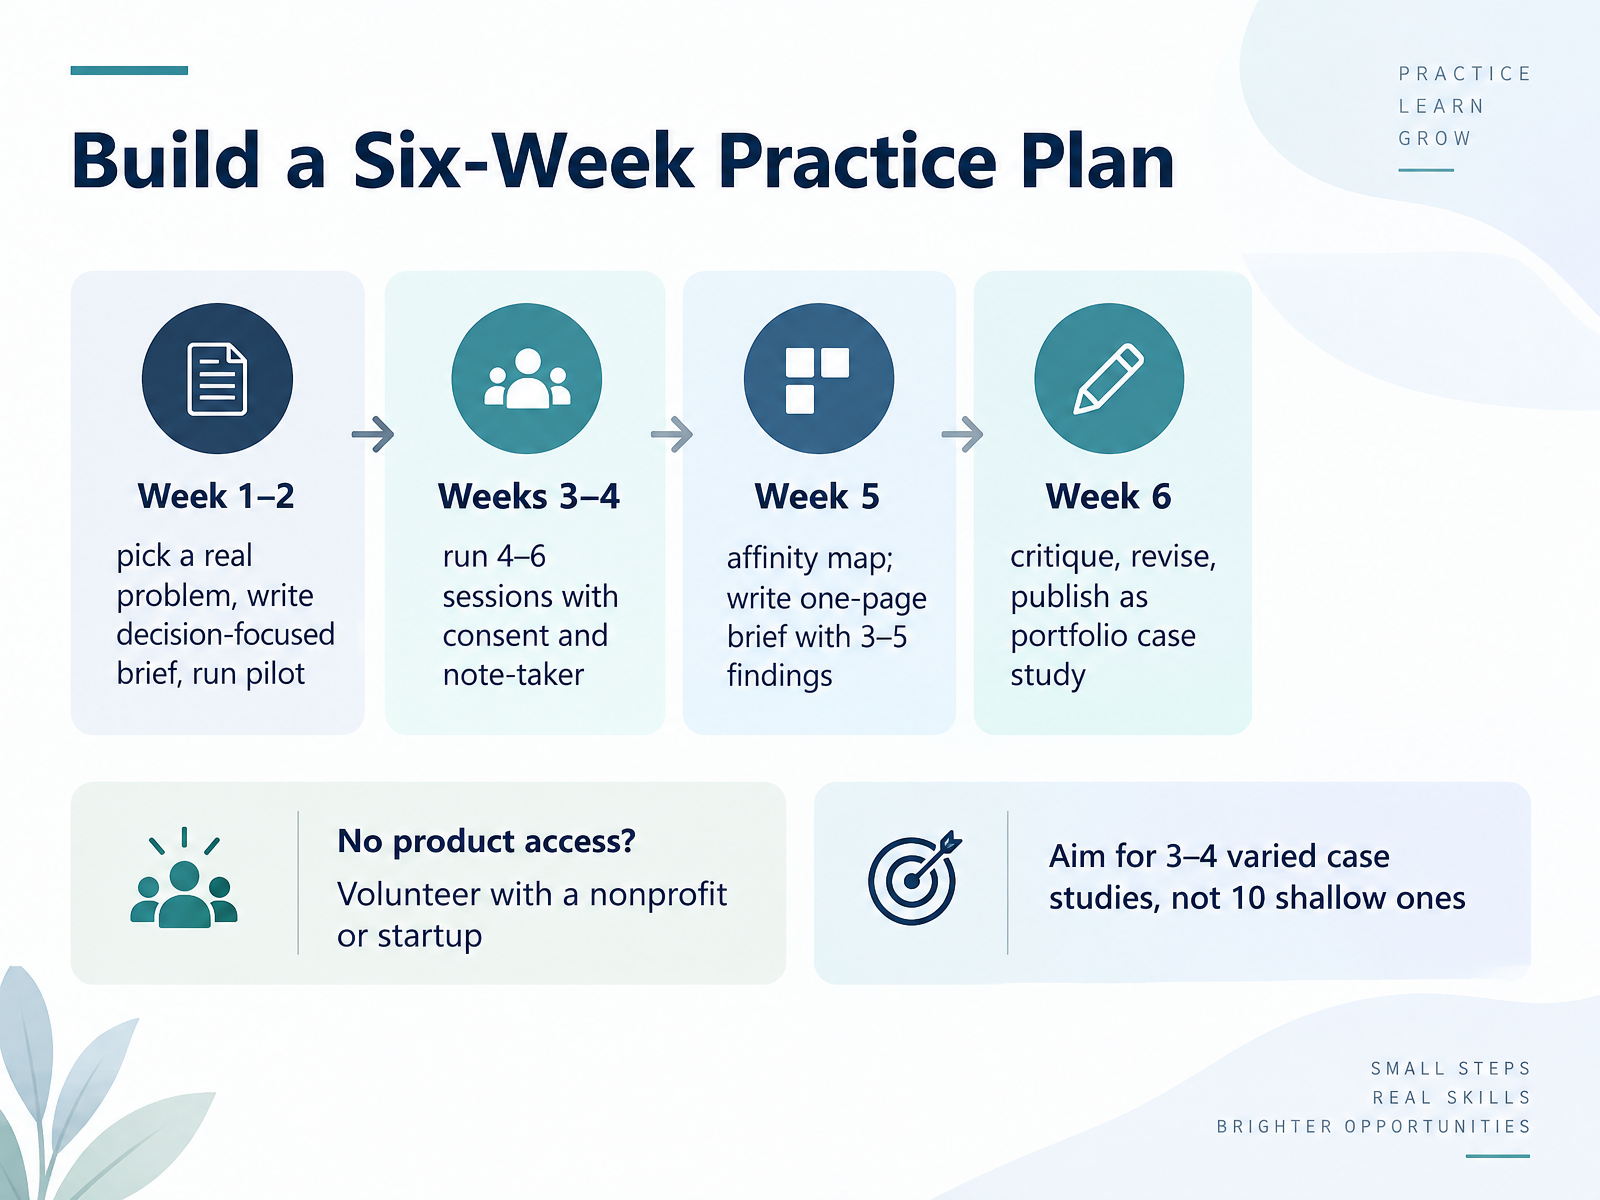
- 12Build a Six-Week Practice PlanNow let's turn all of this into a plan you can actually follow. Here's a six-week practice plan. In weeks one and two, pick a real problem, write a decision-focused brief, and run one pilot session to test your questions. In weeks three and four, run four to six sessions with proper consent and a note-taker. In week five, build an affinity map, then write a one-page brief with three to five findings. Week six is for critique, revision, and publishing your work as a portfolio case study. No product access? That's common. Volunteer with a nonprofit or a startup. And don't chase ten shallow projects. Aim for three or four varied case studies instead. Next, let's look at common pitfalls and how to avoid them.
 job-profiles.fedip.orgddat-capability-framework.service.gov.ukresearchskills.net+21 min
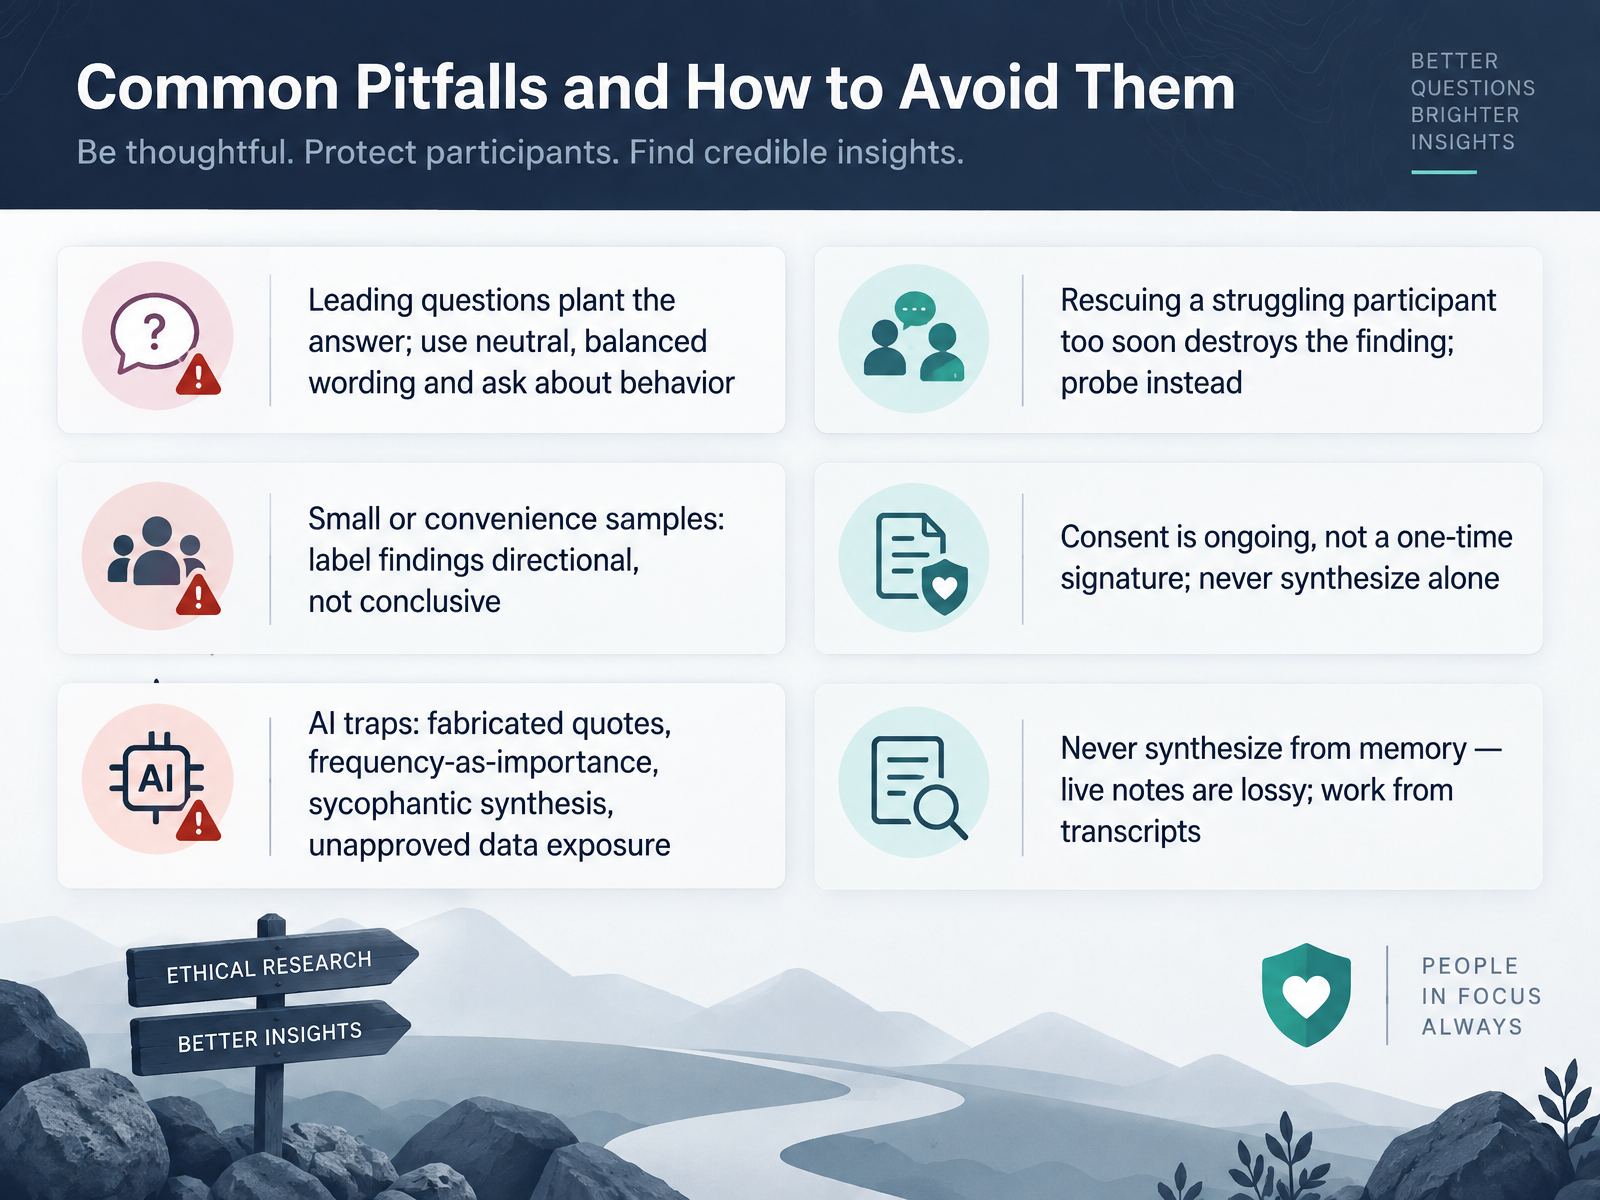
- 13Common Pitfalls and How to Avoid ThemLet's talk about the pitfalls that trip up almost every beginner. First, leading questions. If you ask, was that easy, you've planted the answer. Ask, how did that feel, and you'll hear what's actually true. Ask about behavior, not your hopes. Second, don't rescue a struggling participant too soon. That silence feels painful, but it's data. Probe instead, and only step in when the session has truly stalled. Third, small or convenience samples. Label those findings directional, not conclusive, so nobody overclaims. Fourth, consent is ongoing, not a one-time signature. Check in as you go, and never synthesize alone. And watch for AI traps. Fabricated quotes, treating frequency as importance, sycophantic synthesis that just agrees with you, and exposing data the participant never approved. Finally, never synthesize from memory. Live notes are lossy. Work from transcripts, and tie every quote to its source. Next, we'll look at self-assessment and continuing to learn.
 2 min
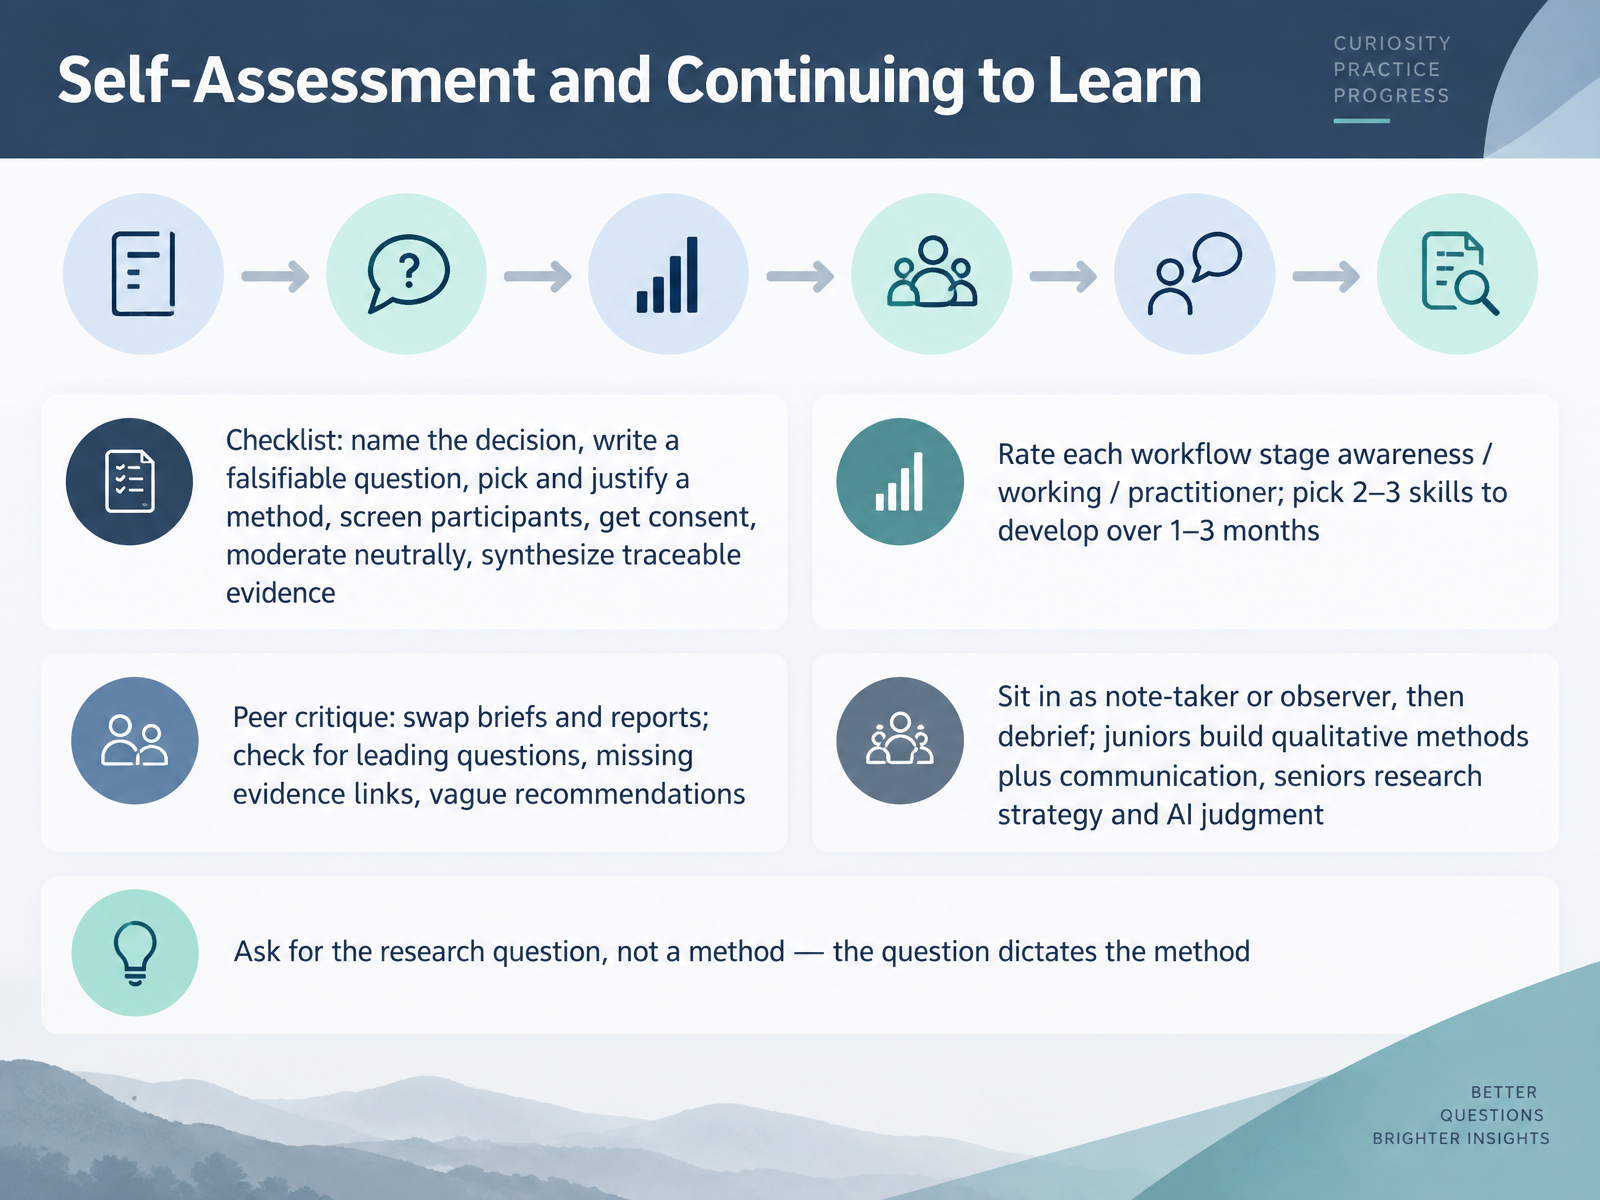
- 14Self-Assessment and Continuing to LearnBefore we finish, let's set up how you'll keep growing. Start with the checklist. Can you name the decision, write a falsifiable question, pick and justify a method, screen participants, get consent, moderate neutrally, and synthesize traceable evidence? If you're unsure, that's normal. Just rate each stage as awareness, working, or practitioner. Then pick two or three skills to develop over the next one to three months. Next, try peer critique. Swap briefs and reports, and check for leading questions, missing evidence links, or vague recommendations. Another easy step is sitting in as a note-taker or observer, then debriefing with the lead researcher. As for what to learn, juniors usually build qualitative methods plus communication. More senior folks focus on research strategy and judgment around AI tools. And when someone asks for a method, ask for the research question instead. The question dictates the method. Thank you for joining me. You don't need everything at once, just the next honest step. Keep going, and be kind to yourself as you learn.
 job-profiles.fedip.orgddat-capability-framework.service.gov.ukresearchskills.net+22 min
Take the deck with you
Download this course as a file — free, no sign-up needed.
- PDF handoutEvery slide page, ready to print or share.15 pages · 3.2 MBDownload
- Narrated PowerPointThe deck that presents itself — every slide carries the digital human's narration video.15 pages · 12.4 MBDownload
- PowerPoint slidesThe full deck as a .pptx — open it in PowerPoint, Keynote, or Google Slides.15 pages · 3.1 MBDownload
Free to use in your own training — please keep the PersonWise credit page at the end.
Have your own deck? Turn it into a course
Sources consulted
Web sources consulted while building this course.
- Junior User Researcher – FEDIP Job Profiles — job-profiles.fedip.org
- User researcher - Government Digital and Data Profession Capability Framework — ddat-capability-framework.service.gov.uk
- Insights - Profile: Learning | Research Skills Framework — researchskills.net
- User research — English — sfia-online.org
- UX Research Team - Career & Competency Frameworks - Feb 2024 — whatfix.com
- Graphic / UI Designer to UX Researcher Resume Guide | ApplyKiro — applykiro.com
- Q1 2026 UX Research FAQ - by Dave Chen — deardanielleanddave.substack.com
- The UX Designer’s Guide to User Research — userinterviews.com
- UX challenge #31: Got transferable skills into UX? — uxdesigncourses.substack.com
- How to Become a UX Researcher: The Ultimate Career Guide | User Interviews — userinterviews.com
- User Experience Research Briefing Template — uxinsight.org
- How to write a user research brief · Talkful — talkful.io
- https://www.koji.so/docs/ux-research-plan-template — koji.so
- Free Research Brief Generator | GatherHQ — gatherhq.com
- How to Write a Research Brief: Templates, Examples, and AI-Assisted Generation — koji.so
- How to Choose a User Research Method — userinterviews.com
- A Guide to Sample Sizes in Qualitative UX Research — userinterviews.com
- Qualitative Research Guide for UX Teams (2026): Methods and Frameworks — uxcrush.com
- Which Research Method Should You Use? | Busch Labs — busch-labs.at
- User Research — d-lab.mit.edu